charmed Liebling
  • home
  • pattern shop
    • wallet patterns
    • bag patterns
    • laptop and messenger bag pattern
  • items for sale
    • custom orders
  • free tutorials
  • contact
  • about

Burda Style pattern review (shirt #106, 4/2013)

6/6/2014

0 Comments

 
Bild
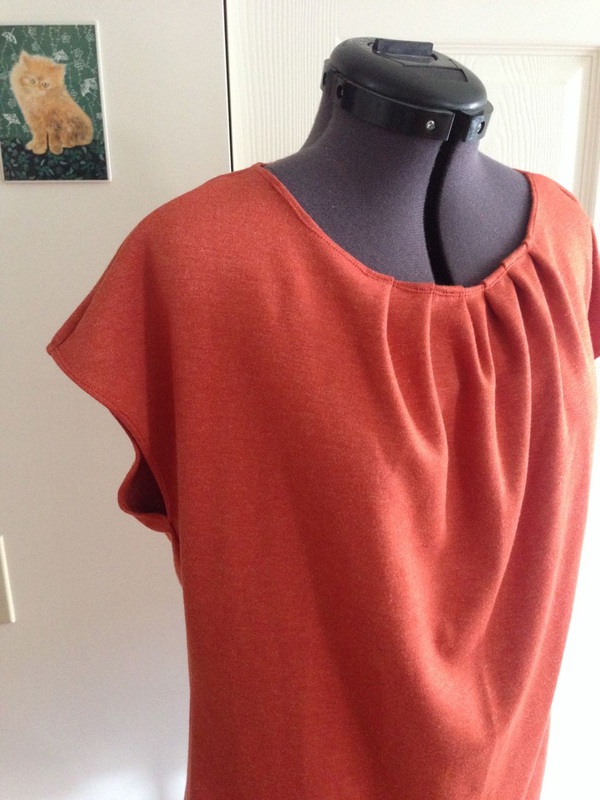
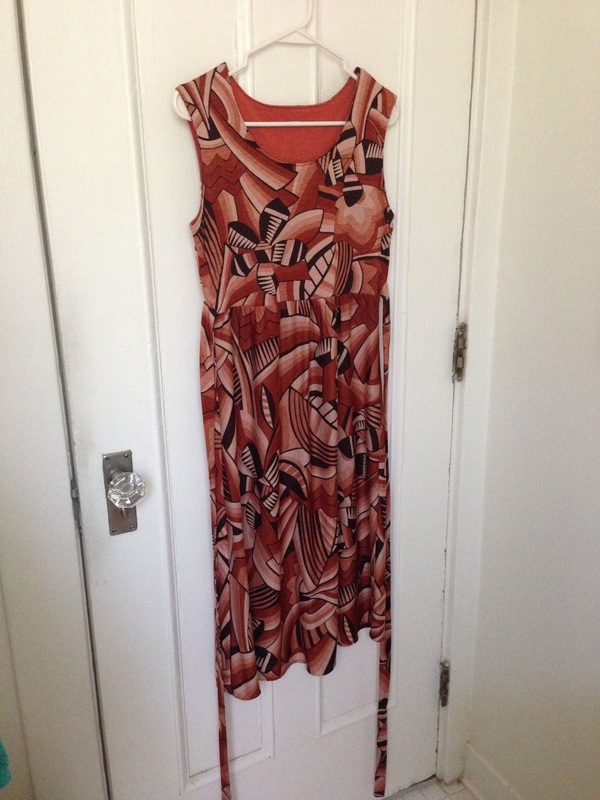
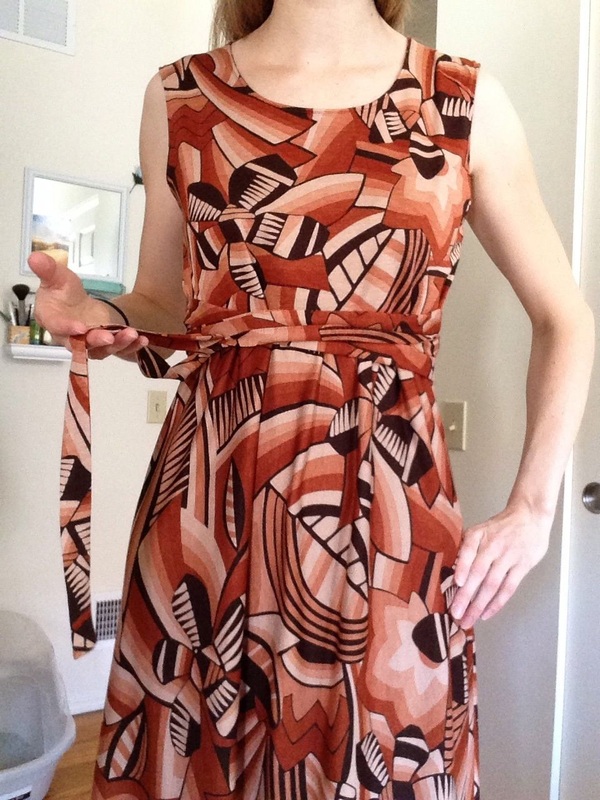
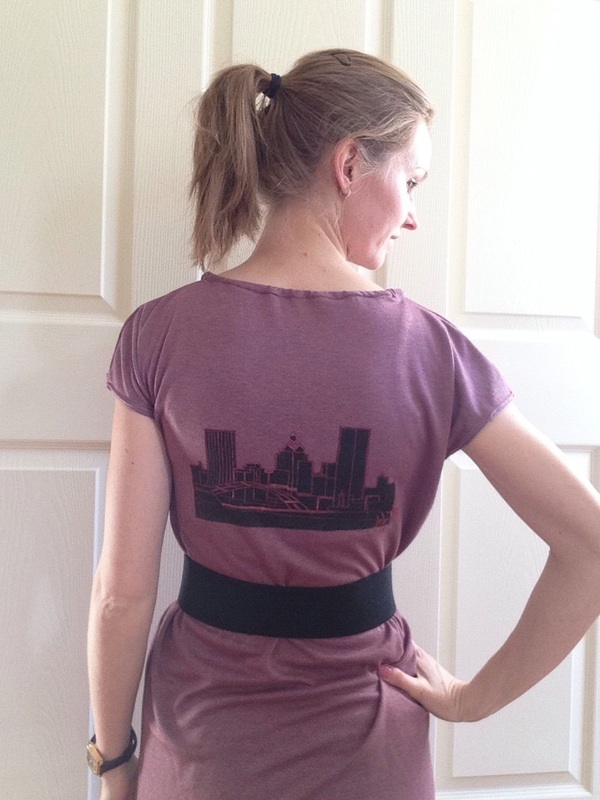
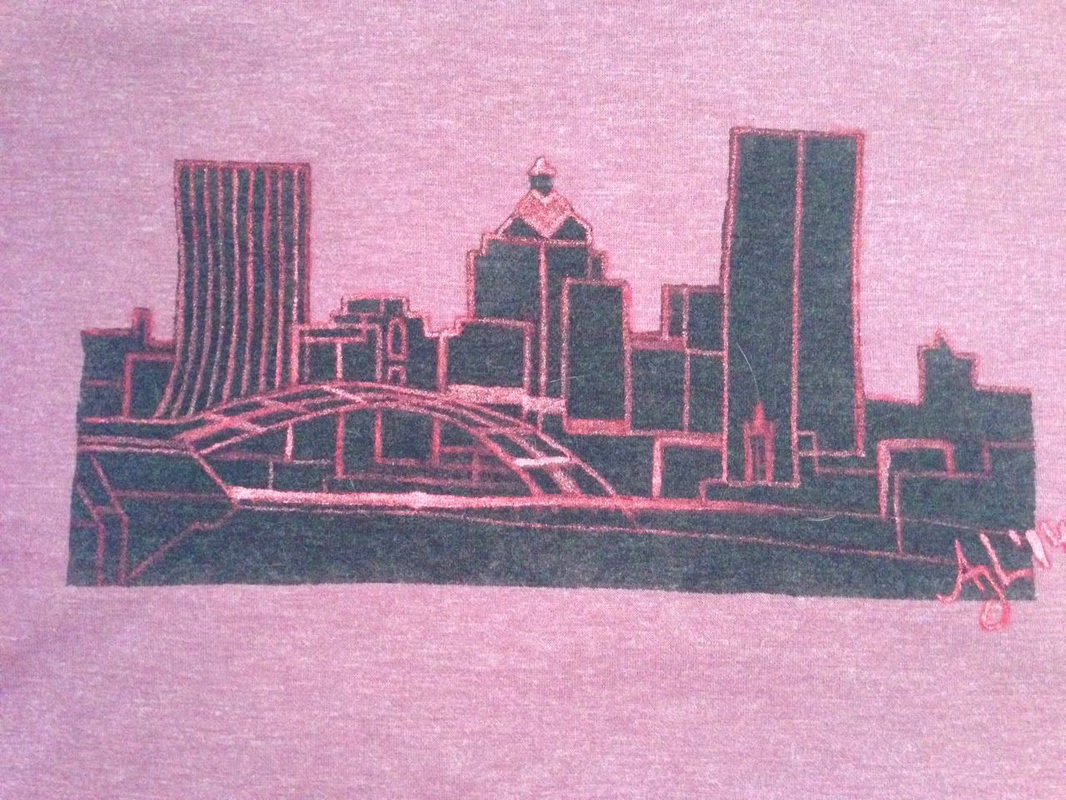
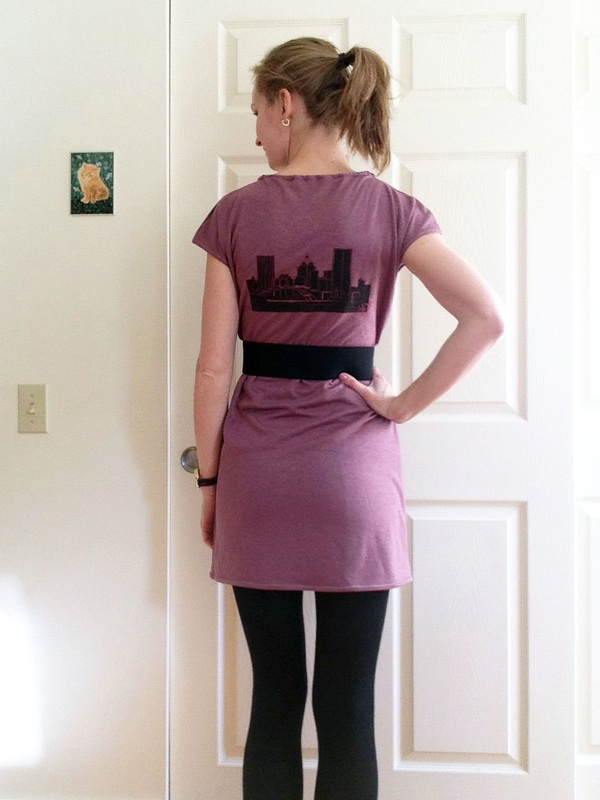
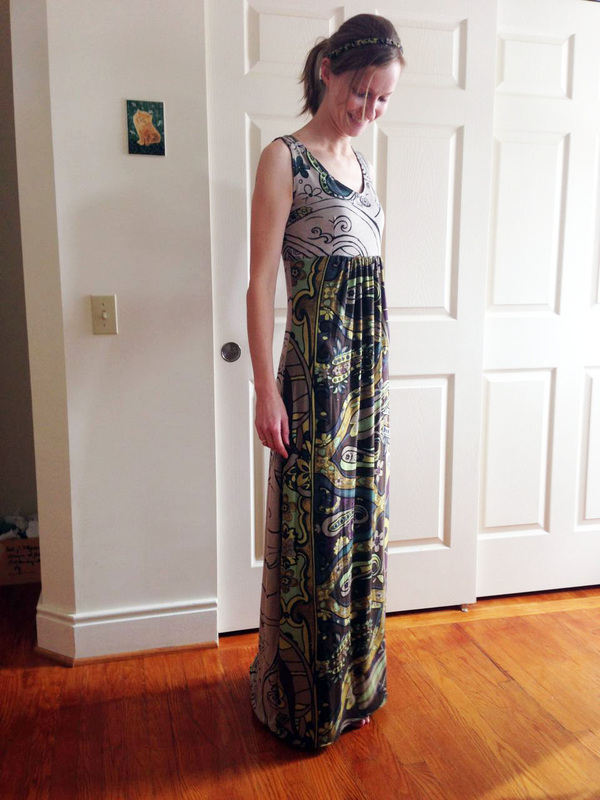
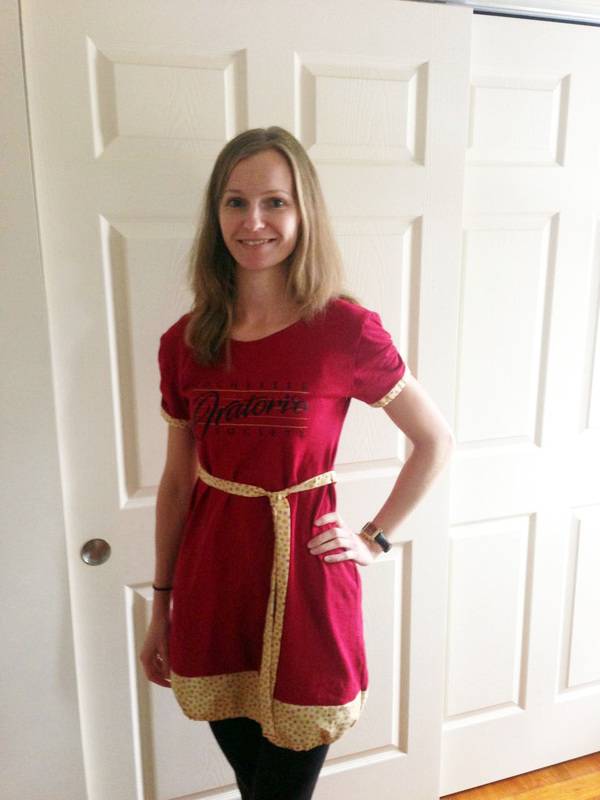
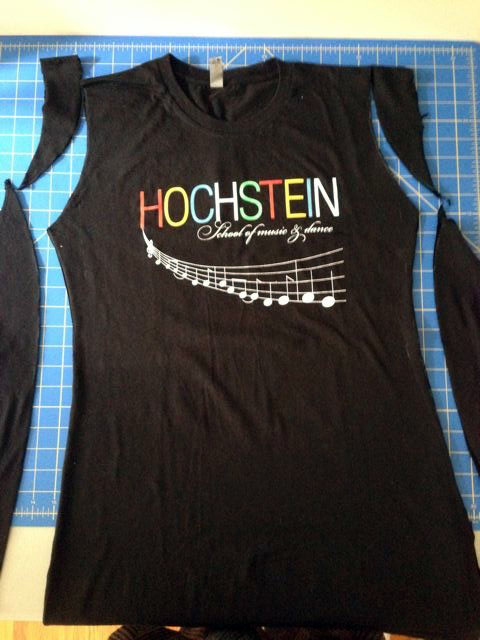
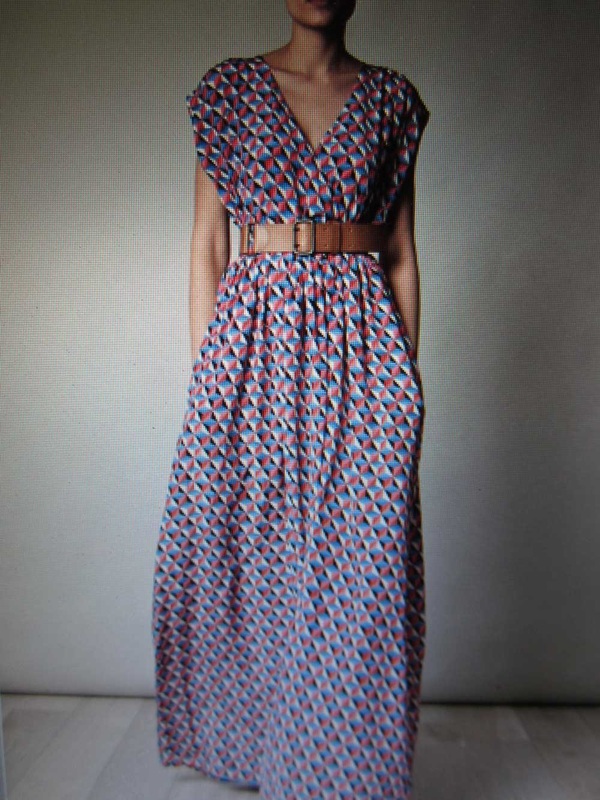
This week I made a new shirt using a Burda style pattern from one of my magazines. I have used this pattern before when I made my Rochester dress and I liked it so much that I wanted to make a shorter version. The knit fabric I used is the same that I used for the dress - just orange :)
Bild
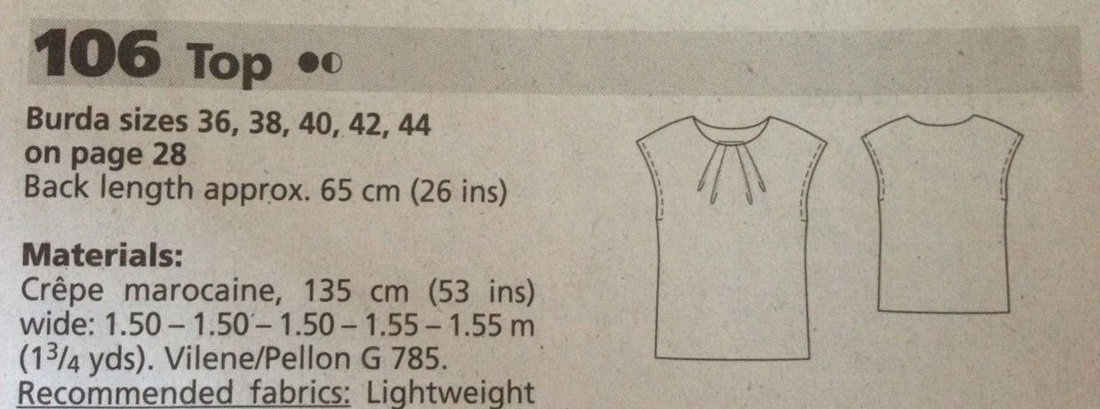
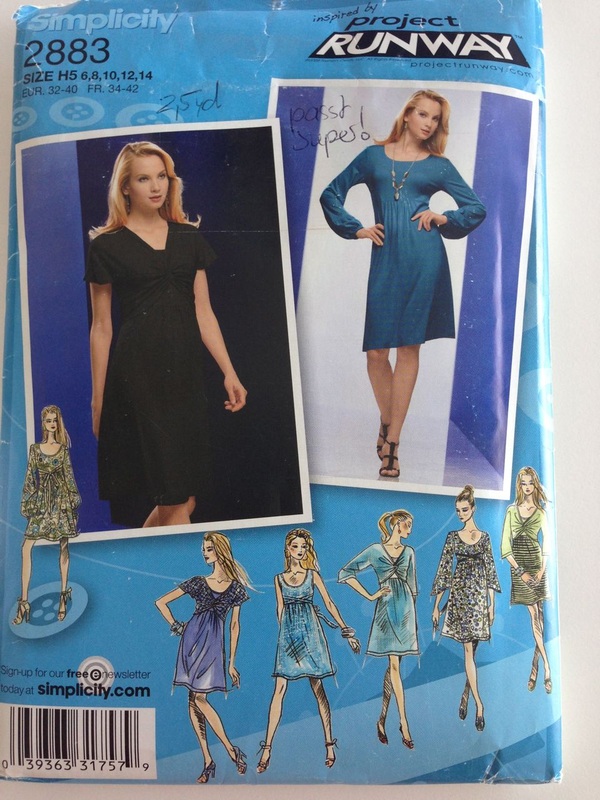
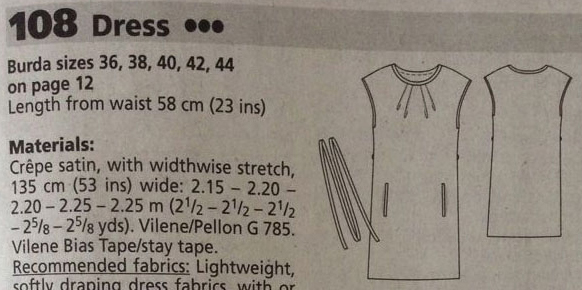
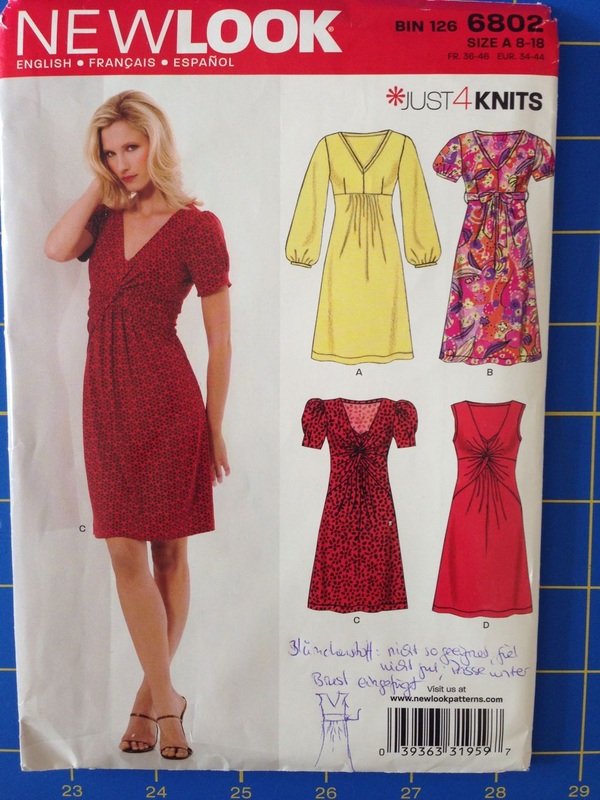
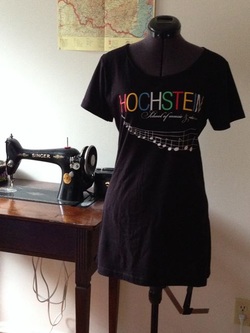
You can find this pattern in the Burda Style magazine 4/2013 or the Spring 2014 edition. There are two versions, the top #106 (as seen on the picture) and the dress #108.

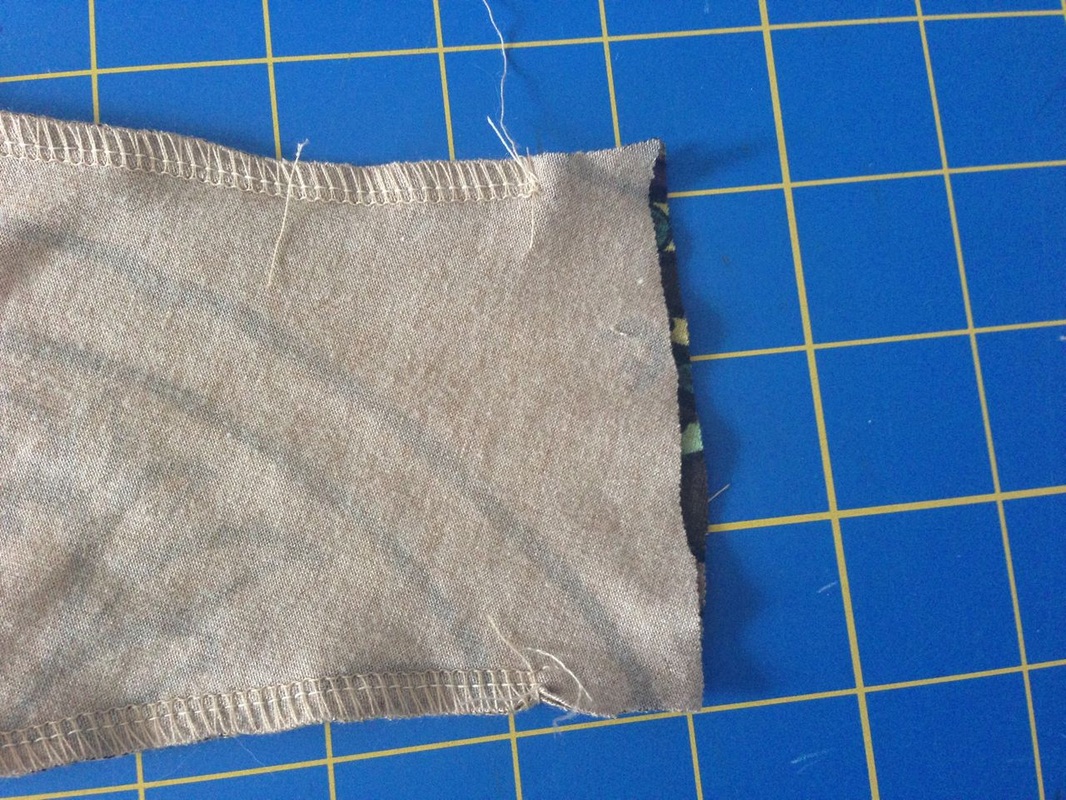
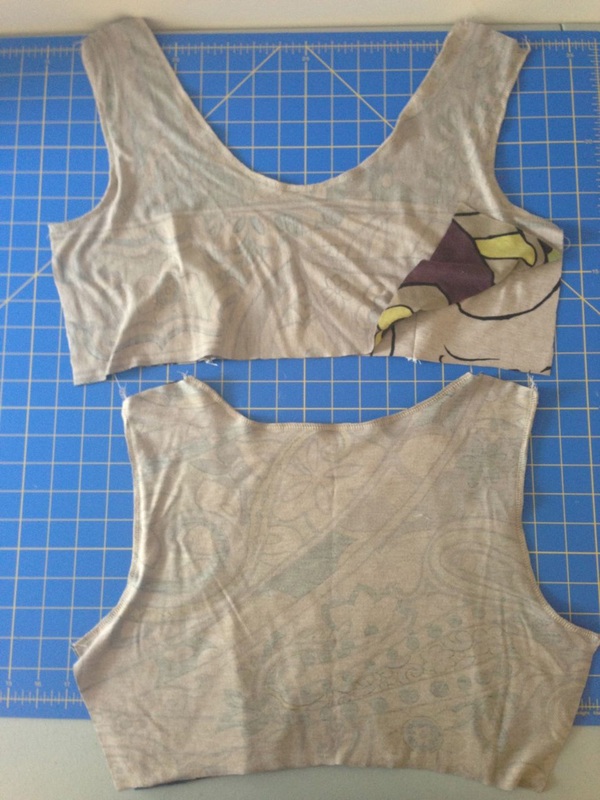
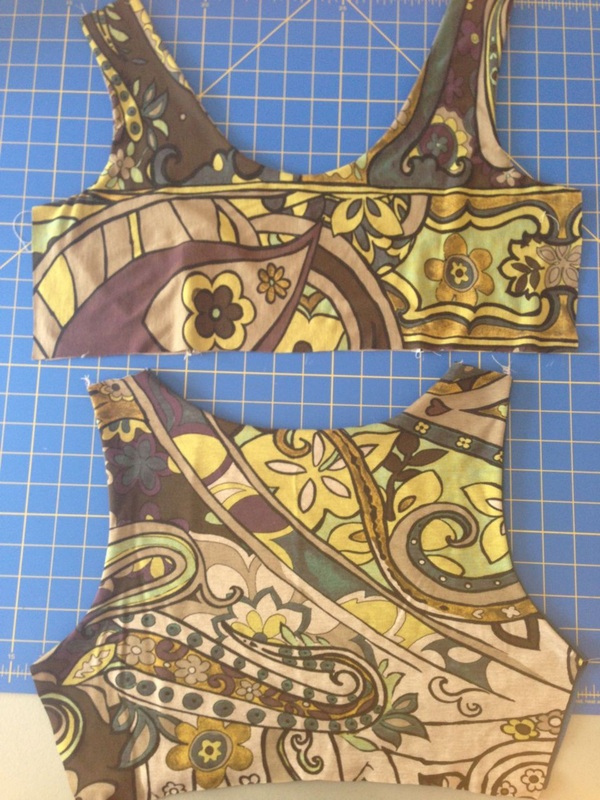
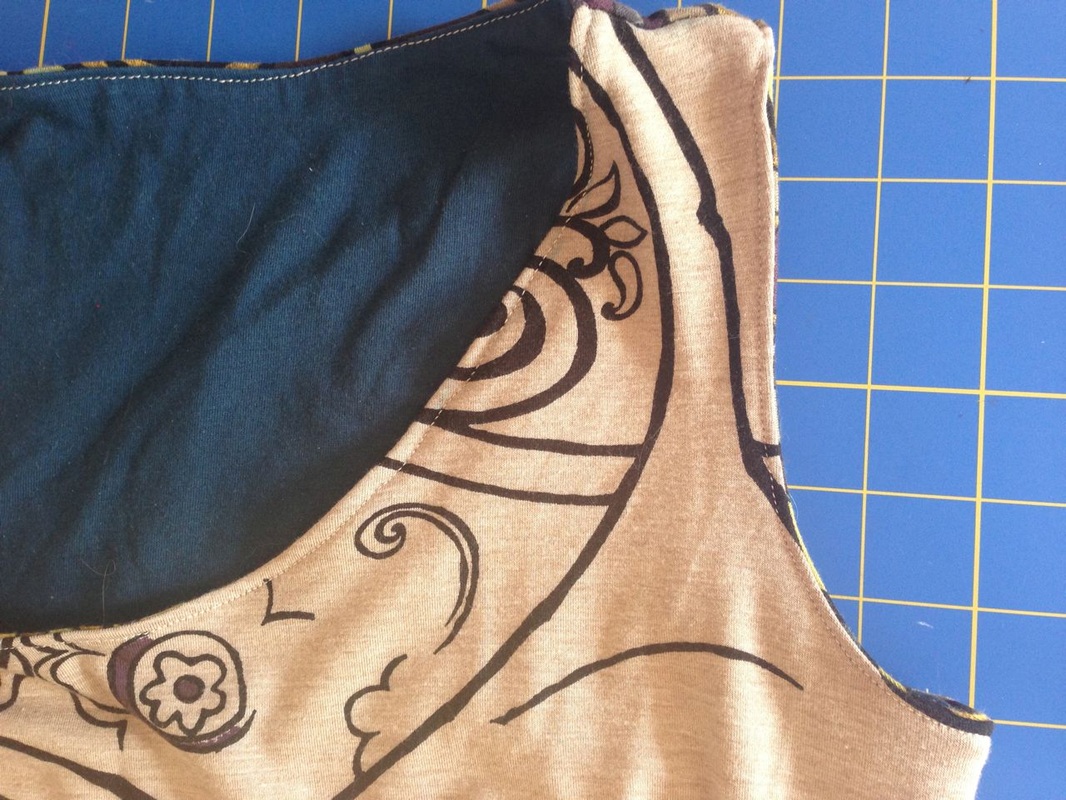
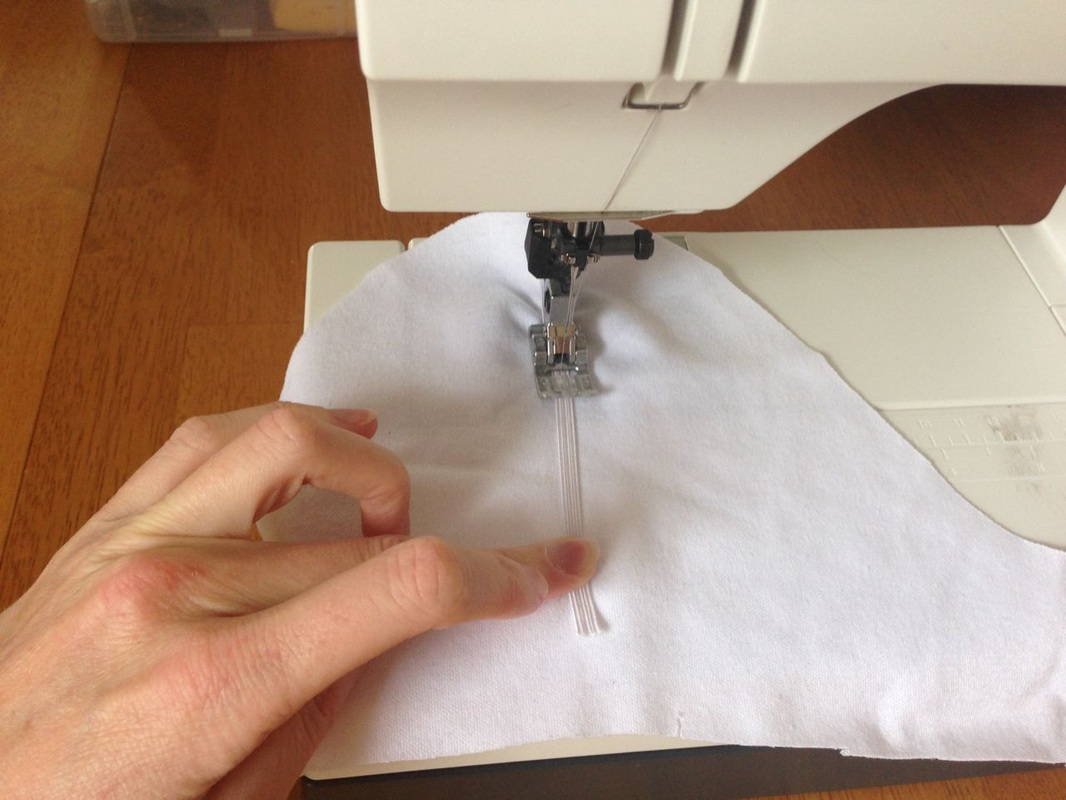
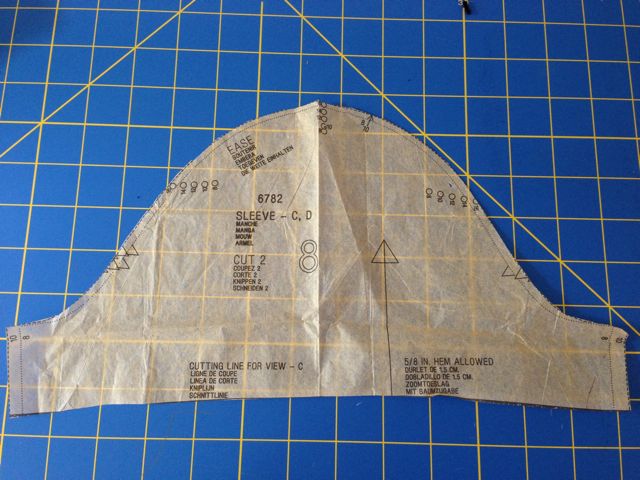
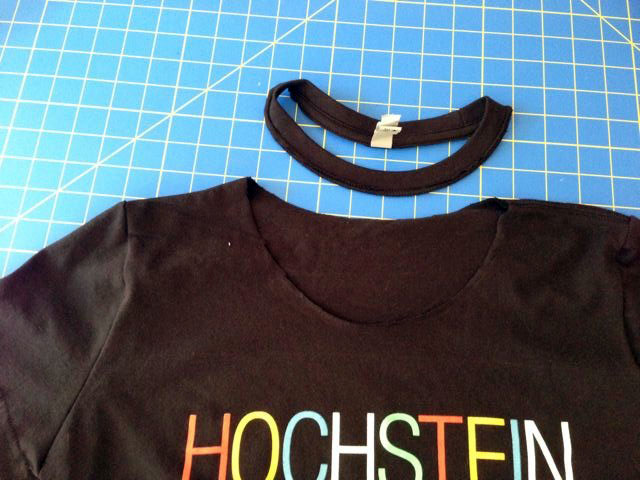
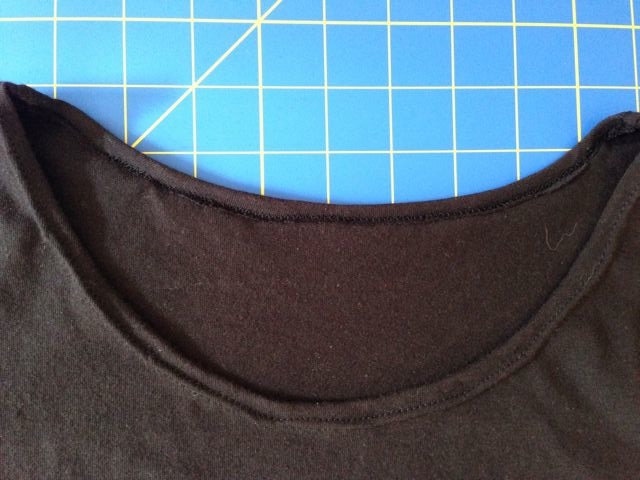
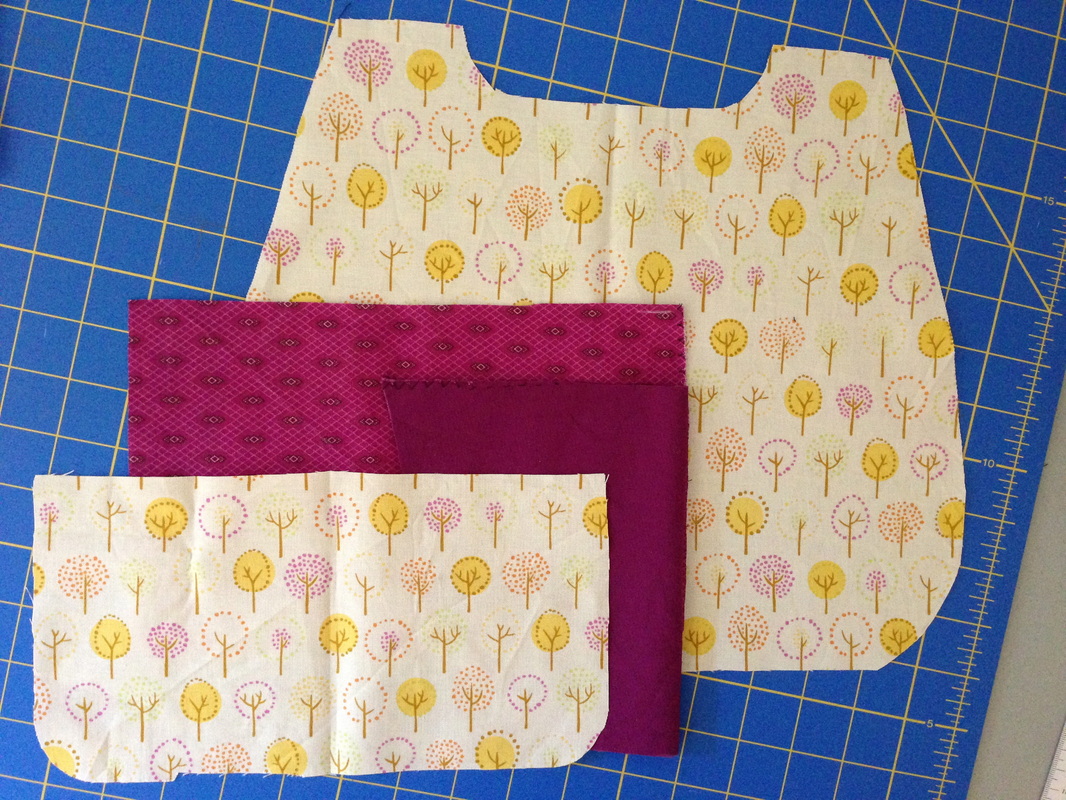
One thing I like about this pattern is its simplicity. The pattern comes with only two main body pieces (front and back on the fold) and the neck facing. (The dress pattern also comes with an optional belt and pockets.) This time I decided not to attach the neck facing to the neckline but simply fold the fabric of the neckline down to the wrong side by 3/8" and stitch it with a twin needle. So all in all I only used the two pattern pieces below to sew my shirt!
This pattern is rated as "Easy to sew, with simple features" and I recommend it for a sewing beginner. Especially if you haven't sewn with knit fabricy yet, this is a nice project to give it a try.
Bild
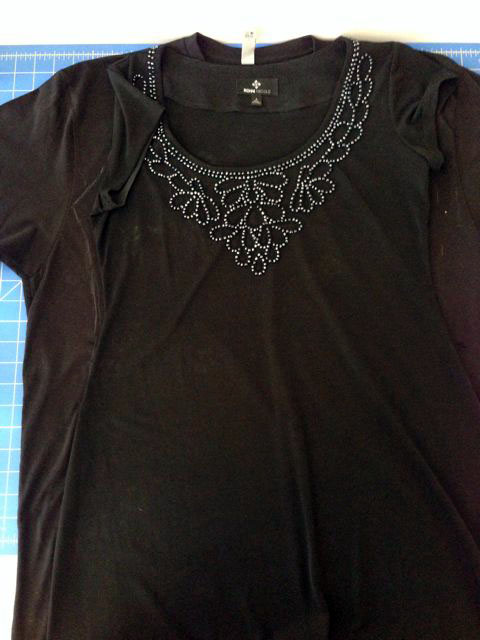
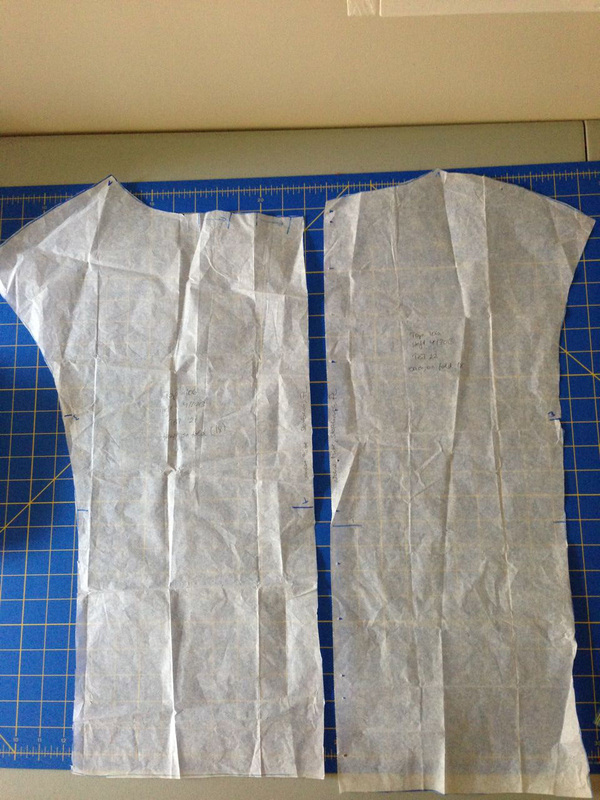
The pattern pieces for front and back
Bild
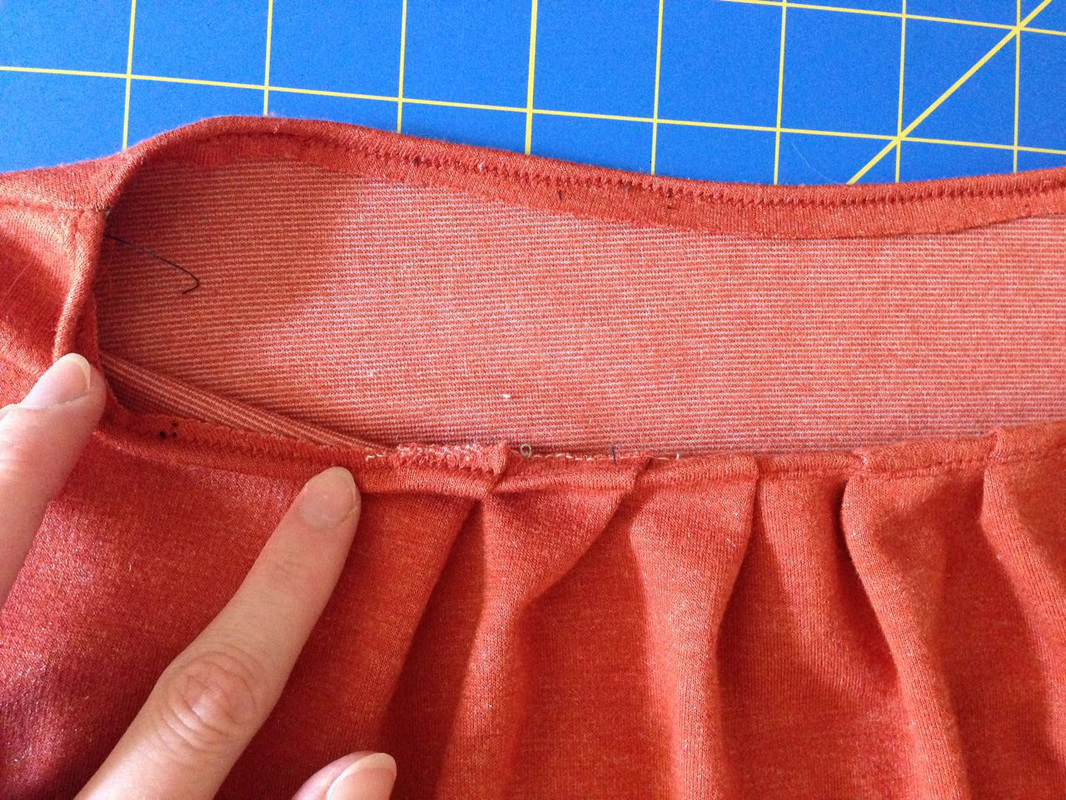
The neckline stitched with a twin needle
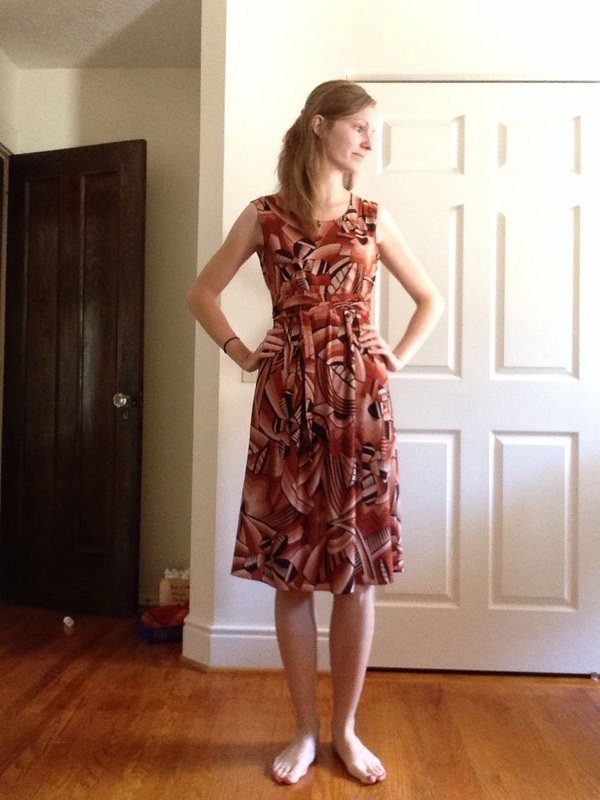
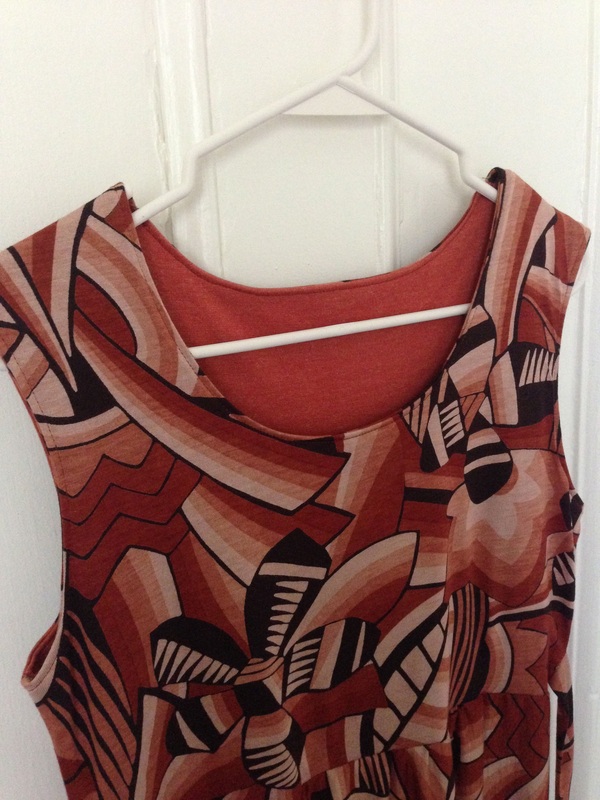
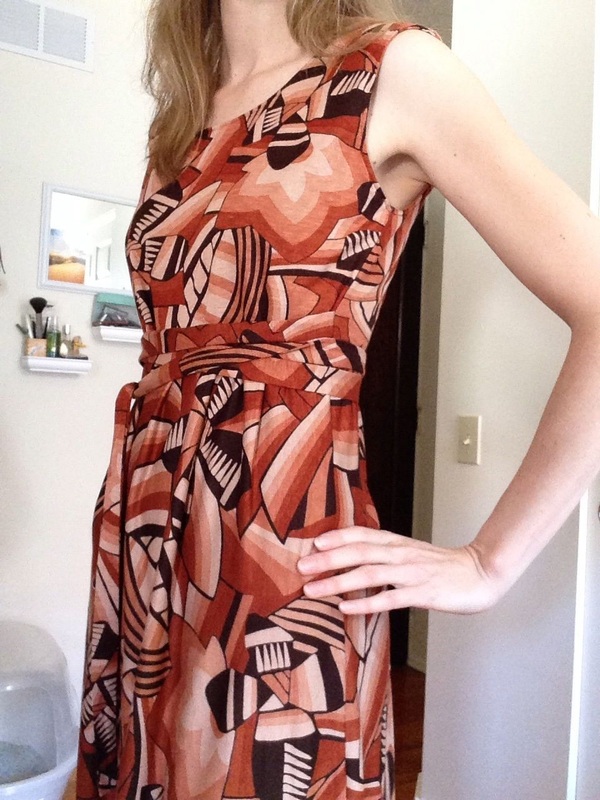
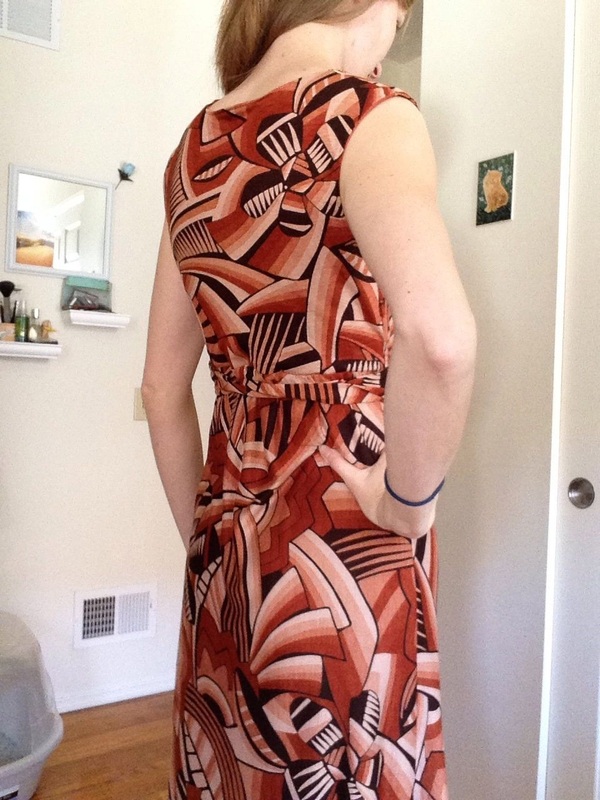
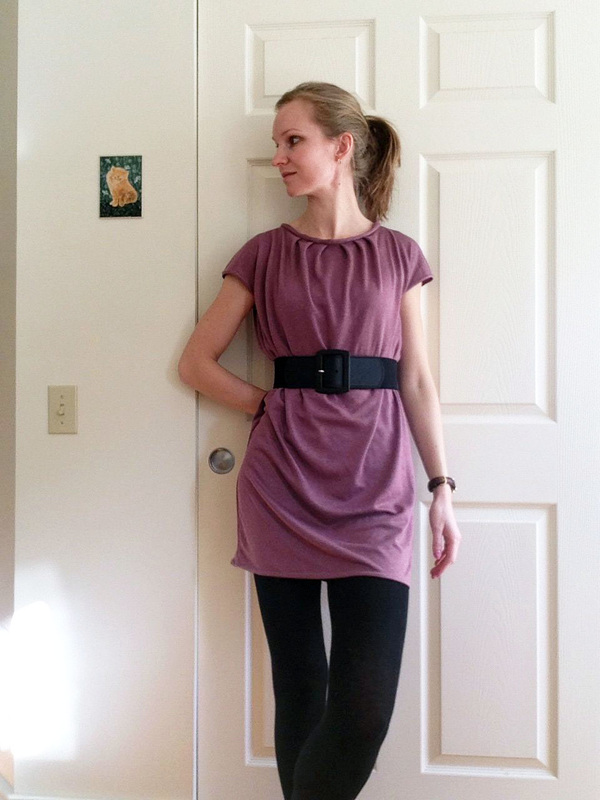
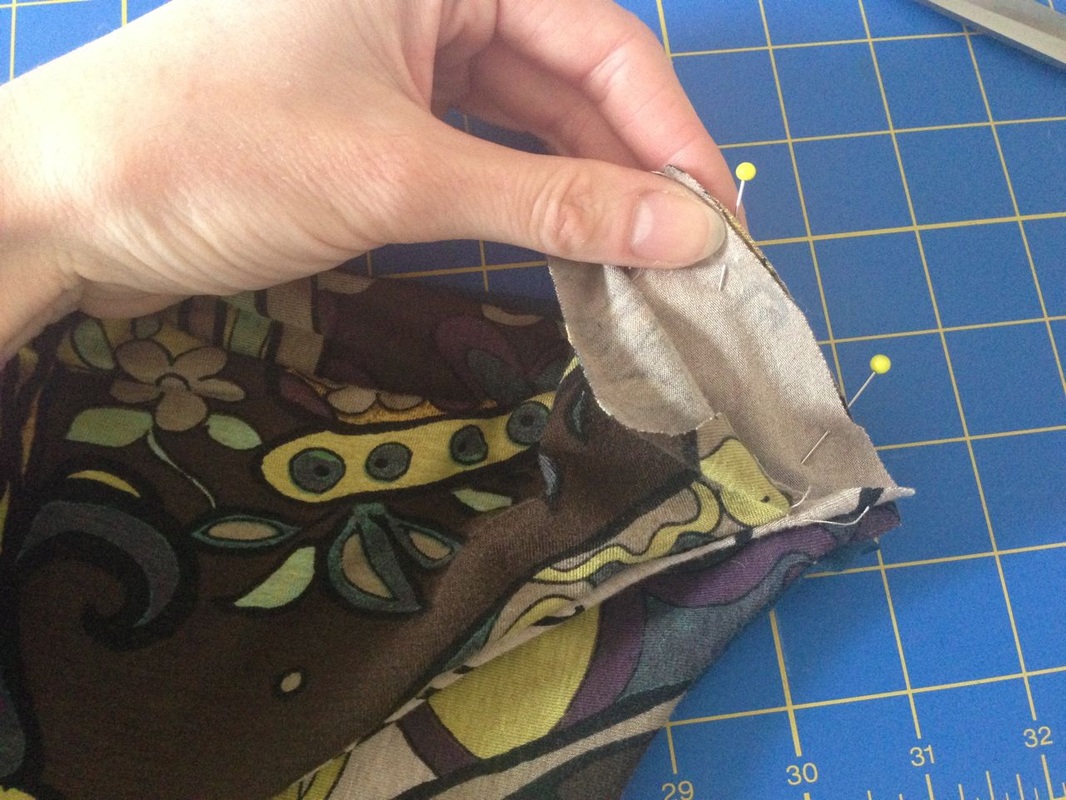
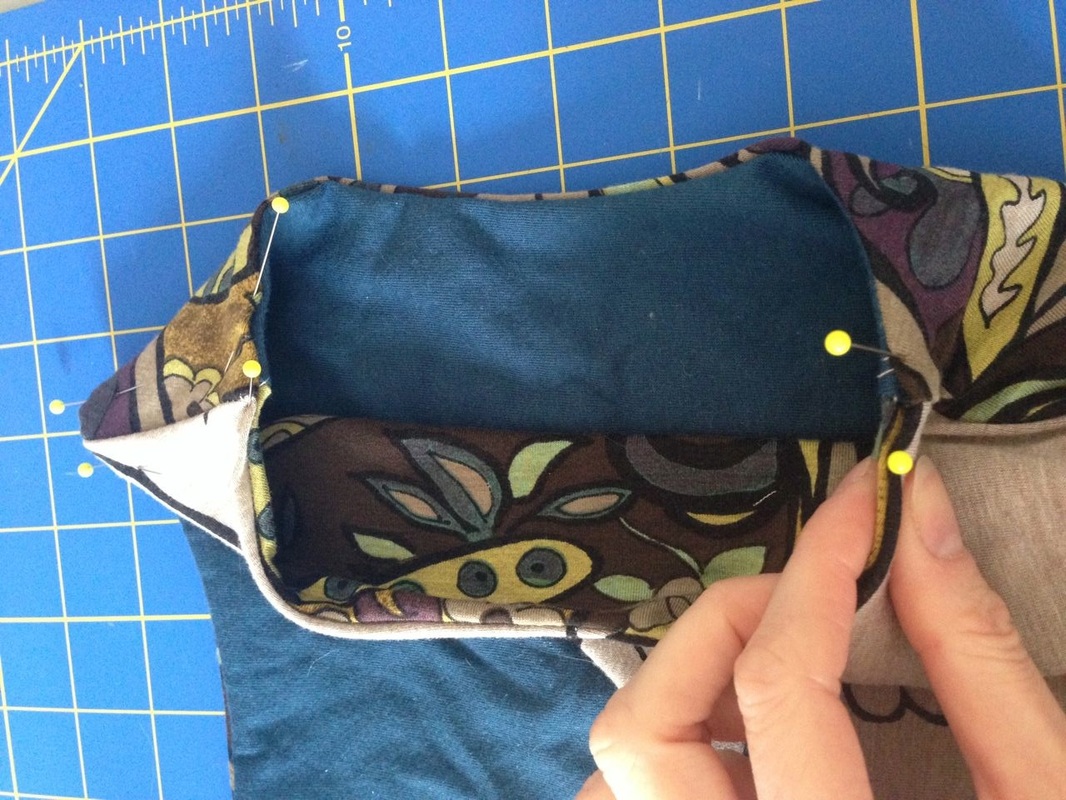
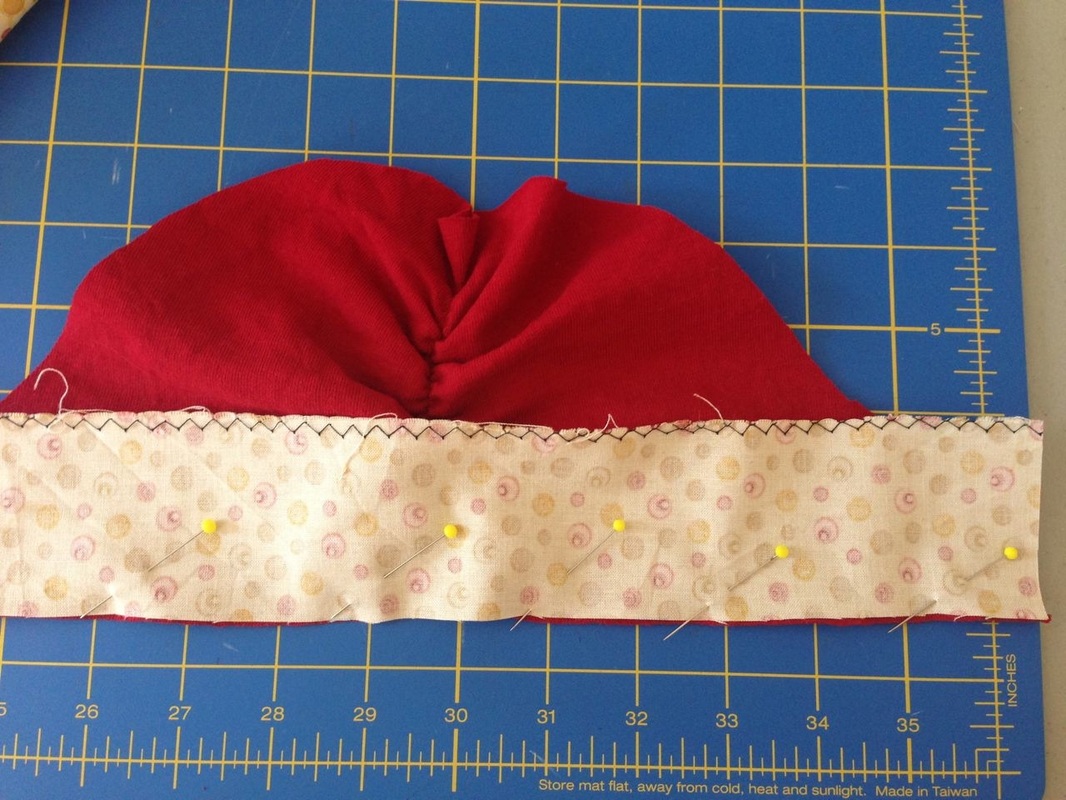
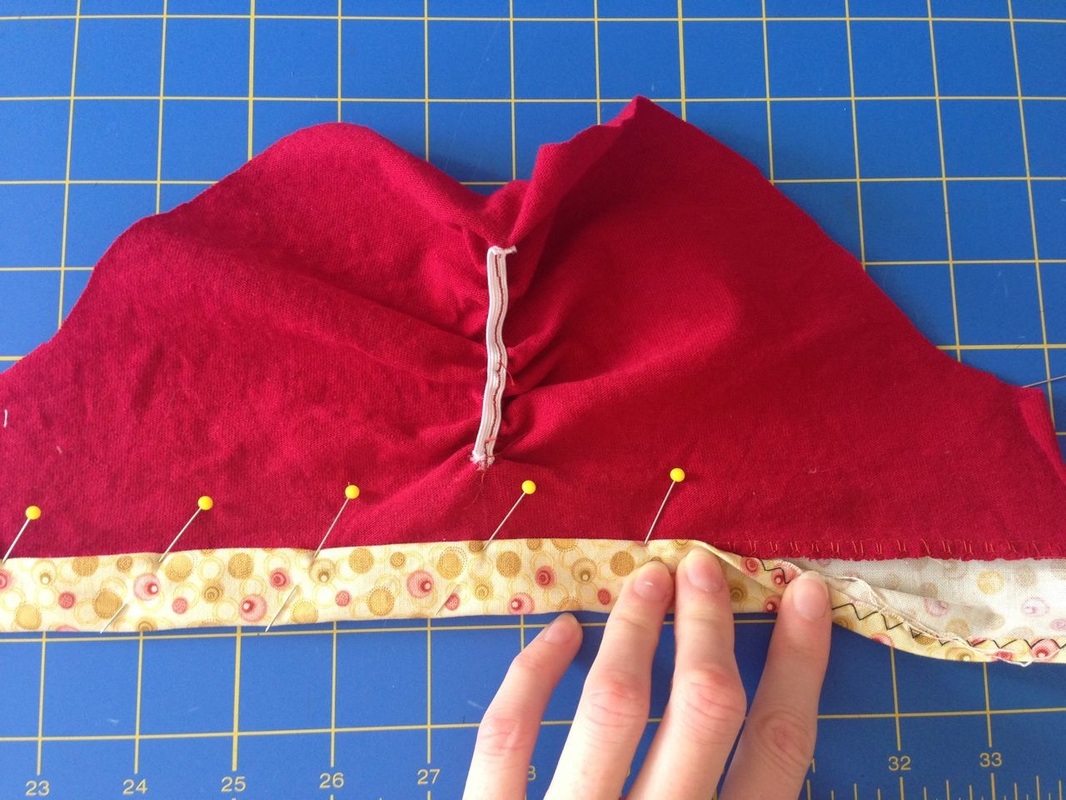
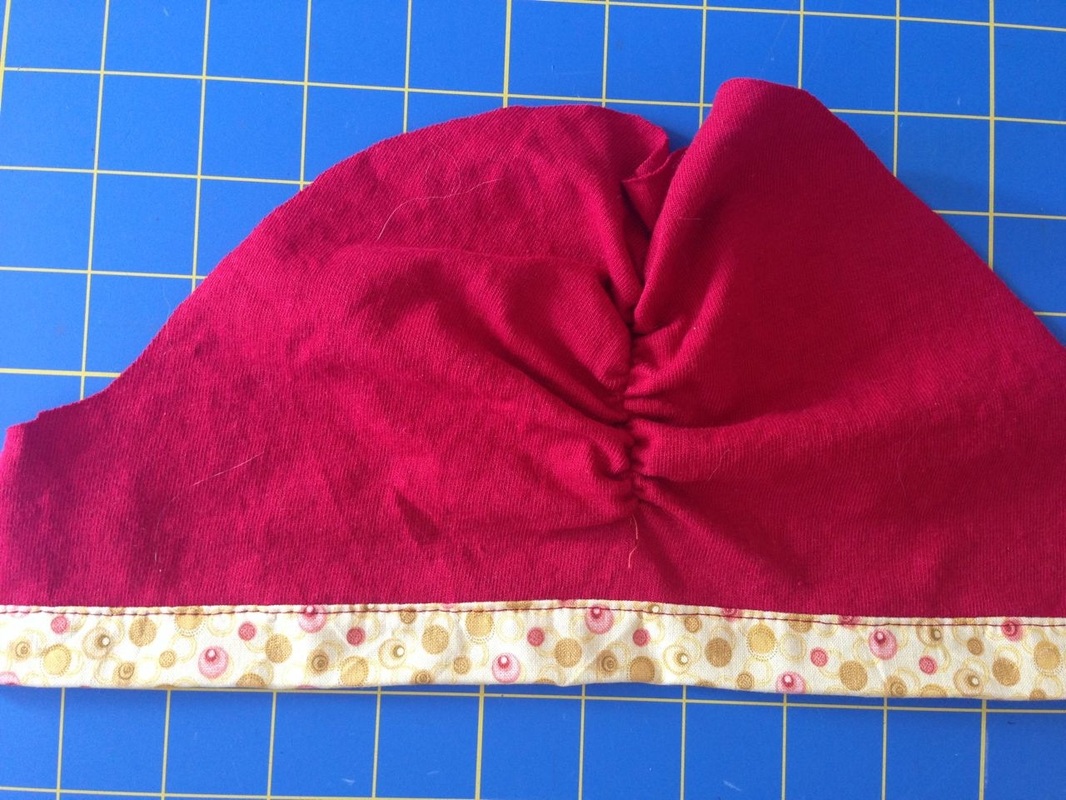
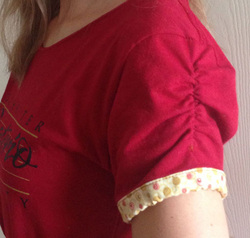
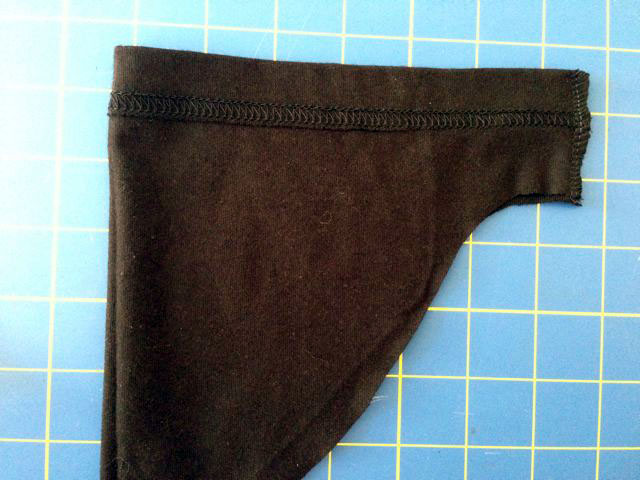
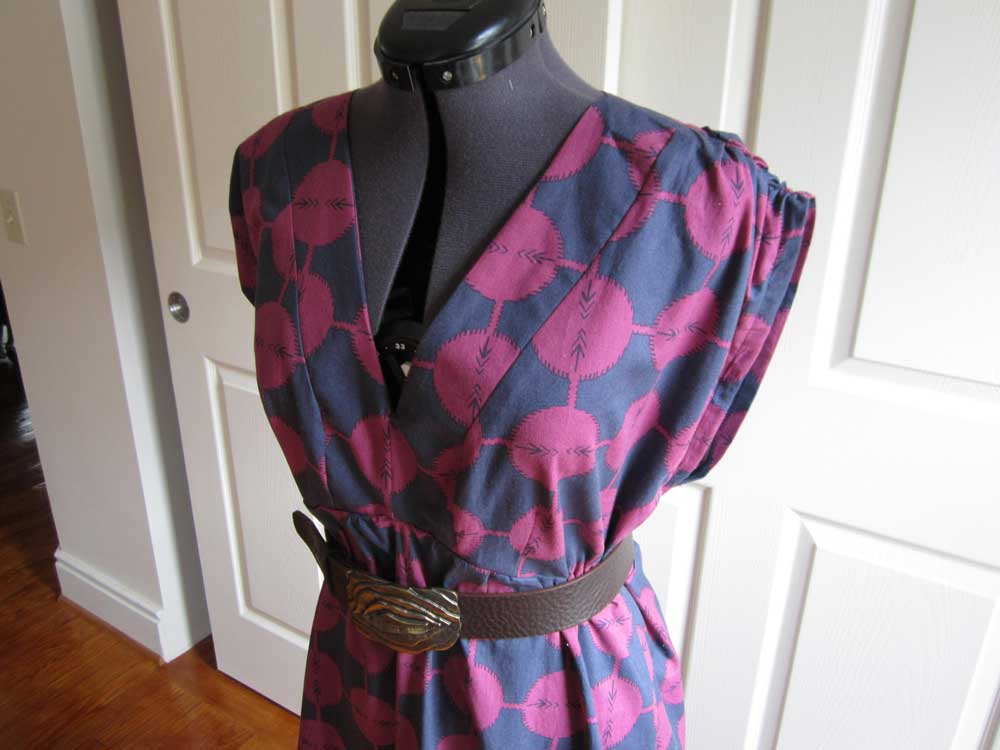
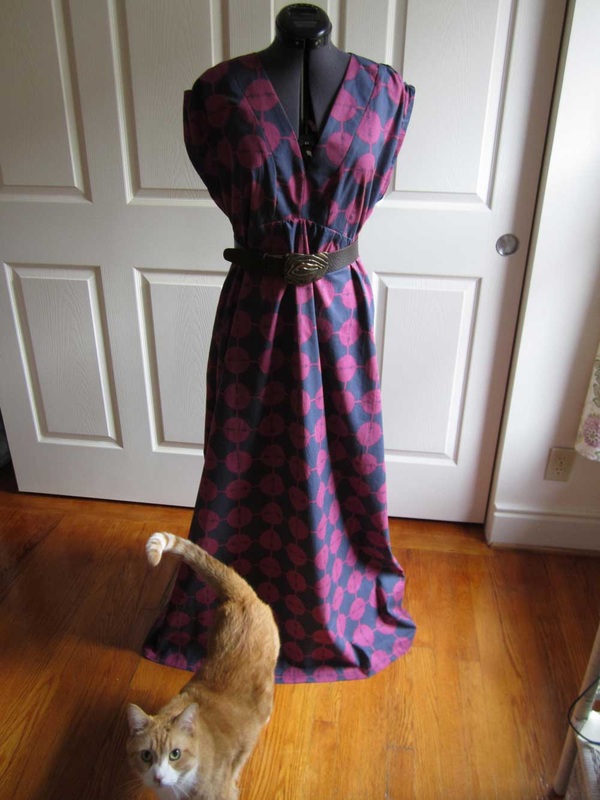
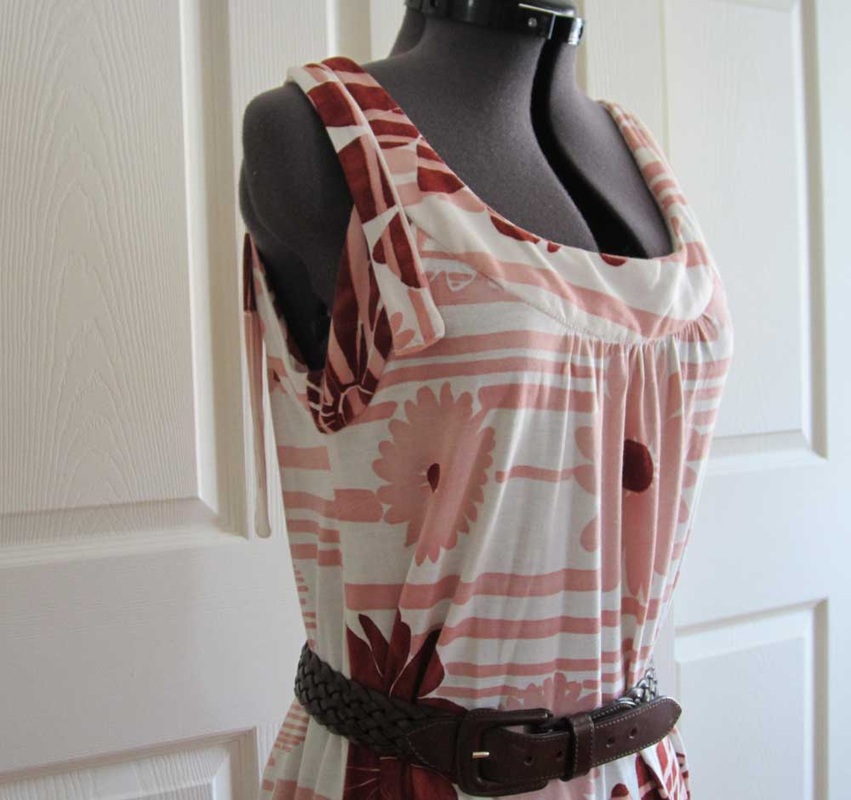
I needed about 3 hours to finish everything. The neckline is pleated - the original pattern asks for four pleats but I folded six (as I have already done with my dress) to make it fit me better. I also stitched the side seams of front and back in a slight curve since I thought it would be nice to have a fitted version.
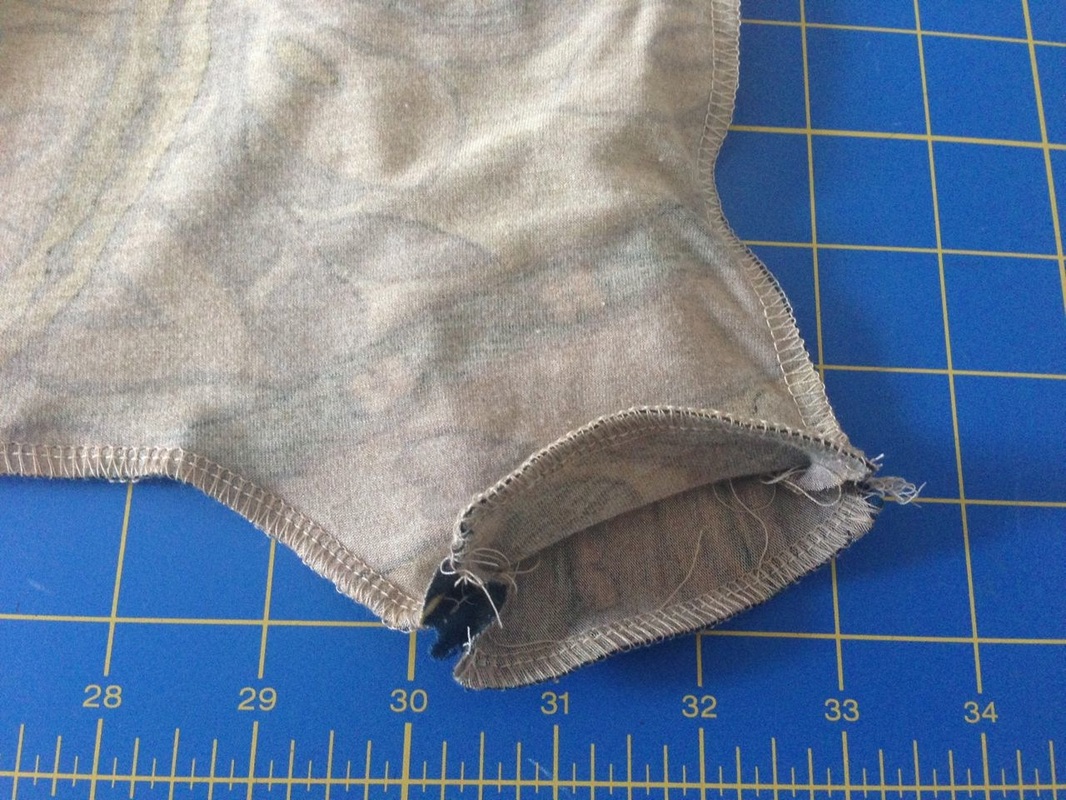
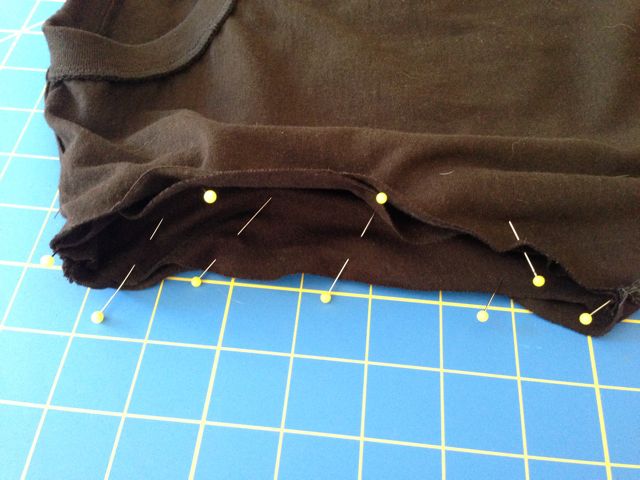
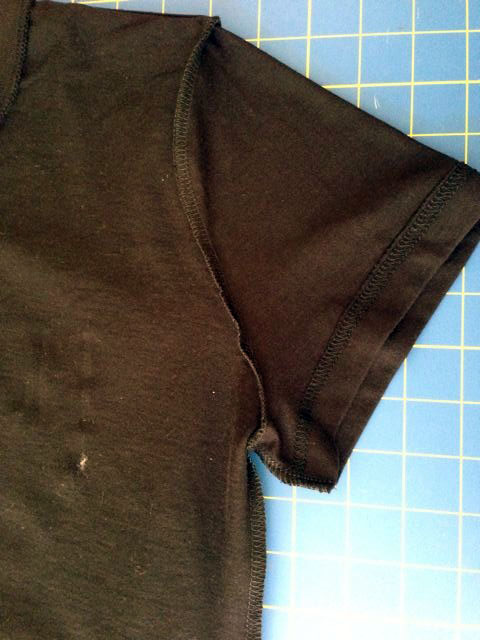
Finally all I had to do is finish the sleeves and the hem with the twin needle. That's it, all done!
Bild
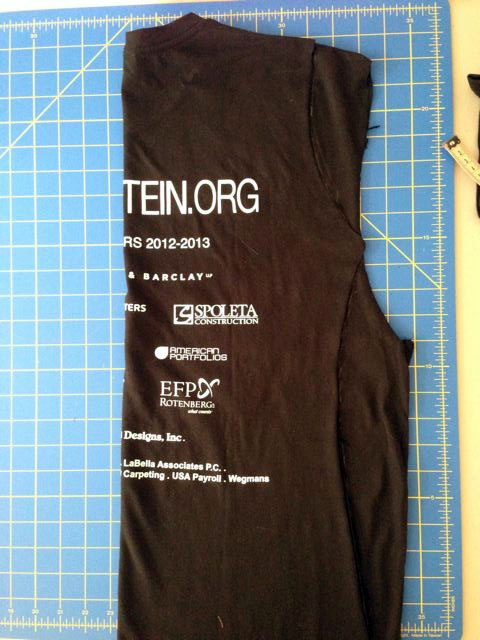
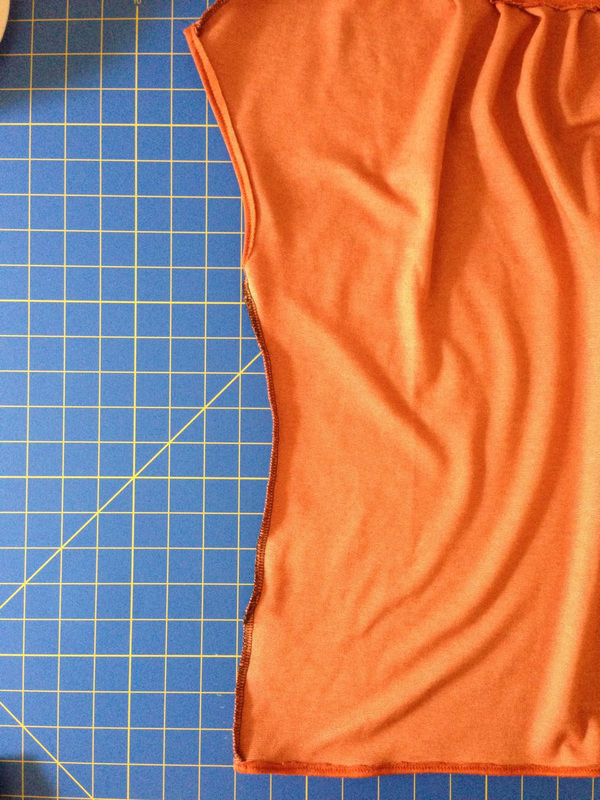
I didn't stitch the side seams of the shirt straight down but in a curve to make it more fitted
Bild
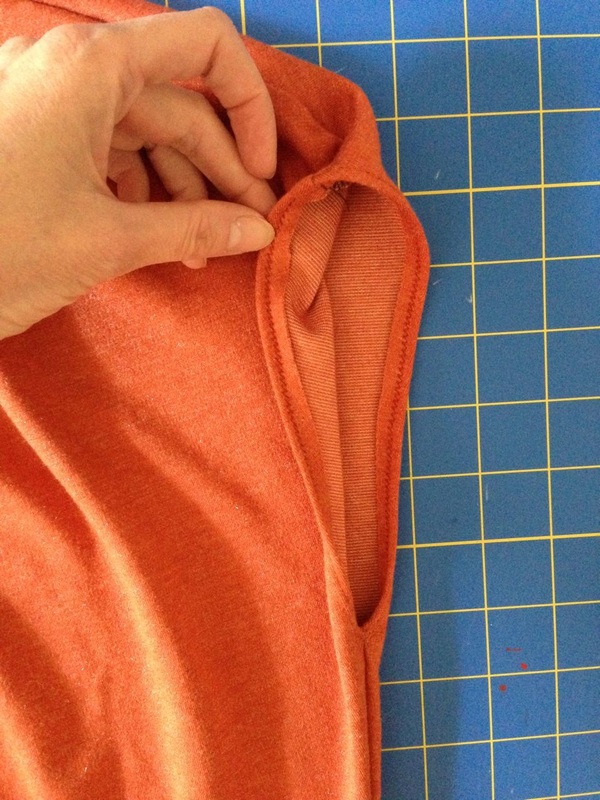
The sleeves stitched with the twin needle
Bild
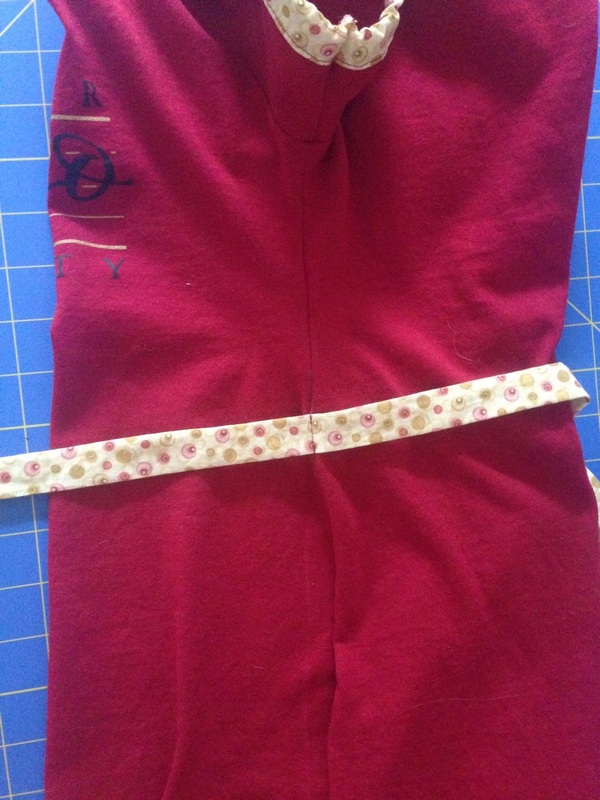
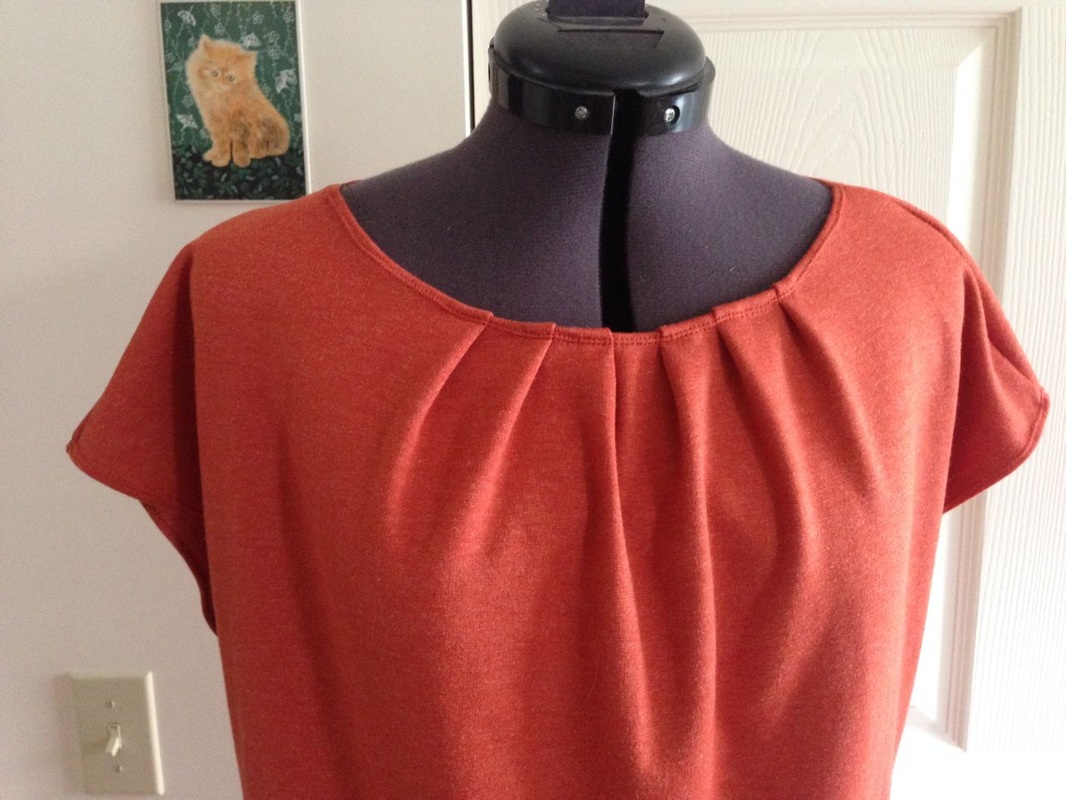
Six pleats at the neckline
Bild
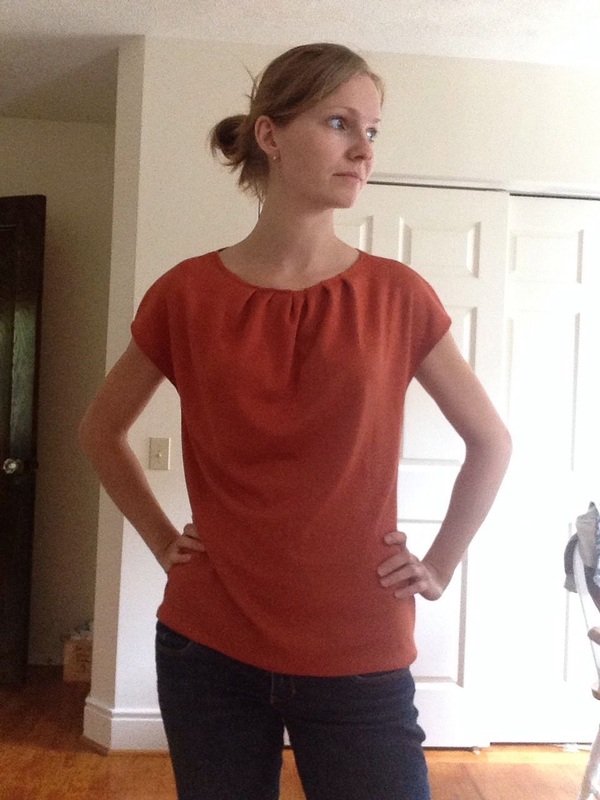
No cats or litterboxes in the picture this time :)
Enjoy the weekend everyone! Are you going to be working on some sort of sewing project? Temperatures will hit 80F here so I will probably skip sewing until Monday... at least I have enough dresses and shirts now to wear for this kind of weather :)
Bild
0 Comments

A new summer dress...

5/30/2014

3 Comments

 
It's been pretty quiet here lately but I finally have a new project to show you. I finished another knit dress, made from one of the fabrics I bought in LA at Mood Fabrics.
I decided to go with a Simplicity pattern (# 2883) that I had bought almost two years ago. I bought it on Ebay since Simplicity does not sell this particular pattern any more. This was the first time working with this pattern and I loved it!
The pattern comes with only four pattern pieces (well, five, if you count the tie ends; six, if you are adding sleeves): bodice front, bodice back, skirt front panel, skirt back panel. No darts or anything on the bodice. The skirt panels are being gathered at the top. That's it! It took me about three hours to cut everything and sew it together with my serger :)
Bild
I cut the length of the pattern down by approx. 1" so that the dress ends right above my knees. Originally I wanted it to be shorter but I figured it would destroy the nice large scale print.
Bild
Bild
I decided to fully line the bodice again. I did this before on one of my maxi dresses and I really like it since it gives the top part a bit more structure and it also looks professionaly finished.
Bild
Bild
Bild
Bild
(....Please ignore my cats' litterbox which is showing in all the pictures. Did not intend that :))

And the best thing: I don't have to wait for better weather to be able to wear it. Summer arrived upstate NY and I am loving it!
Are you working on any projects for the summer right now?
Bild
3 Comments

My ROC City dress and a free sewing tutorial

3/16/2014

3 Comments

 
Bild
I remember that a few years ago there was this cool tutorial in one of my Burda magazines which showed you how to paint a city skyline onto a scarf. There was a stencil included in the magazine which portrayed some random fake city skyline. I thought the idea was pretty cool but if I am going to have a skyline on my clothing I want it to be a real one! So why not put Rochester, NY onto a dress?? If you are interested in making something like this for your city, here's what I did:
You need:
- a picture of your city. Print it onto a letter size sheet of paper
- tracing paper
- cardboard
- scissors and ideally a carpet cutter
- doublesided tape
- black fabric spray paint (I used Tulip Fabric Spray Paint "Asphalt")
-
a fabric pen matching your fabric - I used a red one with glitter effect (make sure it is a "pen" and not "slick" fabric paint which is dimensional!)
Bild
1. Trace the outlines of the city onto tracing paper. Then cut out the interior parts and discard them. Place the cut out picture onto your cardboard
(You may also cut the original picture if you don't have tracing paper or don't want to do the extra step but I thought using tracing paper was a little easier)
Trace the outlines onto the cardboard and then cut out the interior parts of the cardboard. This is going to be your stencil.
Bild
Before proceeding: I highly recommend trying your stencil on an old piece of fabric or muslin. You want to make sure you like the silhouette before you spraypaint the fabric of your garment! I am glad I used some simple yellow lining fabric to try out my stencil and my pens. I accidently bought a slick fabric paint pen which is dimensional and the result didn't really look nice. And I had cut out the bridge in the foreground of the cardboard at first which I also did not like. I removed the bridge part from the stencil so that I would have exclusively the outlines of the skyline. Everything structuring the skyline would have to be painted in later with a fabric pen. 
Bild
2. Tape the stencil to the fabric with doublesided tape. Make sure to cover all edges of the stencil with tape. It is important that the stencil will be attached securely to the fabric to prevent the spray paint from running over the edges. You also want to make sure to cover up the rest of the fabric with newspaper or some old fabric from your stash. For my garment I found this cotton/rayon knit fabric and love the pinkish/purplish color. I only bought a yard and thus knew that I only had one try to make this happen. No pressure at all :-)
Bild
Spray paint your fabric. Make sure to evenly distribute the paint and to get every corner. Let your fabric dry for at least a few hours before proceeding.
3. Take off the stencil and admire your work! So far so good - I actually procrastinated for about two days before proceeding to the next step. I was too scared I would screw up my nice skyline silhouette.
Bild
4. Now it's time to turn the silhouette into an actual skyline. I used the picture of Rochester for help and looked for significant details on the skyscrapers. E. g. the one in the center has a roof with slanted edges that reflects the sun. This part would be painted red to stand out more. The building on the left-hand side again has a very structured look with all those vertical lines, so I tried to draw in as many red lines as possible. The building on the right-hand side however is very dark, so I just draw the outlines and nothing else. As you can see I used the original stencil part to draw the bridge. I didn't want to eyeball this one since I am pretty sure I would have messed up on the proportions.
Bild
All done! After letting the paint dry for another few hours it was time to sew up the dress.
Bild
Bild
Not too bad! "Freddie-Sue Bridge" with Chase Tower, Bausch & Lomb Place and Xerox Tower (from left to right)
As for the dress I made with the fabric: it is a very simple pattern taken from Burda style magazine (April 2013, but they have the same pattern in the Spring 2014 edition which is available in stores right now). The pattern just uses one panel (cut on the fold) for the front and back and two facing pieces for the neckline. There are four pleats folded into the upper front part but I went with six since the neckline was a little too wide. I neglected the pockets. I like this pattern a lot and think the dress looks really good with a belt. Otherwise I would have probably made a more fitted version. 
Bild
Bild
Bild
And I really do like the skyline on the dress! Not everybody carries their city on their back :) Thanks for reading and if you like this tutorial please leave me a comment below!
Have a great week everyone!
Bild
3 Comments

My new maxidress - can't wait for summer!

2/7/2014

16 Comments

 
charmed Liebling Mood maxidress back
Anna Lankeshofer charmed Liebling Mood maxidress front
Only two more months of winter and then we can slowly get ready for spring... <sigh>...
knit fabric from Mood

To put me in the right mood I decided to make a dress out of one of the fabrics I got at Mood Fabrics in NYC in December.
I usually don't go too bold with my clothing but I just love love love the print of this knit fabric. I think it's phenomenal (just like the store I bought it from)!
(Read about my trip to Mood here)

New Look pattern 6802


I wanted it to be simple and casual, so I chose a New Look pattern. I made three changes:
1. I got rid of the sleeves
2. I made it a maxidress, reaching all the way to my ankles.
3. I doubled the bodice. I have a store-bought dress with a fully lined bodice and I really like it since it gives it more structure and a neat finished look.


When I bought this fabric I had absolutely no clue what to make with it. So I bought 2 yards, thinking I would be on the safe side. I am rather tall (5'9") and the fabric was hardly enough for a maxidress. I had to use another knit fabric (plain turquoise) from my stash for the inner back part of the doubled bodice.
I also couldn't play with the print like I had originally planned. The print ist bold and dark on the left-hand side of the fabric panel and kind of fades out to the right-hand side. If I had had more fabric I would have probably cut both the front and back part kind of in the center of the print. Now my front skirt panel is widely patterned and the back panel is rather plain :) To make a contrast to the colorful front skirt part I decided to use the more plain part of the fabric for the front bodice.

It took me a few moments to figure out how to line the bodice but it is actually pretty easy. I decided to share my technique with you, in case you want to try it out yourself.


How to double the bodice:
Note: for your convenience I am offering this tutorial as a PDF file if you prefer to have everything in one structured document. You may purchase it here for only $2.
Bild
1. Cut your bodice part for front and back twice each.

2. Put the two bodice front parts right sides together and pin. Stitch along the neckline and the armholes and make sure to start and stop approx. 2 cm (0.75") from the edges (see picture to the left). You will need this gap later to finish your bodice (I forgot to do it at first and sewed all the way up to the top, like shown on the pictures below. Don't do that!!). Turn right side out.

3. Repeat for the two pieces of the bodice back part.

Bild
Both front and back right sides together
Bild
Both doubled front and back right side out
Bild


4. Put the outer shoulder parts of the bodice back and front right sides together. Pin in place and stitch.

Bild

To do the same with the inner shoulder parts of the bodice front and back you will have to pull the two pieces through the bodice. Pin in place and stitch. Your bodice front and back will be connected at the shoulder seams now, with the gaps still open.


Bild
Bild
5. Repeat the previous step with the side seams of the bodice: Sew the side seams of the outer bodice parts rights sides together. Then sew the seams of the inner bodice parts right sides together. 
Bild
The side seams of the outer bodice part pinned right sides together.
6. To close the gaps on the bodice part, simply fold the seam allowances to the inside. Then topstitch along the whole bodice part (neckline and armholes), at the same time closing the openings.
Bild
Bild
Bild The skirt with the gathered front panel.

7. For the skirt part of my dress I used the two panels that came with the New Look pattern and added about 15" in length for a maxidress. The front panel is wider than the back (the back has the exact width of the back bodice). It has to be gathered to the right width so that it fits the bodice front part.
Stitch your skirt front and back together before proceeding.

Bild Bodice and skirt attached with the help of my serger.

8. Attach the doubled bodice to the skirt:
Put the skirt part and the bodice outer parts right sides together and stitch around the whole piece. I used a serger which will finish the edge neatly at the same time. You will be stitching through three layers of fabric: the skirt, the outer bodice and the inner bodice.

Finding the right length for my dress took me a while but I finally figured it out. I wanted it to be as long as possible, but without risking to fall or to have the fabric touch the ground (and dirt!) when not standing straight.
charmed Liebling braided headband


I had just a tiny bit of fabric left and decided to make a headband. I simply cut three strips of fabric and braided them. The strips I cut were about 4 cm (1.5") wide and 45 cm (18 ") long. To make the braid stay in place I stitched right over it at both the top and the bottom ends. Now I only have to tie the two ends together and my headband is ready to go!


I think the dress turned out really nice. I can't wait to wear it!! I hope you like it too. I am glad I already made it even though summer still seems like a million years away... Are you already sewing things for summer?
Happy sewing everyone and stay warm!
Anna Lankeshofer charmed Liebling Anna and Henry
Henry making his way into my picture (yet again!).
Bild
16 Comments

XXL-shirt to dress - reloaded

12/2/2013

3 Comments

 
Picture
I posted this free tutorial the other day about how to turn an xxl-shirt into a dress and I finally made a second one! I had to wait for my new t-shirt to arrive, which I got from my choir. I joined the Rochester Oratorio Society last year and I really enjoy singing with them. A couple weeks ago they offered the opportunity to order shirts and hoodies with their logo on the front, I already have a hoodie (in light pink :-)) and since that other shirt for my friend turned out so nicely I decided to order a big shirt for myself and turn it into a dress as well.
Picture
This is just a little bit too big :)
For the basic steps to make this dress, please refer to my free tutorial. Below I will show you how I lengthened my shirt, embellished the sleeves and made the belt.

--- This tutorial is free but for your convenience I decided to offer the complete tutorial as a PDF for download for only $2, if you prefer to have everything in one structured document ---


1. Embellish the sleeves
I didn't want to go with regular sleeves and since I was planning on lengthening my shirt with some nice coordinating cotton fabric I thought I'd be a nice idea to add a small strip of that fabric to the sleeves as well. Another thing I did was attaching a piece of elastic to the wrong side of the sleeve, to get a nice effect. To do this you will have to measure the height of your sleeve and take a piece of elastic of about half that height. Place the elastic centered onto the wrong side of your sleeve, starting approx. 0.75" down from the top edge. Stitch it down to the fabric while pulling it tight, so that the other end of the elastic ends about 0.75" from the bottom edge of the sleeve. This will make the elastic to create crinkles (nice ones!) on your sleeve as shown on the picture to the bottom right.
Picture
I did not take a picture of my original sleeves at the time I made my dress so I am showing you what I did on this white knit fabric instead :)
Picture
The elastic all stitched onto the wrong side of the sleeve. You may even pull it tighter if you prefer.
Next I cut two strips of my cotton fabric (each with a height of 2"), which had the same width as the bottom edge of the sleeves. I put the sleeve and the fabric right sides together and stitched. Next I folded the cotton fabric over to the wrong side of the sleeve, folded down the seam allowance and pinned the cotton fabric down on the sleeve, with the its clean edge being pinned down just about 1/8" above the seam you made in the step before.
Picture
Picture
Picture
Topstitch from the right side of the sleeve to make sure your stitching is even. Stitch approx. 1/8" down from the top edge of the cotton fabric.

I also pulled a strip of elastic through the cotton fabric and tightened it just a little bit, for the sleeve the get a nicer and rounder shape. Stitching the ends of the elastic to the cotton fabric made sure it stayed in place for the next step.

Picture


Next I folded my sleeve in half so that the two short edges were aligned and stitched them right sides together. Then I was ready to attach the sleeve to the shirt (see my previous tutorial for this step).

2. Lengthen the shirt
With a height of 5' 9" I am fairly tall and so I had to lengthen the shirt or I would have risked showing to much... and we certainly don't want that :) So I added two 4" long strips of my cotton fabric to the front and the back of the shirt.
Picture
Put your strip of cotton fabric onto the bottom front edge of the shirt. If the jersey fabric is a little out of shape like here, make sure the edge of the cotton fabric is straight (horizontal).
Picture
I used my serger to attach the cotton fabric to the shirt. Do the same with the other strip of fabric and then stitch the side seams.
3. Adding a belt
I decided to add a little belt to my dress since I didn't quite like the look of it. I wanted it to be fairly long so I actually had to stitch two pieces right sides together along the short ends to get a piece that was about 64" long. I made two of these, so both of my fabric pieces ended up being approx. 64" x 1.75". I put them right sides together, all edges aligned and stitched along both long edges using a 1/4" seam allowance. I used a turning tool to turn the belt right sides out and folded down the seam allowance of both short edges and topstitched them closed.
I acutally put on my dress to find the right height for the belt and pinned it down on the two side seams of the dress. I made sure that the center of the belt was aligned with the center of the back of the shirt. Then I simply topstitched the belt down on the two side seams of the dress.
Picture
The back of the dress. The belt is stitched to the side seams. I did not pull it to tight so I would be able to pull the dress over my head :)
Picture
This is acutally more of a summer dress but I don't think I can wait that long before wearing it. I really like the way it turned out and it took me only about 2 hours to make it :)

Thanks for reading and I hope you like this project :)
Picture
3 Comments

FREE sewing tutorial: how to turn an xxl-shirt into a dress

10/25/2013

23 Comments

 
--- UPDATE 12/3/13: I made another dress with embellished sleeves and a belt, and lengthened it with cotton fabric. You can find this blog post here.
For your convenience I decided to offer the complete tutorial as a PDF for download for only $2, if you prefer to have everything in one structured document ---
charmed Liebling knit dress


Another one of my sewing projects is done! A friend of mine had this really big t-shirt and she asked me if I could turn it into a dress for her. This was a really nice opportunity to use my serger again and was easier than I thought.

I had my friend give me one of her knit dresses that fit her well so that I would have some reference for measuremens. I put the xxl-shirt flat onto my sewing table and her dress above, so I could see where her shoulder seams and side seam would have to be. Then I marked everything with a fabric marker. You can see how I folded the sleeve to the side so that I could trace it exactly. The nice thing about knit fabrics is you don't even need to put in darts or pleats to make it fit. Simply let it slightly taper down to the waist.
I only did the tracing on one side of the shirt.
charmed Liebling shirt to dress tutorial
(Before proceeding I already cut the sleeves of. These will have to be adjusted in size later. )
Then it was time to cut off the additional fabric on that side. This is always the part the makes me a little most. After all, this is not my own shirt. Don't want to mess up now.
I simply folded the shirt in half and traced the other side with a fabric marker as well. This way I made sure both sides are even.
charmed Liebling shirt to dress tutorial
Using your serger (if you have a regular sewing machine you can use a stretch stitch) sew both side edges together again, right sides together.

For the new sleeves I actually looked through my paper patterns and took a sleeve pattern piece from a knit dress that seemed to be perfect to be used for the new sleeves. If you want to make sure the sleeve fits exactly into the armhole, measure the width of the armhole and adjust the width of the sleeve before cutting.
You can also go with a wider sleeve and gather it a little at the rounded top edge like you normally do, especially when sewing with cotton fabrics (e. g. a blouse). The only thing you want to avoid is having the width of the sleeve be smaller then the width of the armhole.
I took one of the shirt sleeves that I had cut off, folded my paper pattern piece in half and put it on top, the opening of both pieces matching. Then I traced around the paper sleeve and cut along this line.
charmed Liebling shirt to dress tutorial


With your serger or using a stretch stitch on your regular sewing machine, sew the sleeve together again at its short bottom edges. Repeat for the second sleeve.

Put the first sleeve into one of the armholes, right sides together. Both seams of sleeve and shirt should match. Use a lot of pins to keep the sleeve in place. I measured mine to fit exactly into the opening without having to gather the sleeve fabric.
Then stitch around the sleeve.
charmed Liebling shirt to dress tutorial
Repeat for the second sleeve and the other side of the shirt.

charmed Liebling shirt to dress tutorial
Almost done, the only thing I wanted to alter as well was the neckline. It was very small and wouldn't really look good on this dress.
I cut off the neck trim to make the neckline bigger, then simply folded it down to the wrong side by approx. 1 cm (3/8") and used lots of pins to hold everything in place.  Using my regular sewing machine and a twin needle I stitch all along the neckline.

charmed Liebling shirt to dress tutorial
And that is it already! I hope my friend will enjoy her new dress. I have to say I liked her idea so much that I am thinking about making a dress like this for myself as well. I even have an idea of what shirt to use...

I hope you enjoyed this tutorial. If you have any questions feel free to leave me a comment. Have you made a similar project? I would love to know :)
Bild
23 Comments

Upcoming sewing projects :)

10/9/2013

2 Comments

 
I am not sure if you guys use this term over here but I have some UFOs lying around on my sewing table! German sewists also refer to these as "unfinished objects" :) Have a look at what I am planning on finishing over (hopefully) the next days:

Sewing project number 1: Alter my tennis racket bag
Picture
Picture
I don't know if anybody else is crazy enough to make their own tennis bag but I just didn't like the ones I found in stores...ok, that is probably the worst excuse ever. But on the other hand I found this really cute laminted cotton with the pear print on Etsy and I thought it would be perfect for a bag like this.
I think I started this bag some time in March or April. And it is acutally finished BUT (yeah, there's always a but..): I didn't use any stabilizer which turned out to be a mistake. I thought I wouldn't need it but I should have known better. I decided I would have to make a lining for the bag as well, but it took me a while to order the right fabric for it. I wanted the bag to be entirely made of oilcloth or laminated cotton, so I had to order some more for the lining. It is just a plain white fabric, so it will match nicely with the pears on the exterior.

Sewing project number 2: Make a dress out of an xxl t-shirt
Picture
Picture
This project came to me just recently! A friend of mine asked me if I could make a dress for her using this REALLY big t-shirt which shows the logo of the local music school she teaches at. What a great idea! I already have some ideas in mind on how to do it.
One of them would be to shorten the sleeves, narrow down the width of the shirt and put a piece of elastic either underneath the bust or maybe right at the waist and let the skirt part flare? This would make a cute dress I think. Or maybe make a really snug dress instead, without sleeves? I will show my ideas to my friend next week and I am anxious to see how she will like them. Have you ever turned a shirt into a dress? If you have any other ideas, please leave me a comment :)


Sewing project number 3: Design a new bag pattern
Picture
This is already in the making, the idea for my new bag design! It will be a medium sized shoulder bag and I will probably use store bought leather handles for this one, but I haven't quite made up my mind. These are the fabrics I picked for this project. I already cut down all the pattern pieces and will hopefully find the time to assemble the bag very soon.

Do you have any fall sewing projects coming up? I would love to know!
Happy sewing :)
Picture
2 Comments

A custom made maxidress for Amy

10/4/2012

3 Comments

 
easy to sew maxidress Pinterest


So my last post was all about printing my business cards with my friend Amy. That was kind of one part of the deal we had worked out. In return for this generous favor I promised to make a dress for her. Somewhere on Pinterest she had spotted this gorgeous maxidress and asked me to make something similar for her.

Finding the perfect fabric for a project can be a really annoying task and it took quite a while but eventually she found a really beautiful and soft mediumweight cotton fabric online. The geometric pattern is perfect for this kind of dress and the colors are just beautiful! The top part has short cut sleeves which are gathered at the shoulders, and a v-neck with a neckband.
The skirt part flows nicely even though it consists of only two slightly flared panels.. that's all thanks to the length of almost 50".
Amy's maxidress overview
Amy's maxidress closeup
No, it's actually not that long.. I didn't adjust the height of the dress form, but actually the dress just slightly grazes the floor

Amy's maxidress with Henry
I am absolutely happy with the result. I finished it the day before yesterday, so just right in time for Friday October 5 when Amy is going to have a birthday party/artist showcase at the print studio…"the artist is wearing charmed Liebling", that sounds pretty damn good ;-P
3 Comments

Summer, summer, summer...

6/18/2012

0 Comments

 
charmed Liebling summer dress closeup
Well alright, I might be a little premature with the title since it's another two days until summer officially begins but the recent temperatures already made it perfectly clear that HE is one his way: during the last four days we had a maximum of 86°F/30°C and temperature is supposed to hit 90°F on Friday, awesome! I've been making some nice clothes lately that are perfect for this kind of weather. One of them is a knee-length dress.
It's made of a nice light-weight cotton knit fabric that I found in Berlin. Actually I was planning on making a top that only reaches down to my hips but since I had enough fabric left (why is it that I always buy too much??) I decided to make it a dress! It's a really simple pattern with only a front and a back part (both cut on fold), and facing on neckline and sleeves. I also tied a ribbon on each shoulder strap. So the result first looked like this:
charmed Liebling summer dress before


When I was done I was a bit confused because with no darts or pleats combined with the colors it looked a littttle bit like a nightgown.


Not good enough, so I put on a belt and look at that: I got myself a nice summerdress! Sometimes a tiny little detail can make a huge difference to a pattern.

charmed Liebling summer dress after
0 Comments

    Enter your email address:

    Delivered by FeedBurner


    Follow on Bloglovin

    RSS Feed

    Anna

    anna's blog -

    Welcome to my blog! I am an accountant who once started out her "career" in the US by designing bag and wallet sewing  patterns! My patterns are available on Etsy and occasionally I will share some of my sewing projects that I work on in my spare free time on my website.  Happy sewing :)

    Categories

    All
    Bags
    Bargains
    Dresses
    Fabric
    Fashion
    Germany
    Giveaway
    Home Dec
    Interfacing
    Review
    Sale
    Seasonal
    Sewing Patterns
    Sewing Tips
    Smartphone Cases
    Special Occasions
    Treasury
    Trips
    Tutorial
    Vacation Projects
    Wallets

    Threading My Way_Featured
    Pattern Spot dot com
    This page contains affiliate links. See my disclosure policy.
    Online Sewing Class
    Craftsy

    Archives

    December 2021
    May 2020
    April 2020
    January 2020
    January 2015
    October 2014
    September 2014
    August 2014
    July 2014
    June 2014
    May 2014
    April 2014
    March 2014
    February 2014
    January 2014
    December 2013
    November 2013
    October 2013
    September 2013
    August 2013
    July 2013
    June 2013
    May 2013
    April 2013
    March 2013
    February 2013
    January 2013
    December 2012
    November 2012
    October 2012
    September 2012
    August 2012
    July 2012
    June 2012
    May 2012

Powered by Create your own unique website with customizable templates.