charmed Liebling
  • home
  • pattern shop
    • wallet patterns
    • bag patterns
    • laptop and messenger bag pattern
  • items for sale
    • custom orders
  • free tutorials
  • contact
  • about

My new maxidress - can't wait for summer!

2/7/2014

16 Comments

 
charmed Liebling Mood maxidress back
Anna Lankeshofer charmed Liebling Mood maxidress front
Only two more months of winter and then we can slowly get ready for spring... <sigh>...
knit fabric from Mood

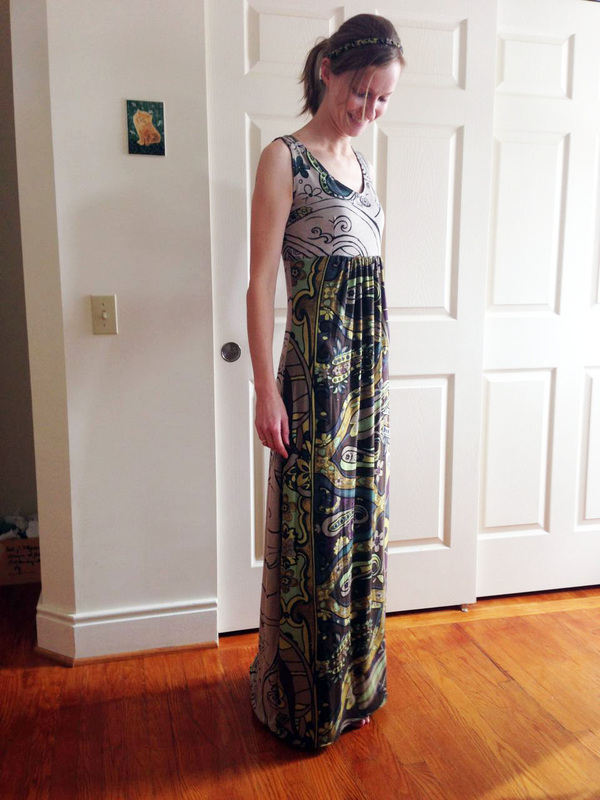
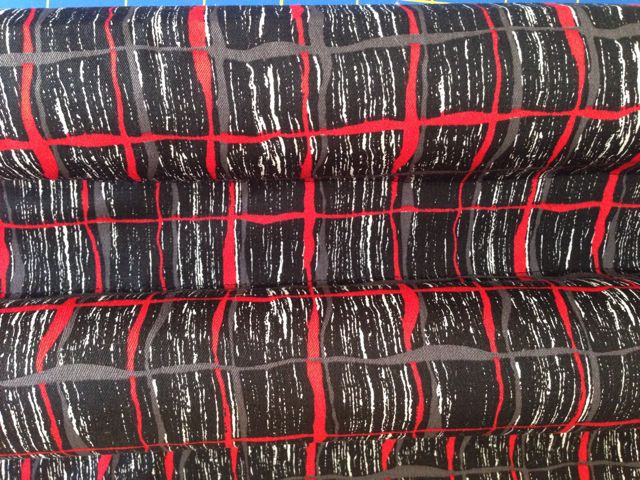
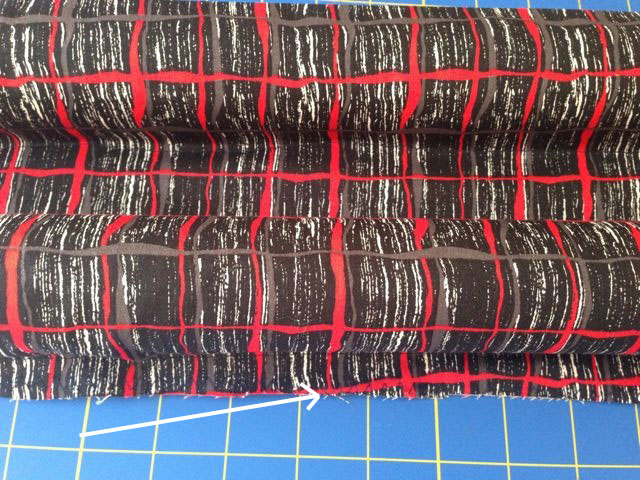
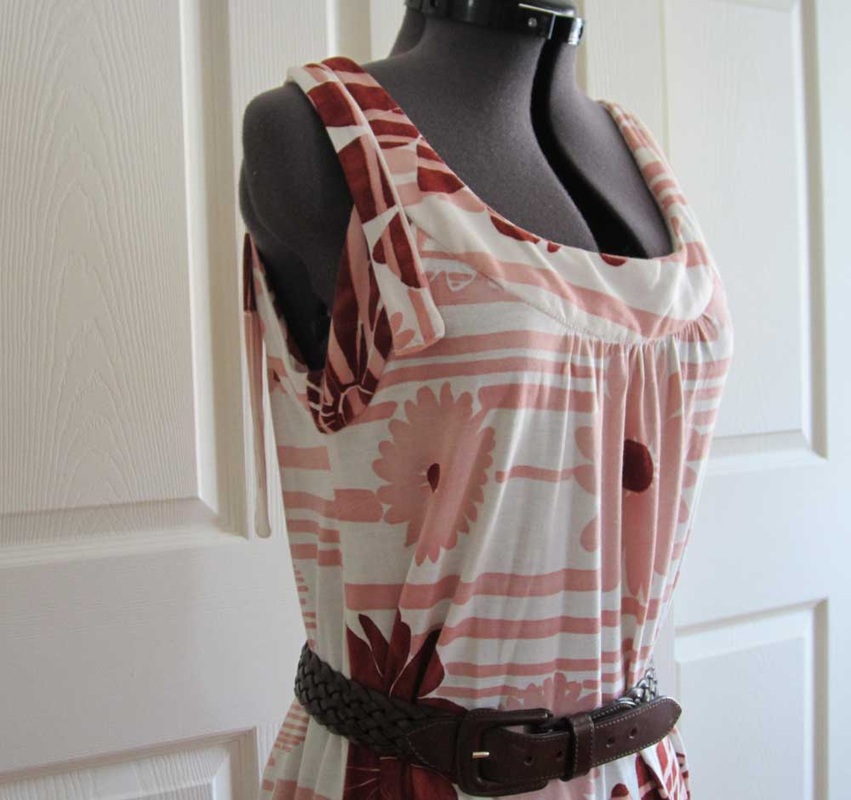
To put me in the right mood I decided to make a dress out of one of the fabrics I got at Mood Fabrics in NYC in December.
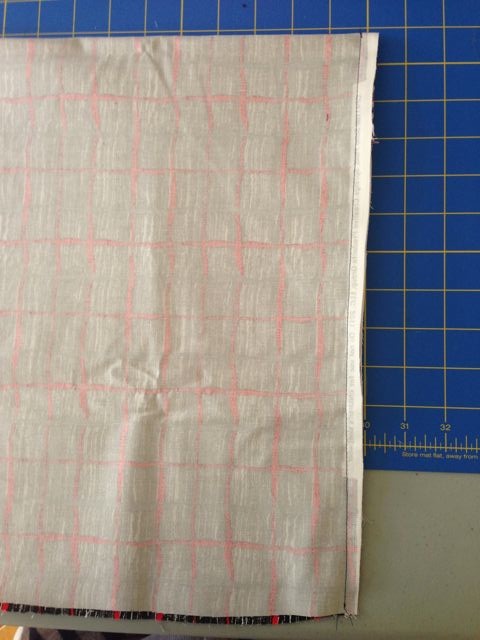
I usually don't go too bold with my clothing but I just love love love the print of this knit fabric. I think it's phenomenal (just like the store I bought it from)!
(Read about my trip to Mood here)

New Look pattern 6802


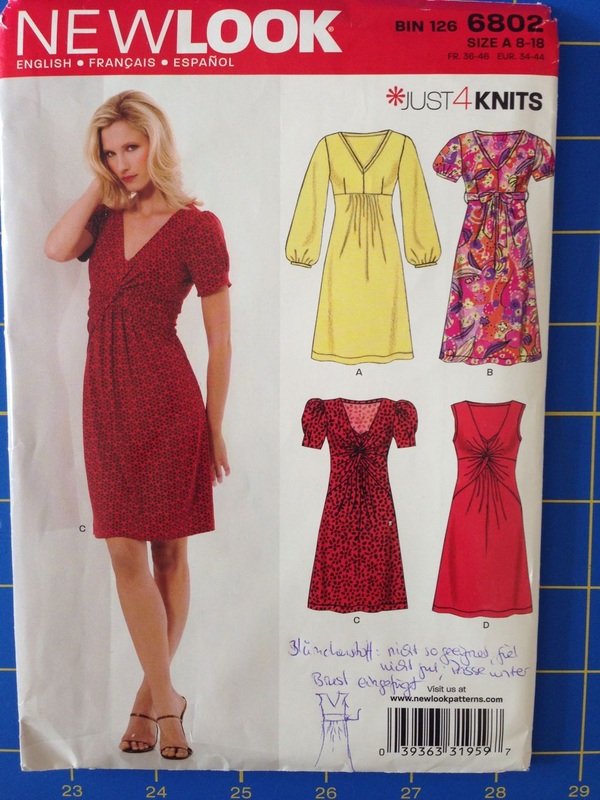
I wanted it to be simple and casual, so I chose a New Look pattern. I made three changes:
1. I got rid of the sleeves
2. I made it a maxidress, reaching all the way to my ankles.
3. I doubled the bodice. I have a store-bought dress with a fully lined bodice and I really like it since it gives it more structure and a neat finished look.


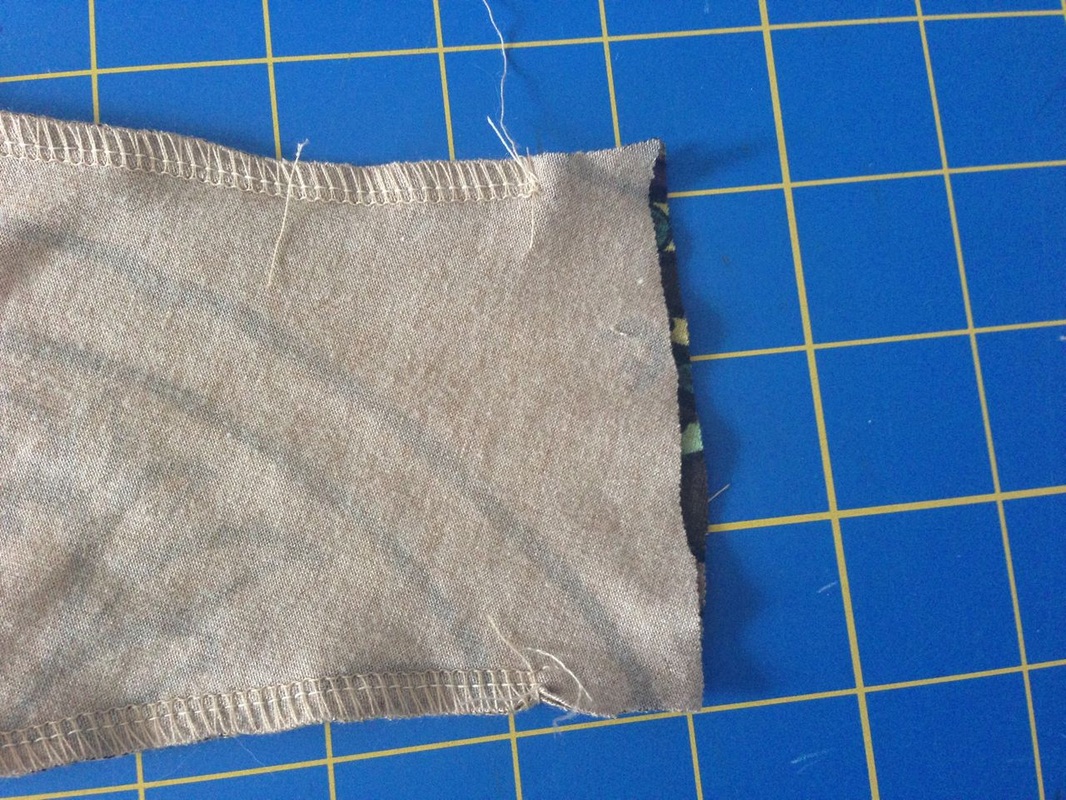
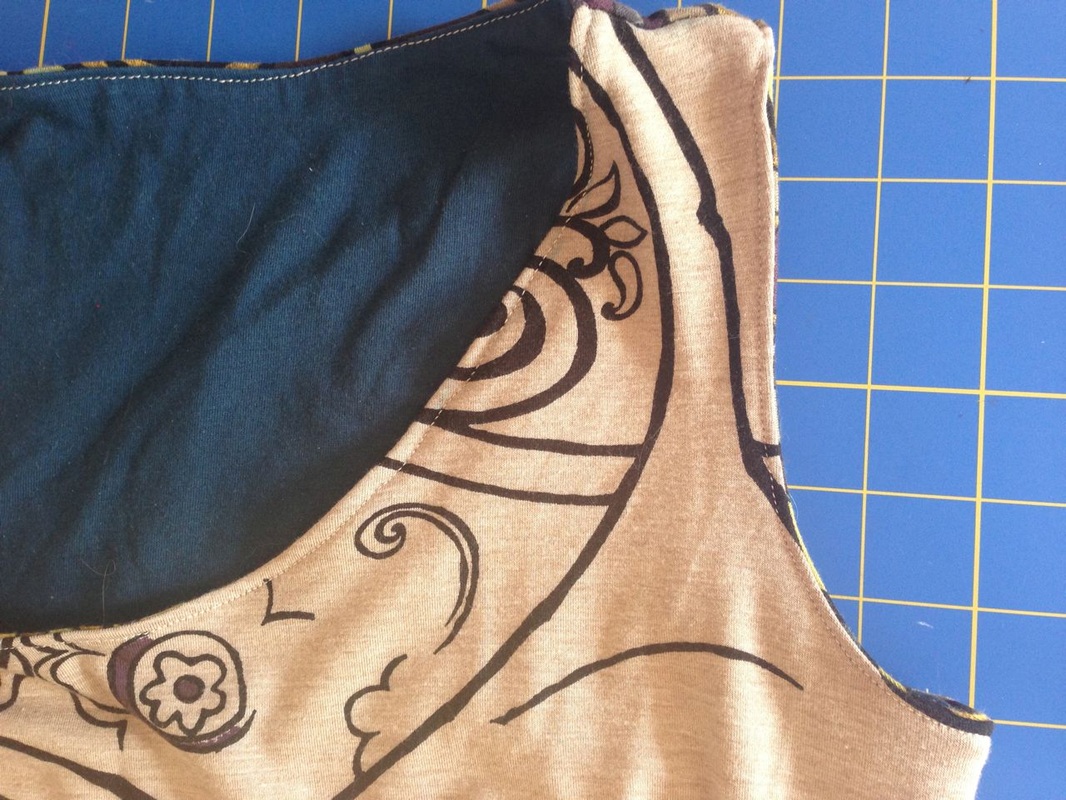
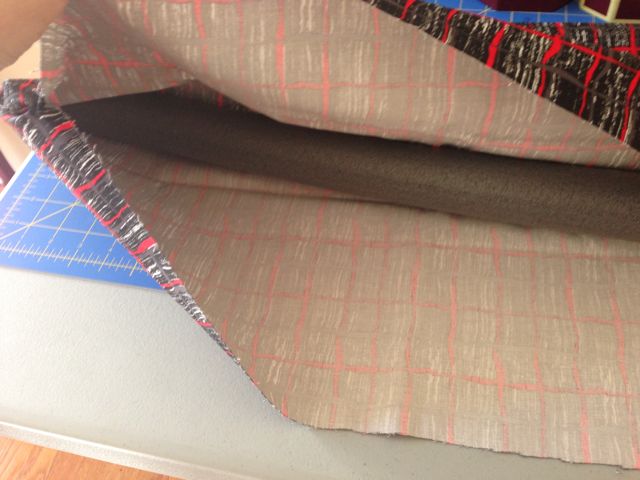
When I bought this fabric I had absolutely no clue what to make with it. So I bought 2 yards, thinking I would be on the safe side. I am rather tall (5'9") and the fabric was hardly enough for a maxidress. I had to use another knit fabric (plain turquoise) from my stash for the inner back part of the doubled bodice.
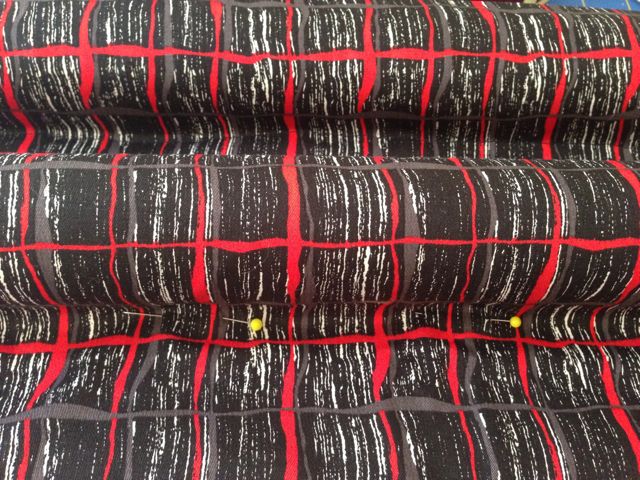
I also couldn't play with the print like I had originally planned. The print ist bold and dark on the left-hand side of the fabric panel and kind of fades out to the right-hand side. If I had had more fabric I would have probably cut both the front and back part kind of in the center of the print. Now my front skirt panel is widely patterned and the back panel is rather plain :) To make a contrast to the colorful front skirt part I decided to use the more plain part of the fabric for the front bodice.

It took me a few moments to figure out how to line the bodice but it is actually pretty easy. I decided to share my technique with you, in case you want to try it out yourself.


How to double the bodice:
Note: for your convenience I am offering this tutorial as a PDF file if you prefer to have everything in one structured document. You may purchase it here for only $2.
Bild
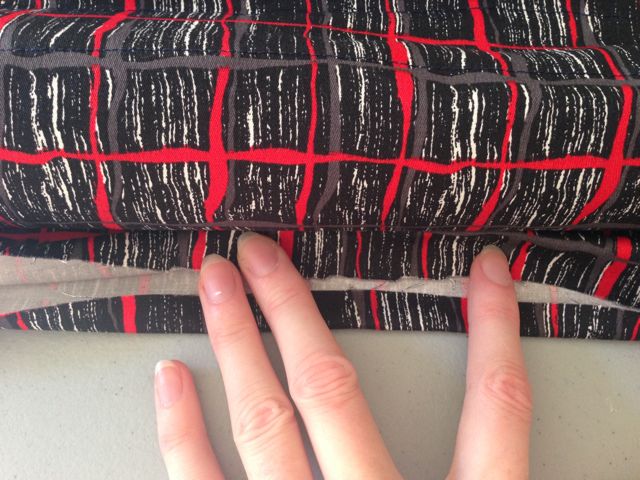
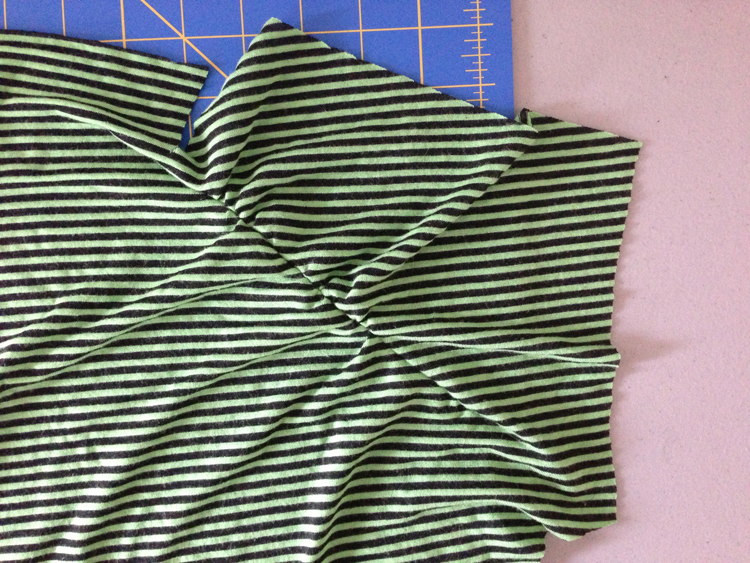
1. Cut your bodice part for front and back twice each.

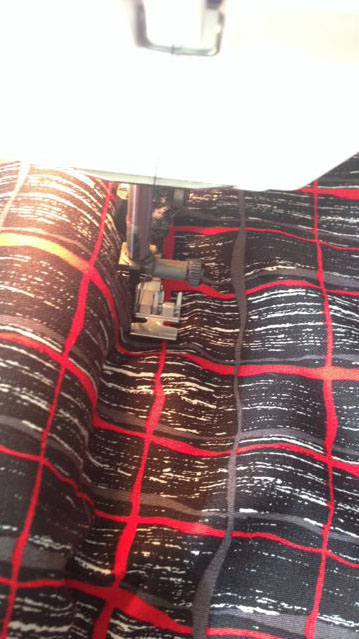
2. Put the two bodice front parts right sides together and pin. Stitch along the neckline and the armholes and make sure to start and stop approx. 2 cm (0.75") from the edges (see picture to the left). You will need this gap later to finish your bodice (I forgot to do it at first and sewed all the way up to the top, like shown on the pictures below. Don't do that!!). Turn right side out.

3. Repeat for the two pieces of the bodice back part.

Bild
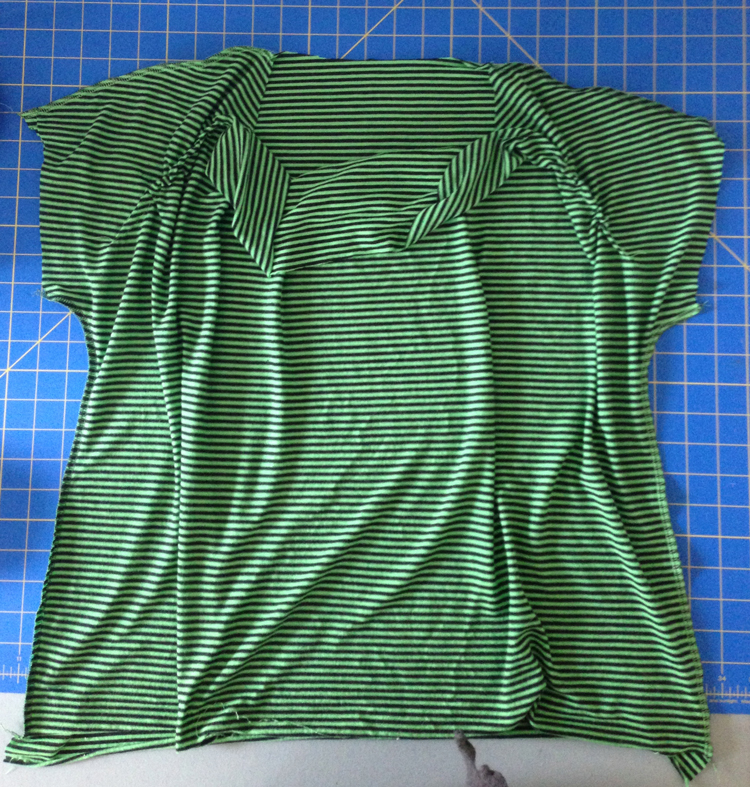
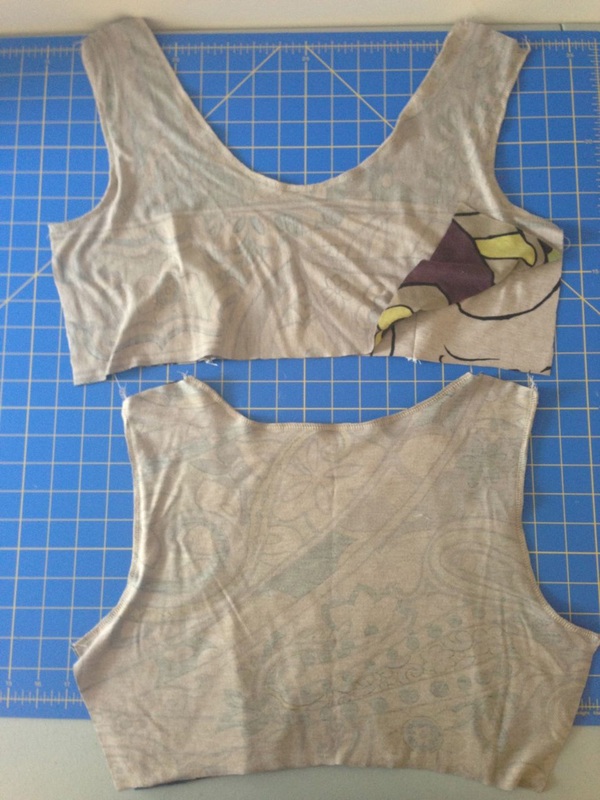
Both front and back right sides together
Bild
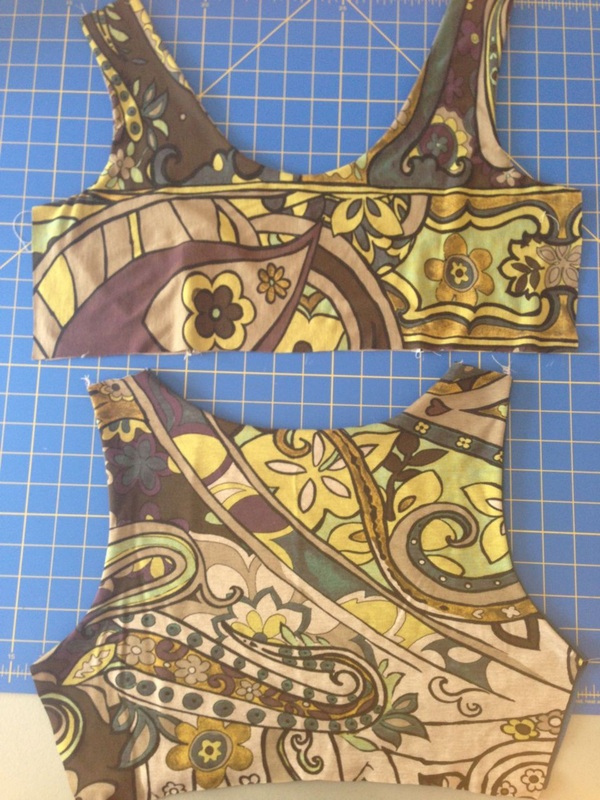
Both doubled front and back right side out
Bild


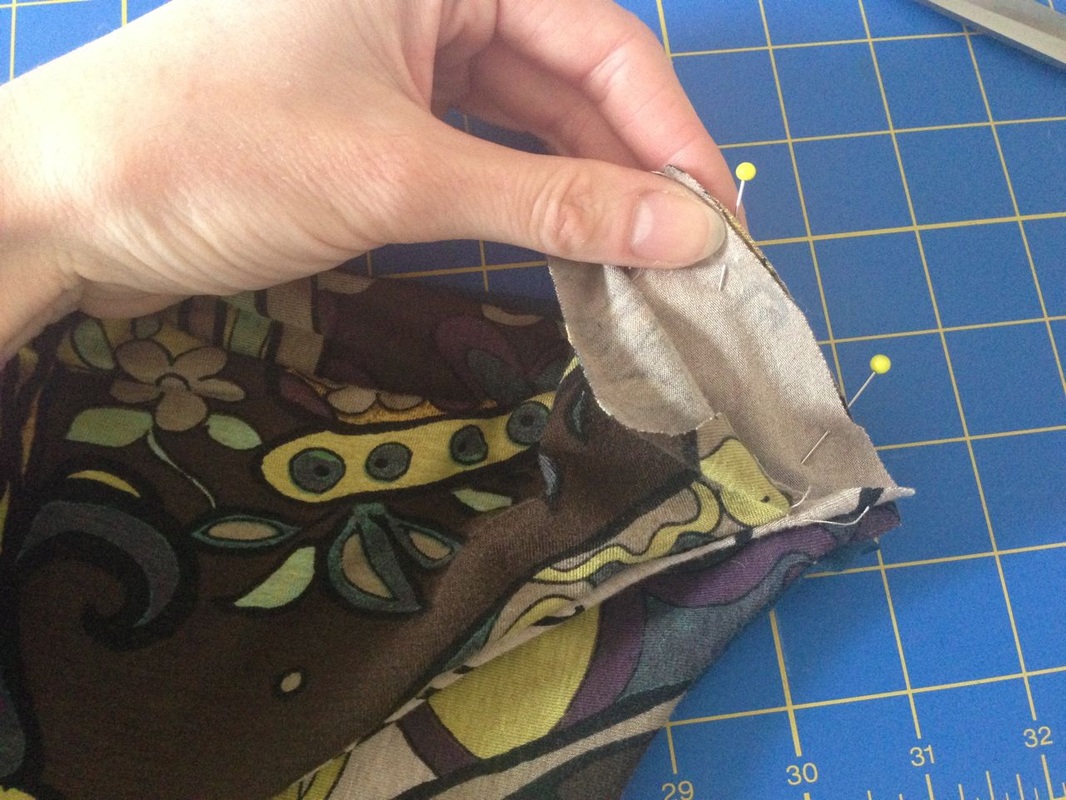
4. Put the outer shoulder parts of the bodice back and front right sides together. Pin in place and stitch.

Bild

To do the same with the inner shoulder parts of the bodice front and back you will have to pull the two pieces through the bodice. Pin in place and stitch. Your bodice front and back will be connected at the shoulder seams now, with the gaps still open.


Bild
Bild
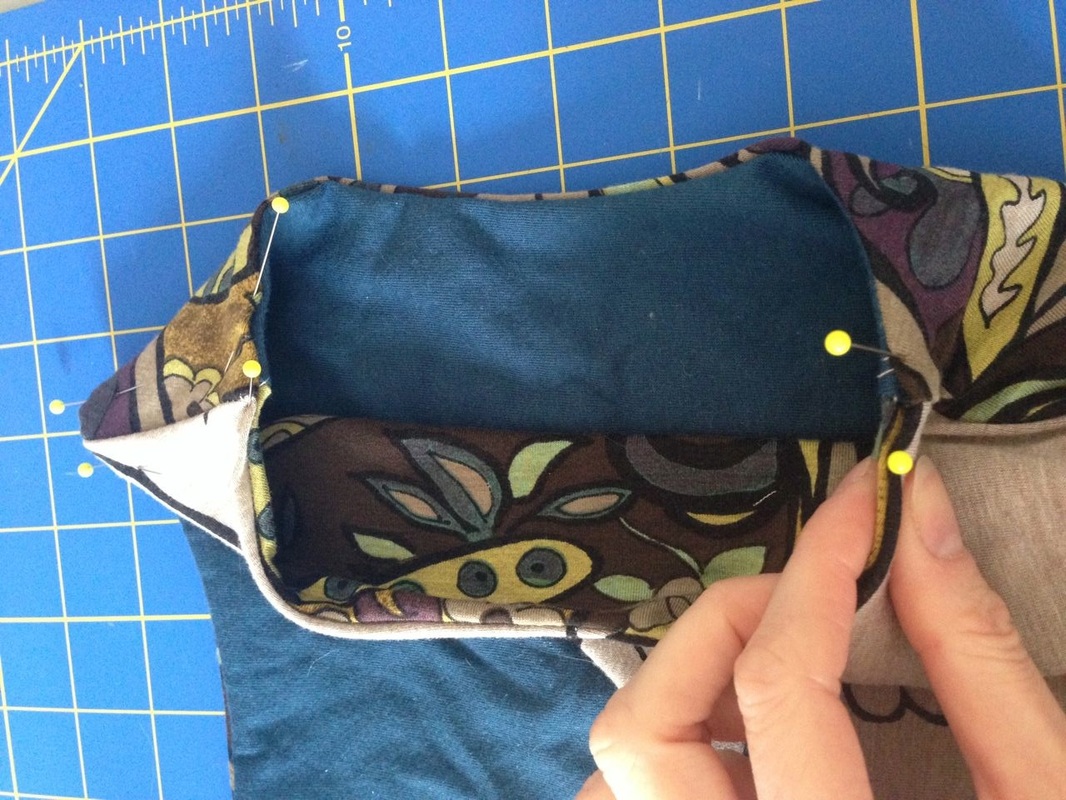
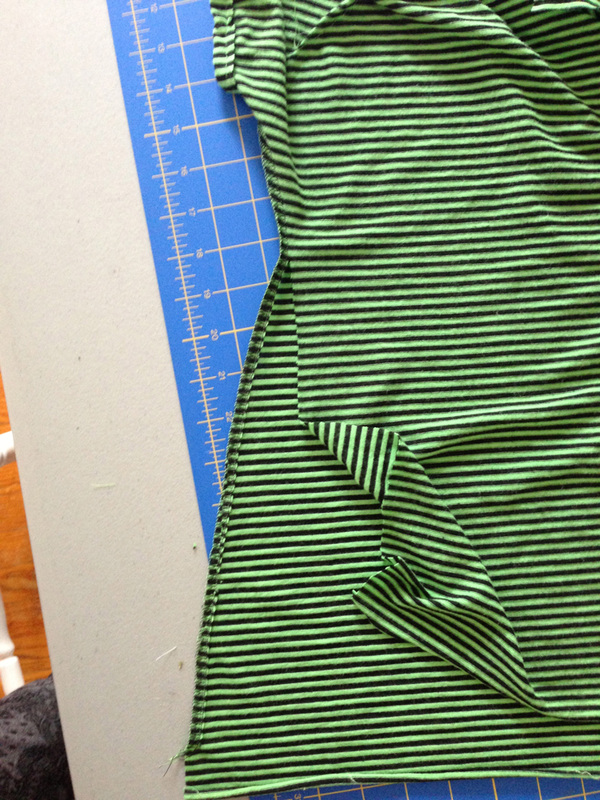
5. Repeat the previous step with the side seams of the bodice: Sew the side seams of the outer bodice parts rights sides together. Then sew the seams of the inner bodice parts right sides together. 
Bild
The side seams of the outer bodice part pinned right sides together.
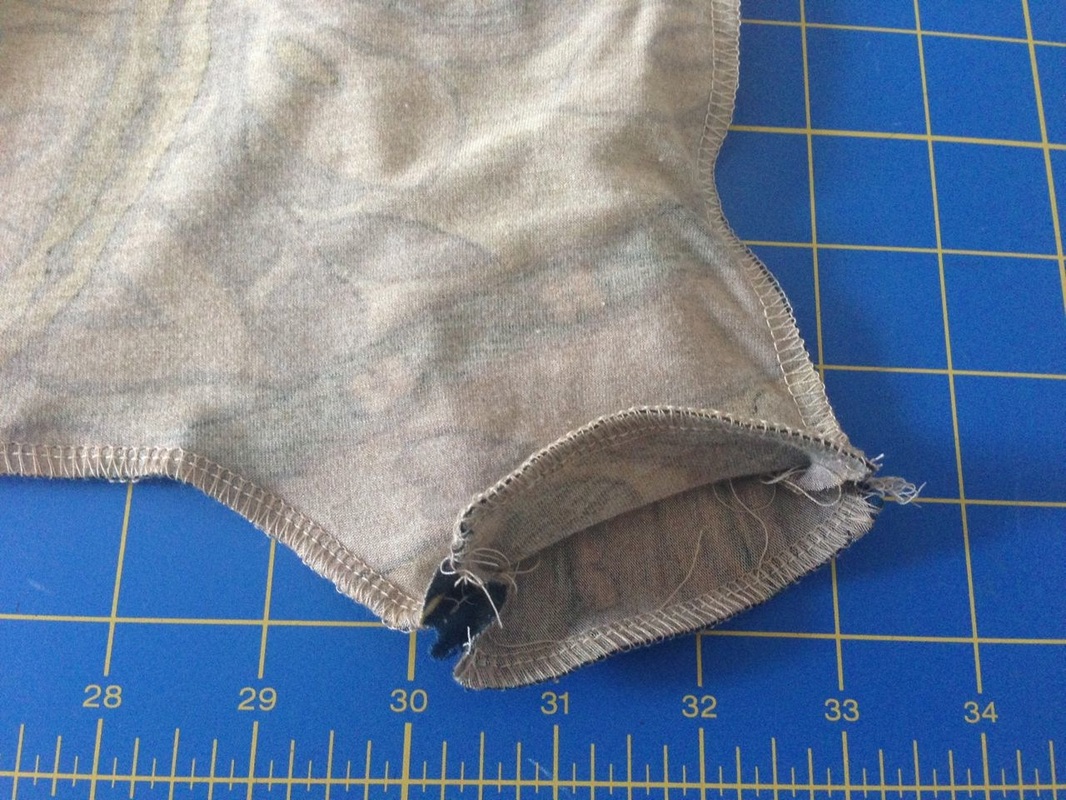
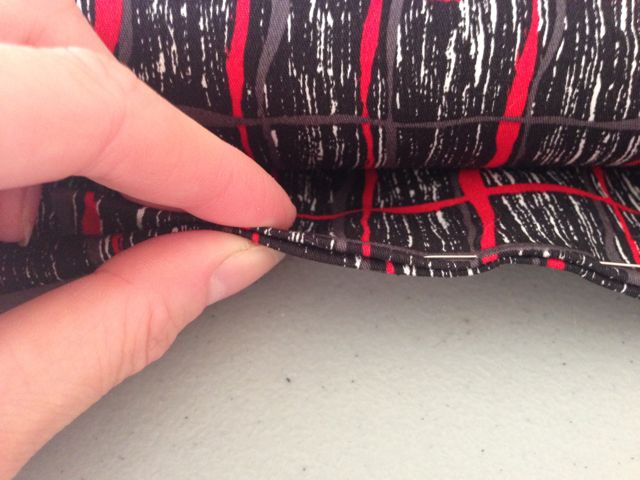
6. To close the gaps on the bodice part, simply fold the seam allowances to the inside. Then topstitch along the whole bodice part (neckline and armholes), at the same time closing the openings.
Bild
Bild
Bild The skirt with the gathered front panel.

7. For the skirt part of my dress I used the two panels that came with the New Look pattern and added about 15" in length for a maxidress. The front panel is wider than the back (the back has the exact width of the back bodice). It has to be gathered to the right width so that it fits the bodice front part.
Stitch your skirt front and back together before proceeding.

Bild Bodice and skirt attached with the help of my serger.

8. Attach the doubled bodice to the skirt:
Put the skirt part and the bodice outer parts right sides together and stitch around the whole piece. I used a serger which will finish the edge neatly at the same time. You will be stitching through three layers of fabric: the skirt, the outer bodice and the inner bodice.

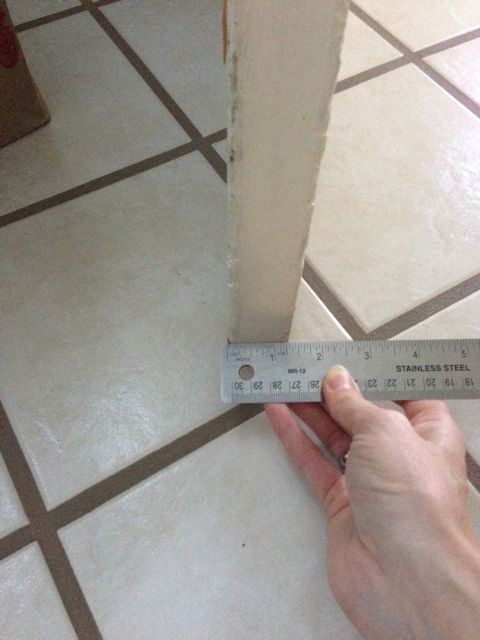
Finding the right length for my dress took me a while but I finally figured it out. I wanted it to be as long as possible, but without risking to fall or to have the fabric touch the ground (and dirt!) when not standing straight.
charmed Liebling braided headband


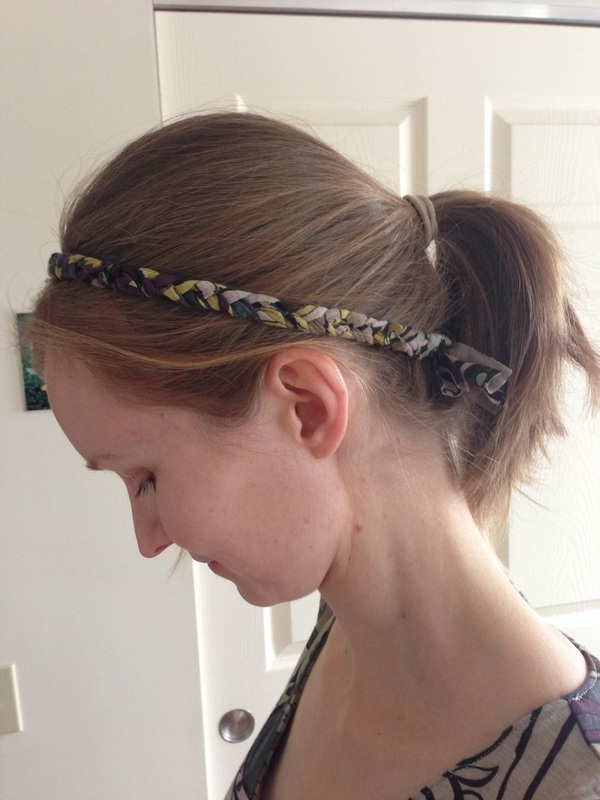
I had just a tiny bit of fabric left and decided to make a headband. I simply cut three strips of fabric and braided them. The strips I cut were about 4 cm (1.5") wide and 45 cm (18 ") long. To make the braid stay in place I stitched right over it at both the top and the bottom ends. Now I only have to tie the two ends together and my headband is ready to go!


I think the dress turned out really nice. I can't wait to wear it!! I hope you like it too. I am glad I already made it even though summer still seems like a million years away... Are you already sewing things for summer?
Happy sewing everyone and stay warm!
Anna Lankeshofer charmed Liebling Anna and Henry
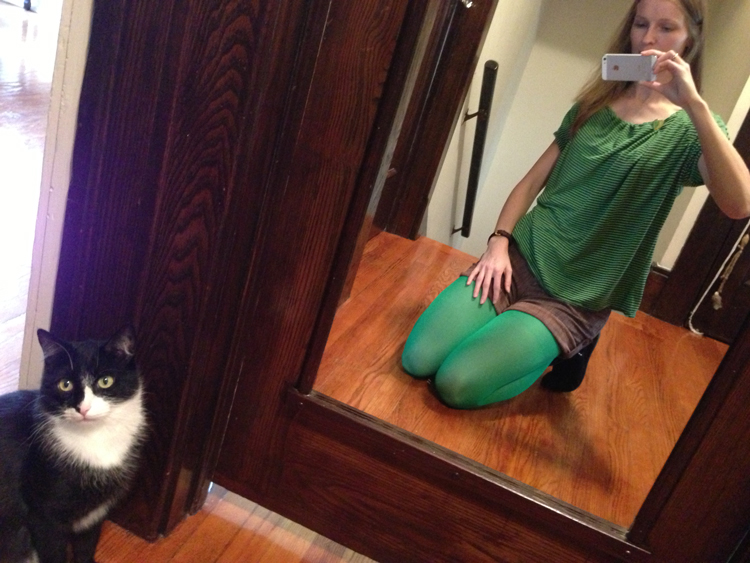
Henry making his way into my picture (yet again!).
Bild
16 Comments

FREE sewing tutorial: how to make a "stylish" draft stopper!

11/12/2013

51 Comments

 
Bild
One of my October weekends was devoted to a project I like to call "Now-that-it's-getting-winter-get-rid-of-the-freaking-drafts-in-your-house". Seriously, weather-wise I just live in the wrong state. I hate freezing, but I freeze all the time as soon as temperatures drop below 60 degrees (mind you USA, that is 15 degrees on the Celsius scale. Sounds pretty bad, huh?!). Our house here is old, built in the 1930s and while they installed new windows before we moved in, the wooden window frames have cracks and holes, if I hold my hand close to them I can feel the wind. No joke. This is not what you want when you live upstate NY where it usually stays cold from November to April. So this year I decided to finally do something about it and so I gathered as much information about how to weatherize windows when you don't have a clue about home improvement whatsoever.
Bild
Before you fall asleep over this blog post that was orininally designed to show you how to easily sew a draft stopper for your door, let me just tell you this: rope caulk is awesome! It is a putty-like substance that comes as a rope (duh...) with different strands and you can simply "unwind" as much as you need, in the thickness that you need to fill cracks or gaps and then simply seal them with it. It is amazing! I spent an entire Sunday filling all the drafty cracks in our house and I used up two of these packages. So if you are looking for a simple way to make your home more cozy, go get rope caulk!

So back to the title of this post. We have a backdoor in our kitchen, that leads into a very cold staircase and the basement. There is a really big gap under the door which I decided had to go as well. I mean, what's the use in fixing your windows if the cold still has this very convenient way to get into your house, right? I thought about making a simple draft stopper, you know, the ones that are made of fabric, stuffed with batting which you simply push in front of the door. I didn't like the idea very much since they always have to be put back in place after using the door. And the gap would be open if I leave the house through that door, so that was no option.
Bild
I found a very cool idea over at this website. They used foam tubes (originally designed for pipe insulation, you will find them at your hardware store as well) as a filler, what an awesome idea! I bought a 6' long foam tube that has a 1.75" inch diameter and started designing my own draft stopper. If you have read so far, congratulations and thank you, I really appreciate it :)
If you are interested in my "stylish" draft stopper, here is what I made:
(This tutorial is free but if you would rather prefer to download this complete tutorial as a pdf file you may purchase it here for only $2.)

First you will have to measure the width of your door, so you will know to what length to cut your foam tubes. When measuring, watch out for protruding parts (see first picture below) and take these into account so you will be able to close your door later with the draft stopper attached.
Also measure the depth of your door. You don't have to be too exact. I noted down 1 1/2" for mine.
Bild
Bild
Get some fabric. I actually had a Polyester fabric lying around in my stash (God knows why I bought this one…) which was perfect for this project. You most certainly don't want to use your best lightweight quilting cotton and you also might want to use darker colors, since the thing is going to be dragged over the ground fairly often.
Bild
Measurements: (seam allowance 1/2" included)

The width of your fabric piece should be: the width of your tube (i. e. the width of your door) plus about 3 extra inches.
The height of your fabric piece should be approx. 26 inches (if you use tubes with a diameter of 1.75 inches. Allow more fabric if you use tubes bigger in diameter). My piece of fabric was much too long as you will see in the pictures, don't let that confuse you :)

Fold the fabric in half horizontally (that means, after folding your fabric will still have the same width but will only be half as high as before), right sides together. Sew along the two short edges. Leave the long edge open.

Turn right side out. Put one of your foam tubes into the fabric and push it right into the upper corner, making sure it is centered. Pin it in place by closing the fabric, so that the tube is entirely covered by fabric. Pin as close to the tube as possible, as indicated by the white dashes in the picture below.
Bild
Bild
Bild


With the zipper foot of your sewing machine, sew along the tube, closing the fabric and trapping the tube inside.

Now measure from the seam you just made: the depth of your door, in my case 1 1/2". You can also put the unfinished draft stopper under your door to get the perfect measurements (see pictures below). Use a fabric marker to mark a line parallel to the seam you just stitched. I also recommend pinning the two fabric layers together, so nothing will slip while sewing. Stitch along the line you marked.
Bild
Bild
Take the second foam tube and put it into the fabric. Slide it inside, all the way to the seam you just made. Using pins, close down the fabric on the other side of the tube, again trapping the tube inside.
Bild
You can see both tubes trapped in the fabric and the gap for the door in between.
Bild
Using the zipper foot of your sewing machine, stitch along the tube again, closing the channel. Trim the rest of the fabric to the appropiate size: since this end of my draft stopper is going to be in the staircase and hence out of my view most of the time, I simply trimmed the fabric down to approx. 3/4" (measured from the stitching next to the tube) and did a zig zag stitch to prevent the edges from fraying. I agree this may not be the cleanest solution but I am not going to try winning Project Runway with this thing after all :-)
Bild
Trim the fabric and sew along the edge with a zig zag stitch, at the same time closing the open edge.
If you want your edge to be neat, trim down the fabric to a length of 1 1/4" (again measured from the stitching next to the tube) and then bend the fabric of both edges down towards the inside by approx. 1/2". Pin in place and stitch along the edge using a 1/4" seam allowance.
Bild
Bild
And that is it! Your draft stopper is finished. Slide it underneath your door and enjoy! No more drafts and it looks kinda stylish too. That fabric isn't even as hideous as I thought.

If you live in a cold area, you will have lots of fun with this. We had our first snow last night and I am not too happy about it... On the other hand I realized I really enjoy the sound of snow falling. Seems like I can't really make up my mind about it :) Do you like winter? Or are you one of those happy folks living in a warmer climate?
Happy sewing and stay warm :)
Bild
51 Comments

Upcoming sewing projects :)

10/9/2013

2 Comments

 
I am not sure if you guys use this term over here but I have some UFOs lying around on my sewing table! German sewists also refer to these as "unfinished objects" :) Have a look at what I am planning on finishing over (hopefully) the next days:

Sewing project number 1: Alter my tennis racket bag
Picture
Picture
I don't know if anybody else is crazy enough to make their own tennis bag but I just didn't like the ones I found in stores...ok, that is probably the worst excuse ever. But on the other hand I found this really cute laminted cotton with the pear print on Etsy and I thought it would be perfect for a bag like this.
I think I started this bag some time in March or April. And it is acutally finished BUT (yeah, there's always a but..): I didn't use any stabilizer which turned out to be a mistake. I thought I wouldn't need it but I should have known better. I decided I would have to make a lining for the bag as well, but it took me a while to order the right fabric for it. I wanted the bag to be entirely made of oilcloth or laminated cotton, so I had to order some more for the lining. It is just a plain white fabric, so it will match nicely with the pears on the exterior.

Sewing project number 2: Make a dress out of an xxl t-shirt
Picture
Picture
This project came to me just recently! A friend of mine asked me if I could make a dress for her using this REALLY big t-shirt which shows the logo of the local music school she teaches at. What a great idea! I already have some ideas in mind on how to do it.
One of them would be to shorten the sleeves, narrow down the width of the shirt and put a piece of elastic either underneath the bust or maybe right at the waist and let the skirt part flare? This would make a cute dress I think. Or maybe make a really snug dress instead, without sleeves? I will show my ideas to my friend next week and I am anxious to see how she will like them. Have you ever turned a shirt into a dress? If you have any other ideas, please leave me a comment :)


Sewing project number 3: Design a new bag pattern
Picture
This is already in the making, the idea for my new bag design! It will be a medium sized shoulder bag and I will probably use store bought leather handles for this one, but I haven't quite made up my mind. These are the fabrics I picked for this project. I already cut down all the pattern pieces and will hopefully find the time to assemble the bag very soon.

Do you have any fall sewing projects coming up? I would love to know!
Happy sewing :)
Picture
2 Comments

St. Patrick's Day - party outfit!

3/11/2013

1 Comment

 
charmed Liebling St. Patty's Day outfit with Oscar
Too much green for Oscar :)

Only a few more days until St. Patty's Day, the second one I'm going to be celebrating here in the US. We got invited to a party and of course my first thought was: "OMG, what am I gonna wear??" followed by "I don't have anything". (These are probably the two most common thoughts of women after they got invited to... well, pretty much anything) Since I haven't made any clothing in months this turned out to be a really good opportunity for me to finally sew something that is not a bag or a wallet.

I found a really nice green and black striped jersey fabric, a rayon/polyester mix, at a local fabric store. The idea for my outfit was to make a simple short sleeved shirt with the jersey fabric, wear some of my short pants with it as well as some green leggings. That should be enough green to not get pinched ;)

Picture
I looked through my sewing magazine collection for a nice pattern and found one in Burda Style 3/2010 which didn't look to complicated. Well turns out I had not quite enough fabric (I bought like 6 inches too little…urgh!) but so the shirt would have to be a bit shorter.

The first step was to make the very decorative pleats at the front part. Therefore I had to baste along the marked lines first, to be able to gather the fabric. After gathering I folded and stitched the darts.
Then the instructions tell you to stitch both the shoulder and the side seams. The front piece looked really wide from the beginning and after stitching it together with the back part, I tried it on and didn't like it at all. Yes, this shirt is supposed to be loose-fit but this way it just looked weird on me. I decided to make it a bit tighter by cutting off approximately 5 cm (2") from the front part. Since I used my serger machine I simply cut the seam open again. There is no use in trying to open a serger seam with a seam ripper. A lot of work with poor results ;-) After reducing the width and sewing both parts together again the shirt already fit much better!

Picture
The gathered dart at the left shoulder/sleeve part.
Picture
This is never going to fit me.
charmed Liebling green shirt
And there goes the first side seam. I had to cut it open almost all the way to the sleeve
Picture
What...??? Very decorative burn hole in my fabric.

The next step was stitching the sleeves. Those had to be gathered as well and then trimmed with a cuff. This part was a little annoying because jersey fabric is not the easiest one to make sleeve cuffs with. The fabric has to be folded in half with the wrong sides together and ironed, so that you have a crease at the middle. This has never happened to me before but I seriously managed to iron a hole into my cuff fabric!! Unbelievable.. I quickly decided that ironing is for losers and I would manage to get the cuff straight onto the sleeve without all that, which luckily worked out pretty well.

Next I folded down the seam allowance around the neck area and stitched it with a twin needle. I did the same with the hem and now my shirt was actually done.. at least according to my Burda pattern, but… the neckline was just way too wide for me ;-) I had to change that as well and used a piece of elastic ribbon which I slid into the seam allowance of the front part. This way the fabric gathers and the neckline gets a little tighter which is totally the better way to go! I finally folded another pleat at the right side and handstitched a leaf button onto it.
Yesterday I finally managed to drag myself to the mall and buy some green tights. Since their only purpose is to be worn on St. Patty's day I couldn't care less about the rather bad quality :) The shirt however is really comfortable and I'm sure I'm going to wear it a lot during the summer!
Picture
The shirt is finally finished! The gathering at the neckline is made with a piece of elastic ribbon.
Picture
My outfit for St. Patty's Day. I look a bit like Peter Pan. But that's probably not the worst :-)
charmed Liebling - detail leaf button
It's not a shamrock but the colors of this cute leaf button match the shirt just perfectly!
1 Comment

My miniature travel sleeve – tutorial soon to come!

1/31/2013

0 Comments

 
Edit: find the free sewing tutorial here :)
------------------------------------------------------------------------------------------
charmed Liebling mini travel sleeve
charmed Liebling travel sleeve
It seems like every time I get ready to go on vacation I feel the urge to make a new item that I can take along:  first my gorgeous travel bag for my trip to Germany last spring and then my super practical handbag, which I took to Berlin. This time I came up with an idea that is clearly related to my (slightly exaggerated) fear of pickpockets… but in my defense: I’ve been there, I know what it feels like to notice that your wallet is gone... and the thief even had the audacity to tie the strings of my backpack in a bow after taking out the wallet!

Anyway, I tried to think of some case or sleeve that would carry only my essentials, since I hate being stuck with a heavy handbag when I do sightseeing or go on a hike. Apart from my phone these essentials turn out be only my driver’s license/ID, green card and credit card plus a little bit of cash. You might even recognize the pattern, it's a mini version of the laptop cases I sell in my charmed Liebling Etsy shop. I basically made a cell phone case, measuring only 8 x 14 cm (3.25 x 5.5"), but I added a strap with a snap hook, so that I can put the case into my pocket and tie it to the belt loop of my pants! Pretty smart, huh? Ok, seriously, I have no idea if this is going to protect me from being robbed. But at least there won’t be any bows as a farewell greeting this time! AND this mini sleeve just looks really cute ;-)
charmed Liebling travel sleeve
charmed Liebling mini travel sleeve
0 Comments

sewing studio - reloaded

12/29/2012

1 Comment

 
The Christmas holidays are always a good time to do some things that you haven't found the time for so far. Especially the days between Christmas and New Years - in Germany we even have a phrase for that, we call it "between the years" - when all the celebrating (and eating!) is done and you can slow down, relax and wait for the new year to arrive...
Well, I dicided to finally give it a try and rearrange the furniture in my sewing studio. I didn't feel that comfortable in there anymore and I have absolutely no idea why - bad karma?? And I have to admit, I probably have the nicest room in our house and still there was something bothering me. This is what the room looked like before:
charmed Liebling old sewing studio window side
charmed Liebling sewing studio right side
All the furniture was simply set up along the wall. I had both my sewing and my cutting table at the one end of the room and what bothered me most was that I was facing the wall all the time and sitting with my back towards the door. All in all the room doesn't look bad but there was just something missing.
charmed Liebling new sewing studio window side
I put the table with my sewing and my overlock machine with the short end along the wall between the windows. That way I can still use the sunlight while sewing but the room suddenly looks much more structured. My old sewing machine table with the Singer vintage sewing machine took the spot of that table and is now kind of in the focus when you enter the room which I like very much. The dress form finally has a real spot, it has been standing in front of the closet and always got in my way.

charmed Liebling new sewing studio window nook


At the back of the sewing table I put all three of my small storage carts (one of them has been hidden in the closet the whole time because I couldn't figure out where to put it), this way creating a really neat and cozy corner at the back window.

Bild


The cutting table and my white shelf both remain in their old spot. At least at my sewing table I no longer have "open space" behind my back but the comfort of my closet. Just a few small changes but they make the room so much nicer. I finally enjoy working in there again!

Enjoy the holidays, have a very Happy New Year and... be creative! ;-)
1 Comment

Summer, summer, summer...

6/18/2012

0 Comments

 
charmed Liebling summer dress closeup
Well alright, I might be a little premature with the title since it's another two days until summer officially begins but the recent temperatures already made it perfectly clear that HE is one his way: during the last four days we had a maximum of 86°F/30°C and temperature is supposed to hit 90°F on Friday, awesome! I've been making some nice clothes lately that are perfect for this kind of weather. One of them is a knee-length dress.
It's made of a nice light-weight cotton knit fabric that I found in Berlin. Actually I was planning on making a top that only reaches down to my hips but since I had enough fabric left (why is it that I always buy too much??) I decided to make it a dress! It's a really simple pattern with only a front and a back part (both cut on fold), and facing on neckline and sleeves. I also tied a ribbon on each shoulder strap. So the result first looked like this:
charmed Liebling summer dress before


When I was done I was a bit confused because with no darts or pleats combined with the colors it looked a littttle bit like a nightgown.


Not good enough, so I put on a belt and look at that: I got myself a nice summerdress! Sometimes a tiny little detail can make a huge difference to a pattern.

charmed Liebling summer dress after
0 Comments

    Enter your email address:

    Delivered by FeedBurner


    Follow on Bloglovin

    RSS Feed

    Anna

    anna's blog -

    Welcome to my blog! I am an accountant who once started out her "career" in the US by designing bag and wallet sewing  patterns! My patterns are available on Etsy and occasionally I will share some of my sewing projects that I work on in my spare free time on my website.  Happy sewing :)

    Categories

    All
    Bags
    Bargains
    Dresses
    Fabric
    Fashion
    Germany
    Giveaway
    Home Dec
    Interfacing
    Review
    Sale
    Seasonal
    Sewing Patterns
    Sewing Tips
    Smartphone Cases
    Special Occasions
    Treasury
    Trips
    Tutorial
    Vacation Projects
    Wallets

    Threading My Way_Featured
    Pattern Spot dot com
    This page contains affiliate links. See my disclosure policy.
    Online Sewing Class
    Craftsy

    Archives

    December 2021
    May 2020
    April 2020
    January 2020
    January 2015
    October 2014
    September 2014
    August 2014
    July 2014
    June 2014
    May 2014
    April 2014
    March 2014
    February 2014
    January 2014
    December 2013
    November 2013
    October 2013
    September 2013
    August 2013
    July 2013
    June 2013
    May 2013
    April 2013
    March 2013
    February 2013
    January 2013
    December 2012
    November 2012
    October 2012
    September 2012
    August 2012
    July 2012
    June 2012
    May 2012

Powered by Create your own unique website with customizable templates.