charmed Liebling
  • home
  • pattern shop
    • wallet patterns
    • bag patterns
    • laptop and messenger bag pattern
  • items for sale
    • custom orders
  • free tutorials
  • contact
  • about

National Sewing Month: The Flip Flap Purse - FREE pattern

9/29/2014

3 Comments

 
Hey there everyone!
Today I am excited to introduce another free bag making sewing pattern to you!
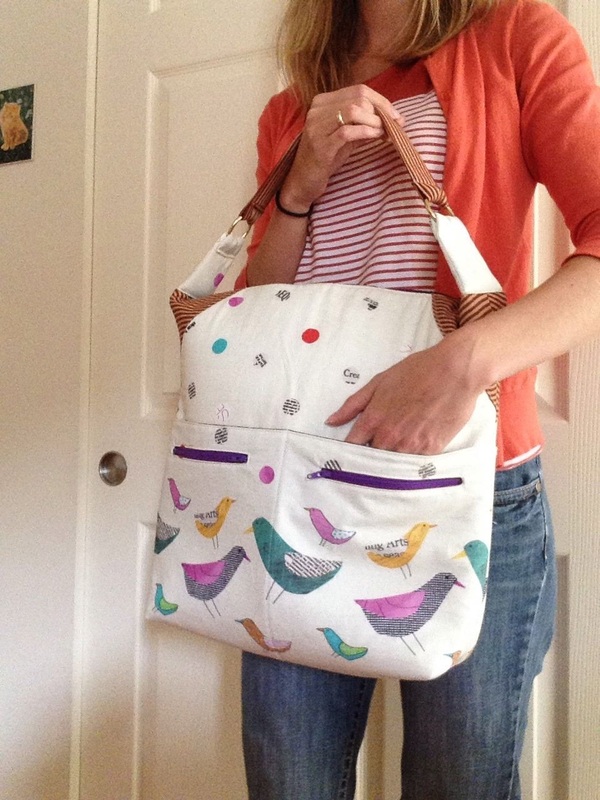
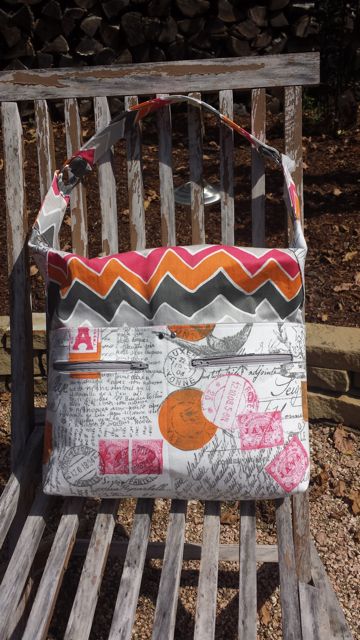
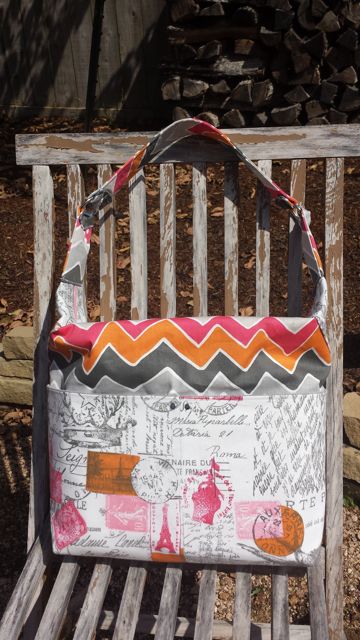
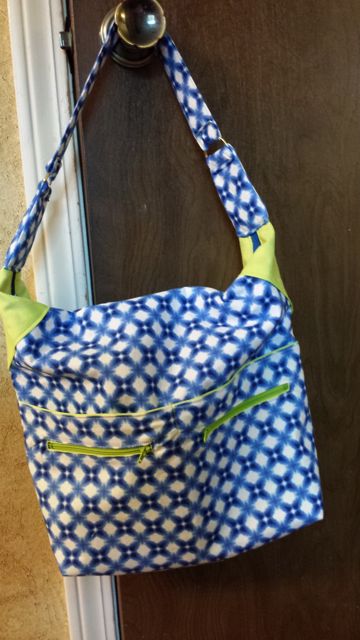
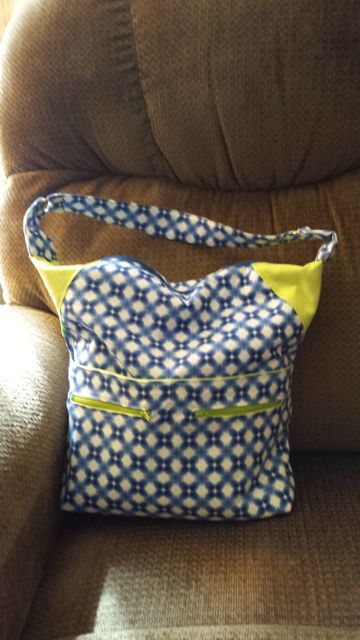
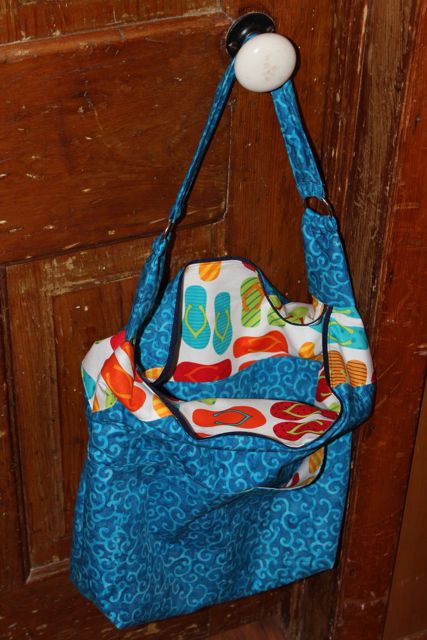
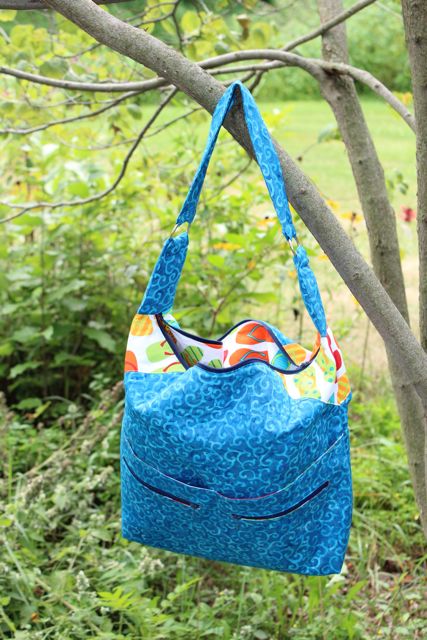
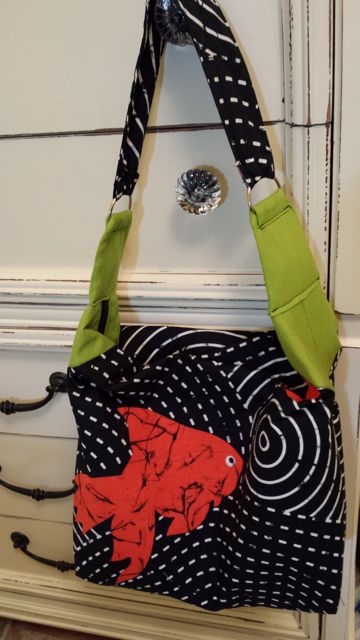
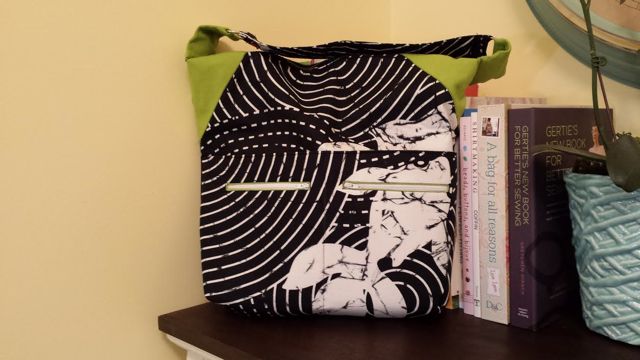
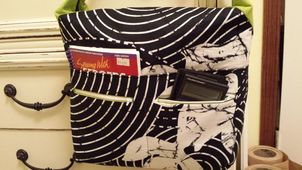
The Flip Flap Purse is a cute little handbag that I designed for Seams and Scissors, the new blog of AllFreeSewing. We are celebrating National Sewing Month 2014 and they currently have daily giveaways going on with awesome prizes, so please do check out their website.
Bild
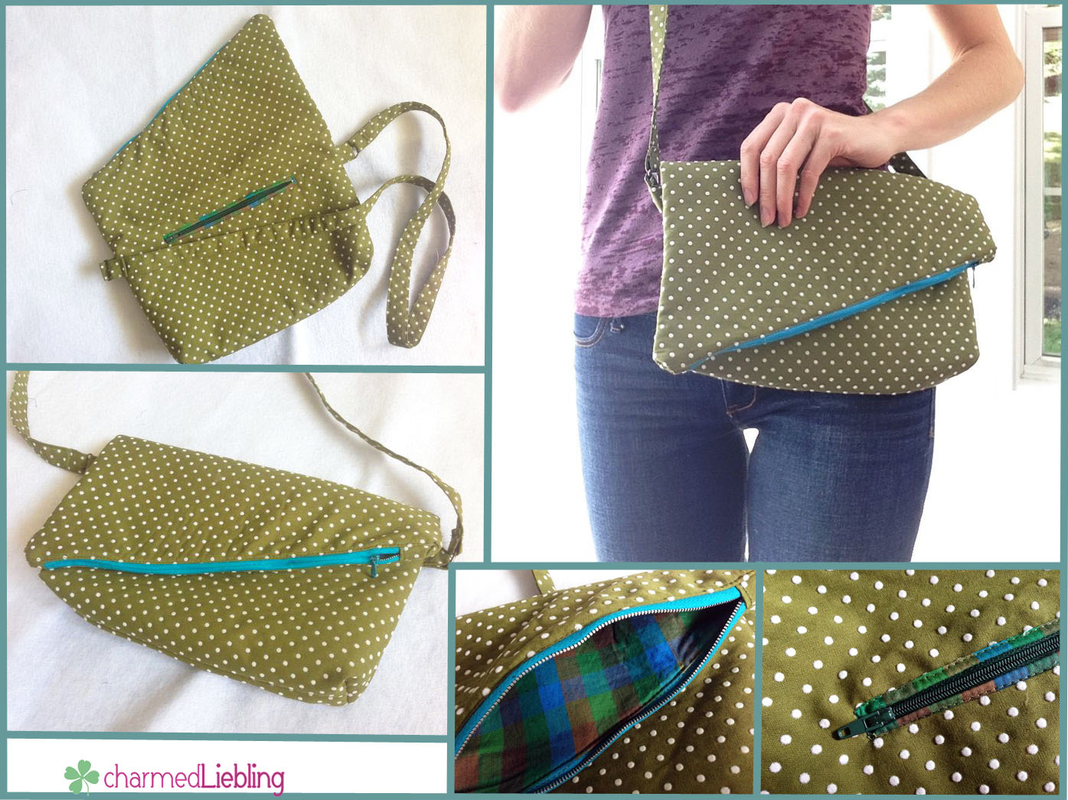
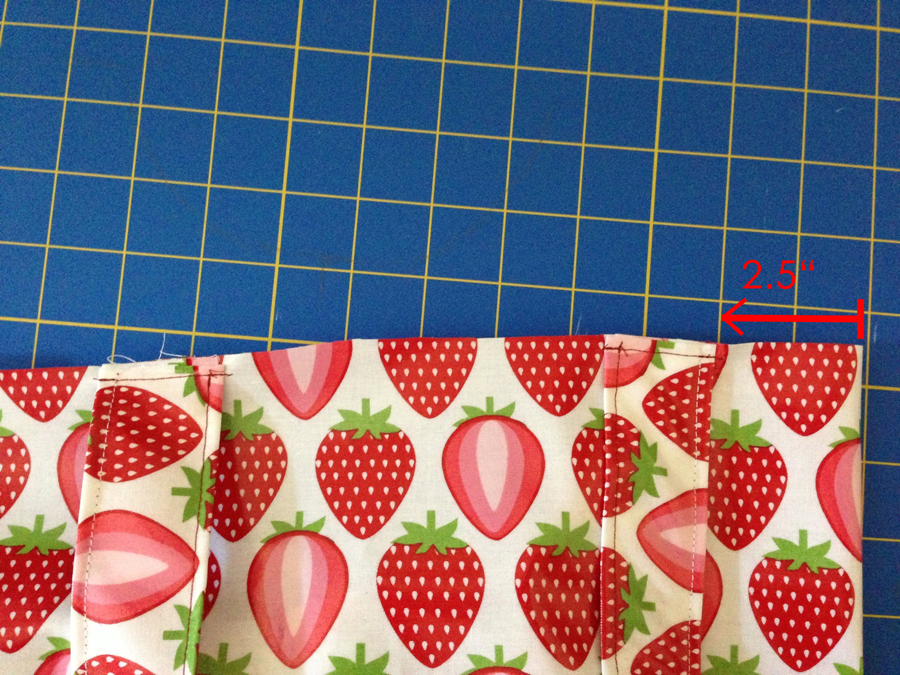
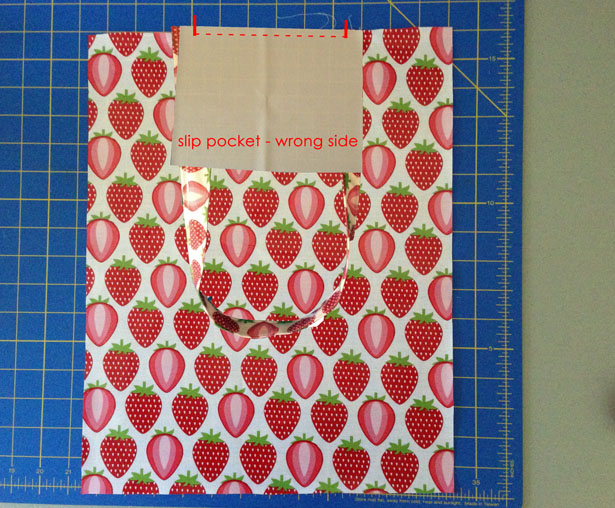
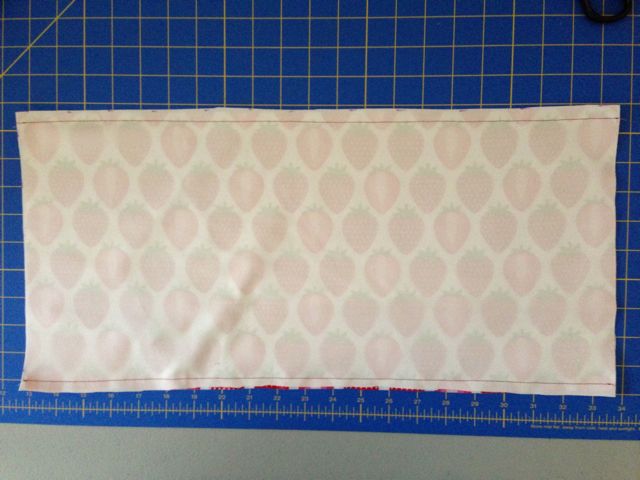
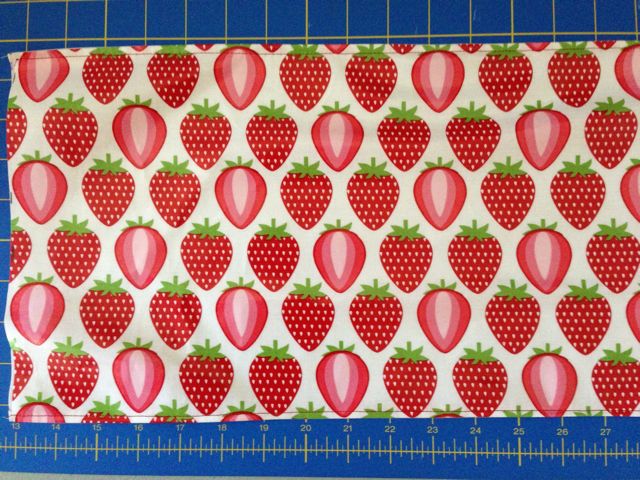
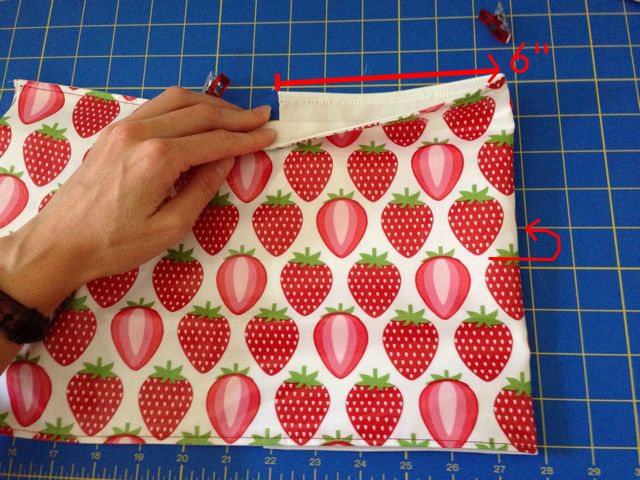
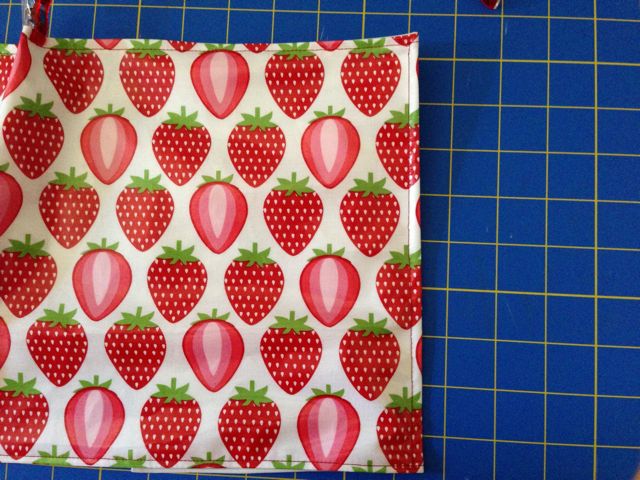
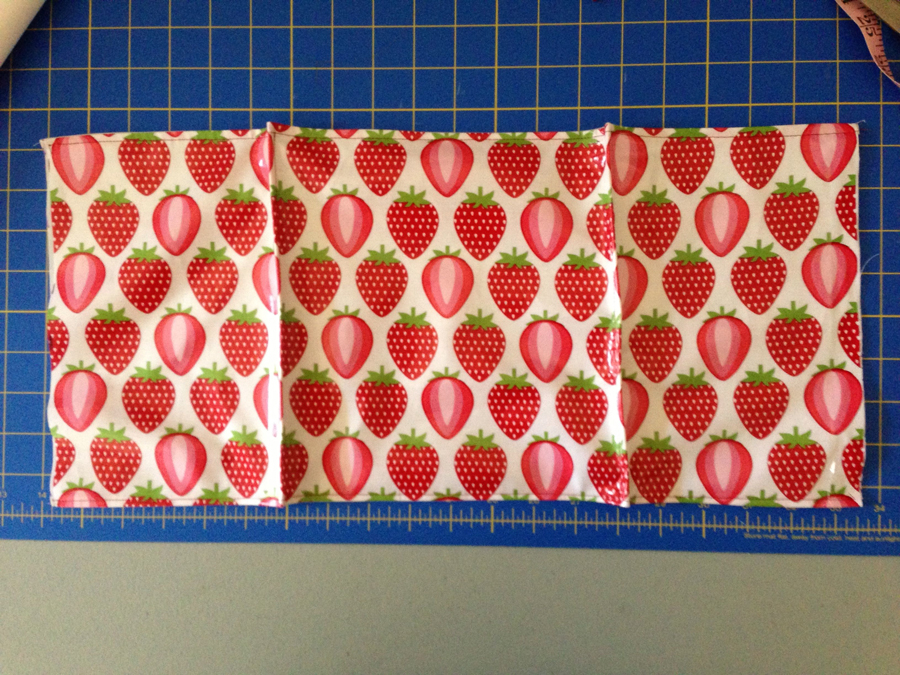
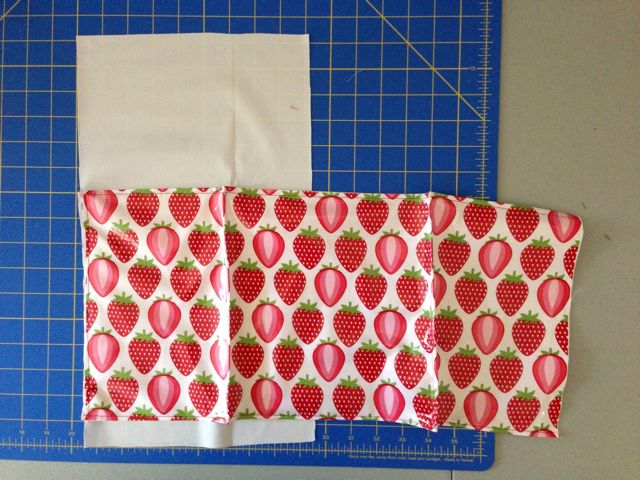
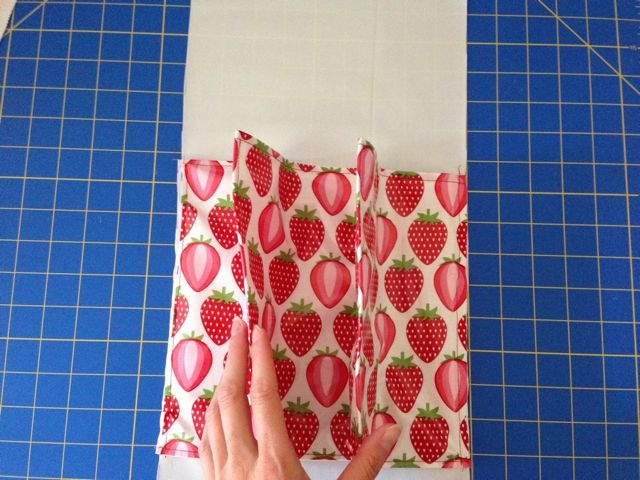
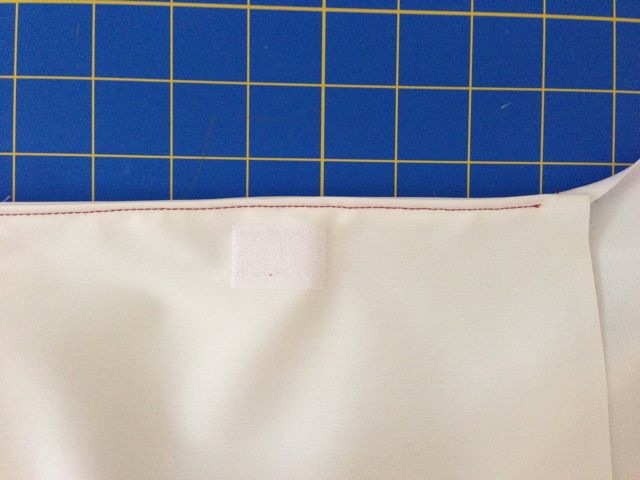
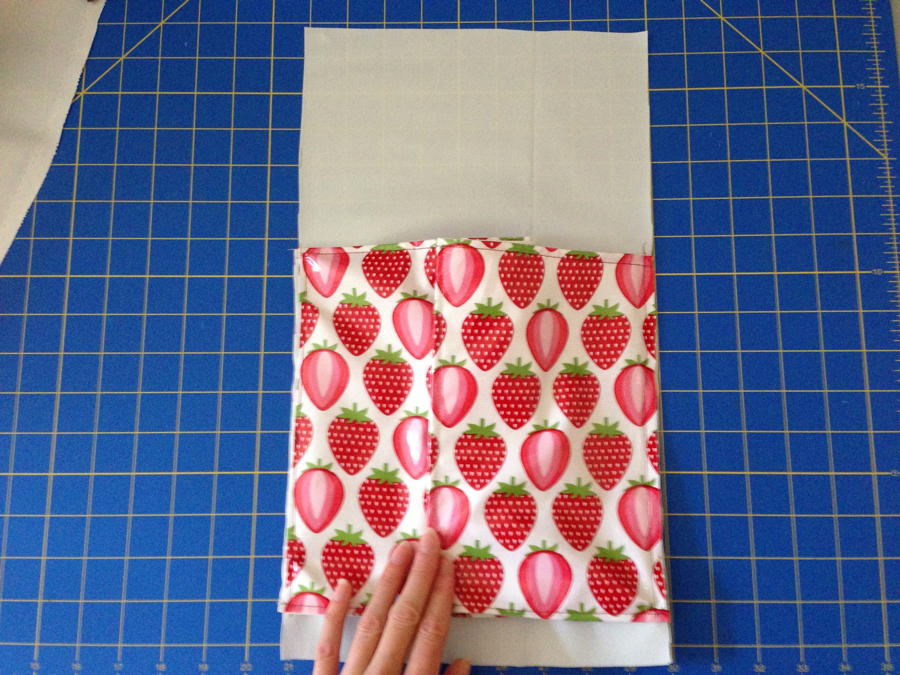
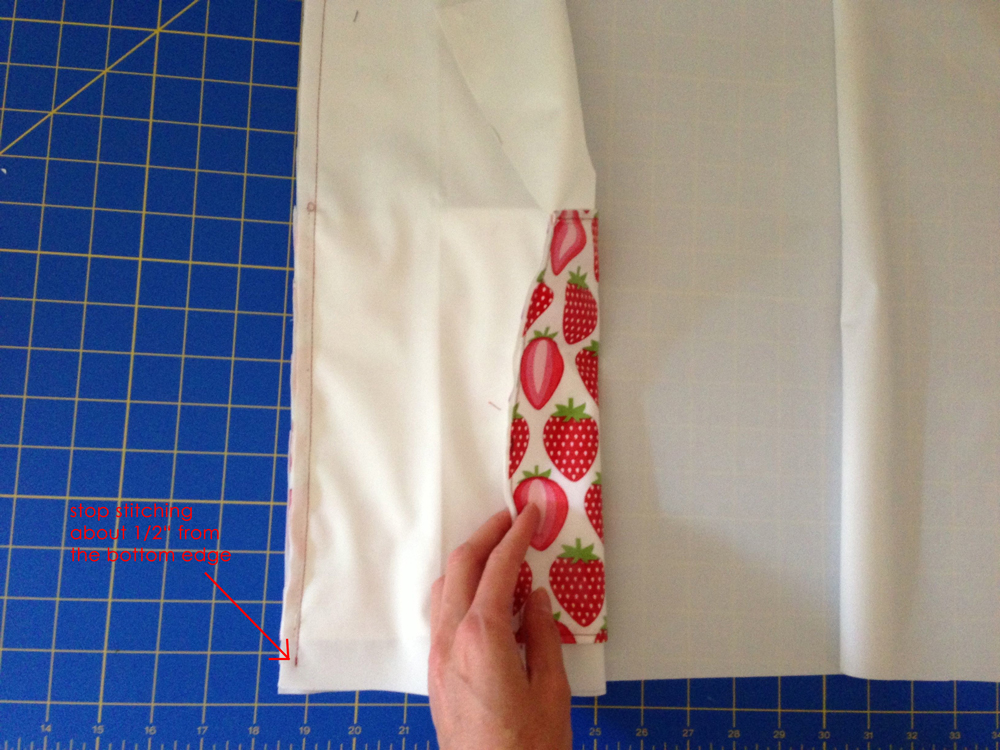
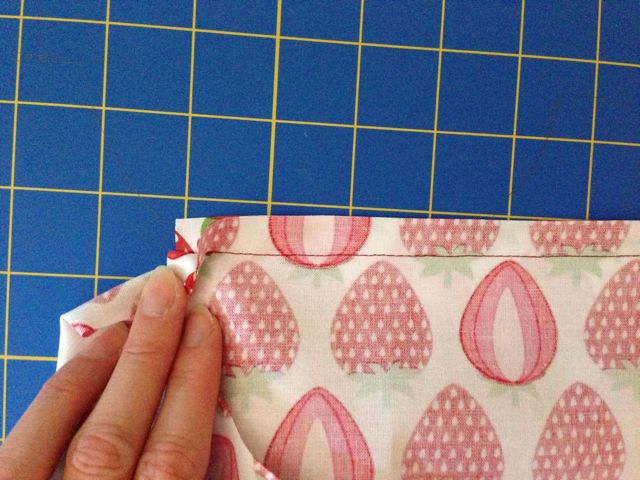
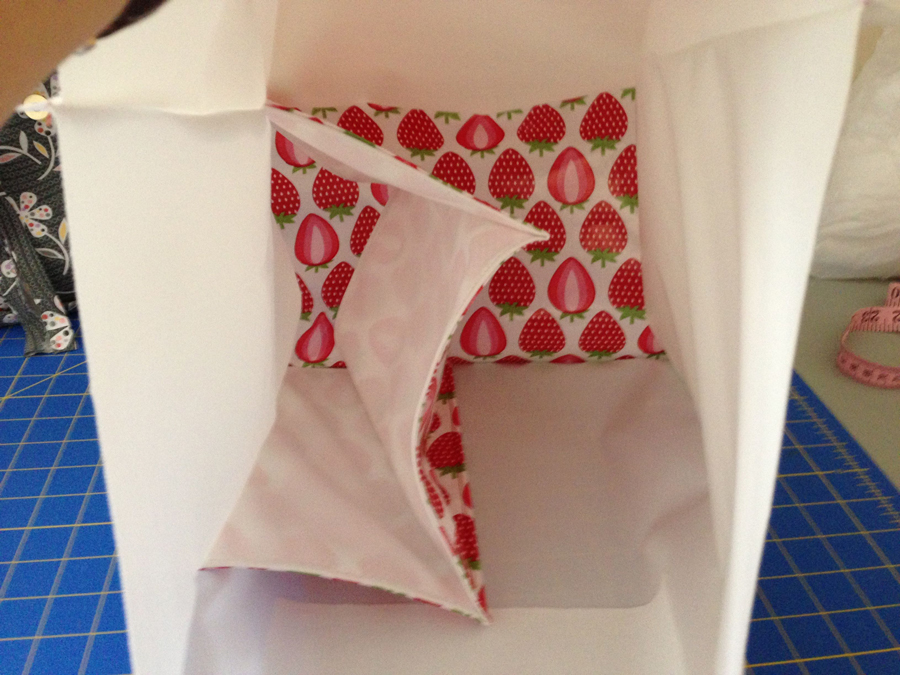
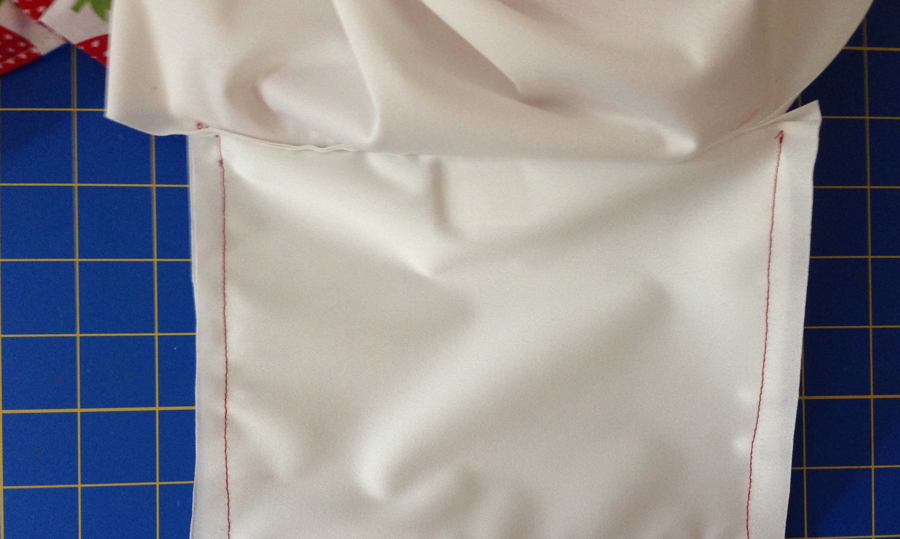
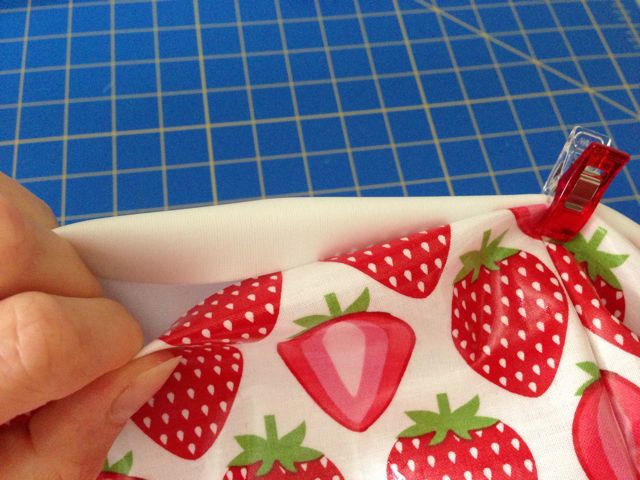
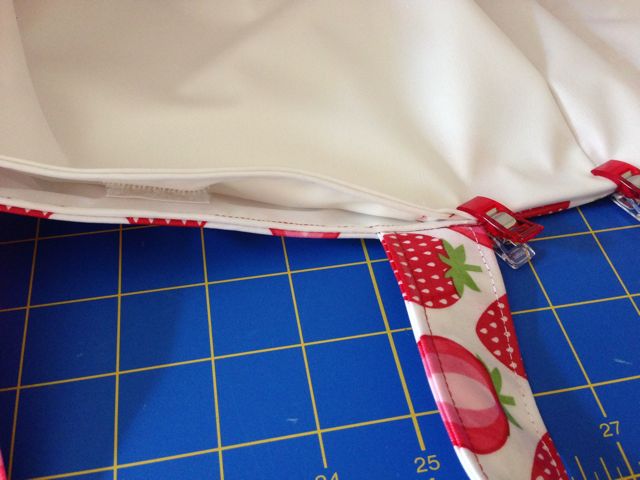
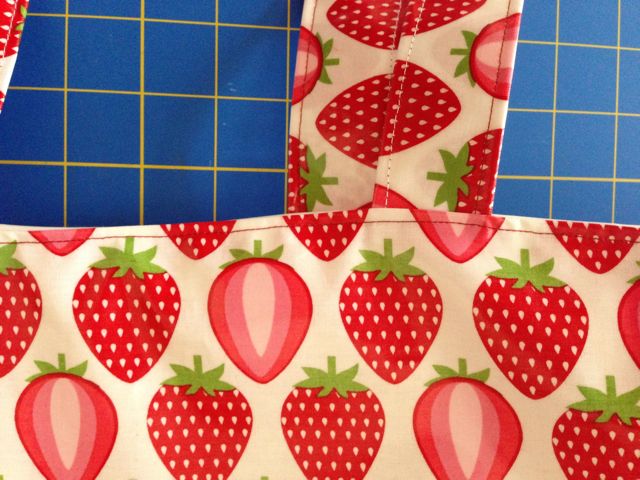
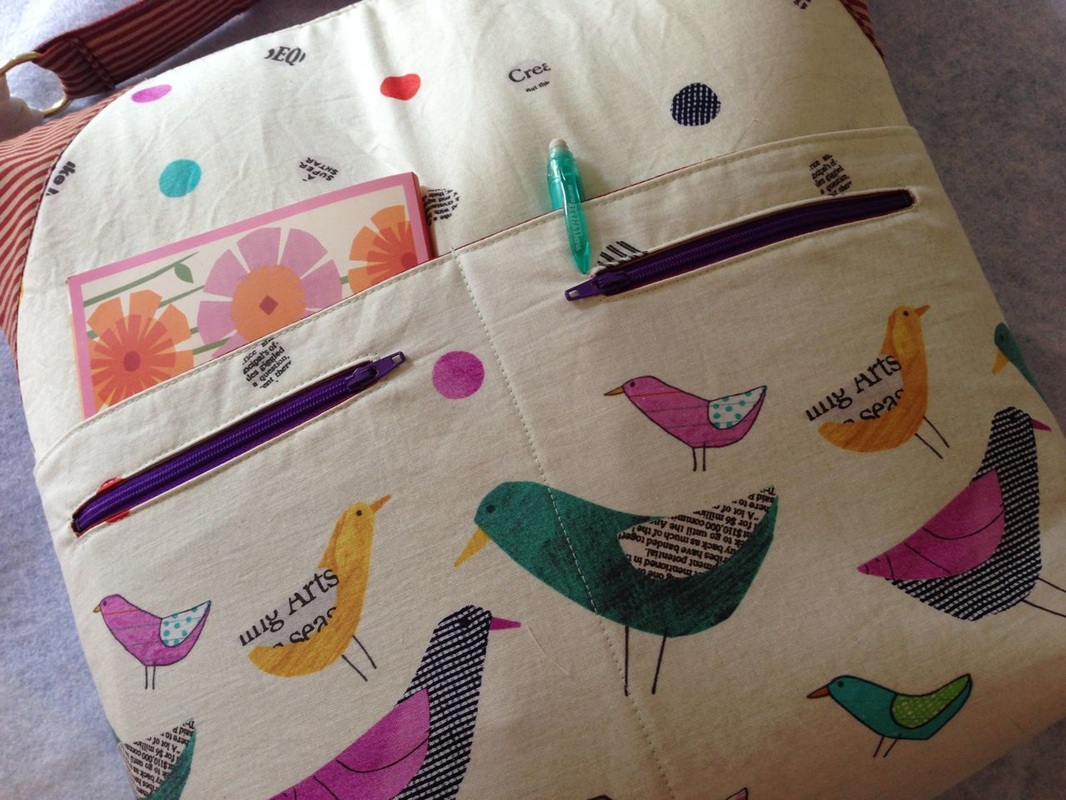
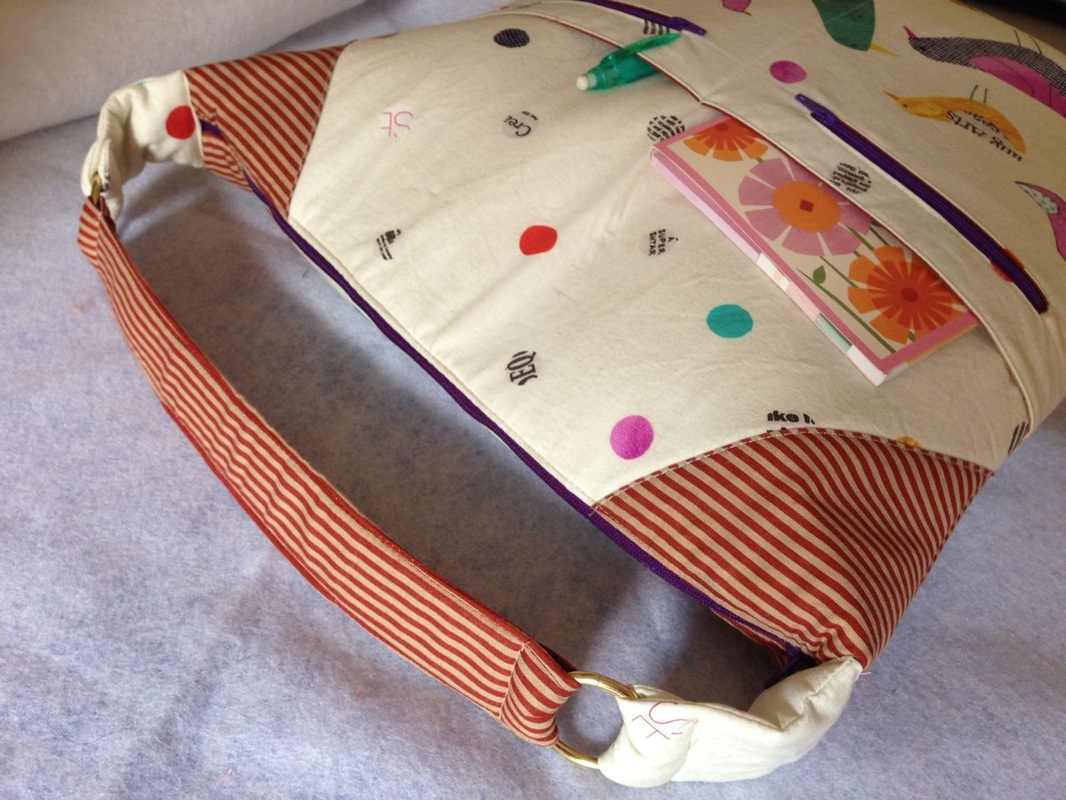
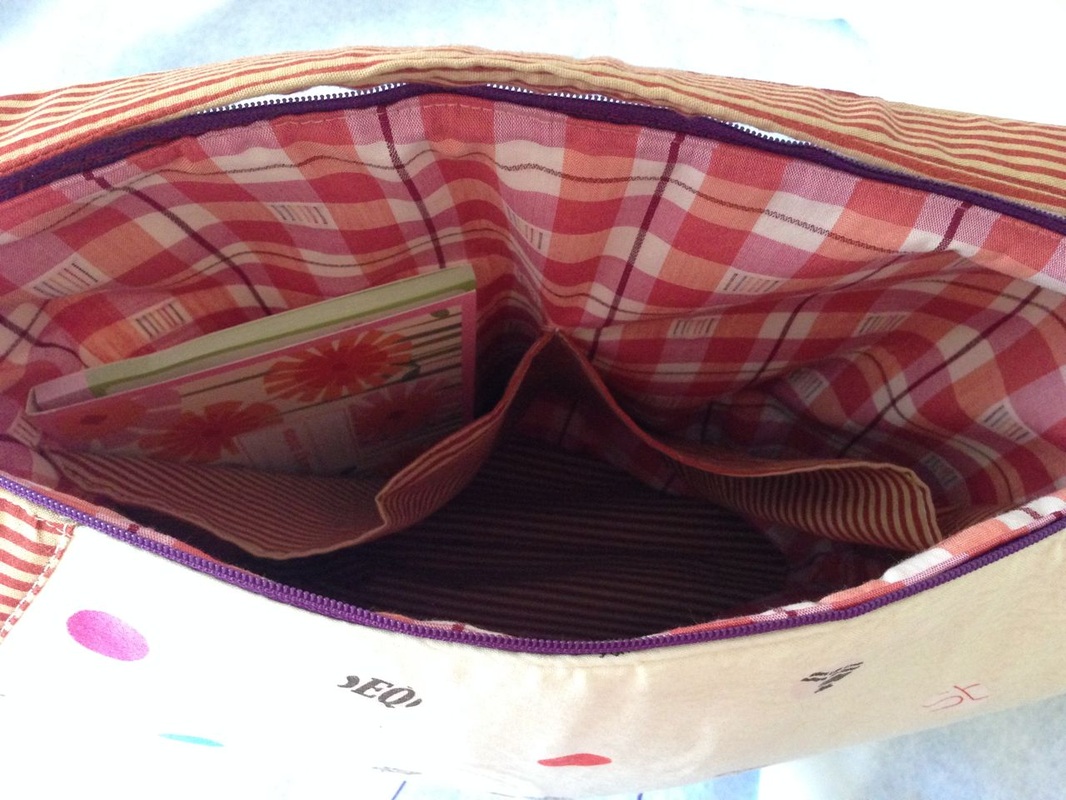
This fun bag sewing pattern is perfect for an advanced beginner. The asymmetric shape of the fold over flap makes this bag a real eye catcher! There is an additional zipper pocket on the back of the purse. This project will also teach you how to install a top zipper closure.
If you are interested in giving this pattern a try please hop over to my guest blog post over at Seams and Scissors.
Bild
3 Comments

National Sewing Month: The fabulous farmers' market tote

9/20/2014

1 Comment

 
Picture
Hey there everybody!
September is National Sewing Month and today I wanted to post this fun tutorial which I contributed to the Favecrafts Blog of AllFreeSewing last year as a guest poster! I am still using this tote when I go grocery shopping and like it a lot, especially the happy strawberry print! I never posted this on my website so I thought this is the perfect time to do it. So here we go, please find the original post below. And while your at it, do go check out all the awesome posts on Seams and Scissors for National Sewing Month this year (that's the new blog of AllFreeSewing). Hint: I will have a free bag making tutorial coming up there very soon!!

Go shopping at the farmers market in style! This bag holds all the groceries you can carry. There is a divider inside the bag to keep everything organized. The hidden slip pocket on the front side of the bag is perfect to fit in your wallet, phone and keys.
This bag is great for laminated cotton or oilcloth, but you could also use home decor fabric or just simply lightweight quilting fabric. If you do, I recommend interfacing the exterior fabric pieces as stated below in the instructions.

All seam allowances are ½” unless otherwise stated. All measurements given are height x width.  Please read all instructions before you begin.


You need:
-    Exterior fabric: 1 1/8 yd (44" width)
-    Lining fabric: 1 yd (44" width)
-    1 piece of hook and loop tape (self-adhesive or sew-on): 1”

Helpful hints:
- I made this tote completely out of laminated cotton. If you decide to do so too, please be careful when ironing parts of your fabric while sewing. I usually place a kitchen towel on top of the fabric, which is folded twice. I like to sprinkle the towel a little bit with water and used less steam than usual. I also don't use the highest setting of the iron and I don't press too long at the same spot.
- I also recommend using sewing clips instead of pins as they won’t leave holes in your laminated cotton or oilcloth.

Cut from:
Exterior fabric:
-    (2x) 16" x 12.75” – main body
-    (2x) 16" x 9” – side panel
-    (1x) 9" x 12.75” – bottom panel
-    (1x) 10" x 21” – interior divider
-    (2x) 29" x 5.5” – strap

Lining fabric:
-    (2x) 16" x 12.75” – main body
-    (2x) 16" x 9” – side panel
-    (1x) 9" x 12.75” – bottom panel
-    (1x) 10" x 21” – interior divider
-    (2x) 8" x 9” – slip pocket

I didn’t use any interfacing on this tote since I used laminated cotton throughout and intended a slouchy look. If you use lightweight cotton fabric you might want to interface parts of your tote. In this case, cut the following pieces from fusible interfacing:
-    (2x) 16" x 12.75” – main body
-    (2x) 16" x 9” – side panel
-    (1x) 9" x 12.75” – bottom panel

If you don't need to fold your tote when not using it, you may also think about interfacing the interior divider with heavy stabilizer. In this case cut the following piece from heavy stabilizer:
-    (1x) 10" x 21” - interior divider

Interface the wrong sides of the exterior parts of your tote.

Instructions

a)    Make the straps

- Fold one of your strap fabric pieces in half lengthwise, with the wrong sides together and press. Open up again and fold both long edges towards the middle crease and press again.
Picture

Picture
Repeat the folding and stitching with the second strap fabric piece.

- Place one of the straps onto one of the exterior main body panels. The outer edges of the strap should be placed 2.5” in from the side edges of the bag. The loop of the strap should face to the bottom and the raw edges of both main body panel and straps should be aligned. Pin in place and baste the strap end to the main body using a ¼” seam allowance.

- Repeat for the other strap and the other main body panel.

Picture
b) Prepare the slip pocket
- Place the hook part of your piece of hook and loop tape onto the right side of one of the slip pocket pieces. It should be positioned centered and 1” down from the top edge. Tape it down or sew it onto the fabric (depending on what kind of hook and loop tape you are using).
- Repeat with the loop part of the hook and loop tape and the other slip pocket piece.
Picture
- Take one of the slip pocket pieces and put it onto one of the exterior main body panels, right sides together. It should be positioned centered on the main body panel and the top edges of both fabric pieces should be aligned. (Since you already attached the straps to the exterior main body fabric panels, your slip pocket will partially cover the straps).
- Pin in place and stitch along the top edge using a 1/4” seam allowance, starting and stopping 1/2” from the outer edges of the slip pocket fabric piece.
- Repeat the previous step with the second slip pocket fabric piece and one of the lining main body panels.
- Set both main body panels aside.
Picture
c) Make the interior divider

- Take both of your interior divider pieces and put them right sides together. Pin in place and stitch along both long edges.
Picture
- Turn right side out and press. Topstitch along both long edges using a 1/4” seam allowance.
Picture
- On both the top and the bottom edge, measure and mark 6” in from the side edges. Fold the divider towards what will be the wrong (= inner) side of the divider.
Picture
- Topstitch along the folded edge using a 1/4” seam allowance.
- Repeat the 6” markings, folding and topstitching on the other side of the divider.
Picture
This is what you should have after folding and topstitching along both folds:
Picture
- Take one of the lining main body side panels and place it right side up. Put your divider right (= outer) side up onto the side panel. Match the side edges of both fabric pieces and position the divider approx. 1” up from the bottom edge of the lining side panel. Pin the divider in place and stitch along the side edges using a 1/4” seam allowance.
Picture
This is what you should have after stitching both side seams of the divider to the lining side panel:
Picture
- On the lining main body panel with the slip pocket piece attached, fold the slip pocket over so that the wrong sides of both slip pocket and main body panel are now touching. Topstitch along the upper edge of the slip pocket, starting and stopping 1/2" from the outer edges.
- Repeat the previous step with the other slip pocket piece on the exterior main body panel.
Picture
d) Assemble the bag lining:
Take one of the lining main body panels and place it right side up. Take one of your lining side panels and put it on one of the side edges of the main body panel, right sides together, the edges of both pieces should be aligned. Pin in place and stitch along the edge, but stop 1/2" up from the bottom end (this 1/2" is important later, when you are going to sew the bottom panel onto the bag).
- Repeat with the second side panel and the other edge of the main panel (when stitching the side panel with the divider attached, make sure to fold the divider together so it won't get caught in the stitching).
- Take your second main panel and repeat the previous steps.
Picture
Picture
On the picture above you can see one of the lining main body panels with the two lining side panels (one of them includes the interior divider) already attached. You can also see how the side seam stops about 1/2" from the bottom edge.
- Place the bottom panel with its four edges onto the bottom edges of the bag, right sides together. Pin in place and stitch along the first edge, starting and stopping 1/2” from the edge. Since you left the seam open by 1/2" when sewing the side panels to the main body panels, you should be able to have your bottom panel seams start and stop exactly at the end of these seams (see on the next picture - note that I chose exterior fabric for the bottom panel of my bag lining).
Picture
This is what your bag lining should look like on the inside after stitching all the pieces together:
Picture
e) Make the bag exterior:
- Repeat step d) to assemble the bag exterior.
f) Finish the slip pocket:
- Place your two slip pocket fabric pieces right sides together (since they are already attached to the exterior and lining main body you will have to bend those parts out of the way for this step). Pin in place and stitch around the three edges of the slip pocket. Make sure to start and stop the stitching right beneath the topstitching of the top edge of the slip pocket pieces.
Picture
Picture
g) Assemble the bag:
- Due to the finished slip pocket, the bag exterior and the bag lining are already attached to each other. The bag exterior should be right side out, the bag lining wrong side out. Put the bag lining into the exterior. The slip pocket will be hidden between the layers. Make sure to fit the lining correctly into the exterior. Match the side seams and flatten the bottom panels, so that the lining sits snug inside the bag.
- Fold down the seam allowance of the top edges of both exterior and lining towards the inside. Pin in place and stitch along the top edge using a 1/4” seam allowance. Start and stop right before you reach the slip pocket.
Picture
Picture
Picture
Congratulations, your farmers' market tote is finished!
Bild
1 Comment

Curtain projects in my new house and advice needed

9/8/2014

10 Comments

 
Hi everyone!
So, as some of you know my husband and I recently moved into our new house, on August 23 to be exact. We are loving it and the good thing about a new home is you get to decorate again :-)))
For our old apartment I had sewn up all the curtains and I was rather pleased to see that some of them would also fit the windows in the new house. At least anyway :) Most of the windows are a bit shorter now, so I decided to shorten the curtains which is hardly any work at all. I admit, I first even hung them up the way they are and I think I even could have lived with it but hubby hated it so much and repeately asked me to do something about it... So last week I fixed the issue.
Bild
Bild
The curtains in our bedroom and in my husband's office (both are sheer organza fabrics), the one on the left side has soft green and purple stripes as a pattern). I can see how that is not really working...
Bild
Bild
While still hanging I measured them to be about an inch longer than the edge of the window frame and then added another inch for seam allowance. Then I took them down and cut the excess fabric off. Next I folded down the raw edge twice again, which for organza always presents some kind of a challenge because the fabric is just sooo slippery. Not a big fan! With the bedroom curtains I could at least use the vertical colored lines for help. With the sheer fabric I had to trust my instincts that the bottom edge wouldn't end up crooked. I stitched along the bottom edge and as the last step inserted the leaded drapery tape which I had taken out of the old seam.
Bild
The leaded tape ready to be taken out the old curtain seam.
When using light-weight fabric like organza for curtains you want to make sure to add some kind of curtain weight, so your curtains will drape in a nice way. I had used leaded tape in the bottom seam of the curtains which I only had to take out and insert into the new seam. I pulled it through the seam with the help of a safety needle and then simple handstitch the ends down to the curtain - on the wrong side, so it won't show.
Bild
bedroom window #1
Bild
bedroom window #2
Bild
One of two office windows
Well, I gotta admit, this does look much better. The husband likes it a lot. And you know how they say "happy husband, happy..." no wait...?? :-P
So now I only have to figure out what to do with the curtains in my new sewing studio. As in the bedroom there are two window, so one of them is really short. I am not sure if I want to cut off that much of my gorgeous fabric... but have a look:
Bild
This one doesn't even look wrong, does it?
Bild
Well, the short window.. what to do? Cut off almost a yard of fabric?
The fabric is a mid-weight cotton fabric, so I am not even sure if it would look good when cut too short, especially with the large scale pattern. What do you think? Any advice? I appreciate any input you can give me. Just leave a comment below. Thank you so much for your help!
Happy sewing!
Bild
10 Comments

New sewing pattern: Summer Moves On Hobo

9/1/2014

2 Comments

 
Yes, summer moves on and I can't believe it is September already. I've promised this pattern for a couple weeks now and - with the move to our new house finally behind us - I am happy to finally announce the release of the Summer Moves On Hobo, which is now available in my pattern store!
Bild
If you have read my blog hop post from last week you might have already seen a few pictures of this new bag design. I tried to go a little crazy adding pockets to the bag exterior: there are six of them (plus another two on the inside)! Four of the six exterior pockets are slip pockets and then I added another two small zipper pockets, to make the bag look more interesting and to kind of have a designated front side of the bag.
Bild
The slip pockets and zipper pockets on the bag front
Bild
This bag has a top zipper closure
The zipper has a top zipper closure and one handle that is connected to the bag with two handle extenders and two O-rings. I also added accents to the top corners of the bag.
Bild
Inside there are two spacious slip pockets which help keep your things organized in this large hobo bag!
Bild
So many pockets!
Have a look at all the bags my pattern testers made, aren't they all gorgeous? :)
Bild
Bild
First up is Ree from Sincerely, Ree. I recently called her the fastest sewer on this planet and I think she really deserves this moniker! She completed her Summer Moves On Hobo in no time and yet again I am amazed by her awesome fabric choices!
Bild
Bild
This is the first time that Tammy tested for me and she also did an awesome job. I love the contrast that the bright accents and the zippers create on her bag!
Bild
Bild
Tonya made this colorful bag, at a time she way very busy harvesting and canning veggies from her backyard. I am very glad she still decided to participate in testing this pattern for me. Thanks Tonya!
Bild
Bild
Bild
Look at this awesome fabric pattern of Erin's bag! I am loving this, the color contrasts are amazing and that giant red fish on the back side looks so cool!
Bild
Bild
Jenniffer picked this very elegant fabric for her Summer Moves On Hobo. The red and brown shades look great together and I also love the little heart shaped tag on the zipper!

I have long wanted to make a hobo, so I hope you like this new design.
Enjoy the end of summer everyone. While being a little sad that those gorgeous summer days will be over soon I still always enjoy this part of the year. It might have been a little influential on the name I chose for the bag I admit :)

Happy Labor Day!
Bild
2 Comments

    Enter your email address:

    Delivered by FeedBurner


    Follow on Bloglovin

    RSS Feed

    Anna

    anna's blog -

    Welcome to my blog! I am an accountant who once started out her "career" in the US by designing bag and wallet sewing  patterns! My patterns are available on Etsy and occasionally I will share some of my sewing projects that I work on in my spare free time on my website.  Happy sewing :)

    Categories

    All
    Bags
    Bargains
    Dresses
    Fabric
    Fashion
    Germany
    Giveaway
    Home Dec
    Interfacing
    Review
    Sale
    Seasonal
    Sewing Patterns
    Sewing Tips
    Smartphone Cases
    Special Occasions
    Treasury
    Trips
    Tutorial
    Vacation Projects
    Wallets

    Threading My Way_Featured
    Pattern Spot dot com
    This page contains affiliate links. See my disclosure policy.
    Online Sewing Class
    Craftsy

    Archives

    December 2021
    May 2020
    April 2020
    January 2020
    January 2015
    October 2014
    September 2014
    August 2014
    July 2014
    June 2014
    May 2014
    April 2014
    March 2014
    February 2014
    January 2014
    December 2013
    November 2013
    October 2013
    September 2013
    August 2013
    July 2013
    June 2013
    May 2013
    April 2013
    March 2013
    February 2013
    January 2013
    December 2012
    November 2012
    October 2012
    September 2012
    August 2012
    July 2012
    June 2012
    May 2012

Powered by Create your own unique website with customizable templates.