charmed Liebling
  • home
  • pattern shop
    • wallet patterns
    • bag patterns
    • laptop and messenger bag pattern
  • items for sale
    • custom orders
  • free tutorials
  • contact
  • about

California Sunshine Bag in "Piper" by Dear Stella 

10/31/2013

2 Comments

 
charmed Liebling California Sunshine Bag
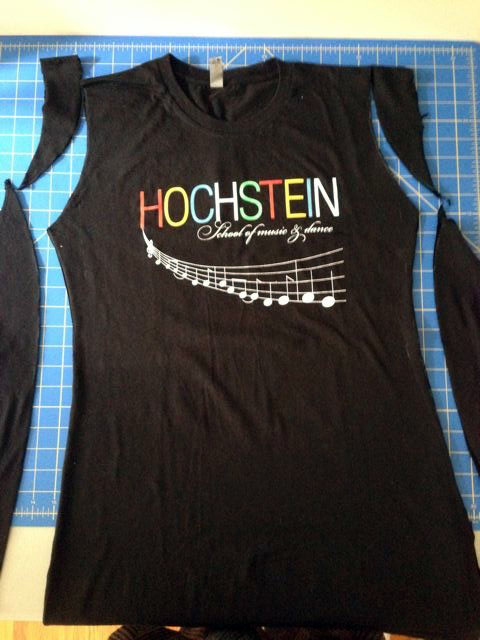
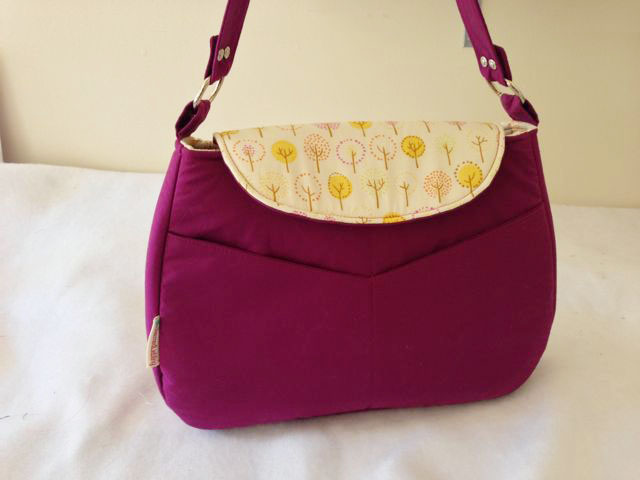
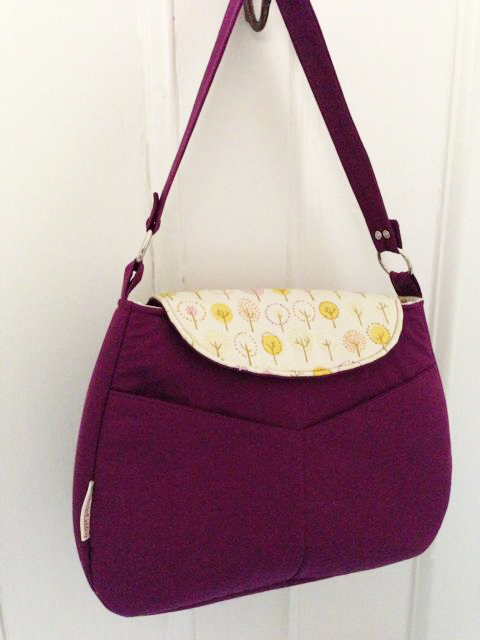
I just finished another California Sunshine Bag!
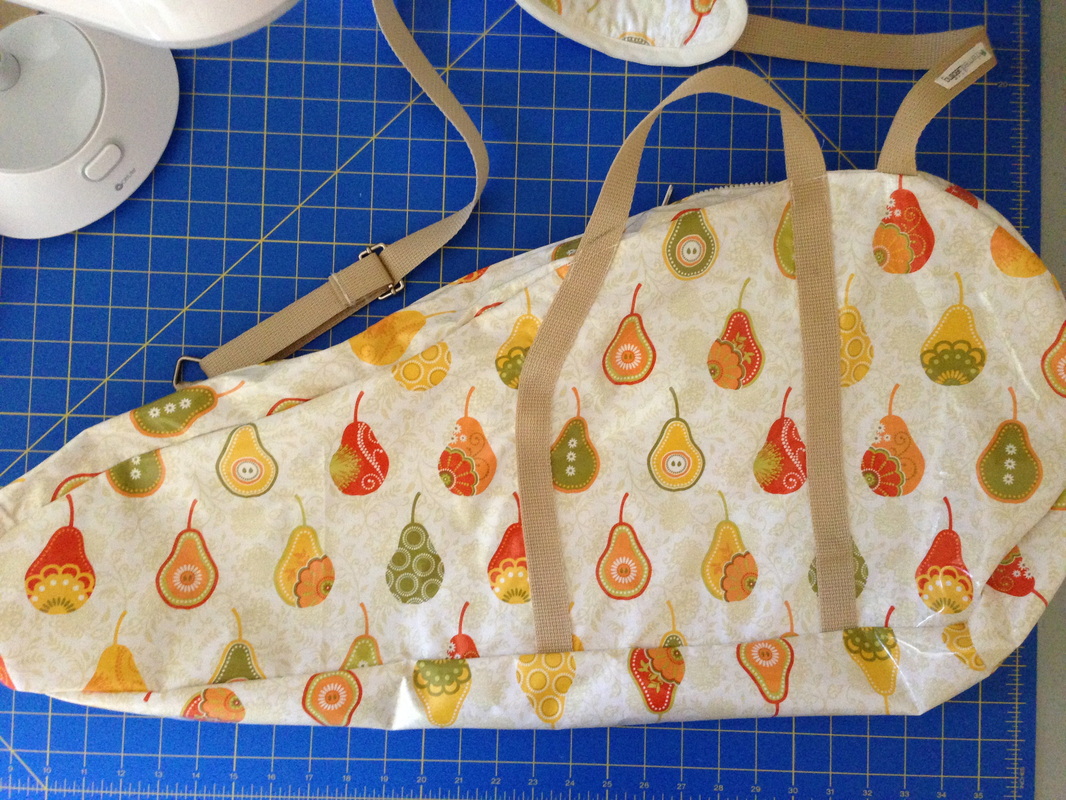
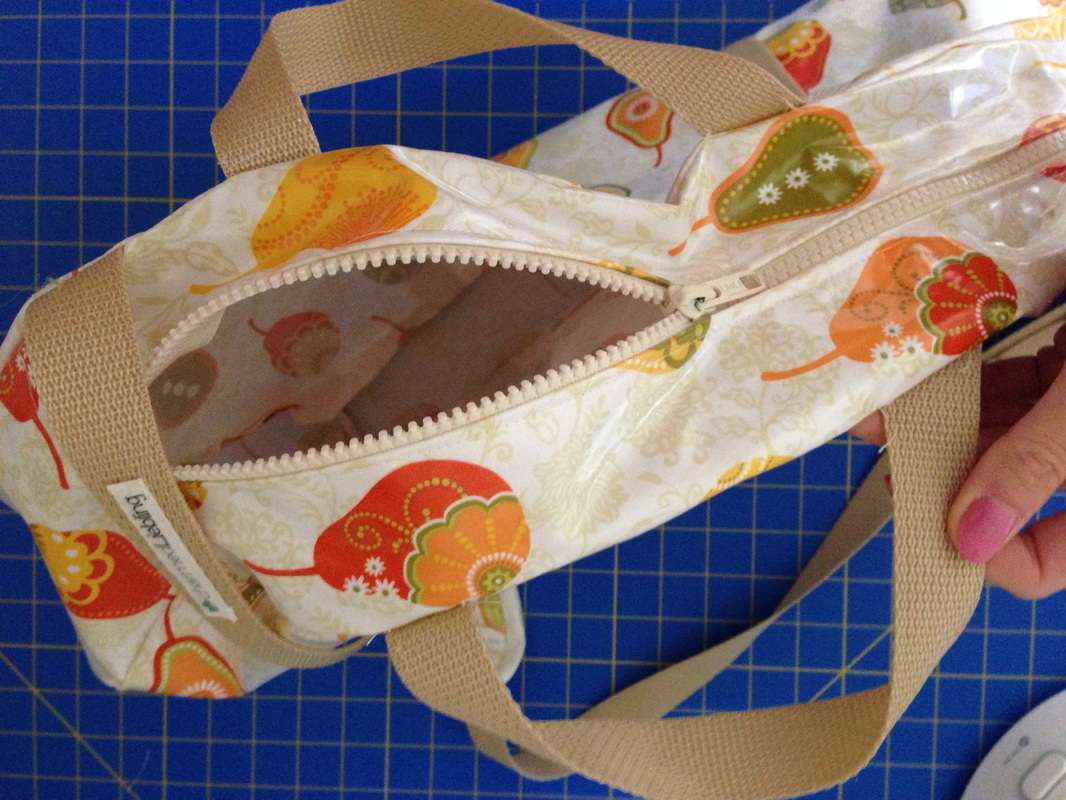
This one is going to my local fabric store - Sew Creative in Fairport, NY- as a sample. I am very likely going to teach sewing classes there, using my very own bag sewing patterns! I went to the store the other day with my California Sunshine Bag to buy more fabric (that I didn't really need but it was a rainy day and well, I don't really have a good excuse...). The owner saw the bag and I told her that I make my own patterns. I would love to teach a class there so keep your fingers crossed that enough people are going to sign up ;-)
charmed Liebling California Sunshine Bag back
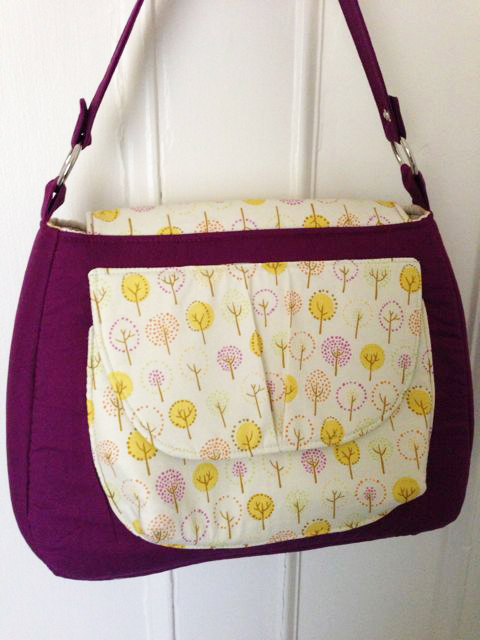
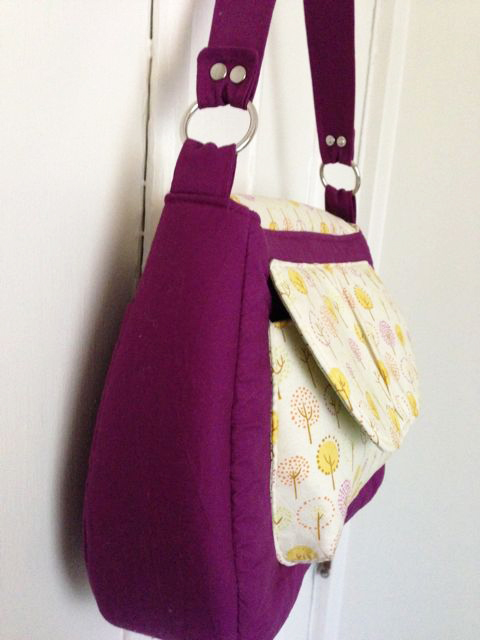
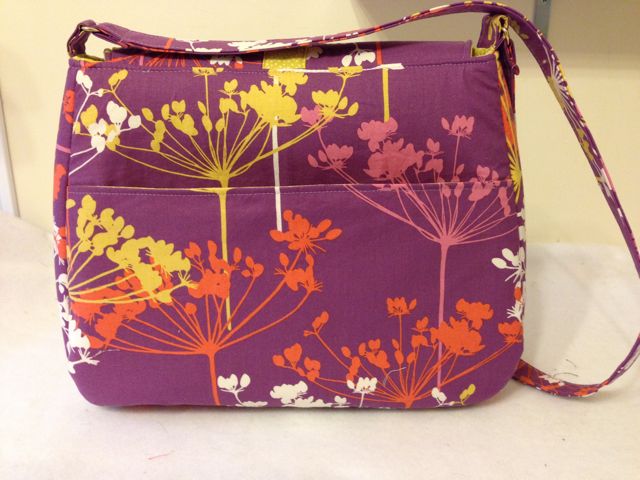
The back slip pocket... fussy cut :)
charmed Liebling California Sunshine Bag front
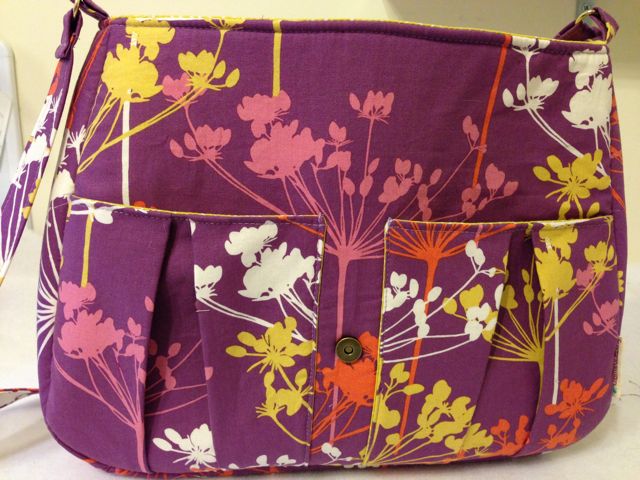
The pleated front pockets
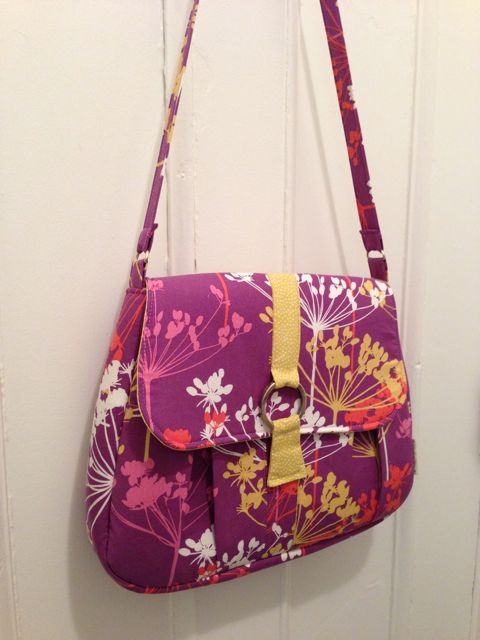
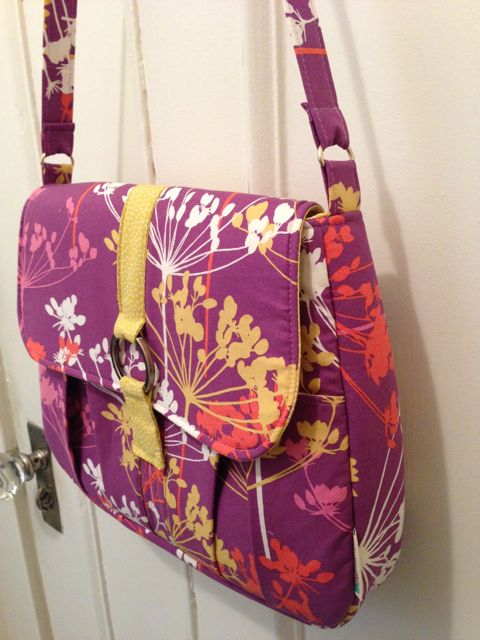
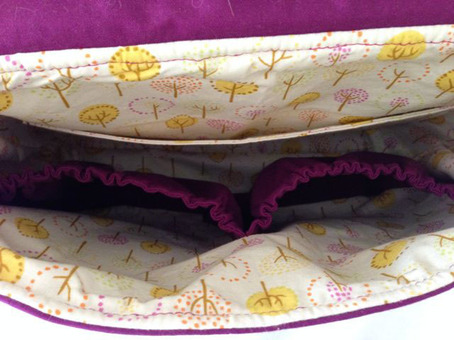
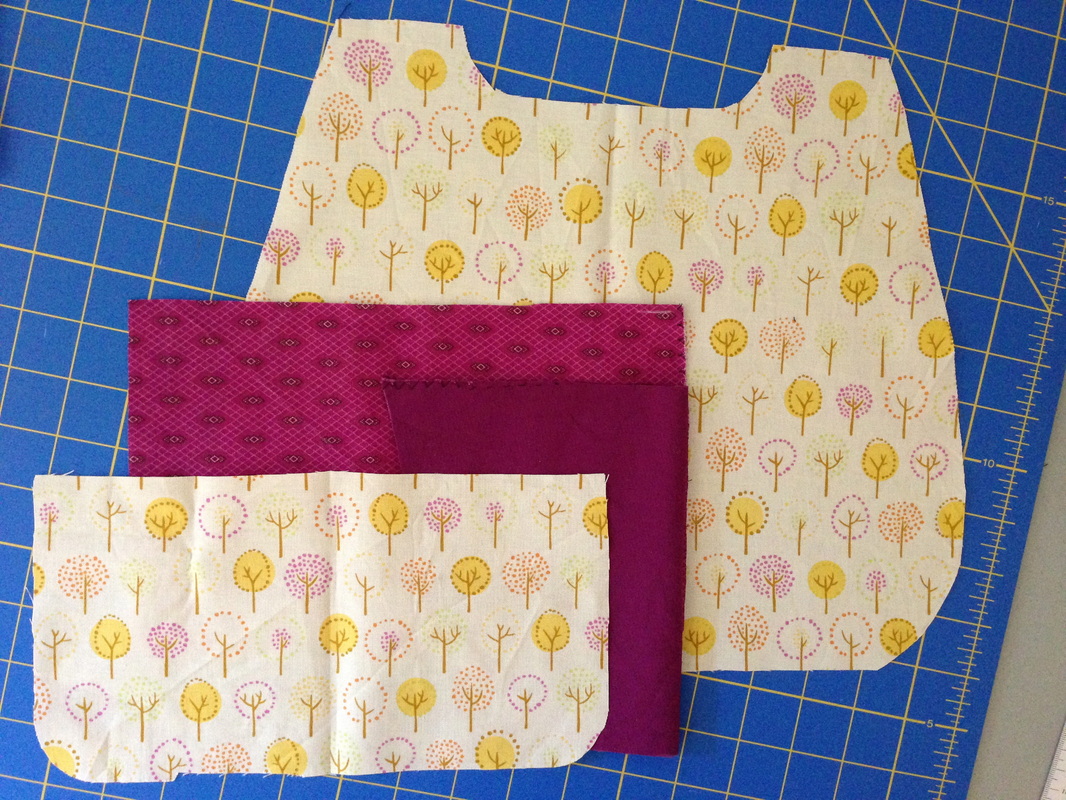
The fabric is "Queen Anne's Lace" from the Piper Collection by Dear Stella. I love the combo of purple, red and mustard. The interior is the same fabric I already used for my first California Sunshine Bag ("Citron" from Garden Pindot by Michael Miller). I used it for the flap strip and the closure tab as well.
charmed Liebling California Sunshine Bag
Anna


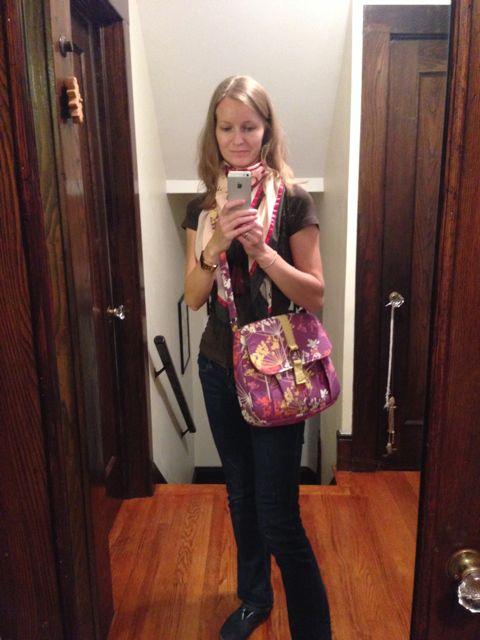
If you want to make a California Sunshine Bag yourself you can check out the pattern in my pattern store.

And if you are anywhere upstate NY, please do come to one of my sewing classes some time :) I will let you know the schedule as soon as I have it!


Happy sewing :)
Bild
2 Comments

FREE sewing tutorial: how to turn an xxl-shirt into a dress

10/25/2013

23 Comments

 
--- UPDATE 12/3/13: I made another dress with embellished sleeves and a belt, and lengthened it with cotton fabric. You can find this blog post here.
For your convenience I decided to offer the complete tutorial as a PDF for download for only $2, if you prefer to have everything in one structured document ---
charmed Liebling knit dress


Another one of my sewing projects is done! A friend of mine had this really big t-shirt and she asked me if I could turn it into a dress for her. This was a really nice opportunity to use my serger again and was easier than I thought.

I had my friend give me one of her knit dresses that fit her well so that I would have some reference for measuremens. I put the xxl-shirt flat onto my sewing table and her dress above, so I could see where her shoulder seams and side seam would have to be. Then I marked everything with a fabric marker. You can see how I folded the sleeve to the side so that I could trace it exactly. The nice thing about knit fabrics is you don't even need to put in darts or pleats to make it fit. Simply let it slightly taper down to the waist.
I only did the tracing on one side of the shirt.
charmed Liebling shirt to dress tutorial
(Before proceeding I already cut the sleeves of. These will have to be adjusted in size later. )
Then it was time to cut off the additional fabric on that side. This is always the part the makes me a little most. After all, this is not my own shirt. Don't want to mess up now.
I simply folded the shirt in half and traced the other side with a fabric marker as well. This way I made sure both sides are even.
charmed Liebling shirt to dress tutorial
Using your serger (if you have a regular sewing machine you can use a stretch stitch) sew both side edges together again, right sides together.

For the new sleeves I actually looked through my paper patterns and took a sleeve pattern piece from a knit dress that seemed to be perfect to be used for the new sleeves. If you want to make sure the sleeve fits exactly into the armhole, measure the width of the armhole and adjust the width of the sleeve before cutting.
You can also go with a wider sleeve and gather it a little at the rounded top edge like you normally do, especially when sewing with cotton fabrics (e. g. a blouse). The only thing you want to avoid is having the width of the sleeve be smaller then the width of the armhole.
I took one of the shirt sleeves that I had cut off, folded my paper pattern piece in half and put it on top, the opening of both pieces matching. Then I traced around the paper sleeve and cut along this line.
charmed Liebling shirt to dress tutorial


With your serger or using a stretch stitch on your regular sewing machine, sew the sleeve together again at its short bottom edges. Repeat for the second sleeve.

Put the first sleeve into one of the armholes, right sides together. Both seams of sleeve and shirt should match. Use a lot of pins to keep the sleeve in place. I measured mine to fit exactly into the opening without having to gather the sleeve fabric.
Then stitch around the sleeve.
charmed Liebling shirt to dress tutorial
Repeat for the second sleeve and the other side of the shirt.

charmed Liebling shirt to dress tutorial
Almost done, the only thing I wanted to alter as well was the neckline. It was very small and wouldn't really look good on this dress.
I cut off the neck trim to make the neckline bigger, then simply folded it down to the wrong side by approx. 1 cm (3/8") and used lots of pins to hold everything in place.  Using my regular sewing machine and a twin needle I stitch all along the neckline.

charmed Liebling shirt to dress tutorial
And that is it already! I hope my friend will enjoy her new dress. I have to say I liked her idea so much that I am thinking about making a dress like this for myself as well. I even have an idea of what shirt to use...

I hope you enjoyed this tutorial. If you have any questions feel free to leave me a comment. Have you made a similar project? I would love to know :)
Bild
23 Comments

My new bag design - name the bag and win the pattern!

10/20/2013

14 Comments

 
One of my projects is finished! Took me a bit longer than I thought since I totally changed the design of this bag while I was assembling everything... but: I am really happy with the result. So here it is, the prototype of my new bag design!
Bild
I still have to finish the instructions for this pattern. I am really happy with this bag, the only thing this design needs now is a proper name! And I need your help for this:
Please have a look at the bag and all its features and if you can come up with a nice name you are welcome to leave me a comment. I will pick one winner, choose the name they suggested for my new bag design AND as a thank you she (or he?) will get the new pattern for free! You can either leave me a comment below, send me a message or email me at anna(at)charmed-liebling(dot)com. Please leave your name suggestion for the bag pattern, your name and your email address, so that I can contact you in case you win! I am looking forward to your suggestions. I will leave this contest open until November 3 and then pick a winner :)
charmed Liebling new bag design


I added two exterior pockets to this bag, well, actually it is even three pockets :-) There is a divided slip pocket on the front as you can see on the first picture. I decided to go with slanted edges to mix it up a little.

The flap of the bag closes with a magnetic snap. The strap is attached to the bag with two o-rings. Two rivets on either side are used to keep the strap in place.

On the back there is another pocket or should I rather call it pouch? A 3D pocket with a pleated flap, that also closes with a magnetic snap.
charmed Liebling new bag design
The measurements of this bag are 9.5" x 12.5" x 3.25" (height x width x depth). It is a medium sized bag with a very spacious main compartment. Inside their are a slip pocket and a divided elasticized pocket, which goes across the whole width of the interior.
charmed Liebling new bag design
How do you like this bag? I would love to know! And if you have a good name for the pattern I would like to hear about it too :)
Thanks and happy sewing everyone!
Bild
14 Comments

Upcoming sewing projects :)

10/9/2013

2 Comments

 
I am not sure if you guys use this term over here but I have some UFOs lying around on my sewing table! German sewists also refer to these as "unfinished objects" :) Have a look at what I am planning on finishing over (hopefully) the next days:

Sewing project number 1: Alter my tennis racket bag
Picture
Picture
I don't know if anybody else is crazy enough to make their own tennis bag but I just didn't like the ones I found in stores...ok, that is probably the worst excuse ever. But on the other hand I found this really cute laminted cotton with the pear print on Etsy and I thought it would be perfect for a bag like this.
I think I started this bag some time in March or April. And it is acutally finished BUT (yeah, there's always a but..): I didn't use any stabilizer which turned out to be a mistake. I thought I wouldn't need it but I should have known better. I decided I would have to make a lining for the bag as well, but it took me a while to order the right fabric for it. I wanted the bag to be entirely made of oilcloth or laminated cotton, so I had to order some more for the lining. It is just a plain white fabric, so it will match nicely with the pears on the exterior.

Sewing project number 2: Make a dress out of an xxl t-shirt
Picture
Picture
This project came to me just recently! A friend of mine asked me if I could make a dress for her using this REALLY big t-shirt which shows the logo of the local music school she teaches at. What a great idea! I already have some ideas in mind on how to do it.
One of them would be to shorten the sleeves, narrow down the width of the shirt and put a piece of elastic either underneath the bust or maybe right at the waist and let the skirt part flare? This would make a cute dress I think. Or maybe make a really snug dress instead, without sleeves? I will show my ideas to my friend next week and I am anxious to see how she will like them. Have you ever turned a shirt into a dress? If you have any other ideas, please leave me a comment :)


Sewing project number 3: Design a new bag pattern
Picture
This is already in the making, the idea for my new bag design! It will be a medium sized shoulder bag and I will probably use store bought leather handles for this one, but I haven't quite made up my mind. These are the fabrics I picked for this project. I already cut down all the pattern pieces and will hopefully find the time to assemble the bag very soon.

Do you have any fall sewing projects coming up? I would love to know!
Happy sewing :)
Picture
2 Comments

    Enter your email address:

    Delivered by FeedBurner


    Follow on Bloglovin

    RSS Feed

    Anna

    anna's blog -

    Welcome to my blog! I am an accountant who once started out her "career" in the US by designing bag and wallet sewing  patterns! My patterns are available on Etsy and occasionally I will share some of my sewing projects that I work on in my spare free time on my website.  Happy sewing :)

    Categories

    All
    Bags
    Bargains
    Dresses
    Fabric
    Fashion
    Germany
    Giveaway
    Home Dec
    Interfacing
    Review
    Sale
    Seasonal
    Sewing Patterns
    Sewing Tips
    Smartphone Cases
    Special Occasions
    Treasury
    Trips
    Tutorial
    Vacation Projects
    Wallets

    Threading My Way_Featured
    Pattern Spot dot com
    This page contains affiliate links. See my disclosure policy.
    Online Sewing Class
    Craftsy

    Archives

    December 2021
    May 2020
    April 2020
    January 2020
    January 2015
    October 2014
    September 2014
    August 2014
    July 2014
    June 2014
    May 2014
    April 2014
    March 2014
    February 2014
    January 2014
    December 2013
    November 2013
    October 2013
    September 2013
    August 2013
    July 2013
    June 2013
    May 2013
    April 2013
    March 2013
    February 2013
    January 2013
    December 2012
    November 2012
    October 2012
    September 2012
    August 2012
    July 2012
    June 2012
    May 2012

Powered by Create your own unique website with customizable templates.