charmed Liebling
  • home
  • pattern shop
    • wallet patterns
    • bag patterns
    • laptop and messenger bag pattern
  • items for sale
    • custom orders
  • free tutorials
  • contact
  • about

New sewing pattern: The all-purpose wallet

8/18/2013

6 Comments

 
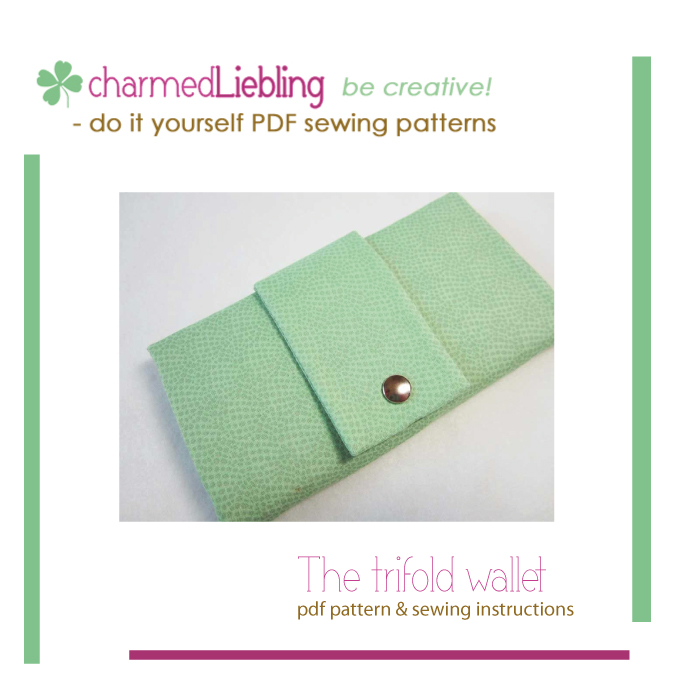
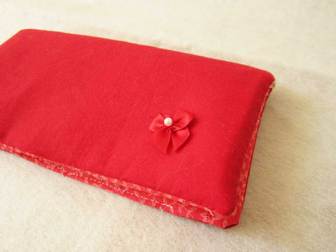
I am happy to announce a new sewing pattern, now available for instant download, in my pattern store: The all-purpose wallet!
Picture
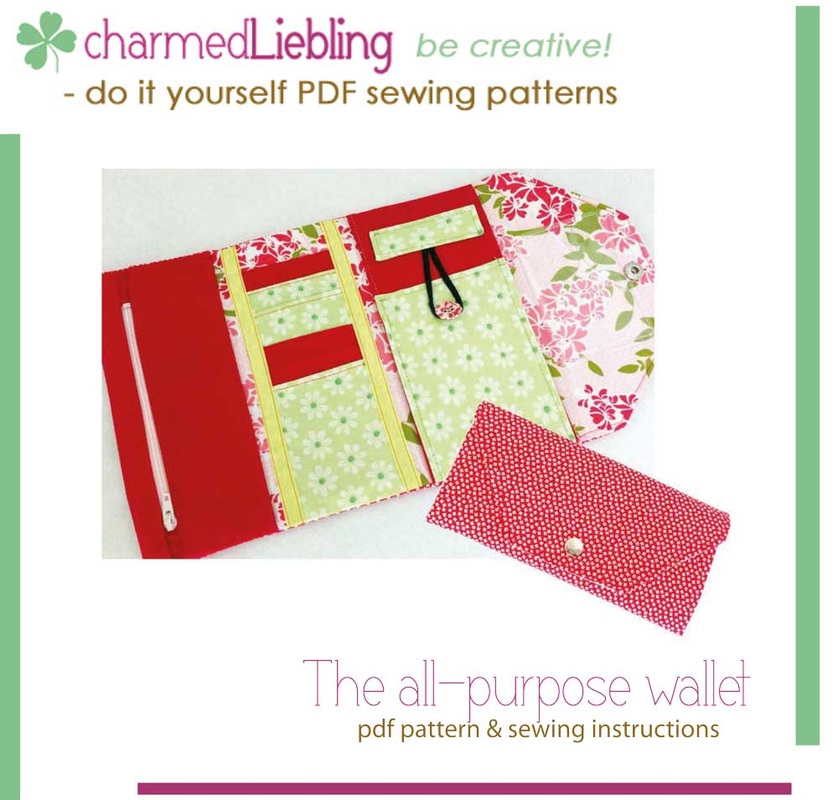
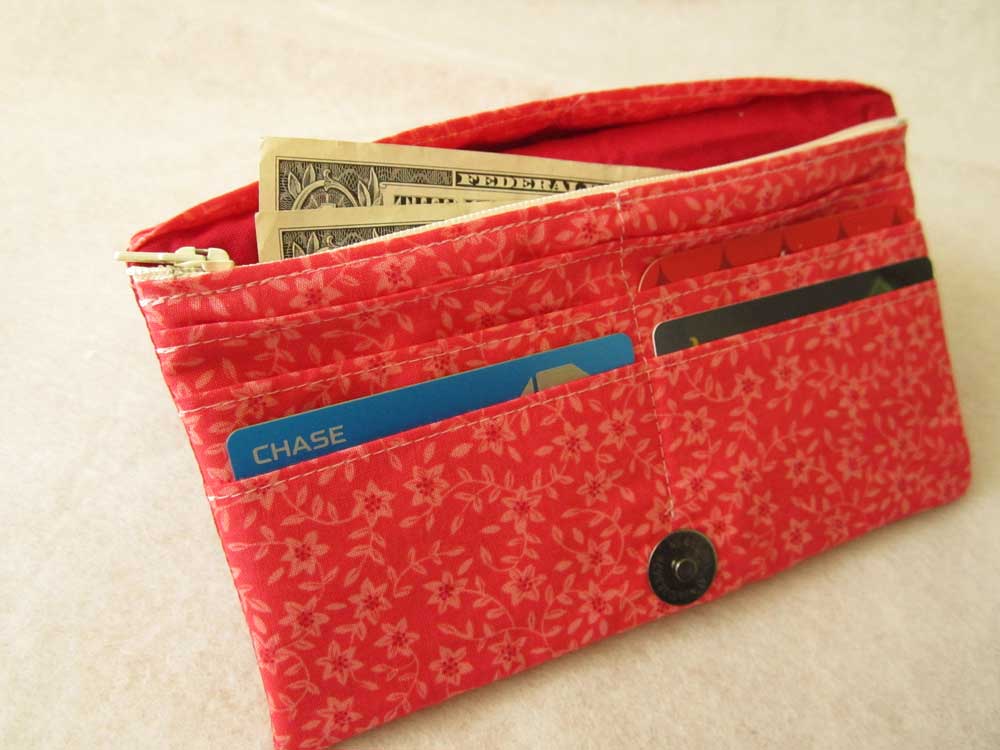
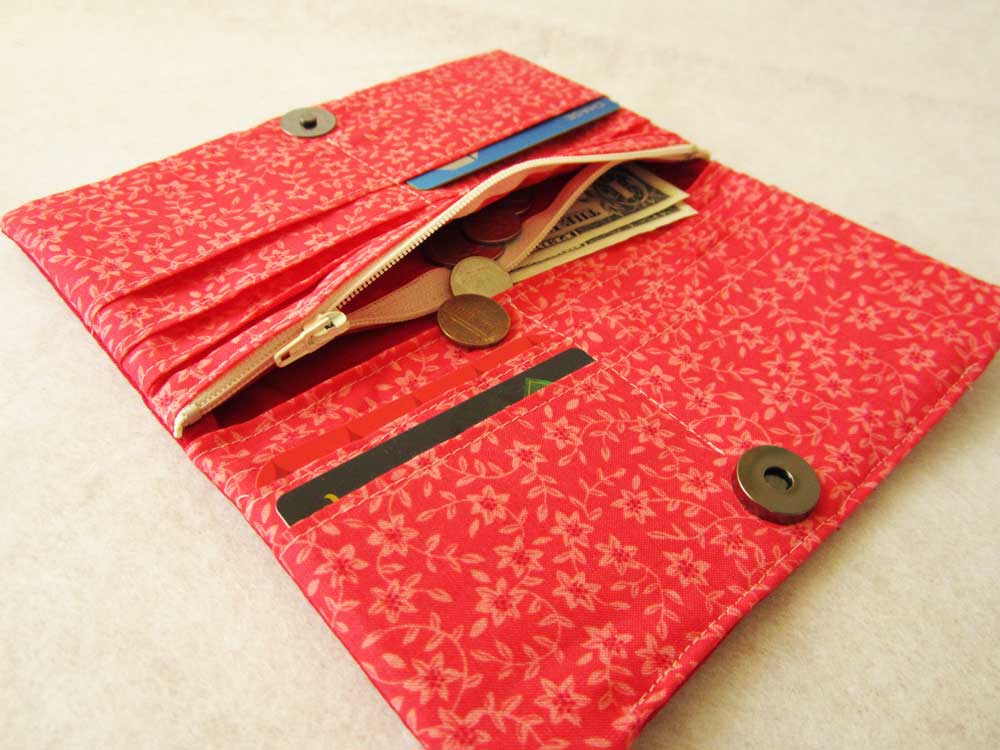
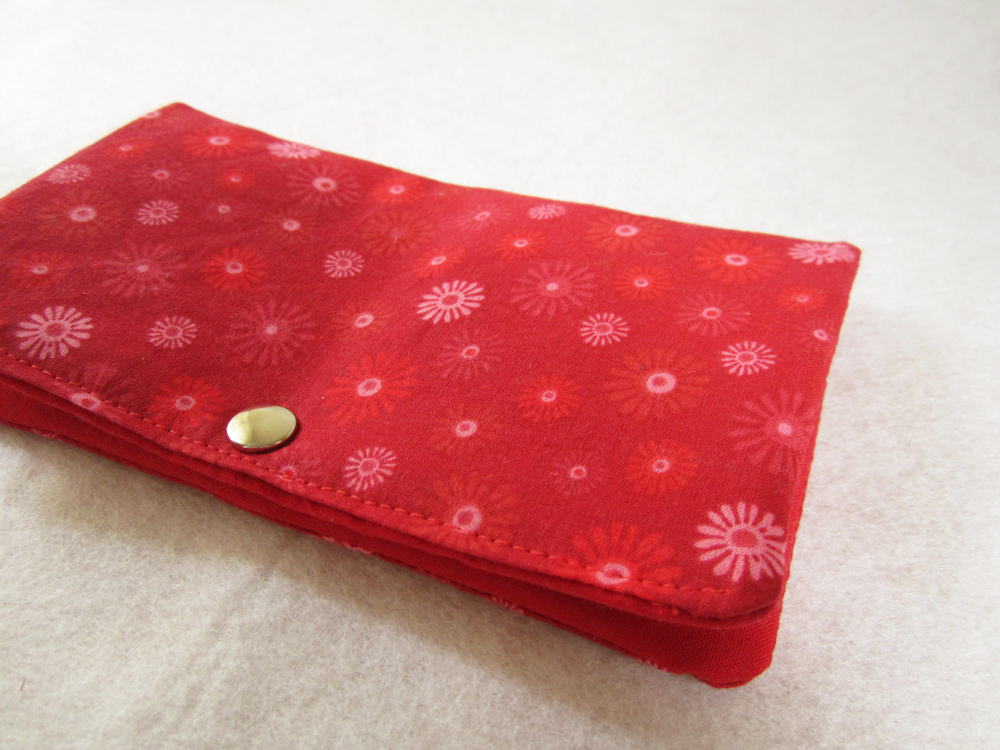
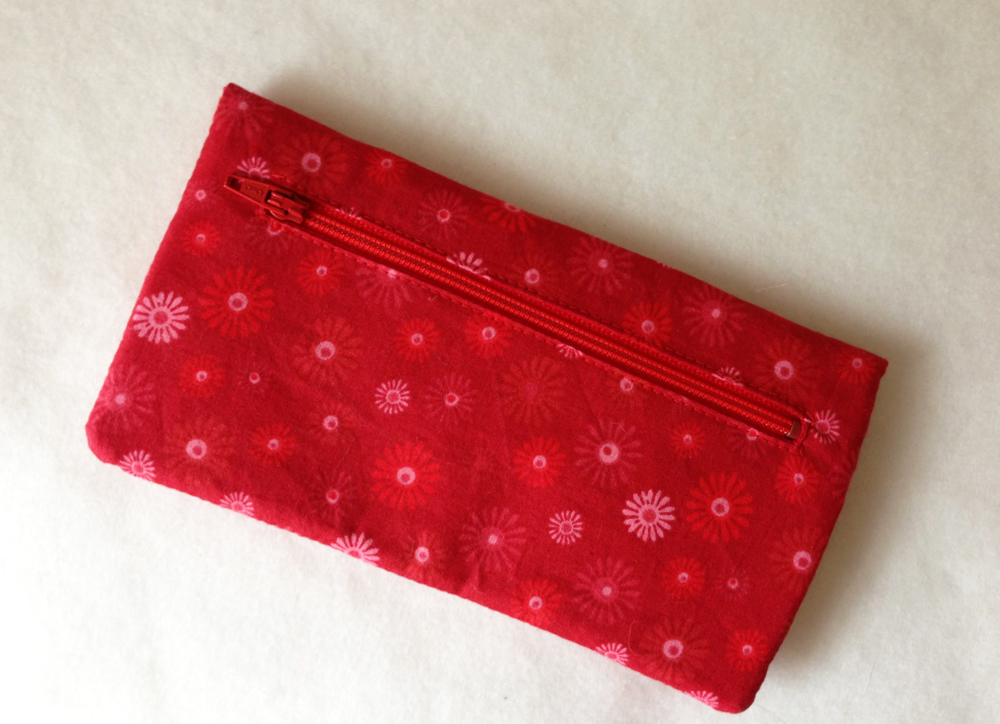
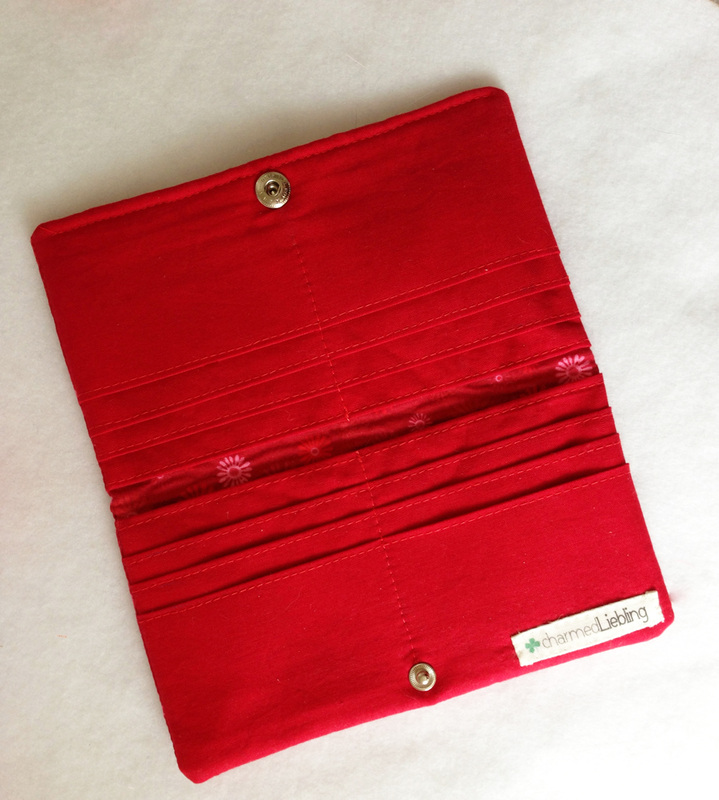
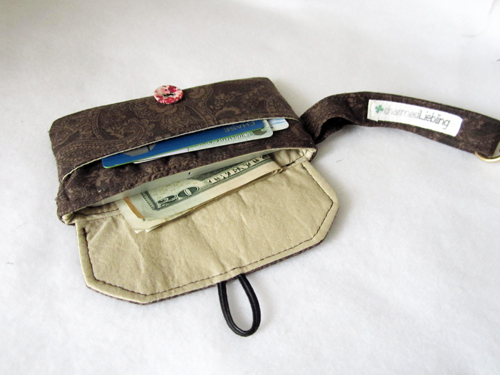
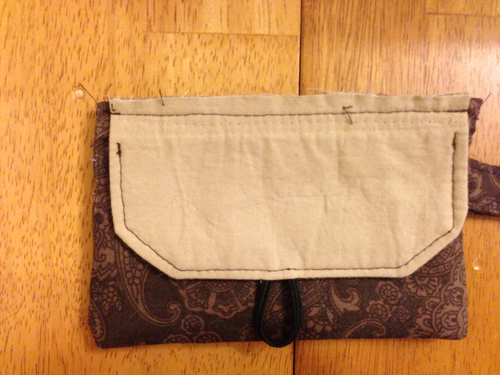
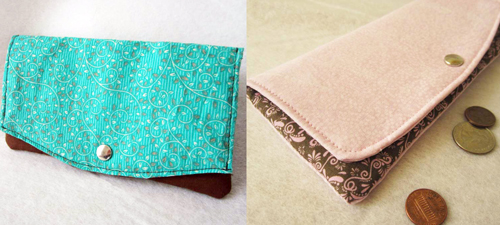
This trifold wallet is as versatile as can be: it not only provides enough space for your money and credit cards, there is also a pocket for your phone and the option to add a clear ID pocket. In addition to the zip pocket for coins there are six card slots as well as a large pocket for bills, receipts and your checkbook. It closes with an anorak snap on the trapezoidal shaped flap.

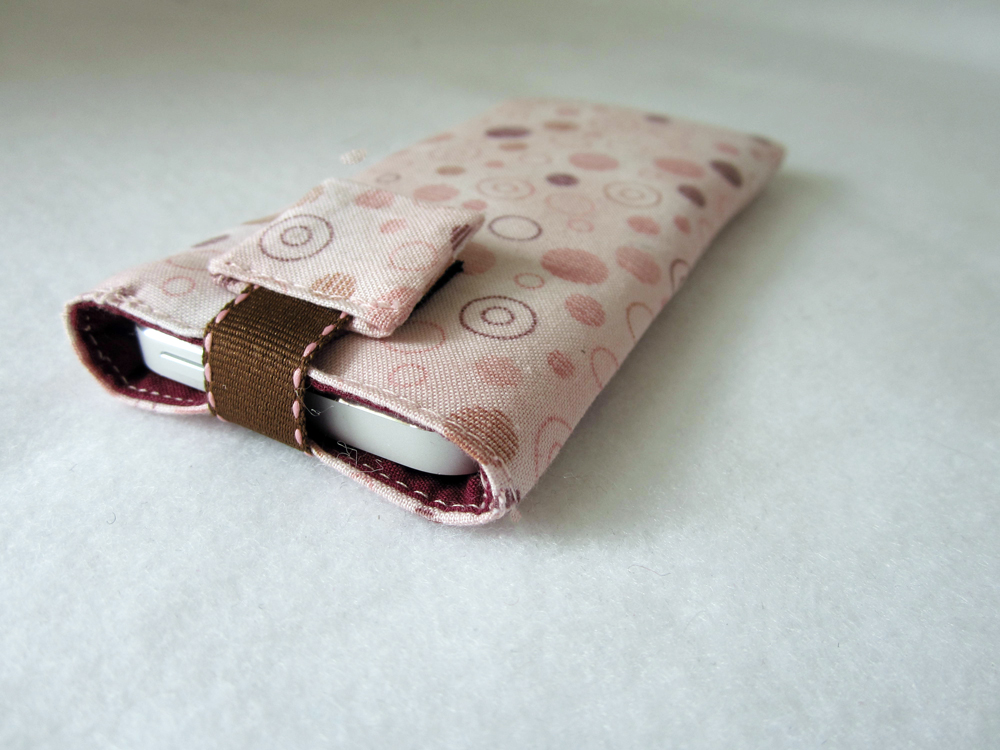
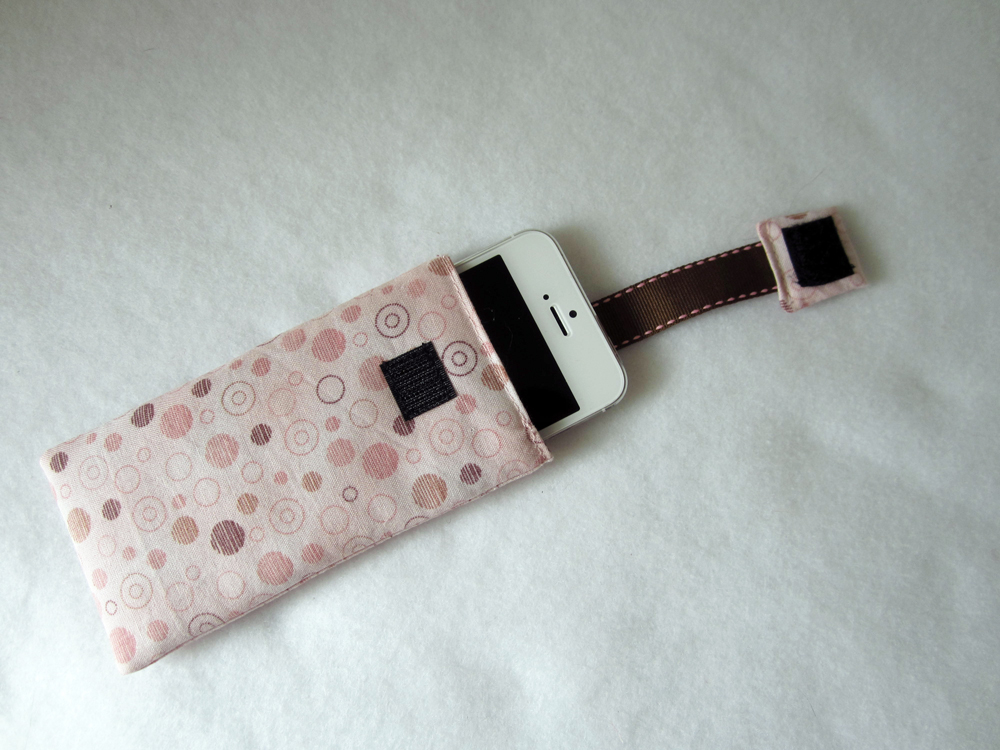
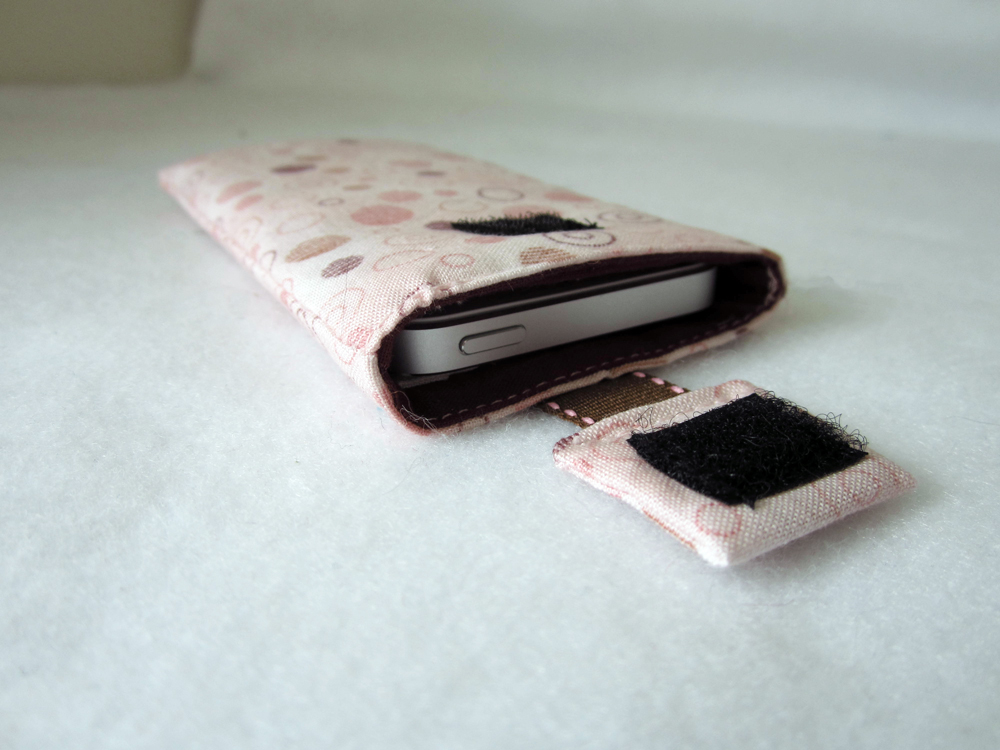
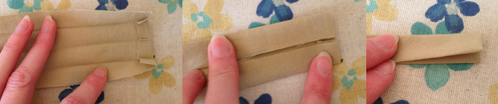
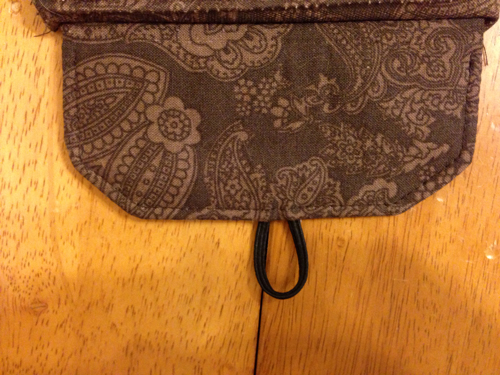
There are two different options to make the phone pocket: you can choose to make a flat version, which fits an iPhone 5 without protective case. If your phone is bigger, you might want to go with version II, which is a 3D-shaped pocket and therefore fits bigger phones, or your iPhone with its protective case.
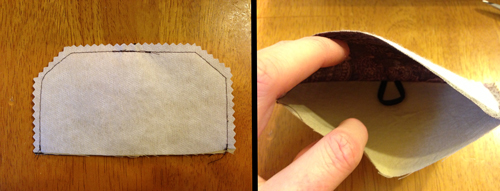
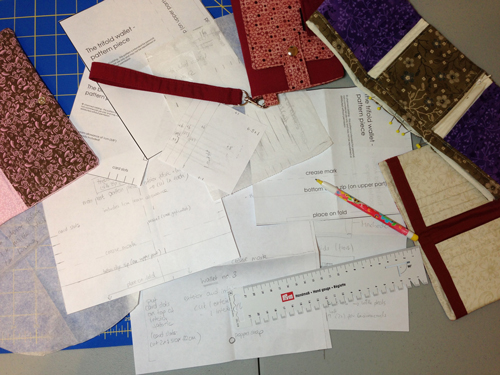
The pdf pattern includes 17 pages of sewing instructions with 40 pictures and 1 pattern piece.
The finished size of this wallet is 9 x 18 cm (3.5 x 7 in) when closed and 35 x 18 cm (13.75 x 7 in) when opened.

Supplies needed:
- Cotton fabric: ½ m or ½ yd
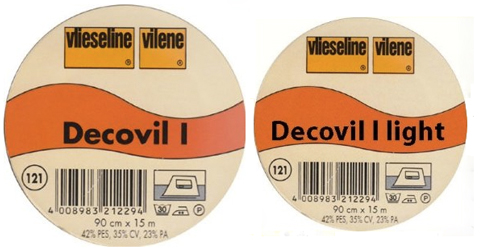
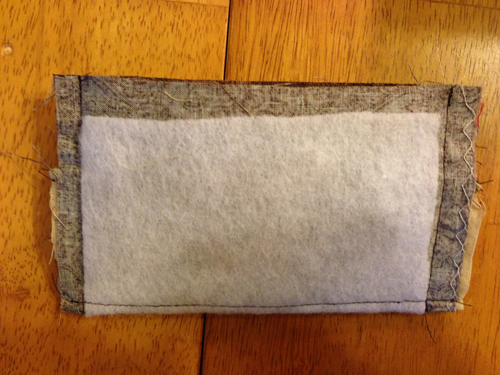
- Fusible fleece e.g. Pellon 987F or heavy stabilizer e.g. Pellon Peltex 71F: 18 cm (7”)
- Fusible interfacing, e. g. Pellon 931 TD: 35 cm (55 cm wide) or 3/8 yd (22” wide)
- 1 zipper, 14 cm (5.5”) à can be longer, will be shortened to the right size later!
- 1 piece of elastic string, 13 cm (5“) long
- 1 button
- 2 pieces of ribbon 1 cm (3/8”) wide: 20 cm (8”) each
- 1 anorak snap
- optional: 1 piece of clear vinyl, 6,5 x 10 cm (2.5 x 4“) for the ID pocket

Thanks to my testers who turned in great work! But see for yourself:
Picture
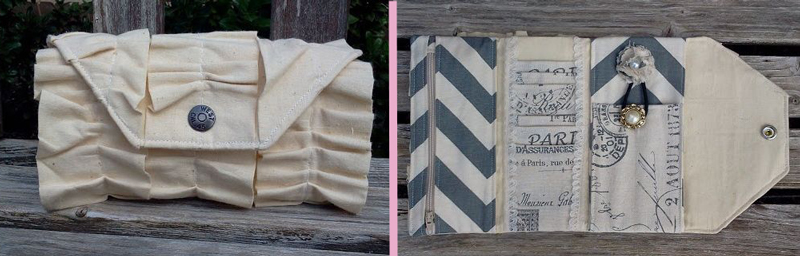
Ree finished her wallet in no time! I think I got her feedback four days after sending out the pattern. Well done Ree! Check out her blog at "Sincerely, Ree" as well. I have seen some really nice projects on her site!
Picture
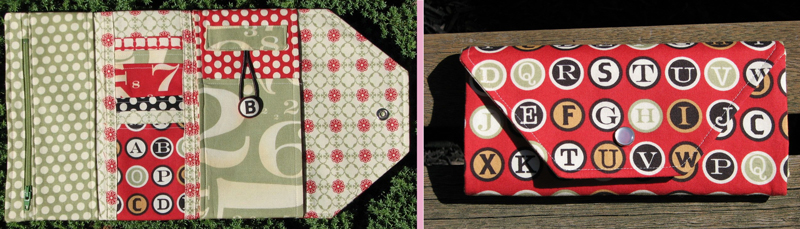
Don't you just love the red and green combo of Becky's wallet? I think it looks gorgeous and her wallet also looks so well finished!
Picture
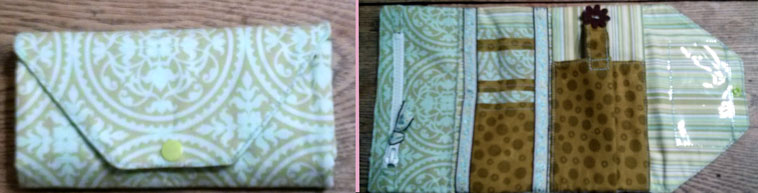
Kim changed the closure of her wallet which gives it a whole different style! Nice job Kim!
Picture
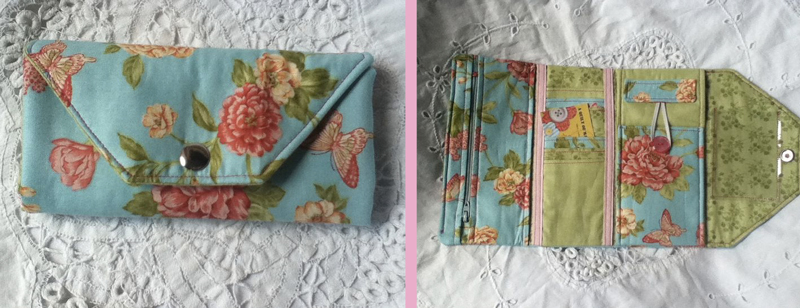
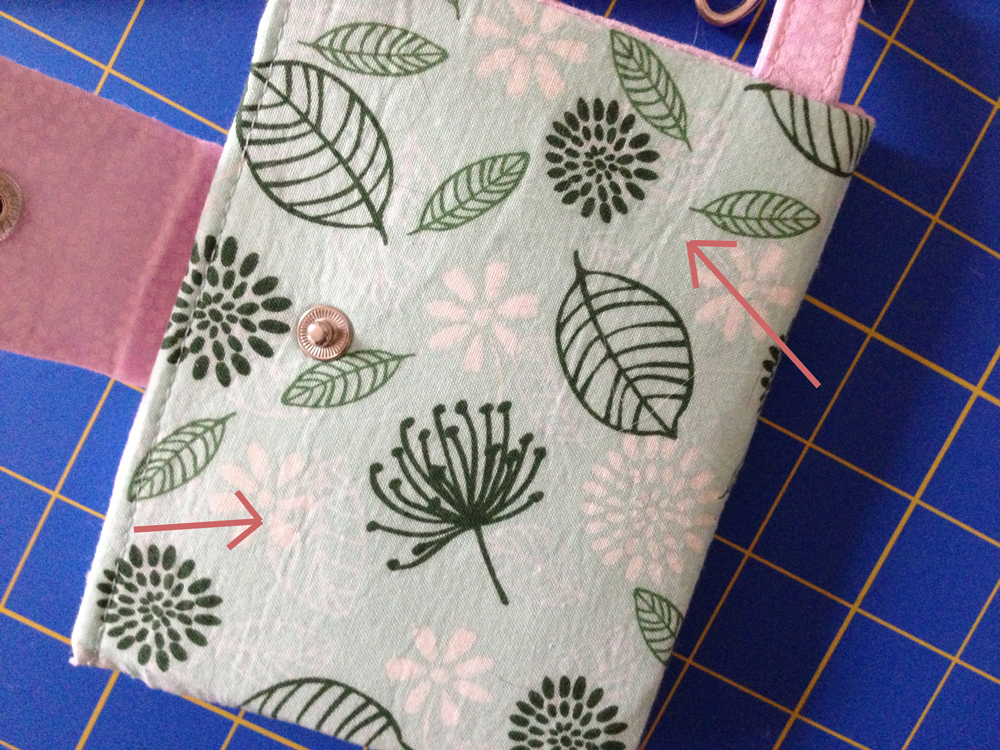
This is Nancy's version of the all-purpose wallet. The rose pattern of the fabric looks so pretty!
Picture
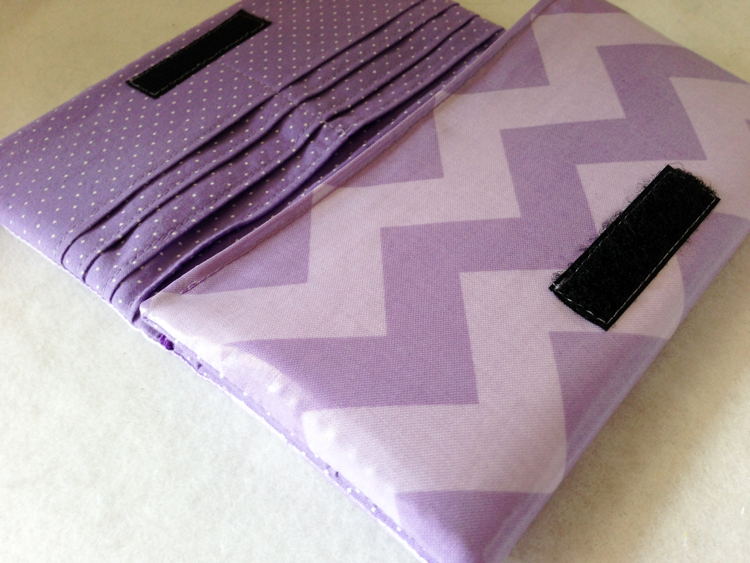
Denise used some hook and loop tape for the closure. Great idea!
Picture
Another fabric with a rose pattern! This one is Janet's wallet. She decided to make a tab closure for the phone pocket instead of elastic.
Picture
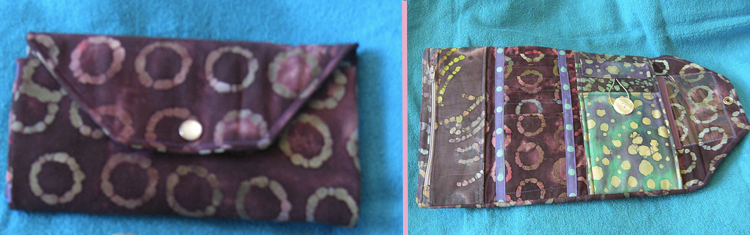
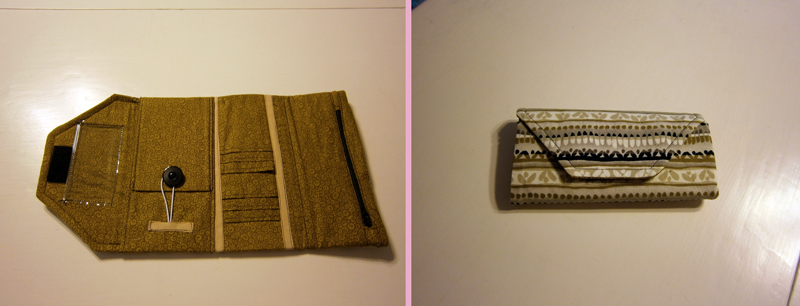
Patti used different kinds of batik fabric for her wallet which all match very nicely!
Picture
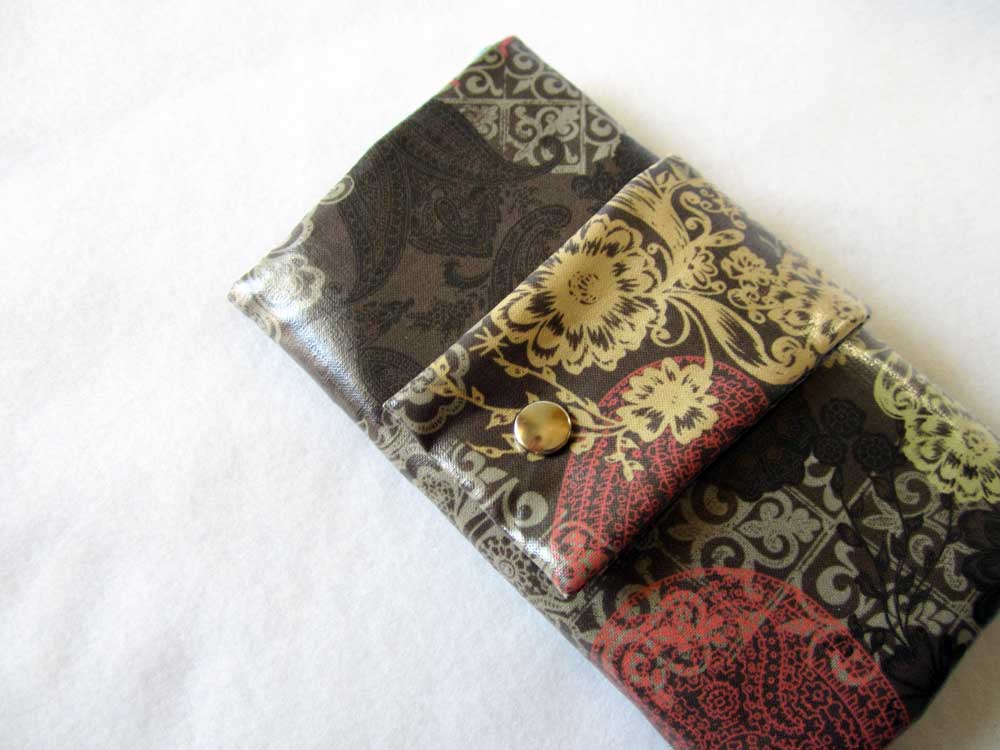
Sue's wallet is a real eyecatcher! The black red and white combo goes well with this wallet design!
Picture
This is Sandra's wallet! She used a tab closure for the phone pocket as well.
Picture
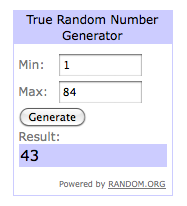
Tonya's wallet comes in gray and blue colors and looks gorgeous!
Picture
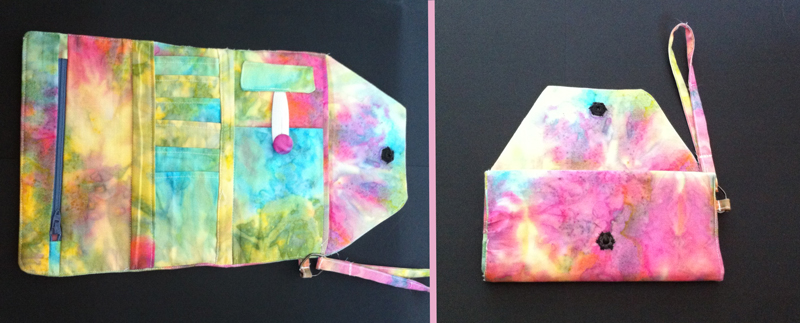
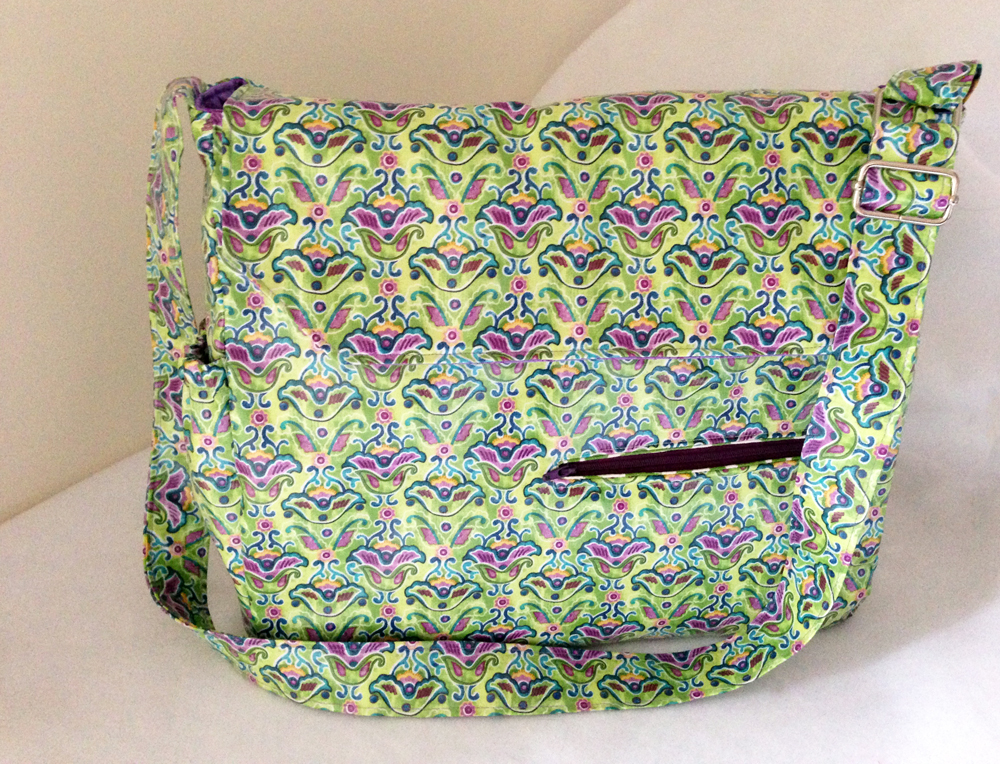
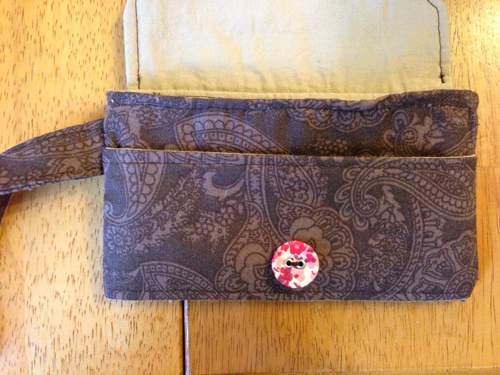
Alyssa made this colorful version of the all-purpose wallet! She also added a little strap to it, so that she can carry it as a wristlet!
Picture
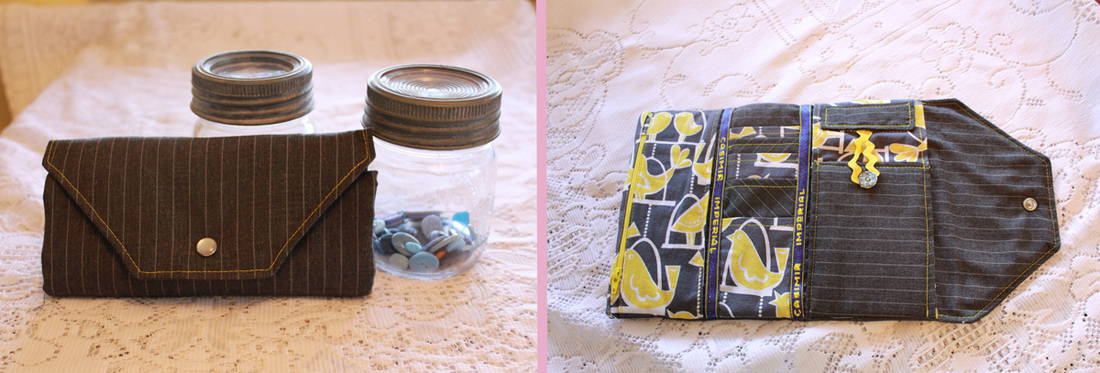
Erin used a summer weight wool suiting for the exterior and a cotton Micheal Miller print for the interior of her wallet. She says she loves the wallet because of its size - it may as well be used as a clutch!

Thanks again to all my testers, your wallets all turned out so nicely!
If you like what you see and want to make this wallet yourself, head over to my pattern store where the pattern is available for instant download!
6 Comments

Pattern testers wanted

7/17/2013

 
----UPDATE 7/19/2013----
Thank you all so much for your interest in testing my sewing patterns, I was overwhelmed by the response. So far I have gotten more than 150 emails and comments. You have no idea how much I appreciate your help and I can't wait to get started working with you! I will send emails out soon, with the patterns that are available for testing :-)
------------------------------------------------------------------------------------------------------------------------------------------
Picture
Today I have a favor to ask ;-) I am currently working on a few new bag and wallet designs and I could really need some pattern testers, who would help me with the process. If that sounds like something you might be interested in please keep on reading!

If you would like to be a tester, email me at anna(at)charmed-liebling(dot)com or leave me a comment below. I will list you as a pattern tester and once I finish up a pattern I will send you some info about it (a picture of the finished item, the notions and supplies you need, the finished measurements etc.) and you can decide if you want to test this particular pattern or not.

If you decide to test it for me I would send you the instructions and the pattern as a pdf file. Your task would be to sew the handbag/wallet according to my pattern and my instructions and note down everything that is not clear, any typos, grammar (I am a German native speaker so there might always be some mistakes in my English language ;-)), if all the measurements given are correct and so on.

When you send me your feedback you would also attach a picture of your finished item so I can put it on my blog in my blogpost about the pattern. And you would get a free copy of the final version of the pattern ;-)

My patterns are usually doable for advanced beginners or intermediate sewers.

Thanks so much for your help, I really appreciate it!

Happy sewing!
Anna

Giveaway day: the lucky winners!

5/11/2013

0 Comments

 
Picture
Thank you all for participating in my very first giveaways! What a week of fun it was!
I was really overwhelmed by all the comments. Thanks to those who also gave me a like on my Facebook page, it is very much appreciated :)

So here's the winner of my giveaway #1:
Picture
Picture
Congrats Emily, my red bifold wallet will go to you!
I will send you an email right away to get your address!

As for my giveaway #2, here's the result:
Picture
Picture
Congrats Karrie! You will be receiving five of my sewing patterns via email! Happy sewing!

Thanks you all for making this giveaway week a really fun week! I hope you come back to my blog or my charmed Liebling Etsy shop every now and then, to see what's new. I'm also planning on doing more giveaways in the future since it is just such a nice way to connect with other fellow crafters.
Have a nice weekend everyone!
0 Comments

Giveaway Day!! Here's my giveaway #2 :)

5/6/2013

71 Comments

 
Picture
giveaway #2: set of sewing patterns

Sew Mama sew is having a giveaway day!! So many great chances to get inspired by fellow crafters AND to win awesome things!
I am actually giving away two different things so make sure you check out my giveaway blog post #1 as well :)

Here you have the chance to win a set of charmed Liebling sewing patterns!
I am addicted to making wallets in all kinds of different designs and if you like making them too, you will love these sewing patterns:
Picture
Picture
Picture
Picture
Picture

To enter the giveaway just leave a comment below:
(if you are a no-reply blogger make sure to leave your email address, so I can get in touch with you if you win!)
When did you become a sewing addict? I would love to know! Sewing is such a great passion of mine but I only started out about 6 years ago and before that had never touched a sewing machine in my whole life!

(I would also love if you became a follower of this blog via Feedburner or like charmed Liebling on Facebook, but not required)

The giveaway runs until May 10th, 8PM EST.
The winners will be chosen by Random Number Generator on May 11th.
Thanks for participating and good luck!
71 Comments

Giveaway Day!! Here's my giveaway #1 :)

5/6/2013

85 Comments

 
Picture
giveaway #1: red bifold wallet

Sew Mama sew is having a giveaway day!! So many great chances to get inspired by fellow crafters AND to win awesome things!
I am actually giving away two different things so make sure you check out my giveaway blog post #2 as well!

Here you have the chance to win a charmed Liebling bifold wallet!
Picture
This wallet holds room for 12 credit cards, it has a zip pocket for coins, two large pockets for bills, receipts or checkbook and closes with a magnetic snap. If you love red you will love this wallet! :)

Measurements:
Closed: 10 x 19 cm (4 x 7.5”)
Open: 21 x 19 cm (8.25 x 7.5”)
Zip pocket: 10 x 19 cm (4 x 7.5”)

All fabrics are 100% cotton

Picture
Picture
To enter the giveaway just leave a comment below:
(if you are a no-reply blogger make sure to leave your email address, so I can get in touch with you if you win!)
How many handbags and wallets do you own? I have about 13 (storebought and handmade) and feel like that might already be too much.. but is it really?? :)

(I would also love if you became a follower of this blog via Feedburner or like charmed Liebling on Facebook, but not required)

The giveaway runs until May 10th, 8 pm EST.
The winners will be chosen by Random Number Generator on May 11th.
Thanks for participating and good luck!
85 Comments

Sewing with oilcloth and laminated cotton

4/25/2013

0 Comments

 
charmed Liebling chevron wallet laminated cotton
charmed Liebling messenger bag laminated cotton
I recently had some requests for items that are supposed to be waterproof and so my focus has been on waterproof fabrics like oilcloth and laminated cotton lately. And the more I work with them, the more I love it! Actually what I am talking about is ONLY laminated cotton, I haven't tried working with oilcloth yet. Laminated cotton is basically a regular cotton fabric which has a laminate overlay, it's PVC free whereas oilcloth is a PVC product and also behaves a little bit different than laminated cotton, it's sturdier and not as soft as laminated cotton.
So far I have tried two wallets with laminated cotton which both turned out very nicely: I interfaced the first one with By Annie's Soft and Stable and the second one with Decovil. The purple one is still available in my charmed Liebling Etsy shop by the way:
charmed Liebling chevron wallet laminated cotton
charmed Liebling trifold wallet laminated cotton
laminated cotton pears

My current project is a waterproof bag for my tennis racket. (At this point I noticed I am no longer a sewing addict by the way. More like a sewing freak I guess. I mean, who makes their own tennis bag?? Well, I do :-)) I found this really cute laminated cotton on Etsy. I love the different styles of the pears!

Some helpful hints when working with oilcloth or laminated cotton
laminated cotton fabrics
1. When working with laminated cotton it is good to use sewing clips instead of pins, or if you don't have any, make sure you only pin on the seam allowance because the holes won't dissappear but stay in your fabric. I also like to use a stretch needle when sewing (e. g. Schmetz Stretch 75/11) which have a thinner point and hurt the fabric less.


2. Ironing is another tricky part and of course you should never iron directly on the laminated side. Only use medium heat and put the laminated cotton with the laminated side facing down plus another piece of fabric or a kitchen towel on top of it and nothing should happen. For me this worked out just fine!

3. It can be helpful to have a special sewing foot, a non-stick foot or a roller foot with two metal rollers like I use on my sewing machine. Oilcloth and laminated cotton don't feed well into the sewing machine and those sewing feet prevent the fabric from sticking on the throat plate and the feed dogs:
Pfaff roller foot
Pfaff roller foot
4. You can find a relatively broad selection of laminated cotton in most online fabric stores but I highly recommend you check out the following two Etsy shops:
Laminates
Oilcloth addict 

They both carry oilcloth by various designers like Amy Butler but you will also find little treasures that the "big" fabric stores don't carry, like e. g. the laminated cotton with the pears ;-)
0 Comments

charmed Liebling items at a silent auction

4/12/2013

2 Comments

 
classical Idol Rochester
charmed Liebling donated items
As mentioned in my previous blogpost about my Amy Butler blossom handbag, I was going to donate the bag for a local silent auction here in Rochester, NY. The auction is part of a really exciting event on April 20, 2013 called "classical idol": a vocal competition with jury and audience participation who search for new talents in the classical music genre. The first prize is $ 2,000 and the opportunity to perform a solo in concert with the Rochester Oratorio Society. That is the choir I am currently a member of, hence my contribution to the silent auction :)

charmed Liebling iPhone case
So I had the handbag, but I felt like I would want to make it like a nice esemble of things, for people to be more likely to donate for it. I decided I would make another one of my iPhone cases (for iPhone 5) but I changed it a little bit from the one I made for myself and added a small velcro closure to it. The salmon color matches nicely with the shades of the handbag.

charmed Liebling iPhone case
charmed Liebling bifold wallet


Finally I made a bifold wallet in bright red colors. It has a lot of slots for credits cards and a zip pocket on the backside.


charmed Liebling bifold wallet
There will not only be a silent auction at this event but also hors d'oeuvres, cash bar and - most important of all - beautiful singing! The festivities start at 6 PM, the Idol competition at 7:30 PM. Tickets for the event are $40, and there also will be student "Theater Seating" available for $15.
To read more about this event please visit the website of the Rochester Oratorio Society. 
2 Comments

one of my favorite sewing products: Decovil by Freudenberg Vlieseline

3/2/2013

7 Comments

 
Decovil I and Decovil I light
I've been using the above mentioned product for quite a while now but since it's still hard to get in the US and I've stumbled upon far too many entries and questions about it in online forums I decided to blog about it, to introduce it to the American sewing community and to shed some light on all the mysteries ;-)
Decovil is a special kind of non-woven interfacing with a leatherlike handle and perfect when you make bags and wallets but also hats or decorative items. This stuff is really awesome which is why I can't stop mentioning it again and again (see also my older blogpost about Decovil).
I buy it in Germany during my trips home but I hope there will be more vendors that sell it in the US in the future. Because I'm addicted!!
At first there was only "Decovil I" but a few months later I found a second version called "Decovil I light" as you can also see above on the picture. You can already tell by the name that the second one is a little bit thinner, softer and more flexible than the first one.
For most of the handbags I make and basically for all my wallets I use the first version, Decovil I. That's the thicker one, it's a little sturdier and feels a bit like leather. Both types of Decovil have one fusible side, so you can iron it onto the wrong side of your fabric.
Picture
This is Decovil I. You can see it's actually not as thick as most of the heavy stabilizers you might know (it's about 1mm, so not even 1/16"), but still quite sturdy!

Decovil I light
Decovil I light appears to be almost as thick as Decovil I on the picture, but you can tell by the cutting mat that shines through that it is actually a lot thinner.

Picture

Decovil is really flexible and bendable compared to "regular" interfacing or especially heavy stabilizer you would use for bags, that should be less slouchy and have a nice "body". It doesn't deform, it stays flat no matter how much you bend it, and your items will end up having a really smooth surface and a great shape.

Heavy stabilizer gives me a hard time because it tends to create wrinkles when you bend it which will show through your fabric later, especially if you don't use thicker fabric like home dec fabric but for instance a lightweight quiliting fabric. And that's what I love about Decovil: it gives your items a real professional look AND touch, just like you would find it with storebought bags or wallets.
wallet interfaced with heavy stabilizer
This wallet I interfaced with heavy stabilizer.

charmed Liebling wallet interfaced with Decovil I
This is one of the wallets currently for sale in my charmed Liebling Etsy shop which I interfaced with Decovil I.

You can see on the first wallet that there are some pleats on the fabric, and no, these are not due to laziness of ironing my finished items, it's the heavy stabilizer that shows through and the wallet has this kind of crinkly look.. not ideal! Now, I admit that it's not totally unacceptable, and using heavy stabilizer will still help you give your bags or wallets the strength they need, but: once you've tried Decovil, you don't want to go back using anything but Decovil! The surface feels smooth and flat and you can even bend it and there still won't be any pleats showing on the fabric!
To sum it up: Decovil can help you draw the tiny but important line between your items looking handcrafted instead of "homemade".
sewing with DecovilStitch along the edge of Decovil.

One helpful hint if you decide to give it a try: always make sure you don't stitch directly on Decovil, since you will find it hard to turn your finished item right side out in the end and still have a neat and clean edge. What I recommend is to cut the Decovil piece without the seam allowance, then put it centered onto the wrong side of your fabric piece, making sure that there is no Decovil on the seam allowance of your fabric. When sewing, make sure to let the needle run exactly along the edge of the Decovil part (I always put the pieces underneath my sewing foot with the Decovil side up, so that I can acutally see where I have to sew).
(What I even do sometimes is NOT sew the Decovil onto my fabric at the beginning. Usually you will have to turn your bag or wallet right side out as one of the last steps and due to Decovil's sturdiness this can be a little tricky. Instead what I do is I turn the item right side out, then slip the Decovil inside before closing it up. I make sure it is all flat and sits perfectly in the item and then I close the seam and iron it.)

I hope you enjoyed this little insight into Decovil. Finally, here's my list of online stores that sell it to the US. Note that not all vendors sell both types though, some only carry Decovil I and not the light version.

If you want to try it out these are some of the places you can order from:
u-handbag: $11.90 per 1/2 yard plus shipping (from GB)
creative-sewing-shop.com: $ 15.00 per meter (39") + shipping (from France)
TOKO Kurzwaren via amazon.com (see link below): $14.10 per meter (39") + shipping (from Germany)
All prices are subject to change!
7 Comments

My miniature travel sleeve - FREE DIY TUTORIAL

2/3/2013

6 Comments

 
charmed Liebling mini travel sleeve
I promised to post this tutorial for my cute little travel sleeve before I go on vacation, so here it comes! It should be easy enough for a confident sewing beginner, but you should be familiar with the basic sewing terms ;-) Happy sewing!
This tutorial is free but if you would rather prefer to download this complete tutorial as a pdf file you may purchase it here for only $2.

You need:
Exterior fabric
Lining fabric
Fusible fleece (thin)
Fusible interfacing
1 button
1 snap hook
1 piece of elastic string, approx. 8 cm (3.25”)

Cut:
Note: these measurements are for iPhone 5 but you can adjust the size to your phone:
For the case take the measurements of your phone and add 5 cm (2”) to both length and width. Cut out your main fabric piece according to this size.
For the flap subtract 1 cm (3/8“) from the width of your main fabric piece. The length should be a little more than the third of the length of the main fabric piece.
For the front pocket take the width of your main fabric piece. As with the flap, the length should be a little more than the third of the length of the main fabric piece.

All measurements are length x width and fit an iPhone 5
exterior fabric:
for the case (main fabric piece): 1 piece of fabric 18 x 16 cm (7.25 x 6.25”)
for the flap: 1 piece of fabric 8 x 15 cm (3.25 x 5.75“)
for the front pocket: 1 piece of fabric 7 x 16 cm (2.75 x 6.25”)
for the strap: 1 piece of fabric 8 x 27 cm (3.25 x 10.75“)

lining fabric:
for the case (main fabric piece): 1 piece of fabric 18 x 16 cm (7.25 x 6.25”)
for the flap: 1 piece of fabric 8 x 15 cm (3.25 x 5.75“)
for the front pocket: 1 piece of fabric 7 x 16 cm (2.75 x 6.25”)

fusible interfacing:
for the lining case: 1 piece 18 x 16 cm (7.25 x 6.25”)
for the exterior flap: 1 piece 8 x 15 cm (3.25 x 5.75“)
for the lining front pocket: 1 piece 7 x 16 cm (2.75 x 6.25”)

fusible fleece:
for the exterior case: 1 piece 18 x 16 cm (7.25 x 6.25”)

Instructions:
All seam allowances are 1 cm (3/8“) unless stated otherwise.
Interface all the fabric pieces with the respective interfacing and fleece pieces.
1. Make the strap:
Fold the fabric in half lengthwise and press. Open up again and fold the two long edges towards the center crease. Press again. Put the two long edges on top of each other and press again. Now topstitch along both long edges, approx. 0,3 cm (1/8“) from the edges. Slide a snap hook over the strap and set it aside.
Picture
Use this pic from another pattern for help with the strap. Note that you DON'T have to fold down the short edges like it's shown here since they won't be visible later.
2. Make the flap:
Take your elastic string, fold it in half and put it onto the center right side of one of the long edges of the exterior flap fabric, with the loop lying on the fabric, and the open ends being aligned with the fabric raw edge. Baste in place.
Put the two flap pieces (lining and exterior) right sides together. Stitch along both short edges and the long edge on which you attached the elastic string. If you like, you can try a shape with an angle like I did (see first picture below).
Picture
Left: Try sewing an angle at the corners of the flap for a nicer look. Right: Here you can see how the elastic string has to be positioned onto the exterior fabric right side.
Picture


Trim the seam allowances, turn right side out and press. Topstitch all around the edges of the flap, except for the raw edge, with a 0,3 cm (1/8“) seam allowance.


Picture
3. Make the front pocket:
Put the two front pocket pieces right sides together and stitch along both long edges. Turn right side out and press. Topstitch along one of the long edges, with a 0,3 cm (1/8“) seam allowance. Place the front pocket with its wrong side (lining side) onto the front part of the exterior main piece. The bottom edge of the pocket should be aligned with the middle crease of the exterior main piece (see picture below). Sew the pocket onto the fabric by topstitching along the bottom long edge of the pocket.
Put the strap onto the exterior main fabric like shown on the picture and baste in place (it should be positioned approx. 2,5 cm (1“) down from the bottom corner).

4. Make the exterior case:
Fold the exterior fabric piece right sides together and stitch along both short edges. Make sure the strap is hidden between the two layers. Turn right side out and press.

Take the flap and put it onto the back of the case, right sides together, with the raw edges aligned. Check the lenght of your flap by bending it over as if closing your case. If it appears too long, shorten it by cutting off from some fabric from the raw edge.
Pin in place and stitch with a 0,5 cm (0.25“) seam allowance.
Picture
The exterior fabric piece folded in half, right sides together
Picture
The flap stitched onto the top edge of the exterior back
Picture

4. Make the lining case:
Fold the lining fabric piece right sides together and stitch along both short edges but leave an opening of approx. 7 cm (2.75“) on one side. Leave wrong side out.

5. Assemble the case:
Take the exterior case right side out and put it into the lining case. Both right sides should now be touching. Pin in place and stitch all around the top corner. Make sure the flap is tucked inside and hidden between the two layers.
Picture
Picture
Picture

Pull the exterior case through the opening in the lining case. Fold the seam allowances down towards the inside of the opening and topstitch/close it.

Picture
Tuck the lining case back into the exterior case and iron well, make sure to flatten out all bumps. Topstitch all around the top edge with a 0,3 cm (1/8“) seam allowance.

Take your button and handstitch it onto the center front pocket.

...And it's done! Have fun with this cute iPhone sleeve/travel case or whatever name you think fits best! ;-)

I ended up using this little sleeve almost everyday.. and not only on vacation! I love the fact that I can carry it around as a small yet stylish purse but still have all my essentials with me. How did your "travel sleeve" turn out? I would love to hear your feedback on this tutorial!

If you would rather prefer to download this complete tutorial as a pdf file you may purchase it here for only $2.
Bild
6 Comments

designing sewing patterns.. and not being able to stop!

1/17/2013

0 Comments

 
This is relatively new to me but really becoming a new passion of mine: creating sewing patterns for people just as crazy about sewing bags and purses as I am! ;-)
I already have two patterns for sale in my charmed Liebling Etsy shop and I'm currently working on four more... yes, at the same time, I started making patterns a few weeks ago and now I can't stop anymore! And so right now I have three rough drafts for wallets and one for a handbag lying on my table...
charmed Liebling sewing pattern drafts
Yeah, there's a huge mess on my cutting table right now..
What comes in handy now is my tendency to be very accurate and well organized in my work (even though the picture above might tell you a different story ;-)):
Whenever I create a new item and I'm finally sewing it on my machine I try to take a picture of every step. This is not the most exciting thing to do and often gives me a good deal of frustration since I'm someone who prefers things to run smoothly when I'm working... if you have to pick up your camera after every single step to take a picture it get's rather time consuming. But it pays off: I have a whole bunch of older pics on my computer which are just waiting to be edited and used as sample pictures in the instructions of my patterns.

Two of the new patterns I'm currently working on are taken from items, I already sell in my shop:
charmed Liebling wallets
Two bifold wallets, with enough room for 12 credit cards and of course cash and your checkbook, plus a zip pocket on the back for your change.
charmed Liebling handbags
One of the first handbag designs I came up with when I started my label. I love the trapezoidal shape and the fact that this bag offers more room for your things than you can imagine!
It's really amazing to see how many clicks my sewing patterns get on Etsy. I feel like there's a huge revival of sewing and handcrafting in general going on right now which I think is really awesome! So go get your sewing machine, knitting things, handicraft paper or whatever you are into and get cracking!
0 Comments
<<Previous

    Enter your email address:

    Delivered by FeedBurner


    Follow on Bloglovin

    RSS Feed

    Anna

    anna's blog -

    Welcome to my blog! I am an accountant who once started out her "career" in the US by designing bag and wallet sewing  patterns! My patterns are available on Etsy and occasionally I will share some of my sewing projects that I work on in my spare free time on my website.  Happy sewing :)

    Categories

    All
    Bags
    Bargains
    Dresses
    Fabric
    Fashion
    Germany
    Giveaway
    Home Dec
    Interfacing
    Review
    Sale
    Seasonal
    Sewing Patterns
    Sewing Tips
    Smartphone Cases
    Special Occasions
    Treasury
    Trips
    Tutorial
    Vacation Projects
    Wallets

    Threading My Way_Featured
    Pattern Spot dot com
    This page contains affiliate links. See my disclosure policy.
    Online Sewing Class
    Craftsy

    Archives

    December 2021
    May 2020
    April 2020
    January 2020
    January 2015
    October 2014
    September 2014
    August 2014
    July 2014
    June 2014
    May 2014
    April 2014
    March 2014
    February 2014
    January 2014
    December 2013
    November 2013
    October 2013
    September 2013
    August 2013
    July 2013
    June 2013
    May 2013
    April 2013
    March 2013
    February 2013
    January 2013
    December 2012
    November 2012
    October 2012
    September 2012
    August 2012
    July 2012
    June 2012
    May 2012

Powered by Create your own unique website with customizable templates.