charmed Liebling
  • home
  • pattern shop
    • wallet patterns
    • bag patterns
    • laptop and messenger bag pattern
  • items for sale
    • custom orders
  • free tutorials
  • contact
  • about

Please vote for me :)

12/24/2013

6 Comments

 
Picture
A couple weeks ago I participated in the Sew Sweetness Bag Contest on Sew Mama Sew and I was really thrilled to see that my Petrillo Bag made it to the TOP 15!! There were about 60 entries and my bag got picked by a jury to be among the top 15 bags of the contest. And here is how you can help me:

Everybody can vote for their top 3 favorite entries among the 15 finalists! So please please please take a look at all the awesome bags - and vote for me :) And then vote for two other bags that you like. I promise it is going to be a really tough choice!
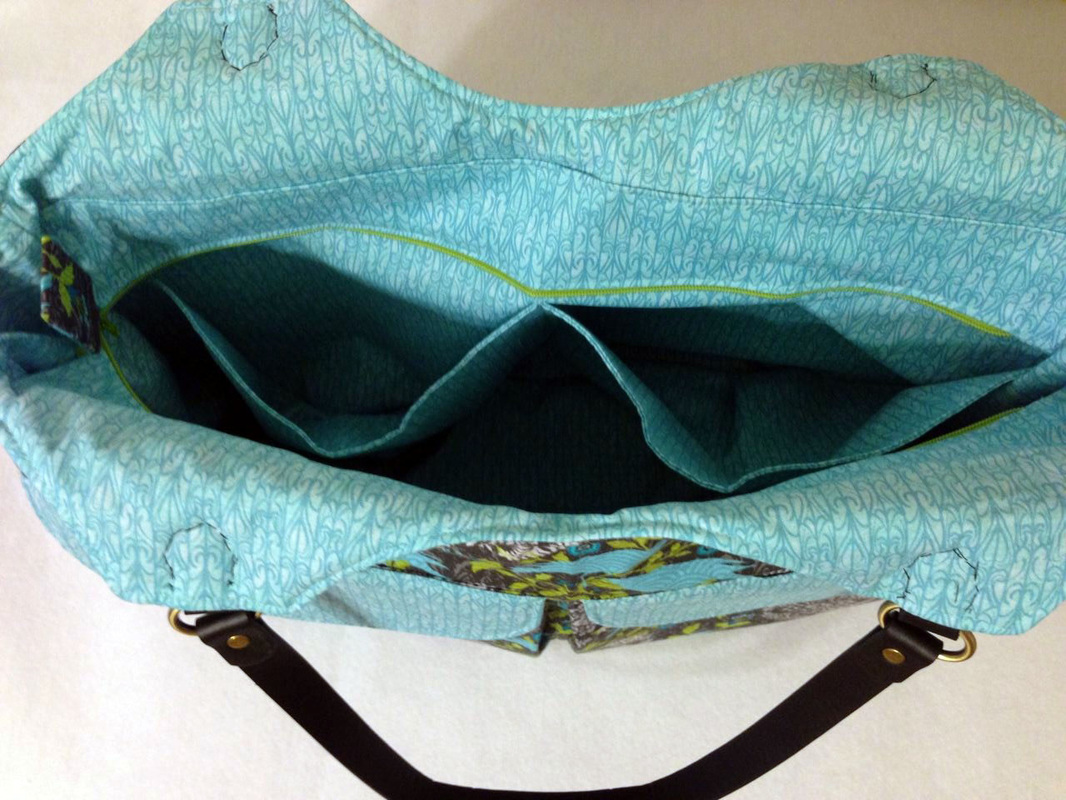
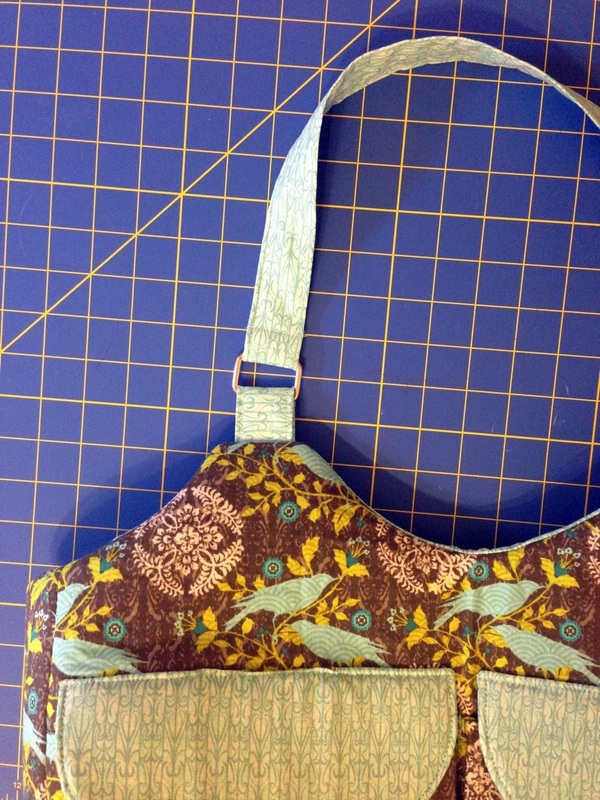
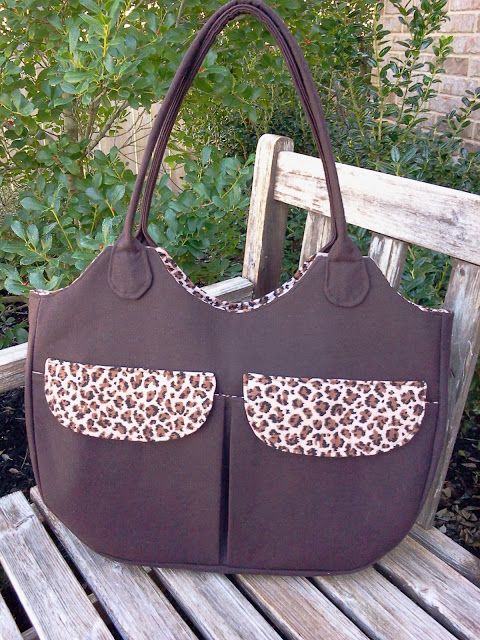
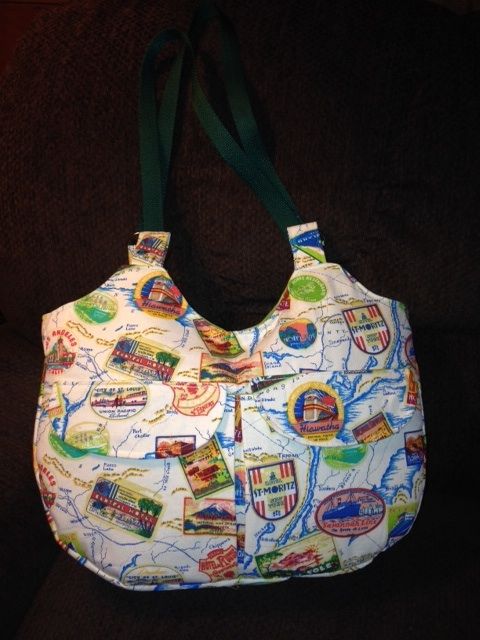
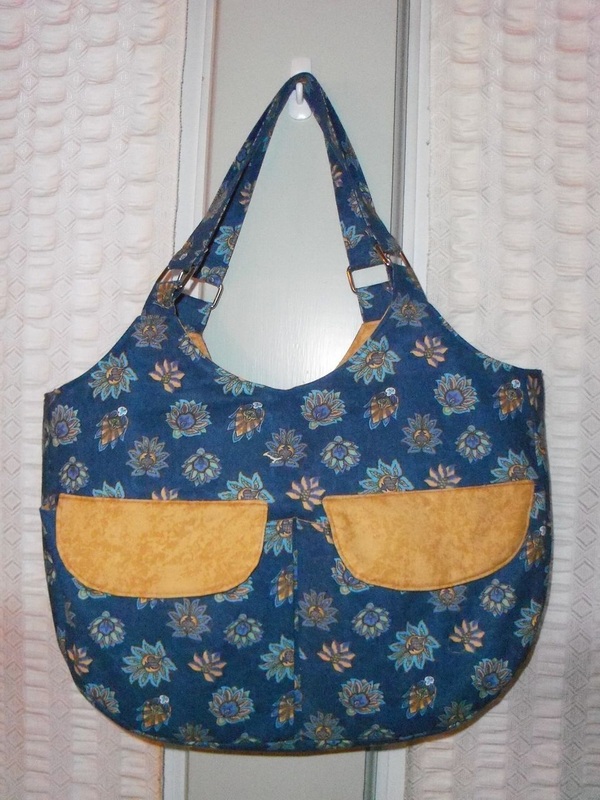
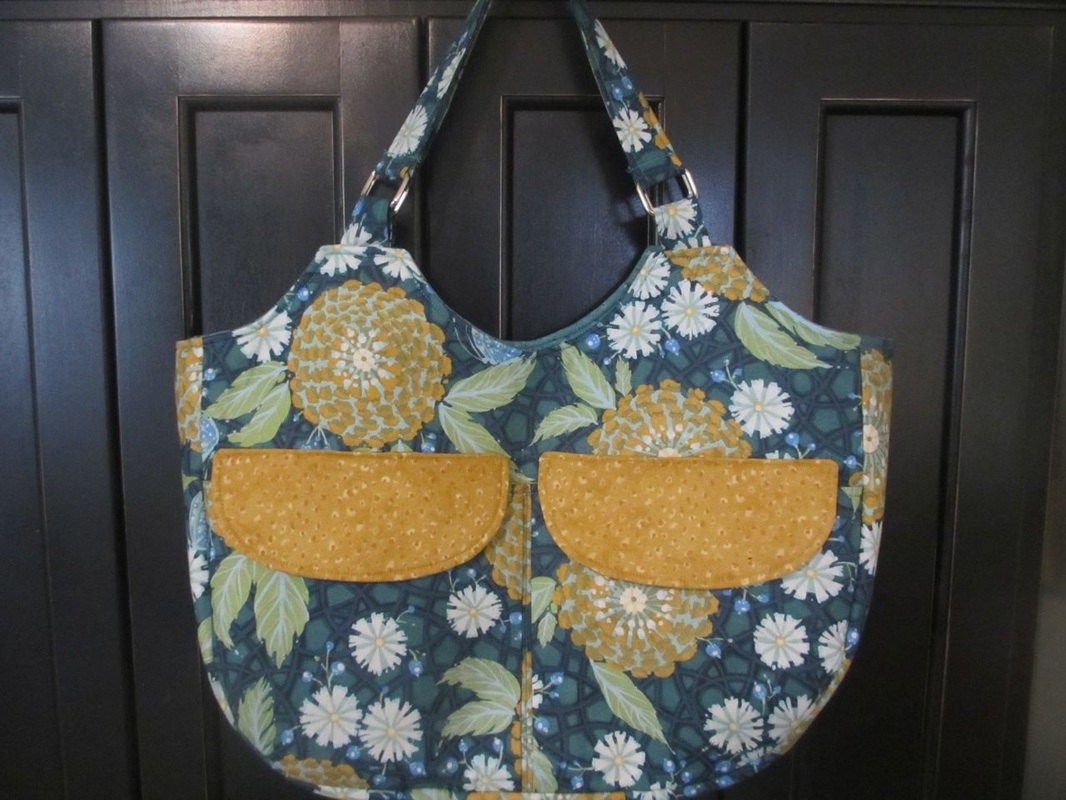
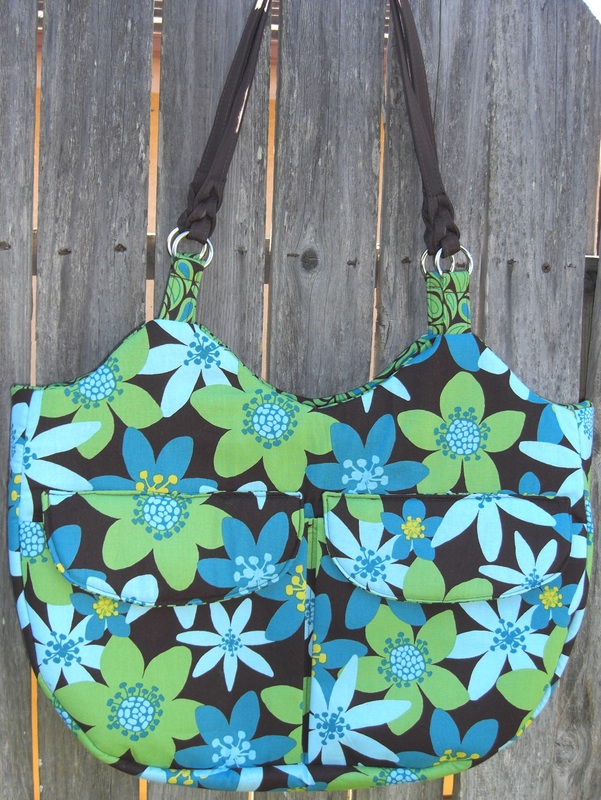
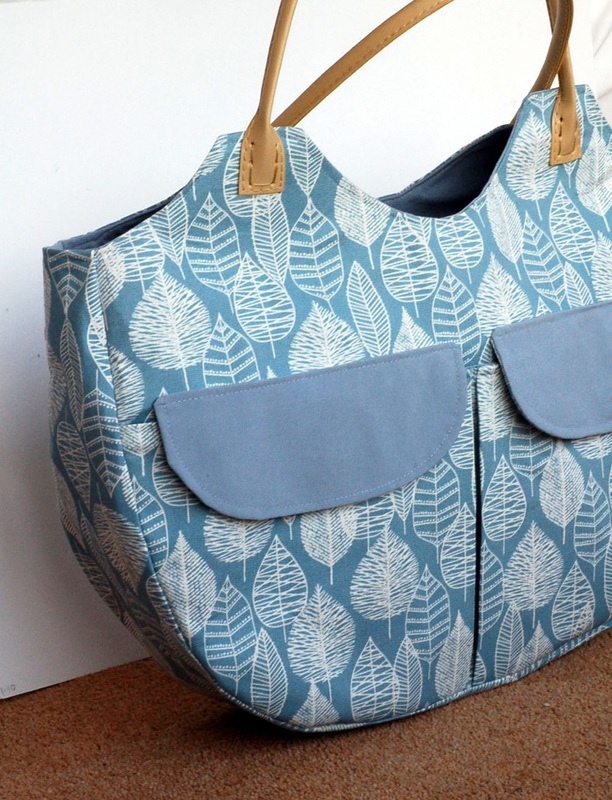
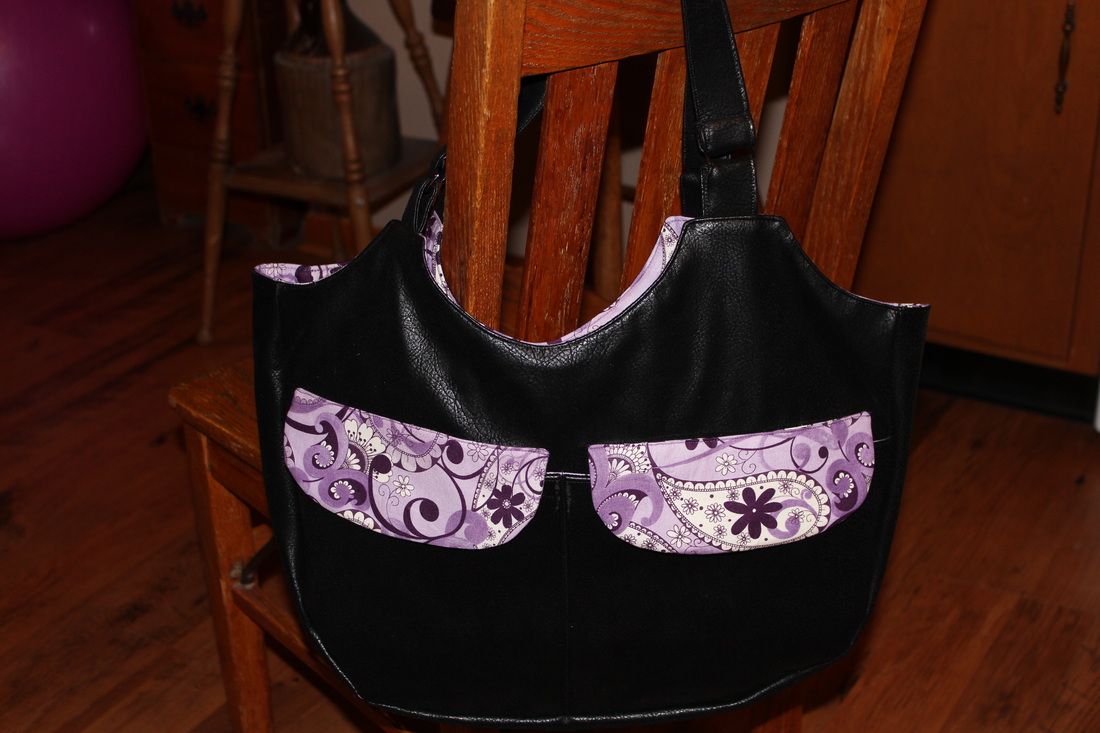
See picture below for my bag :)

Thank you so much everyone!! :-*
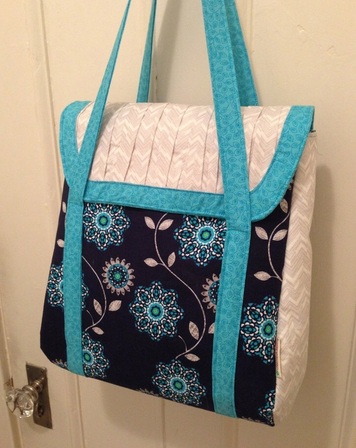

Bild
Picture
My Petrillo Bag
6 Comments

All about bag stabilizers - review on Sew Mama Sew

12/19/2013

0 Comments

 
I am honored to be a guest blogger for Sew Mama Sew!! My review about bag stabilizers was posted two days ago and you can check it out here!
Bild
(They also posted a small bio about me which you can find here.)
If you haven't seen it already I would like to invite you to head over to Sew Mama Sew and check out my review. I am sharing my
favorite stabilizer product options for making bags, with tips for the best way to use each product. Those products are By Annie's Soft and Stable, Timtex, fast2fuse Heavyweight, Stiff Stuff, Roc-Lon Multipurpose Cloth and two versions of Vilene Decovil which is more common outside the United States.
I hope you will like my review and that it will be helpful to you with your upcoming bag projects. Which stabilizers do you usually use? Maybe there's more out there, that I haven't tried yet? You are welcome to leave me a comment or post a comment over at Sew Mama Sew! :)
Bild
0 Comments

Winner of Sew Mama Sew giveaway!

12/17/2013

0 Comments

 
I apologize for being a little late with this but I finally managed to draw the winner of the giveaway! I used Random Number Generator, counting all the blog comments, Facebook likes and new subscribers and this is the result:
Bild
Let's see who is the lucky winner:
Bild
Congratulations Gali! I will get in touch with you so you can let me know which of my sewing patterns I should send out to you!

Thanks to all who participated, it was great fun! I hope to see you around :)

Happy sewing!
0 Comments

Giveaway Day on Sew Mama Sew

12/9/2013

 
Bild
Sew Mama sew is having a giveaway day!! So many great chances to get inspired by fellow crafters AND to win awesome things!
I am giving away two of my sewing patterns to one lucky winner! I currently have 14 sewing patterns in my shop and you will be able to pick two of your choice :)

I am addicted to making bags and wallets in all kinds of different designs and if you like making them too, I hope you will love these sewing patterns! Here is just four of them, to see the whole range you can hop over to my pattern shop and have a look around.
Bild
Bild
Bild
Bild
To enter the giveaway just leave a comment below:
(if you are a no-reply blogger make sure to leave your email address, so I can get in touch with you if you win!)
What kind of purse do you like most? I preferred smaller handbags until I started sewing my own bags. Now I feel like, the bigger the handbag the better!

There is also the option for two bonus entries:
- You can get a bonus entry if you like charmed Liebling on Facebook
- You can follow my blog via Feedburner (upper right hand corner)

The giveaway runs until December 13th, 8PM EST.
The winners will be chosen by Random Number Generator on December 15th.
Thanks for participating and good luck!
Bild

New sewing pattern: Rhine Valley Bag

12/6/2013

11 Comments

 
Just in time before I will leave for my trip home to Germany I am happy to introduce you to my latest sewing pattern which is now available in my pattern store: the Rhine Valley Bag!
Bild
Rhine River Valley

This bag is named after the region where I lived before I moved to the States. I actually grew up close to the area you see on the right-hand side picture and later moved to Mainz, which is a city right on the shore of the beautiful Rhine River, where I lived for eight years.

I actually made a similar version of this bag in the spring and took it with me to Germany. It was the perfect size for hand luggage on the long plane ride. I finally decided to create a sewing pattern and have to say I really love this bag! It is big, it is spacious but so handy at the same time! I hope you like it as much as I do :)
One of my favorite features is the recessed top zipper. Inside the bag there are two 3D shaped slip pockets which easily fit smaller items like your keys or your phone.
charmed Liebling Rhine Valley Bag recessed zipper
charmed Liebling Rhine Valley Bag inner slip pockets
charmed Liebling Rhine Valley Bag front pockets


Since I like making pleats I added two pleated pockets to the front of the bag. It is actually one large divided pocket, and each compartment closes with a flap and a magnetic snap.

I used store-bought (fake) leather handles for both of my bags but my instructions give you the option to attach fabric handles with rectangular rings in case you don't want to go with store-bought handles.
Rhine Valley Bag with fabric handles
optional: Rhine Valley Bag with fabric handles and rectangular rings
charmed Liebling Rhine Valley Bag
Rhine Valley Bag with store bought handles
The pdf file comes with 21 pages of instructions, 56 color photographs and 5 pattern pieces. All measurements are given in centimeters and inches.
The finished size of this bag is 30 x 45 x 10 cm/ 12 x 18 x 4 in (height x width x depth).

Supplies needed:

- Exterior fabric: 1 m or 1 yd
- Lining fabric: 1.30 m or 1 1/3 yd
- Fusible fleece e.g. Pellon 987F: 0.60 m or 2/3 yd
- Fusible interfacing, e. g. Pellon 931 TD:  4.20 m or 4.5 yd
- 1 zipper 46 cm (18”) or longer
- 2 magnetic snaps
- 2 faux leather handles, approx. 55 cm (22”) long

If not using store bought handles you will also need:
- 4 rectangular rings, 3 cm (1.25”) width
- Add 15 cm/ 5” of lining fabric to the amount given above!

Thanks to all the testers who helped me with this project! Have a look at their bags, aren't they all amazing??
Rhine Valley Bag Ree
Ree from Sincerely, Ree used an animal print for her bag. She says this bag will be perfect for travelling. She acutally made a cute hat using the same fabrics, so please make sure to pop over to her blog and have a look!
Rhine Valley Bag Cara
Cara from Early Bird Stitches made this wonderful bag. Her items are always so well-finished and I just love the color combo of this one. ,
Rhine Valley Bag Tracey
Tracey from Sew Chubby Cheeks made a "real" travel bag! Her fabric takes up the travel theme and I would say that this is a perfect bag to use as your carry-on luggage :)
Rhine Valley Bag PJ
This is PJ's bag. The yellow flaps of the front pockets make a really nice contrast to the blue floral print she used for the exterior. PJ also has an Etsy shop, so make sure to check it out!
Rhine Valley Bag Susan
How cute is the pattern of Susan's bag? I totally love all those happy dots :) Susan used fake leather handles for her bag which give her bag look a real professional finish.
Rhine Valley Bag Sarah
Sarah from Prairie Girl Knits chose this really great color combo for her Rhine Valley Bag. I mean, a big bag made entirely with pink lining? Awesome!!
Rhine Valley Bag Silvia
Silvia used a really cute animal print for her bag. The lining actually shows chicken and roosters! She used fake leather handles for the first time and they turned out really nicely.
Rhine Valley Bag Marcia
Marcia from Sew Inspired chose this really colorful floral print for her Rhine Valley Bag. Marcia teaches sewing classes so I am not surprised that her bags always look so well finished!
Rhine Valley Bag Erin
I love the pattern of Erin's bag! The tree theme is really fun and the colors match perfectly. I can totally see why Erin says she is a little sad to be giving this bag away!
Rhine Valley Bag Jenny
This is Jenny's Rhine Valley Bag. She chose a floral print for the exterior and says she especially loved making the recessed zipper, as it turns out they are not that hard to make. I am glad to hear that :)
Rhine Valley Bag Janet
Janet said the suede cloth she used for her bag was a little tricky to sew. She still managed to sew up a really cool Rhine Valley Bag!
Rhine Valley Bag Patti
Patti used braided handles for her bag. They go very well with the fabric she used, Heritage Studio Collection by Fabric Traditions.
Rhine Valley Bag Vicky
How gorgoeous is that leaf print of Vicky's bag?? She actually had two fabrics at first and couldn't decide which one to use. I like her choice :) Vicky sells awesome things and blogs at Vicky Myers Creations so make sure to stop by!
Rhine Valley Bag Tonya
Tonya used a fake leather for the exterior and matched it with a purple cotton for the lining and the pocket flaps. I agree with her that these two fabrics look wonderful together!
I really hope you like my new design. I always prefered smaller handbags but the big ones are really growing on me :) Are you more of a big bag or a small bag girl? I would love to know!
Bild
11 Comments

XXL-shirt to dress - reloaded

12/2/2013

3 Comments

 
Picture
I posted this free tutorial the other day about how to turn an xxl-shirt into a dress and I finally made a second one! I had to wait for my new t-shirt to arrive, which I got from my choir. I joined the Rochester Oratorio Society last year and I really enjoy singing with them. A couple weeks ago they offered the opportunity to order shirts and hoodies with their logo on the front, I already have a hoodie (in light pink :-)) and since that other shirt for my friend turned out so nicely I decided to order a big shirt for myself and turn it into a dress as well.
Picture
This is just a little bit too big :)
For the basic steps to make this dress, please refer to my free tutorial. Below I will show you how I lengthened my shirt, embellished the sleeves and made the belt.

--- This tutorial is free but for your convenience I decided to offer the complete tutorial as a PDF for download for only $2, if you prefer to have everything in one structured document ---


1. Embellish the sleeves
I didn't want to go with regular sleeves and since I was planning on lengthening my shirt with some nice coordinating cotton fabric I thought I'd be a nice idea to add a small strip of that fabric to the sleeves as well. Another thing I did was attaching a piece of elastic to the wrong side of the sleeve, to get a nice effect. To do this you will have to measure the height of your sleeve and take a piece of elastic of about half that height. Place the elastic centered onto the wrong side of your sleeve, starting approx. 0.75" down from the top edge. Stitch it down to the fabric while pulling it tight, so that the other end of the elastic ends about 0.75" from the bottom edge of the sleeve. This will make the elastic to create crinkles (nice ones!) on your sleeve as shown on the picture to the bottom right.
Picture
I did not take a picture of my original sleeves at the time I made my dress so I am showing you what I did on this white knit fabric instead :)
Picture
The elastic all stitched onto the wrong side of the sleeve. You may even pull it tighter if you prefer.
Next I cut two strips of my cotton fabric (each with a height of 2"), which had the same width as the bottom edge of the sleeves. I put the sleeve and the fabric right sides together and stitched. Next I folded the cotton fabric over to the wrong side of the sleeve, folded down the seam allowance and pinned the cotton fabric down on the sleeve, with the its clean edge being pinned down just about 1/8" above the seam you made in the step before.
Picture
Picture
Picture
Topstitch from the right side of the sleeve to make sure your stitching is even. Stitch approx. 1/8" down from the top edge of the cotton fabric.

I also pulled a strip of elastic through the cotton fabric and tightened it just a little bit, for the sleeve the get a nicer and rounder shape. Stitching the ends of the elastic to the cotton fabric made sure it stayed in place for the next step.

Picture


Next I folded my sleeve in half so that the two short edges were aligned and stitched them right sides together. Then I was ready to attach the sleeve to the shirt (see my previous tutorial for this step).

2. Lengthen the shirt
With a height of 5' 9" I am fairly tall and so I had to lengthen the shirt or I would have risked showing to much... and we certainly don't want that :) So I added two 4" long strips of my cotton fabric to the front and the back of the shirt.
Picture
Put your strip of cotton fabric onto the bottom front edge of the shirt. If the jersey fabric is a little out of shape like here, make sure the edge of the cotton fabric is straight (horizontal).
Picture
I used my serger to attach the cotton fabric to the shirt. Do the same with the other strip of fabric and then stitch the side seams.
3. Adding a belt
I decided to add a little belt to my dress since I didn't quite like the look of it. I wanted it to be fairly long so I actually had to stitch two pieces right sides together along the short ends to get a piece that was about 64" long. I made two of these, so both of my fabric pieces ended up being approx. 64" x 1.75". I put them right sides together, all edges aligned and stitched along both long edges using a 1/4" seam allowance. I used a turning tool to turn the belt right sides out and folded down the seam allowance of both short edges and topstitched them closed.
I acutally put on my dress to find the right height for the belt and pinned it down on the two side seams of the dress. I made sure that the center of the belt was aligned with the center of the back of the shirt. Then I simply topstitched the belt down on the two side seams of the dress.
Picture
The back of the dress. The belt is stitched to the side seams. I did not pull it to tight so I would be able to pull the dress over my head :)
Picture
This is acutally more of a summer dress but I don't think I can wait that long before wearing it. I really like the way it turned out and it took me only about 2 hours to make it :)

Thanks for reading and I hope you like this project :)
Picture
3 Comments

    Enter your email address:

    Delivered by FeedBurner


    Follow on Bloglovin

    RSS Feed

    Anna

    anna's blog -

    Welcome to my blog! I am an accountant who once started out her "career" in the US by designing bag and wallet sewing  patterns! My patterns are available on Etsy and occasionally I will share some of my sewing projects that I work on in my spare free time on my website.  Happy sewing :)

    Categories

    All
    Bags
    Bargains
    Dresses
    Fabric
    Fashion
    Germany
    Giveaway
    Home Dec
    Interfacing
    Review
    Sale
    Seasonal
    Sewing Patterns
    Sewing Tips
    Smartphone Cases
    Special Occasions
    Treasury
    Trips
    Tutorial
    Vacation Projects
    Wallets

    Threading My Way_Featured
    Pattern Spot dot com
    This page contains affiliate links. See my disclosure policy.
    Online Sewing Class
    Craftsy

    Archives

    December 2021
    May 2020
    April 2020
    January 2020
    January 2015
    October 2014
    September 2014
    August 2014
    July 2014
    June 2014
    May 2014
    April 2014
    March 2014
    February 2014
    January 2014
    December 2013
    November 2013
    October 2013
    September 2013
    August 2013
    July 2013
    June 2013
    May 2013
    April 2013
    March 2013
    February 2013
    January 2013
    December 2012
    November 2012
    October 2012
    September 2012
    August 2012
    July 2012
    June 2012
    May 2012

Powered by Create your own unique website with customizable templates.