
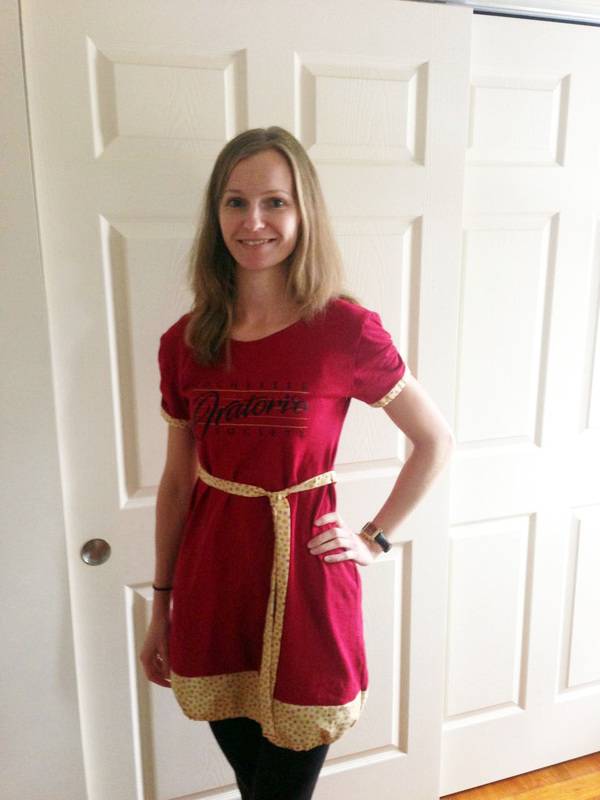
I posted this free tutorial the other day about how to turn an xxl-shirt into a dress and I finally made a second one! I had to wait for my new t-shirt to arrive, which I got from my choir. I joined the Rochester Oratorio Society last year and I really enjoy singing with them. A couple weeks ago they offered the opportunity to order shirts and hoodies with their logo on the front, I already have a hoodie (in light pink :-)) and since that other shirt for my friend turned out so nicely I decided to order a big shirt for myself and turn it into a dress as well.
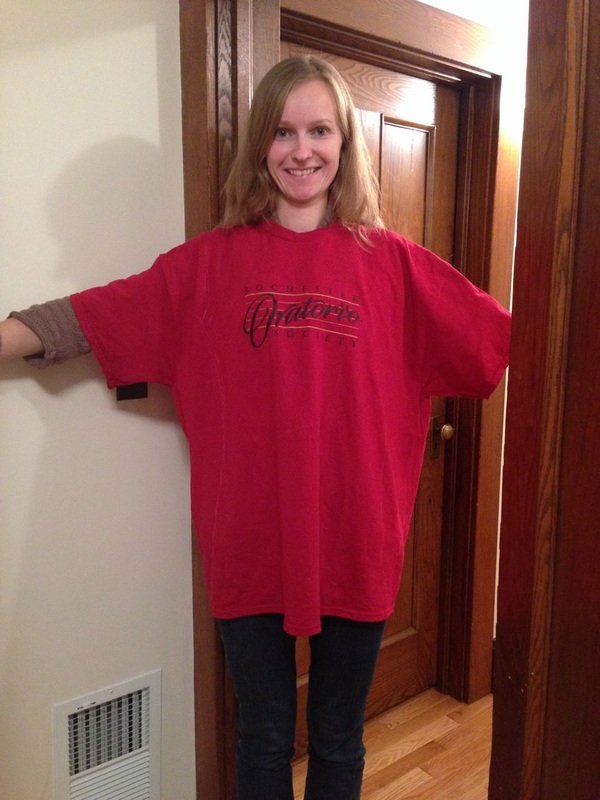
This is just a little bit too big :)
For the basic steps to make this dress, please refer to my free tutorial. Below I will show you how I lengthened my shirt, embellished the sleeves and made the belt.
--- This tutorial is free but for your convenience I decided to offer the complete tutorial as a PDF for download for only $2, if you prefer to have everything in one structured document ---
1. Embellish the sleeves
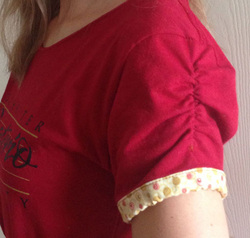
I didn't want to go with regular sleeves and since I was planning on lengthening my shirt with some nice coordinating cotton fabric I thought I'd be a nice idea to add a small strip of that fabric to the sleeves as well. Another thing I did was attaching a piece of elastic to the wrong side of the sleeve, to get a nice effect. To do this you will have to measure the height of your sleeve and take a piece of elastic of about half that height. Place the elastic centered onto the wrong side of your sleeve, starting approx. 0.75" down from the top edge. Stitch it down to the fabric while pulling it tight, so that the other end of the elastic ends about 0.75" from the bottom edge of the sleeve. This will make the elastic to create crinkles (nice ones!) on your sleeve as shown on the picture to the bottom right.
--- This tutorial is free but for your convenience I decided to offer the complete tutorial as a PDF for download for only $2, if you prefer to have everything in one structured document ---
1. Embellish the sleeves
I didn't want to go with regular sleeves and since I was planning on lengthening my shirt with some nice coordinating cotton fabric I thought I'd be a nice idea to add a small strip of that fabric to the sleeves as well. Another thing I did was attaching a piece of elastic to the wrong side of the sleeve, to get a nice effect. To do this you will have to measure the height of your sleeve and take a piece of elastic of about half that height. Place the elastic centered onto the wrong side of your sleeve, starting approx. 0.75" down from the top edge. Stitch it down to the fabric while pulling it tight, so that the other end of the elastic ends about 0.75" from the bottom edge of the sleeve. This will make the elastic to create crinkles (nice ones!) on your sleeve as shown on the picture to the bottom right.
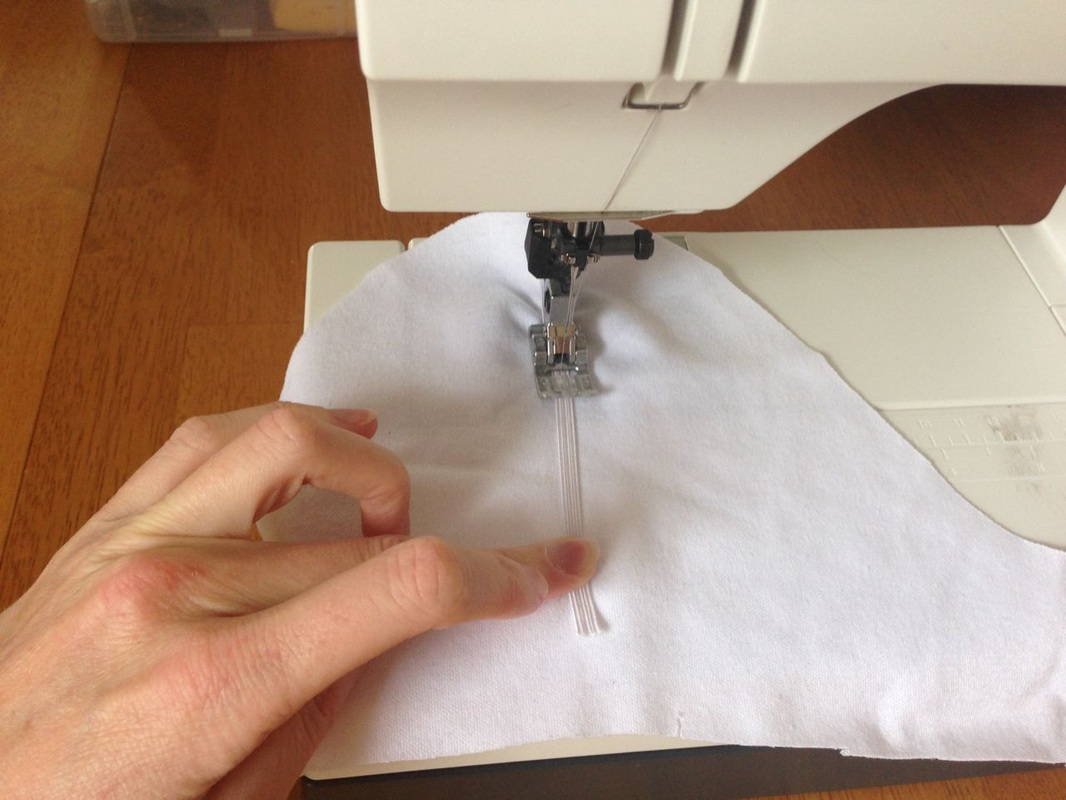 I did not take a picture of my original sleeves at the time I made my dress so I am showing you what I did on this white knit fabric instead :) |  The elastic all stitched onto the wrong side of the sleeve. You may even pull it tighter if you prefer. |
Next I cut two strips of my cotton fabric (each with a height of 2"), which had the same width as the bottom edge of the sleeves. I put the sleeve and the fabric right sides together and stitched. Next I folded the cotton fabric over to the wrong side of the sleeve, folded down the seam allowance and pinned the cotton fabric down on the sleeve, with the its clean edge being pinned down just about 1/8" above the seam you made in the step before.
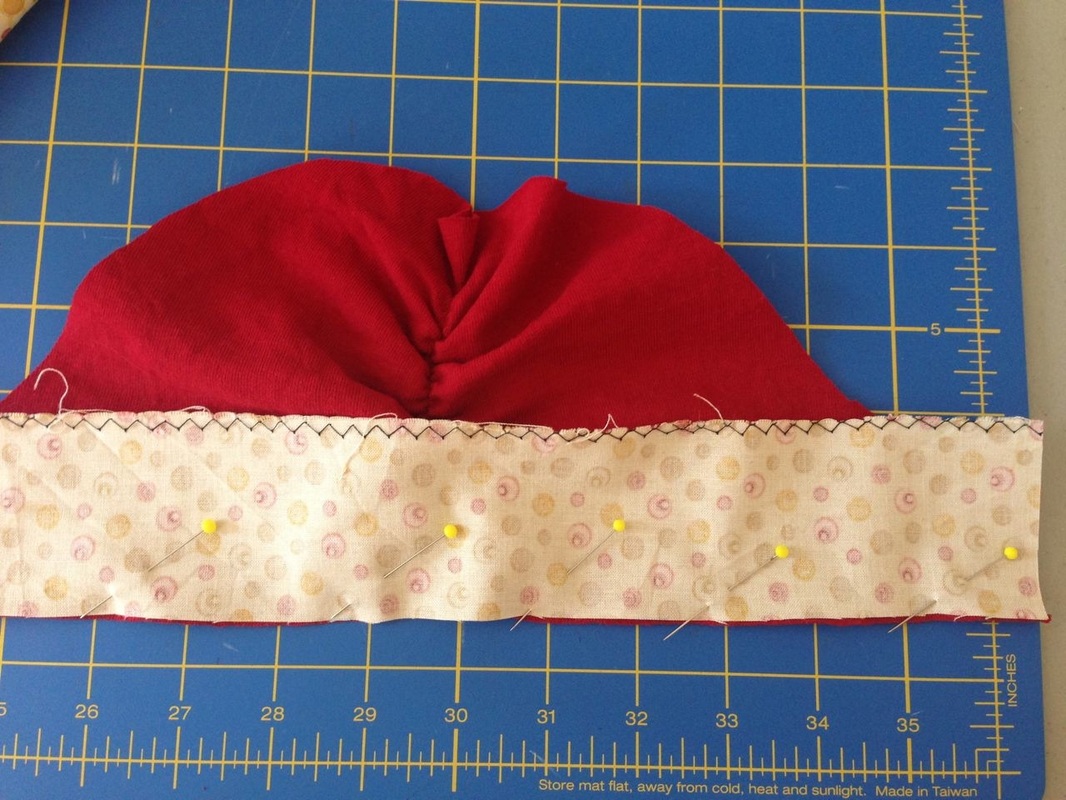 | 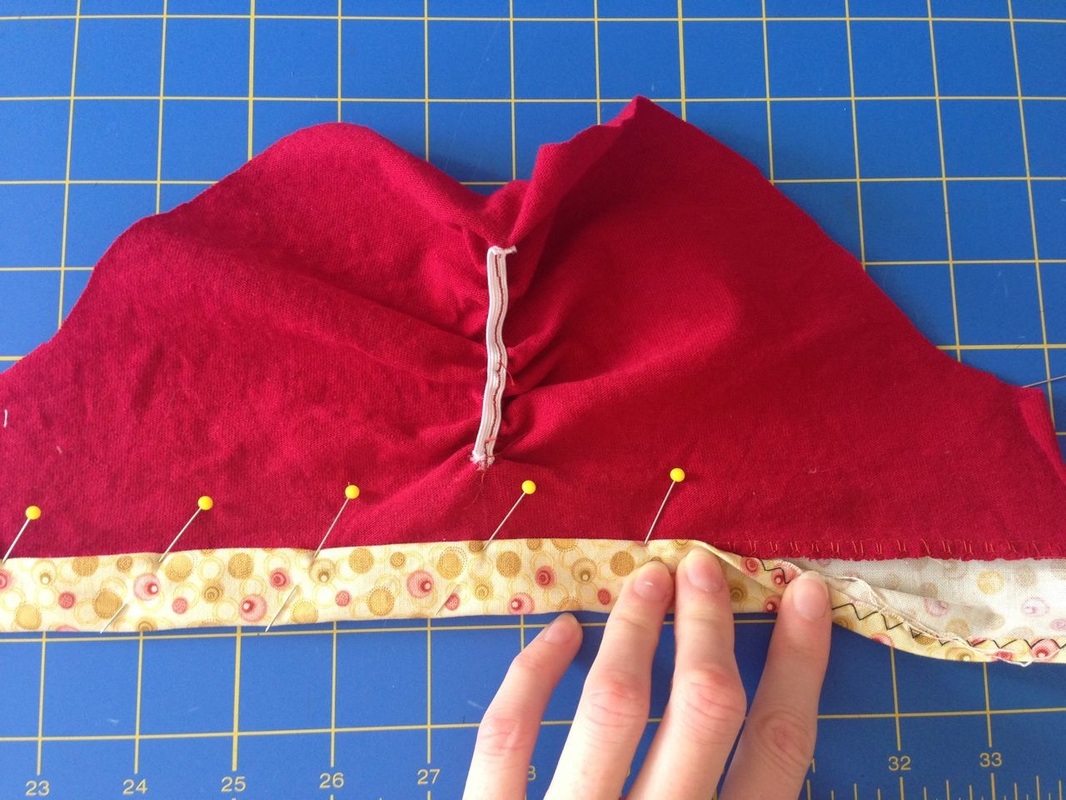 |
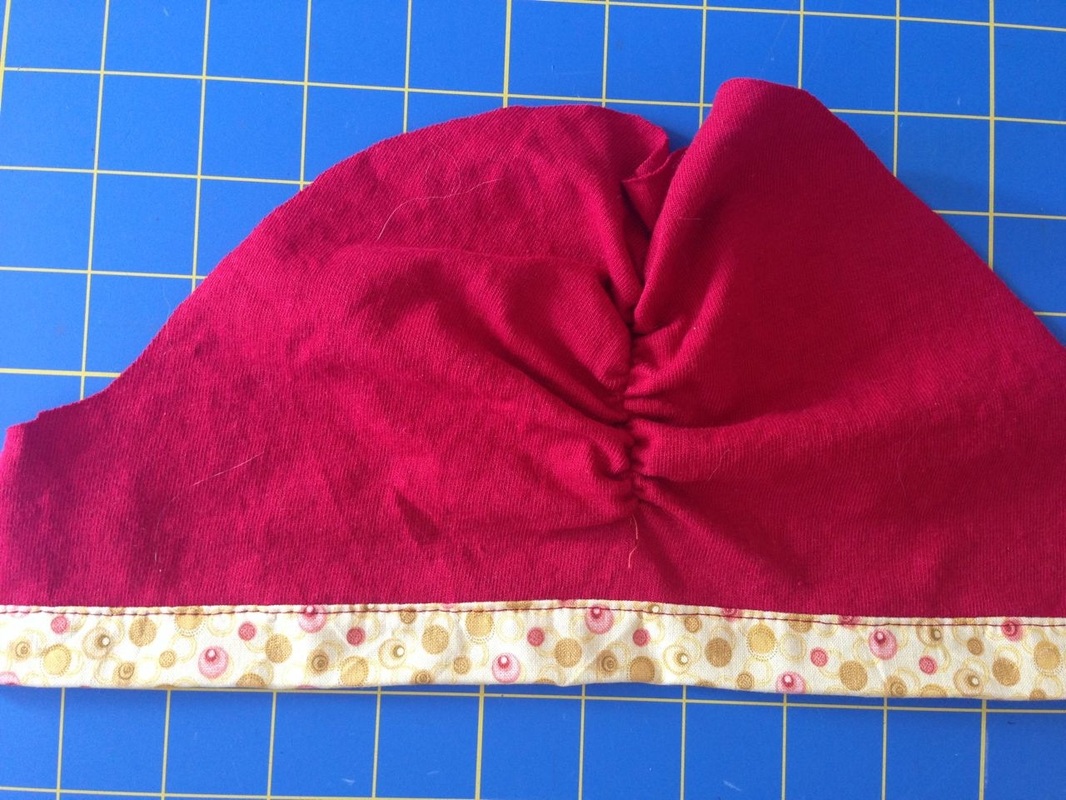
Topstitch from the right side of the sleeve to make sure your stitching is even. Stitch approx. 1/8" down from the top edge of the cotton fabric.
I also pulled a strip of elastic through the cotton fabric and tightened it just a little bit, for the sleeve the get a nicer and rounder shape. Stitching the ends of the elastic to the cotton fabric made sure it stayed in place for the next step.
I also pulled a strip of elastic through the cotton fabric and tightened it just a little bit, for the sleeve the get a nicer and rounder shape. Stitching the ends of the elastic to the cotton fabric made sure it stayed in place for the next step.
Next I folded my sleeve in half so that the two short edges were aligned and stitched them right sides together. Then I was ready to attach the sleeve to the shirt (see my previous tutorial for this step).
2. Lengthen the shirt
With a height of 5' 9" I am fairly tall and so I had to lengthen the shirt or I would have risked showing to much... and we certainly don't want that :) So I added two 4" long strips of my cotton fabric to the front and the back of the shirt.
With a height of 5' 9" I am fairly tall and so I had to lengthen the shirt or I would have risked showing to much... and we certainly don't want that :) So I added two 4" long strips of my cotton fabric to the front and the back of the shirt.
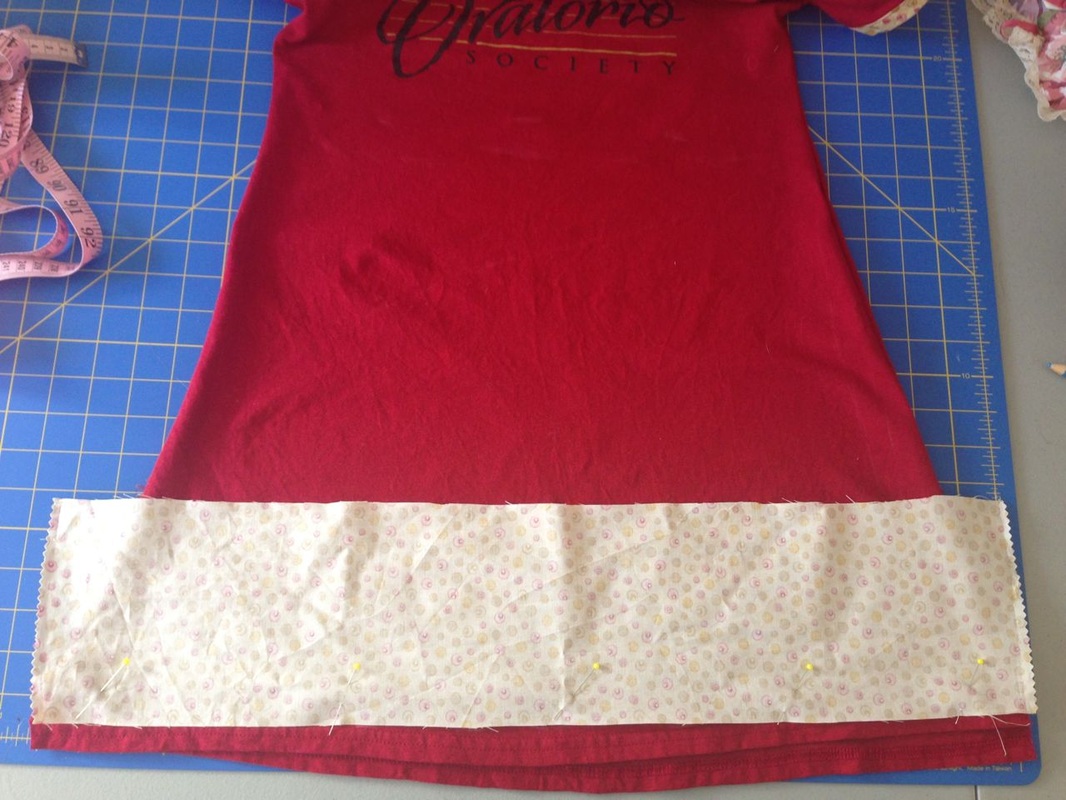 Put your strip of cotton fabric onto the bottom front edge of the shirt. If the jersey fabric is a little out of shape like here, make sure the edge of the cotton fabric is straight (horizontal). | 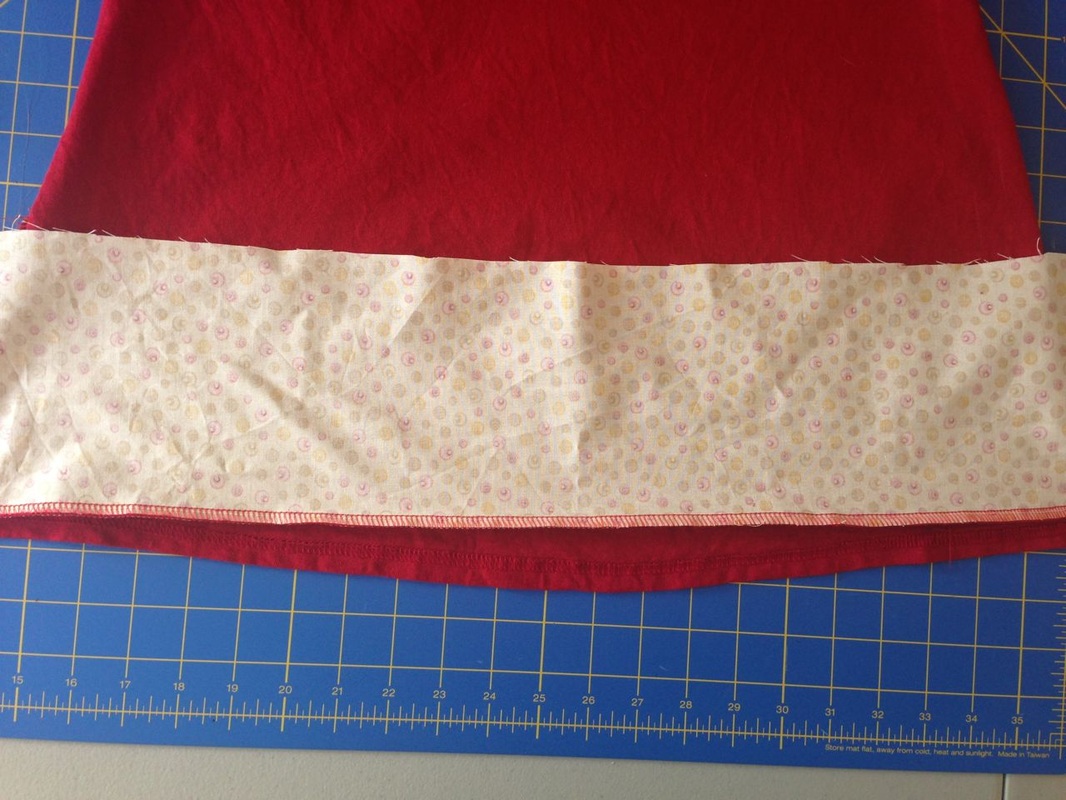 I used my serger to attach the cotton fabric to the shirt. Do the same with the other strip of fabric and then stitch the side seams. |
3. Adding a belt
I decided to add a little belt to my dress since I didn't quite like the look of it. I wanted it to be fairly long so I actually had to stitch two pieces right sides together along the short ends to get a piece that was about 64" long. I made two of these, so both of my fabric pieces ended up being approx. 64" x 1.75". I put them right sides together, all edges aligned and stitched along both long edges using a 1/4" seam allowance. I used a turning tool to turn the belt right sides out and folded down the seam allowance of both short edges and topstitched them closed.
I acutally put on my dress to find the right height for the belt and pinned it down on the two side seams of the dress. I made sure that the center of the belt was aligned with the center of the back of the shirt. Then I simply topstitched the belt down on the two side seams of the dress.
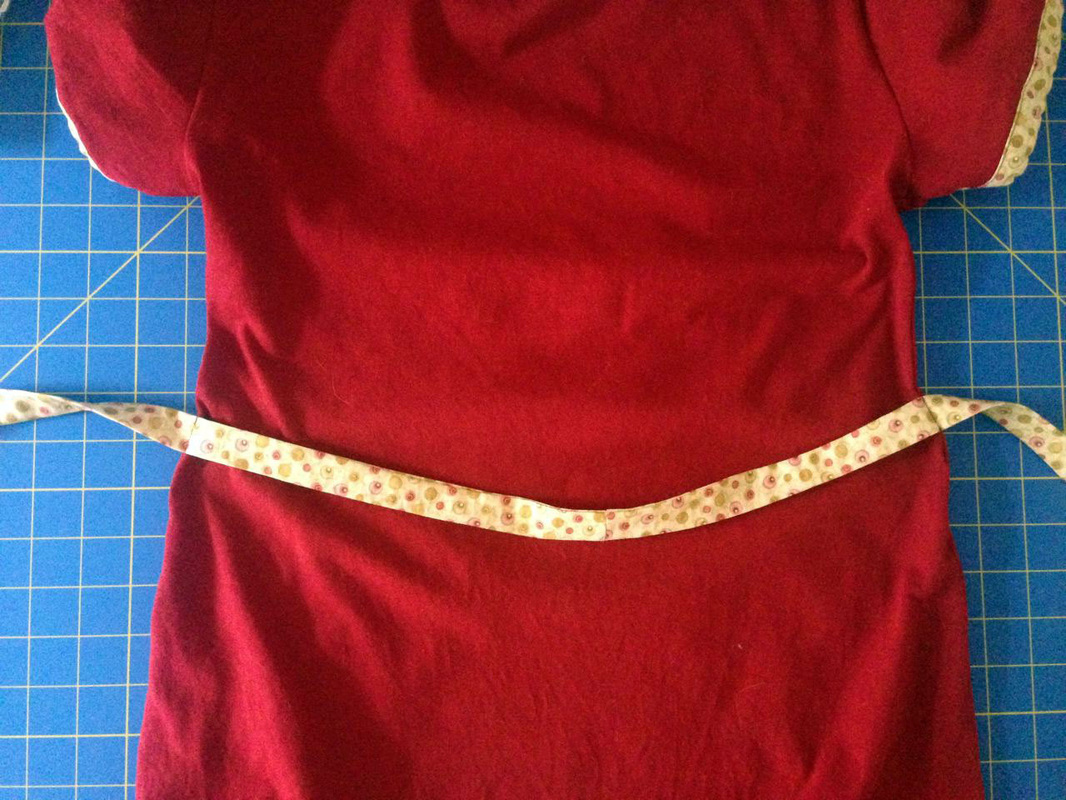 The back of the dress. The belt is stitched to the side seams. I did not pull it to tight so I would be able to pull the dress over my head :) | 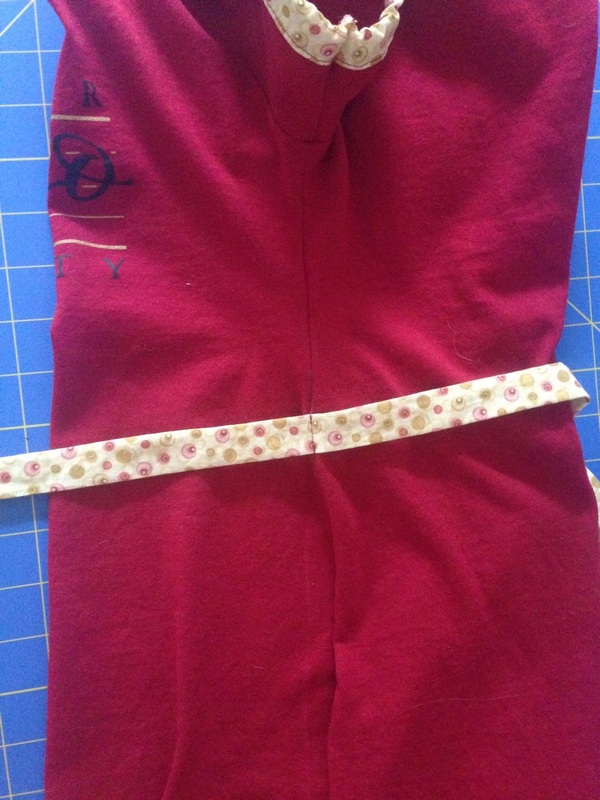 |
This is acutally more of a summer dress but I don't think I can wait that long before wearing it. I really like the way it turned out and it took me only about 2 hours to make it :)
Thanks for reading and I hope you like this project :)
Thanks for reading and I hope you like this project :)


 RSS Feed


