charmed Liebling
  • home
  • pattern shop
    • wallet patterns
    • bag patterns
    • laptop and messenger bag pattern
  • items for sale
    • custom orders
  • free tutorials
  • contact
  • about

Celebrate with me: 40% off ALL my patterns on ETSY!

7/14/2014

2 Comments

 
Bild
Yesterday was such a happy day for me: Germany won the Soccer World Championship!! Woohoooo!!!!
This tournament is held every four years and took place in Brazil this time. It is a very big deal for Germans - or Europeans for that matter - since we are crazy about soccer - or football as we call it.
To celebrate this epic win I decided to give you a big discount of 40% on all of my PDF sewing patterns which are currently listed in my Etsy shop. Use the following coupon code during checkout: 
WORLDCHAMPION2014
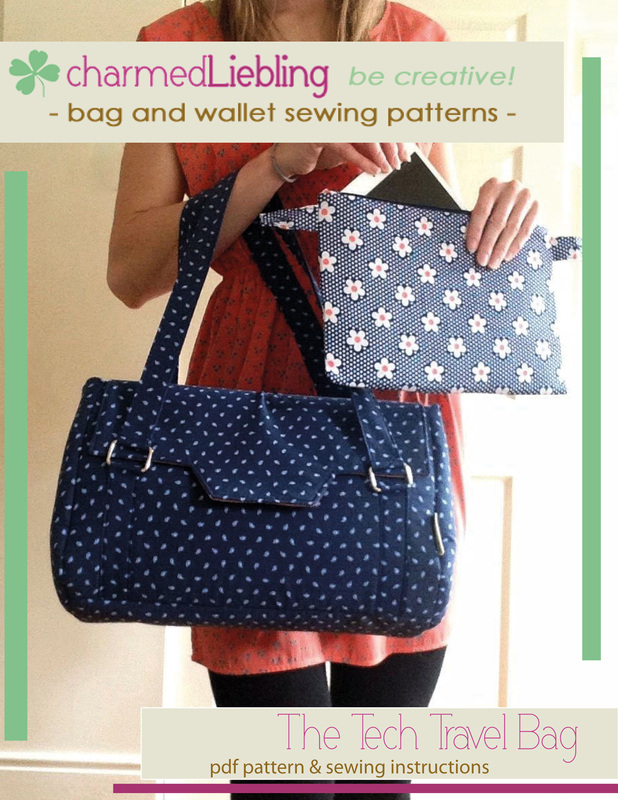
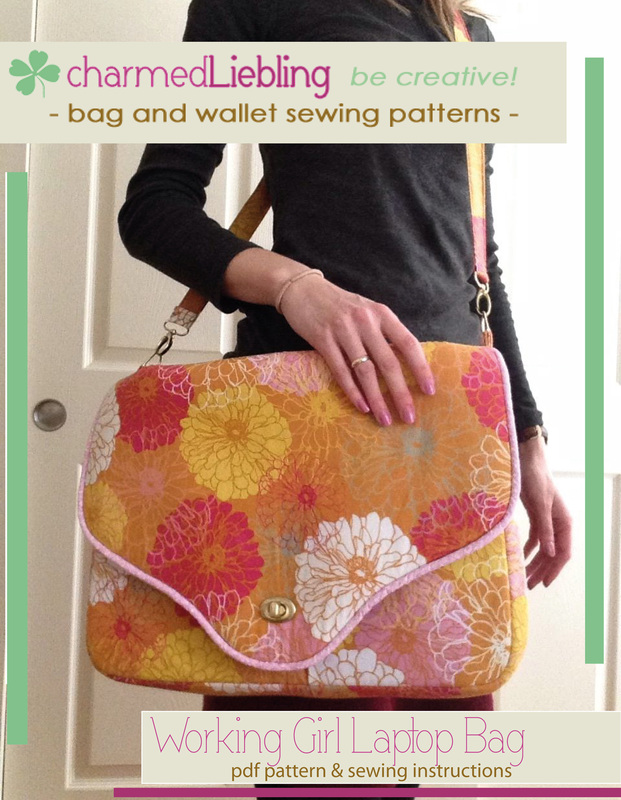
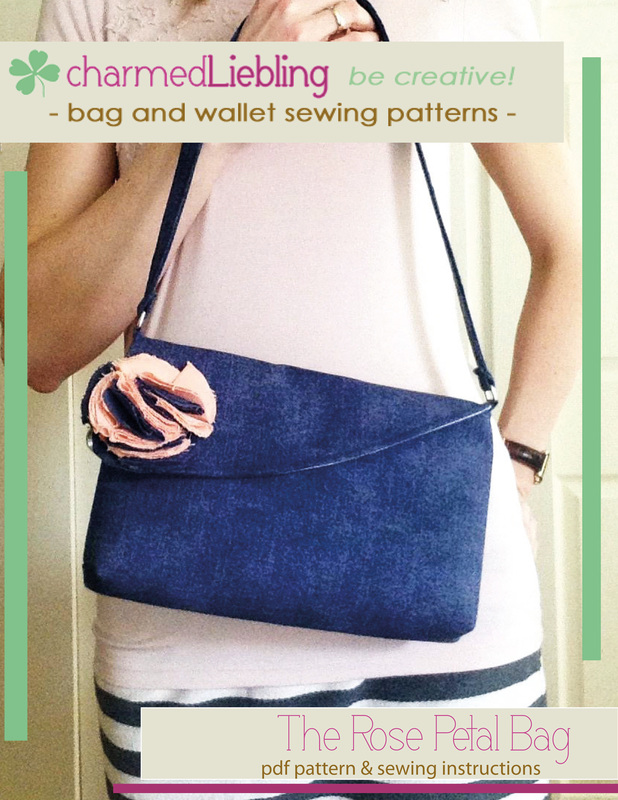
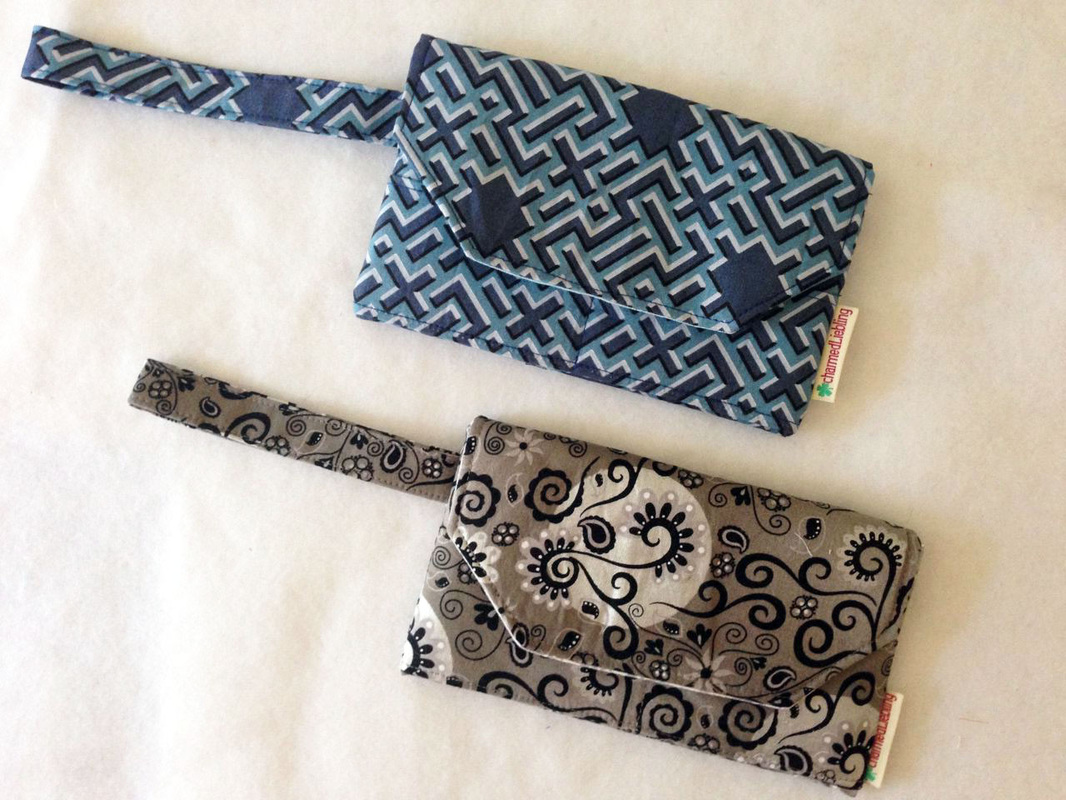
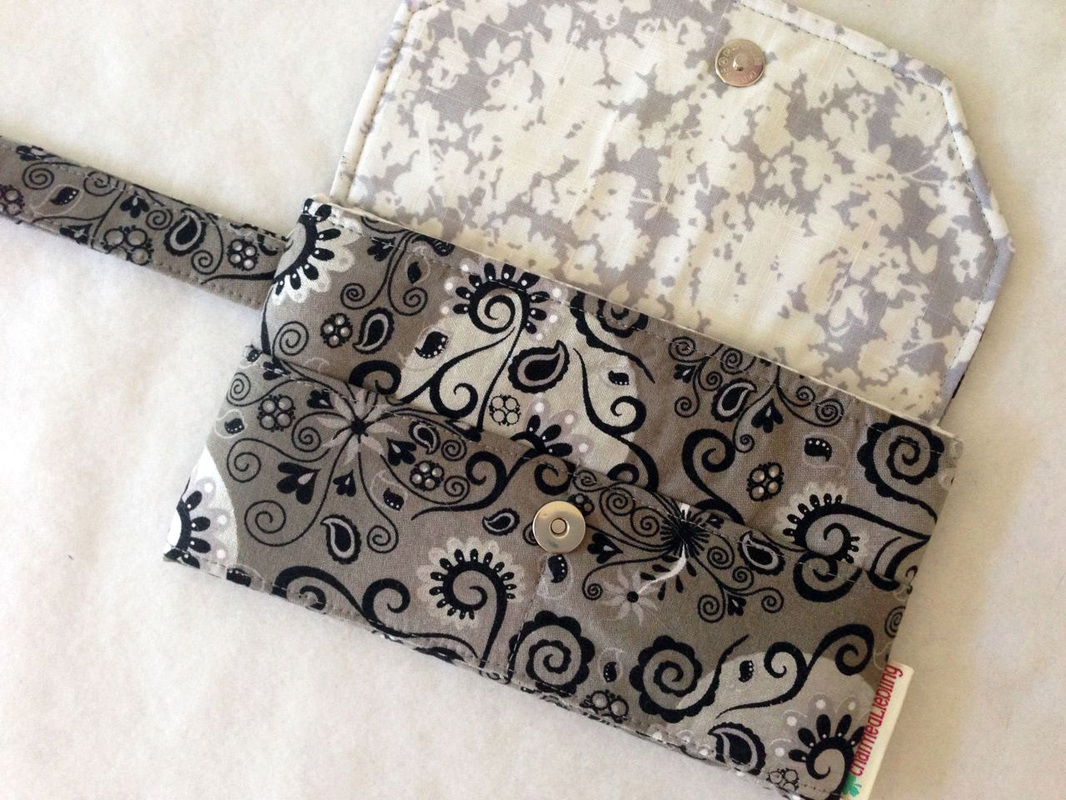
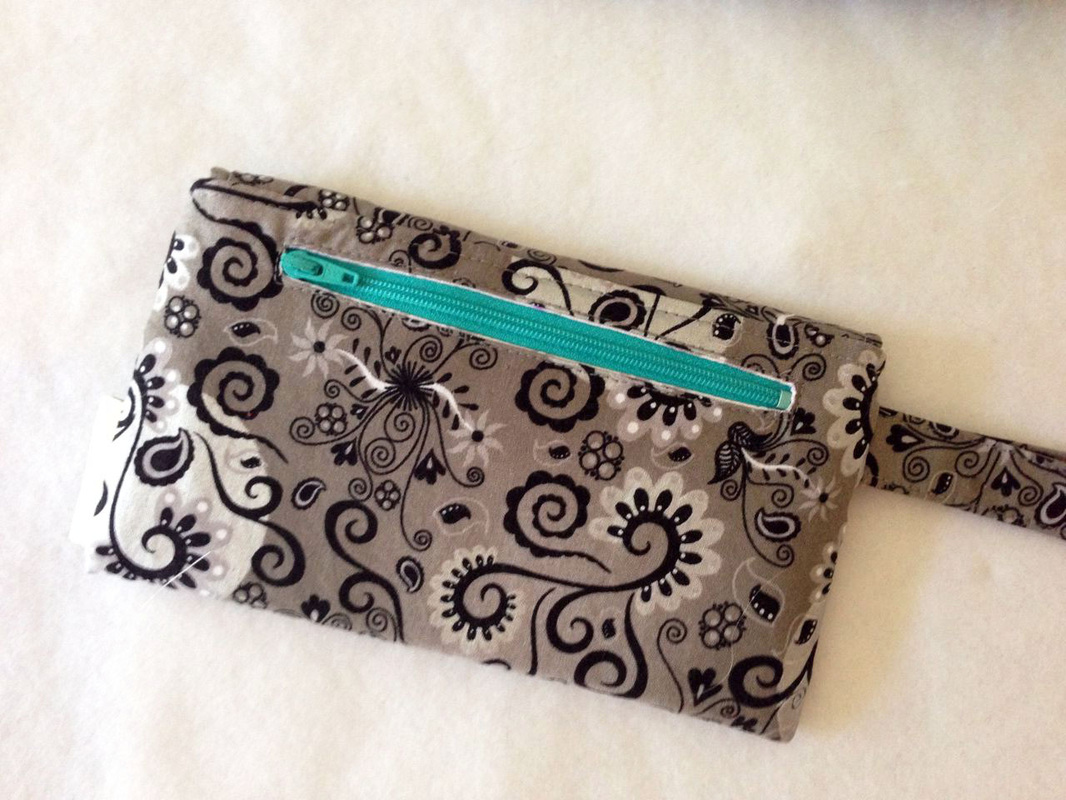
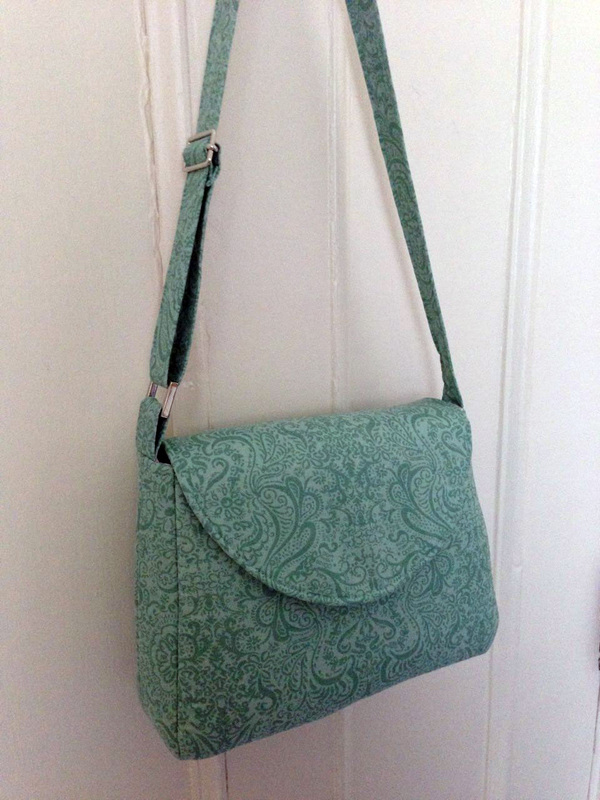
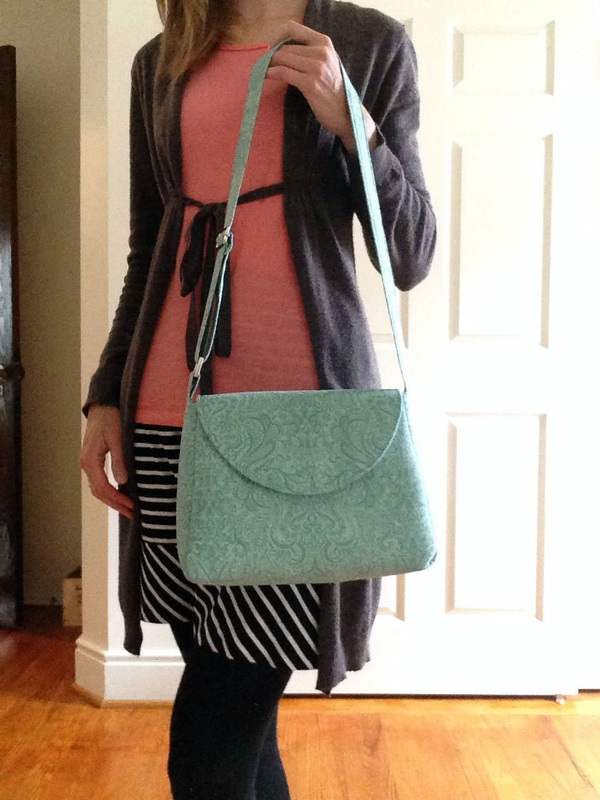
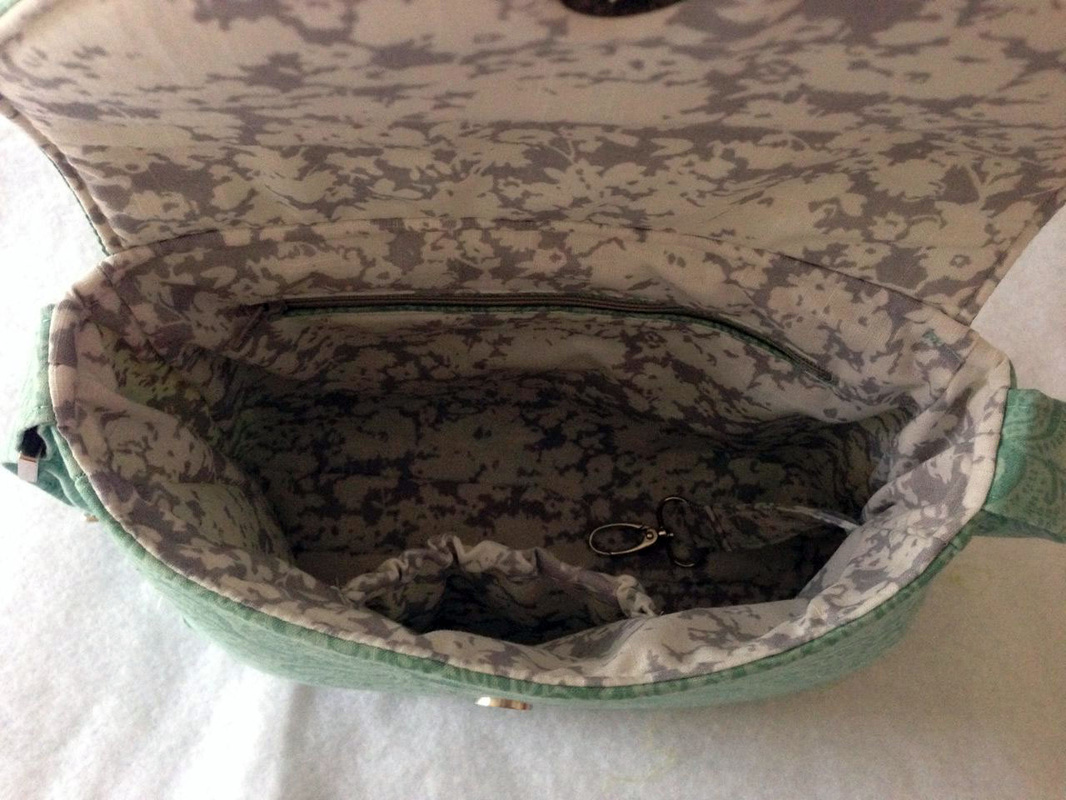
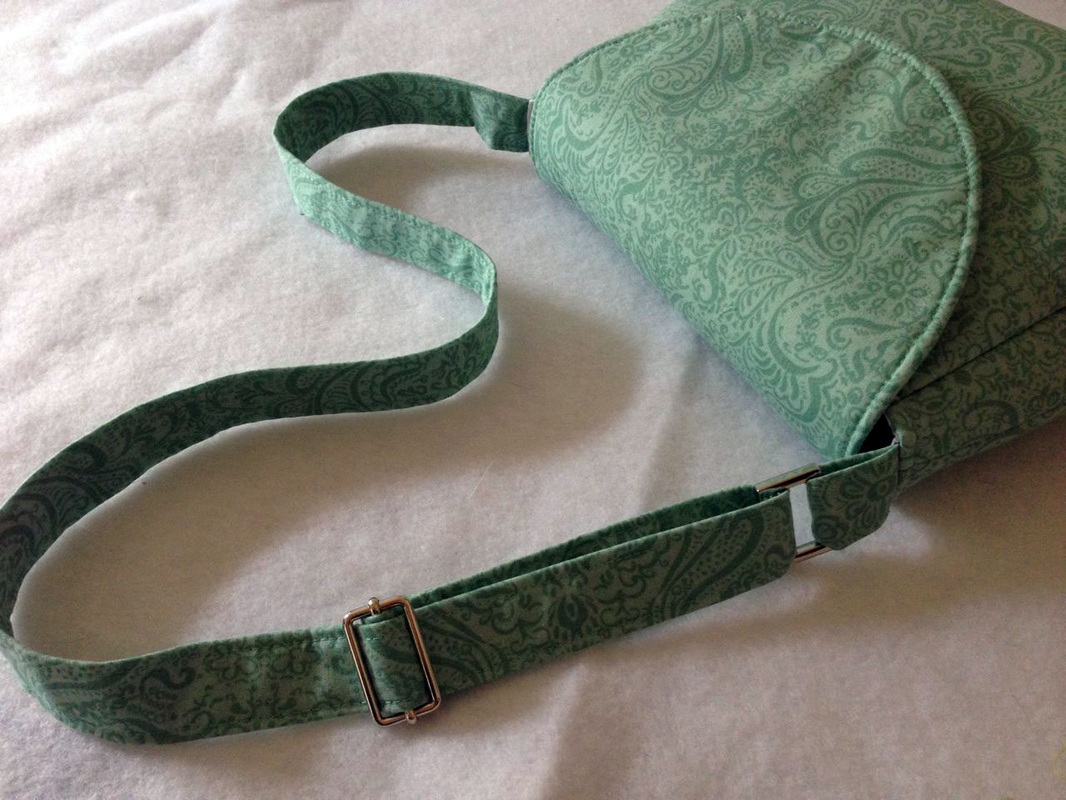
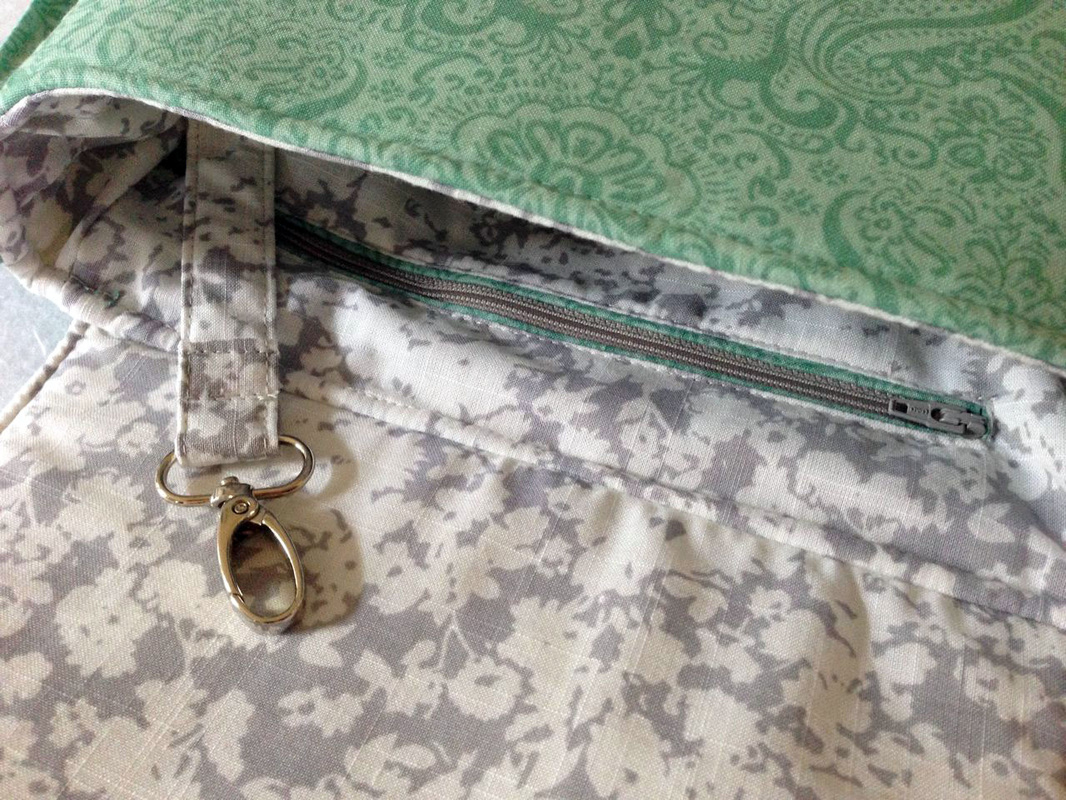
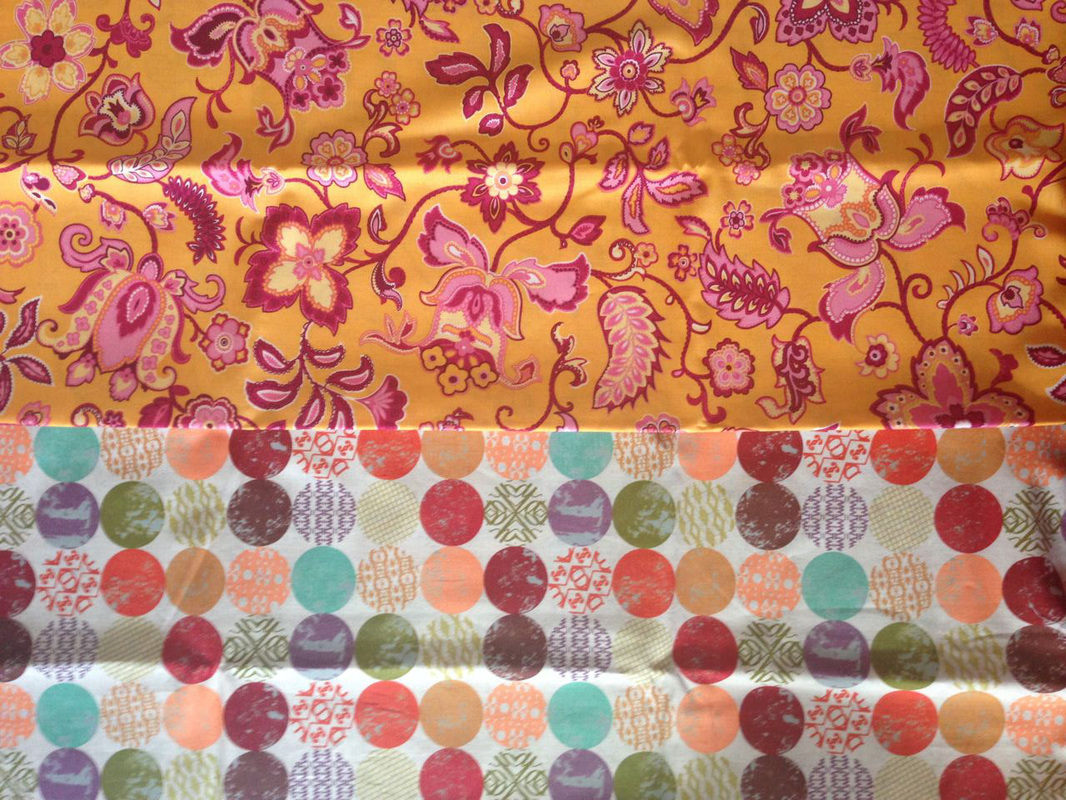
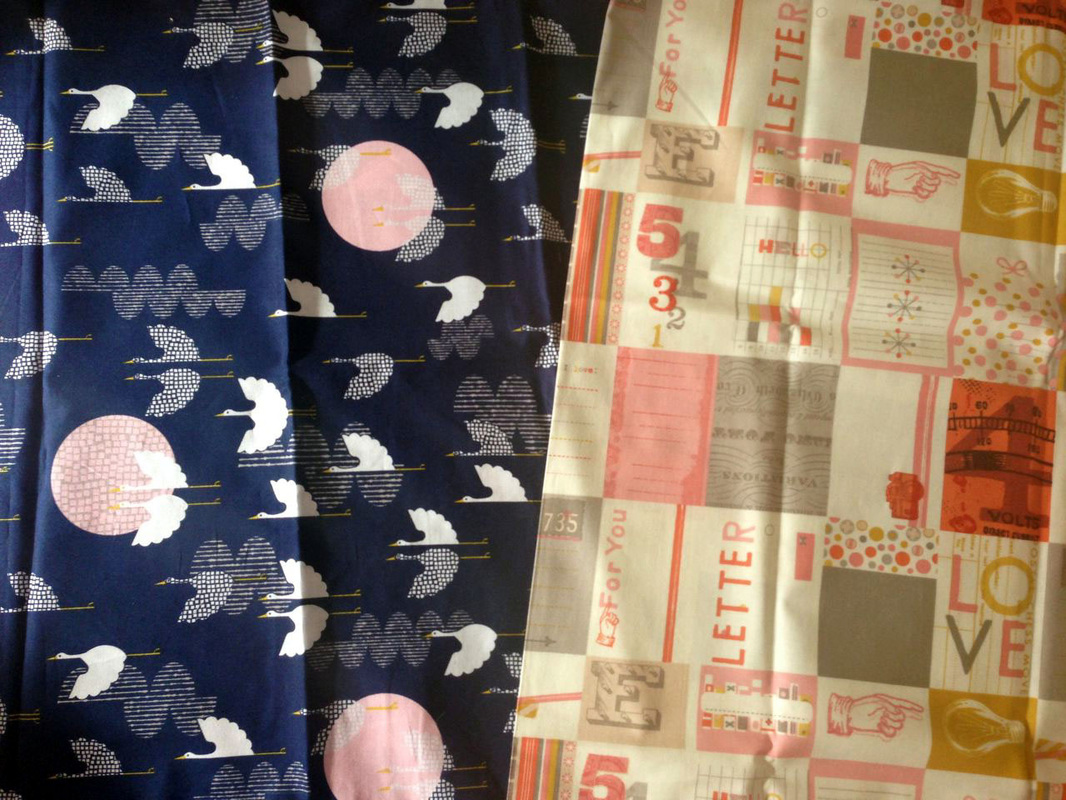
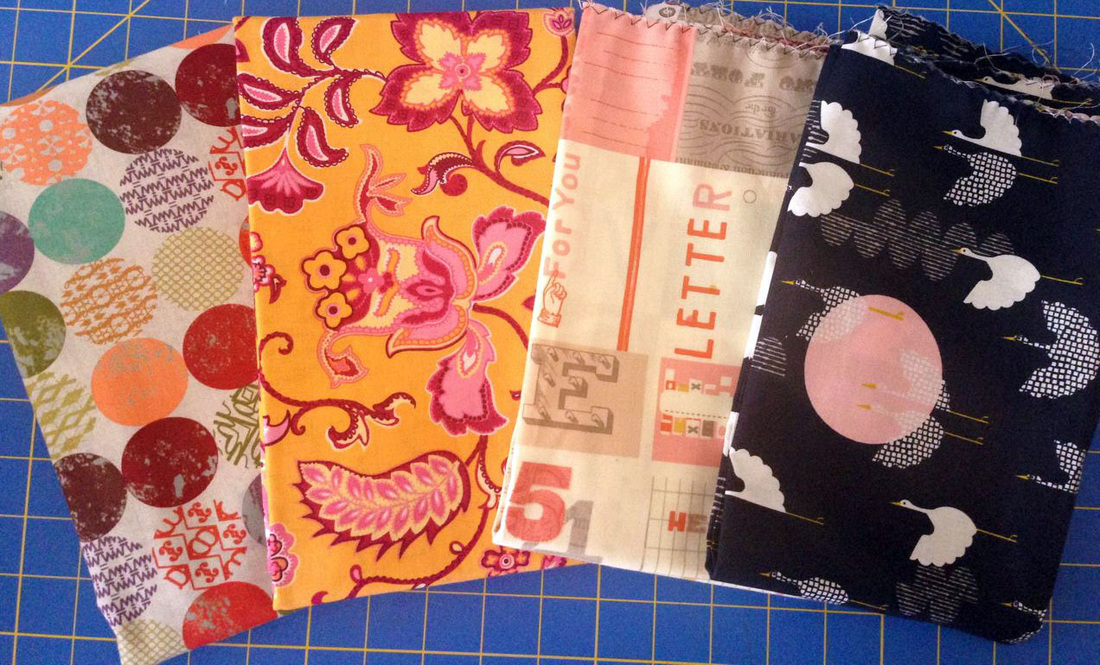
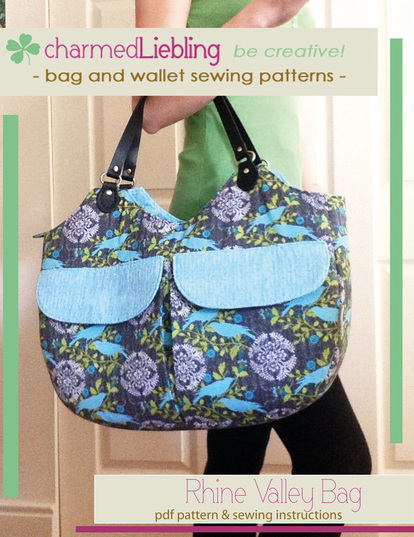
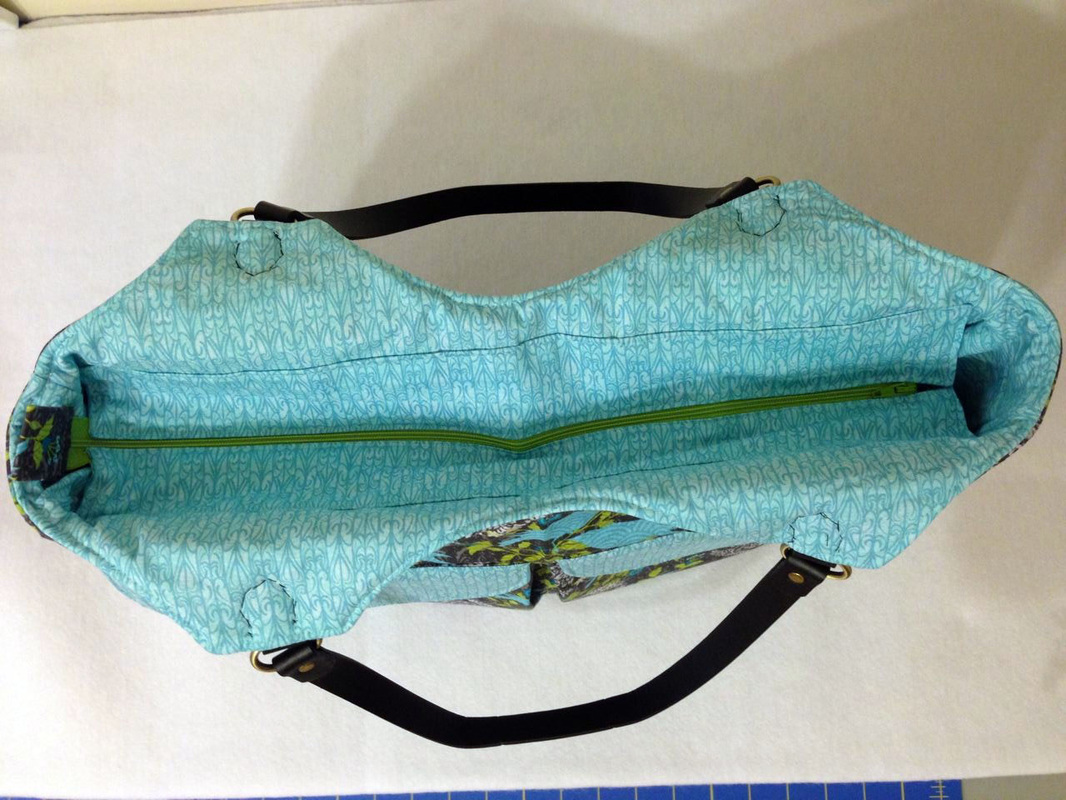
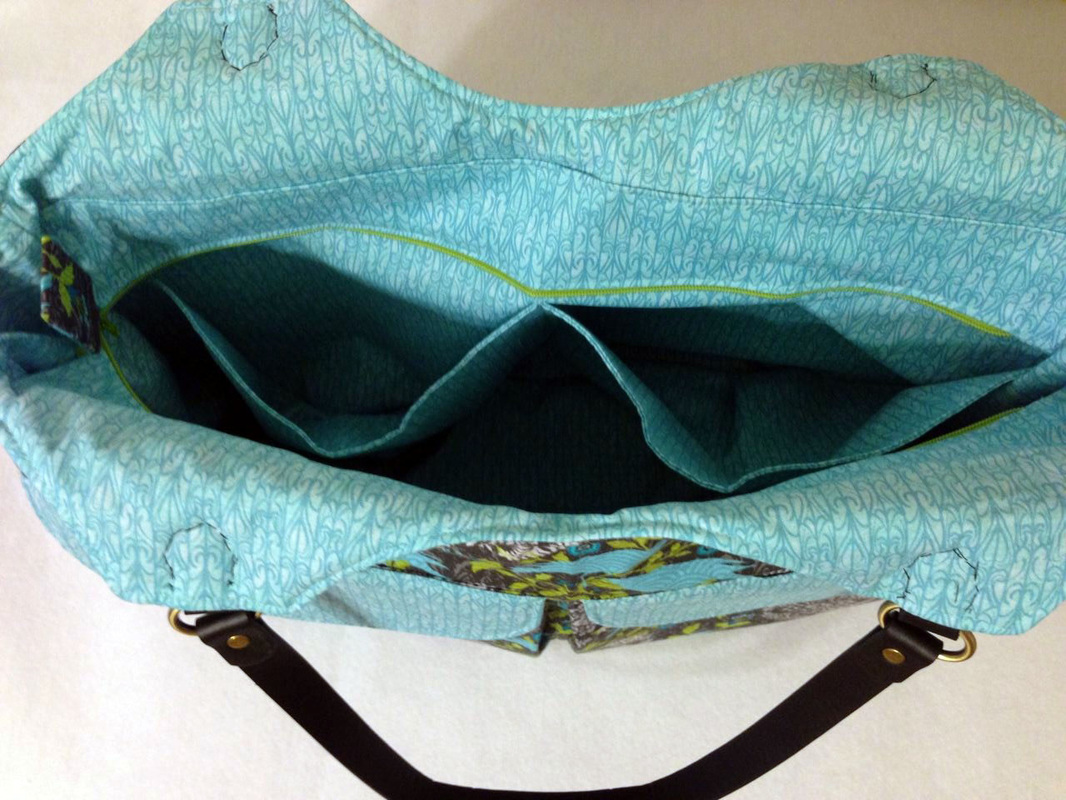
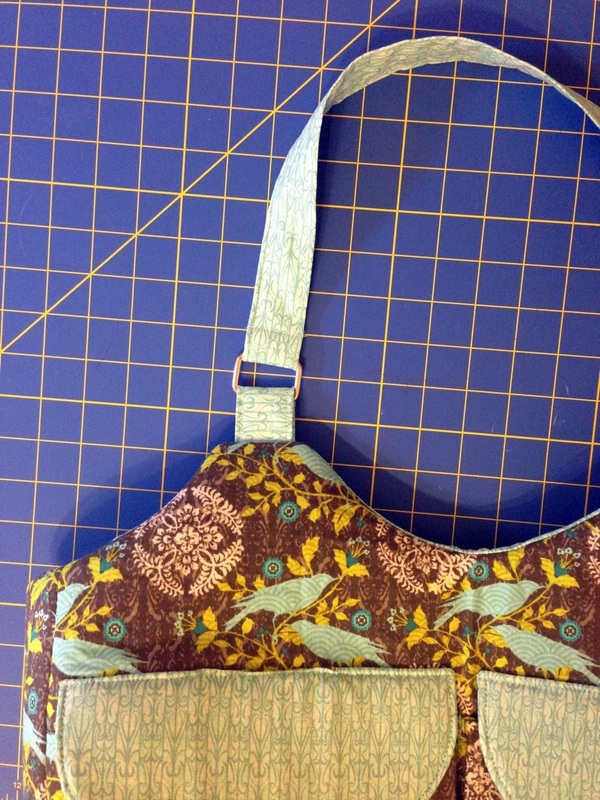
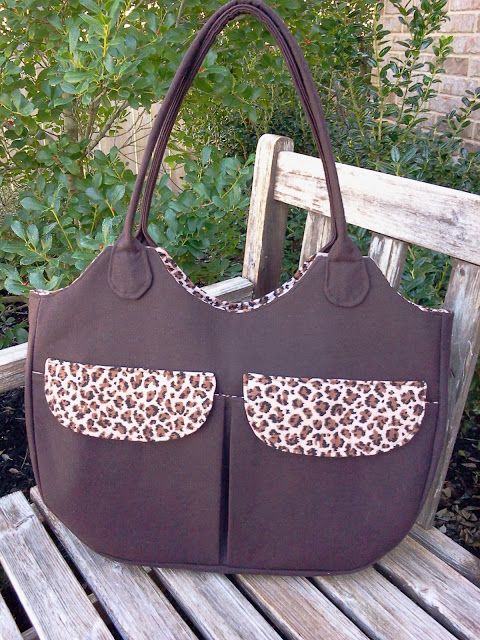
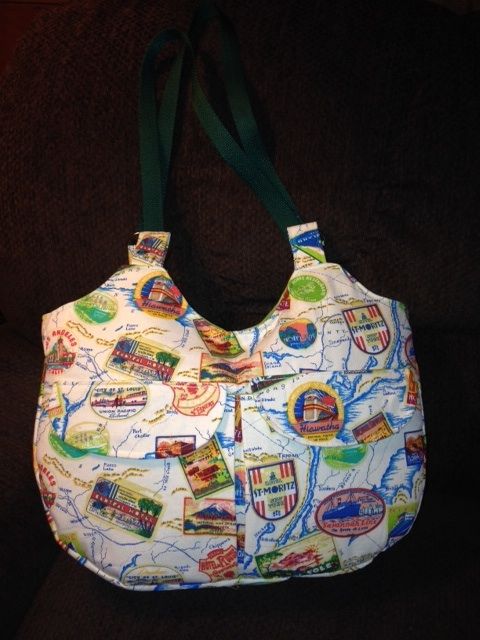
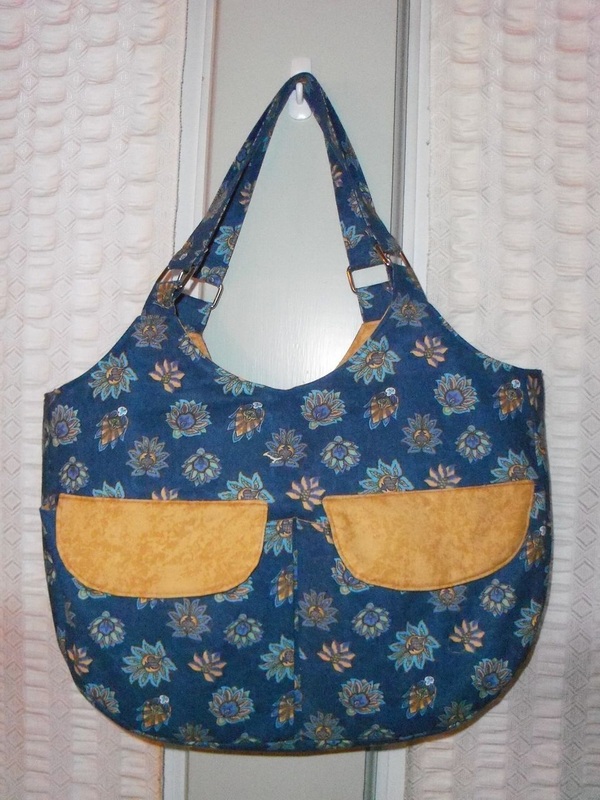
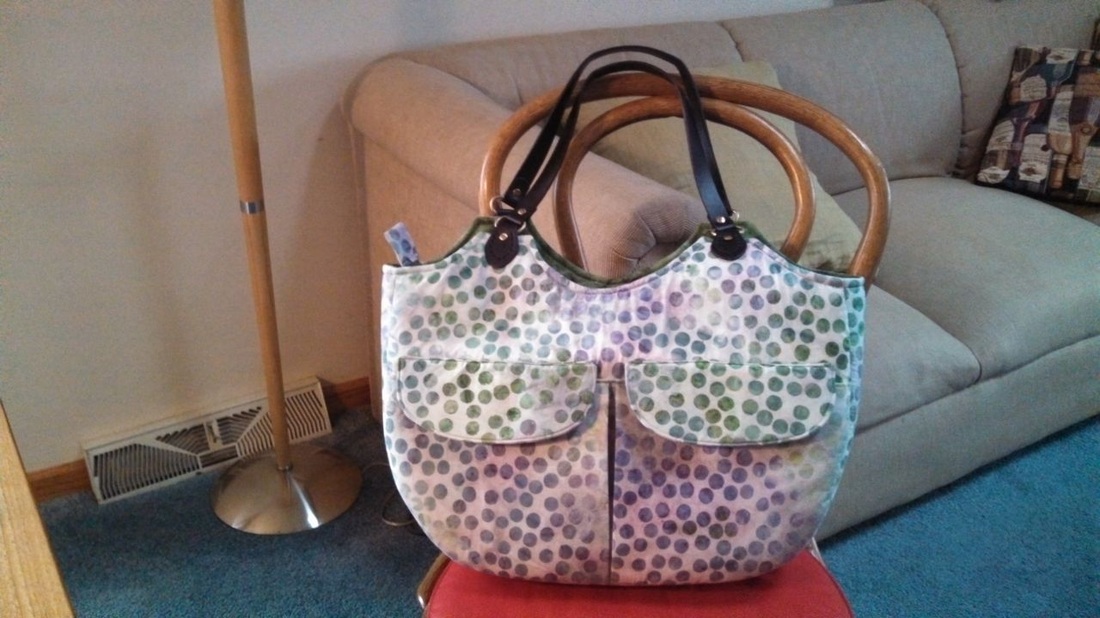
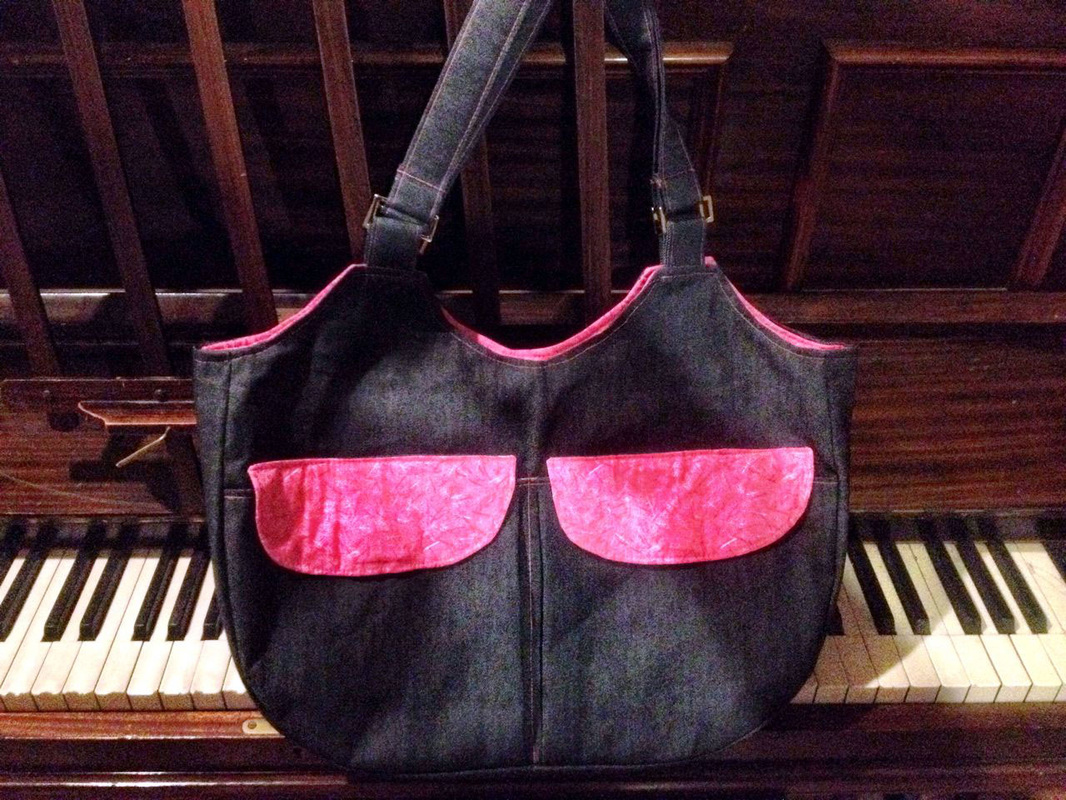
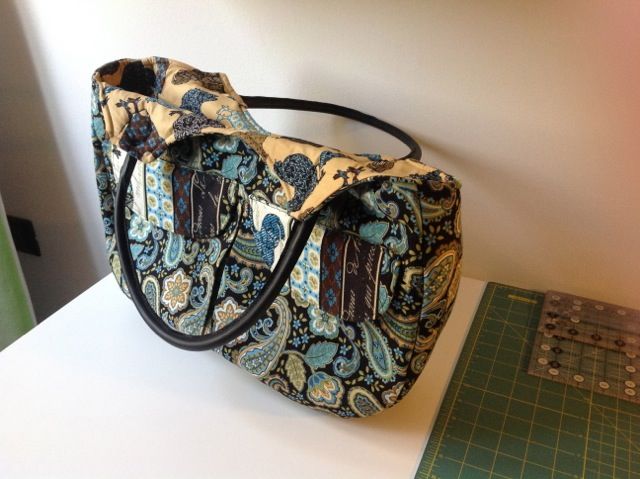
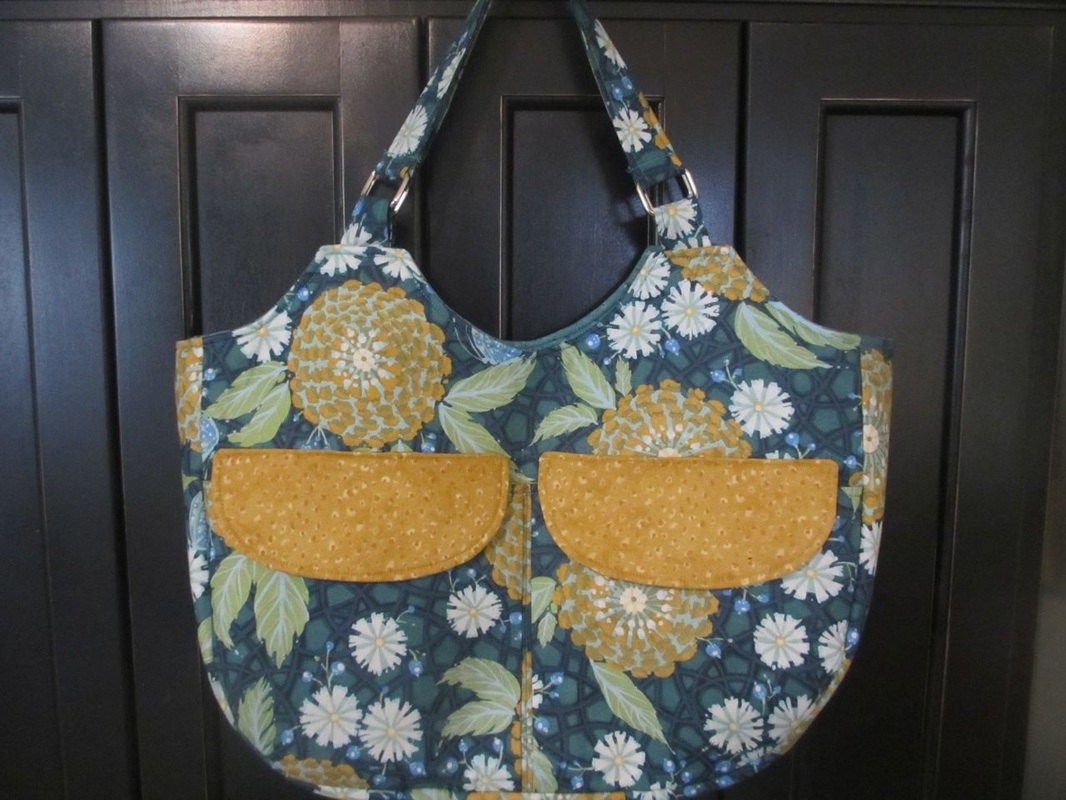
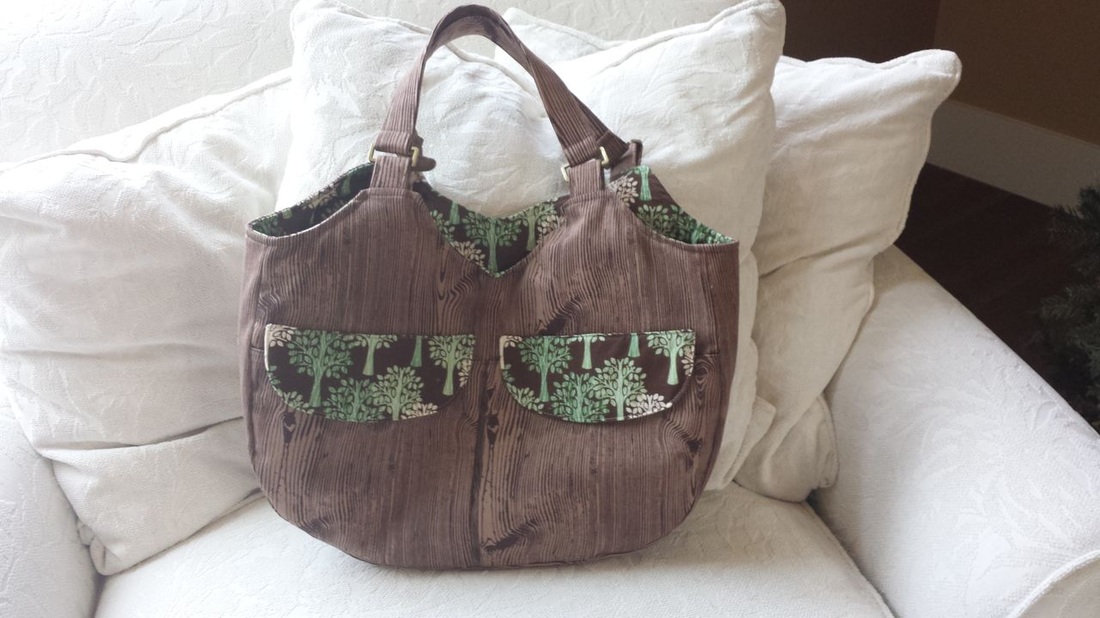
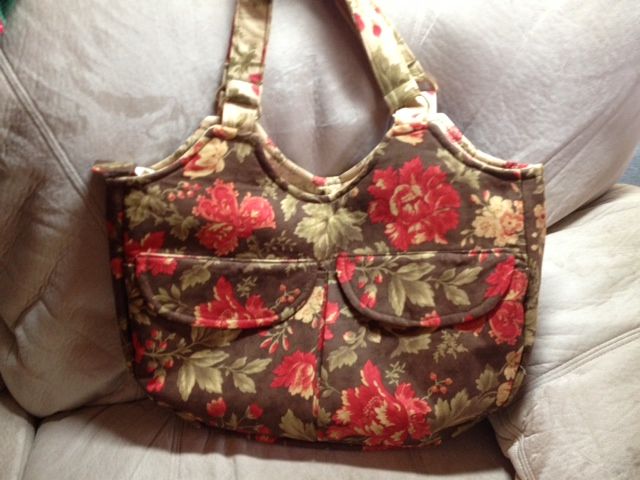
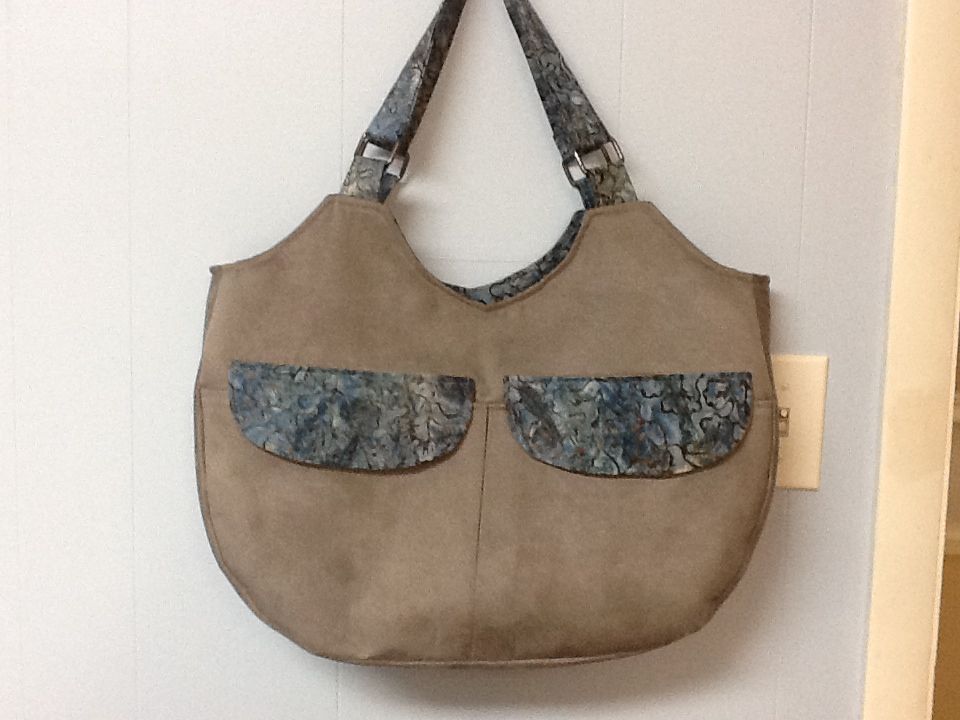
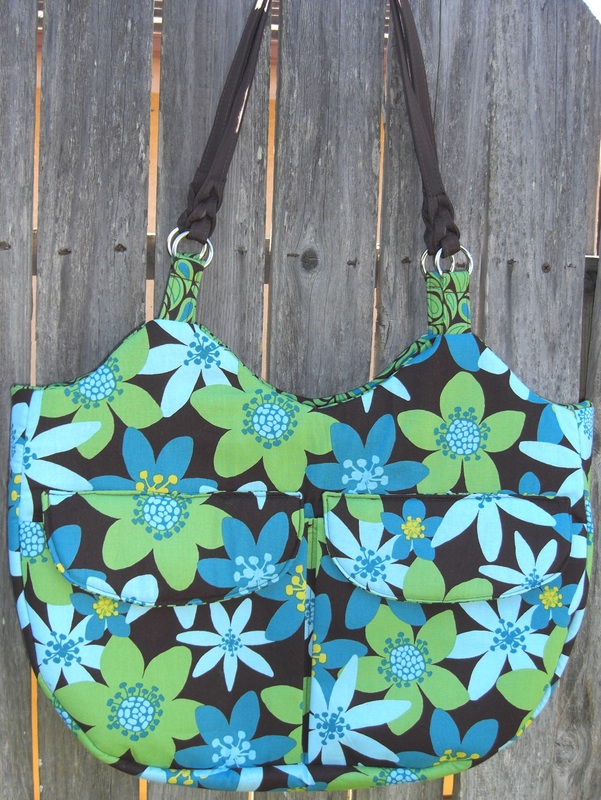
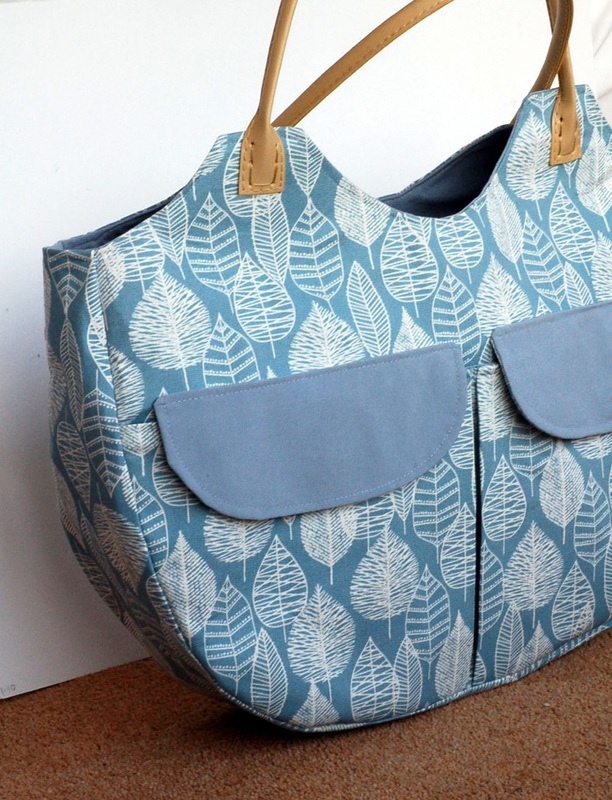
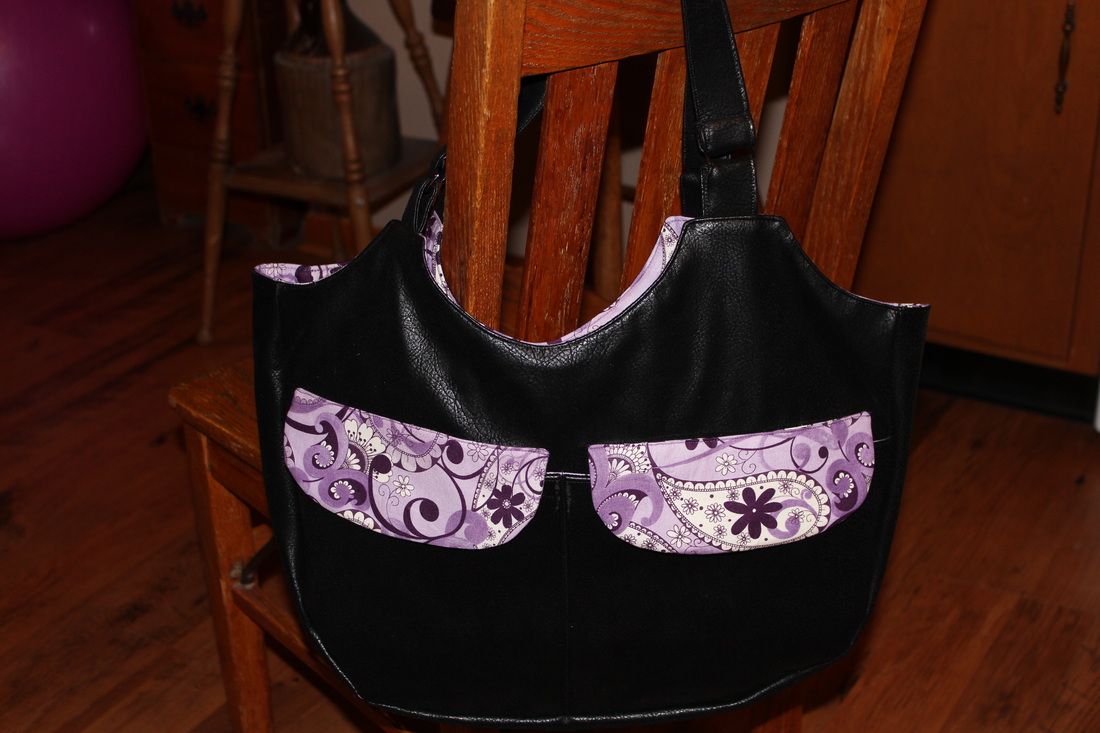
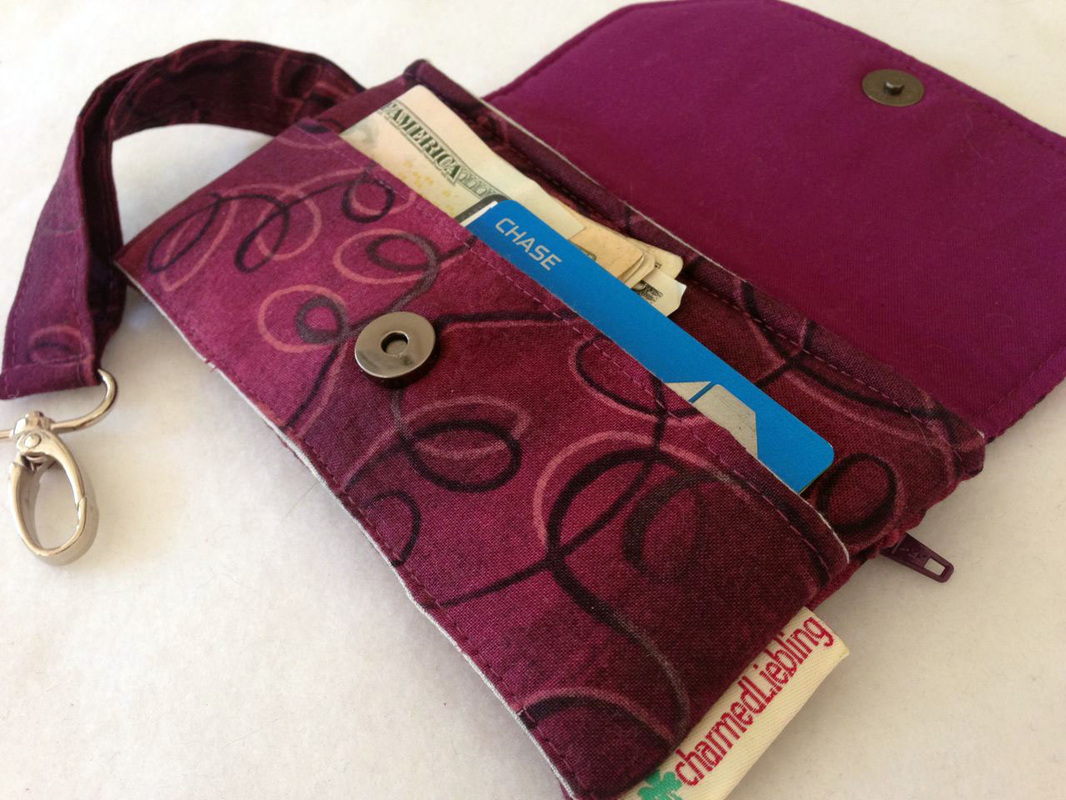
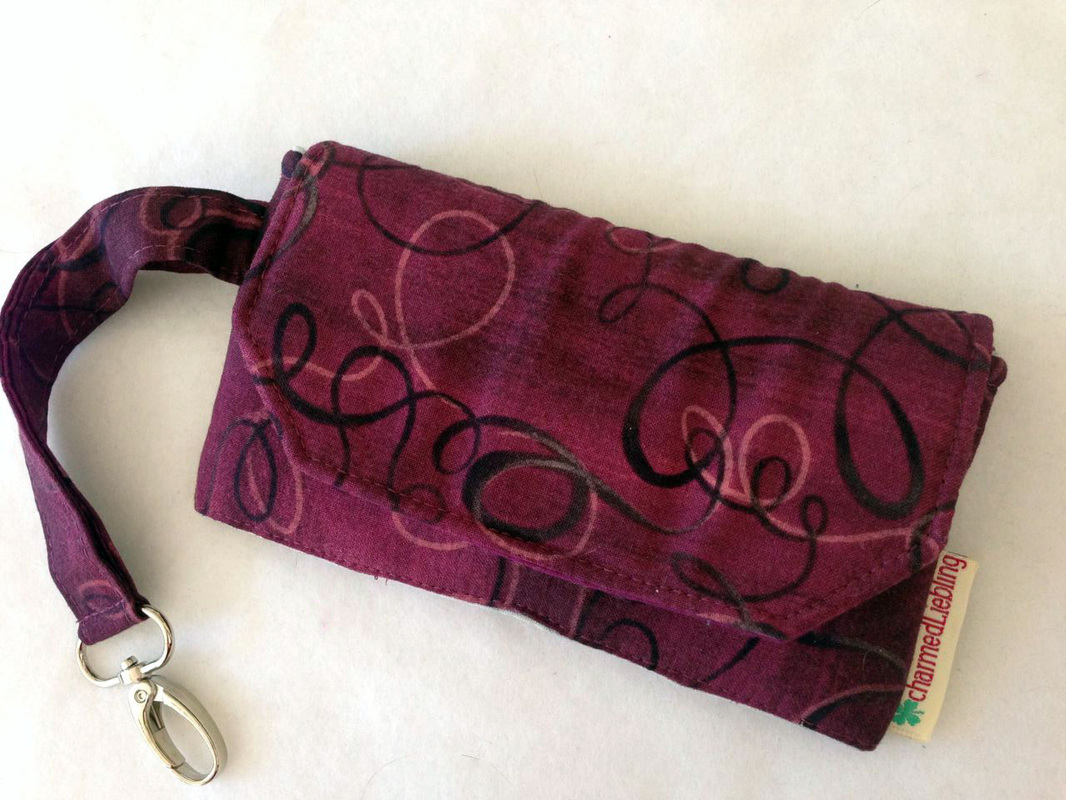
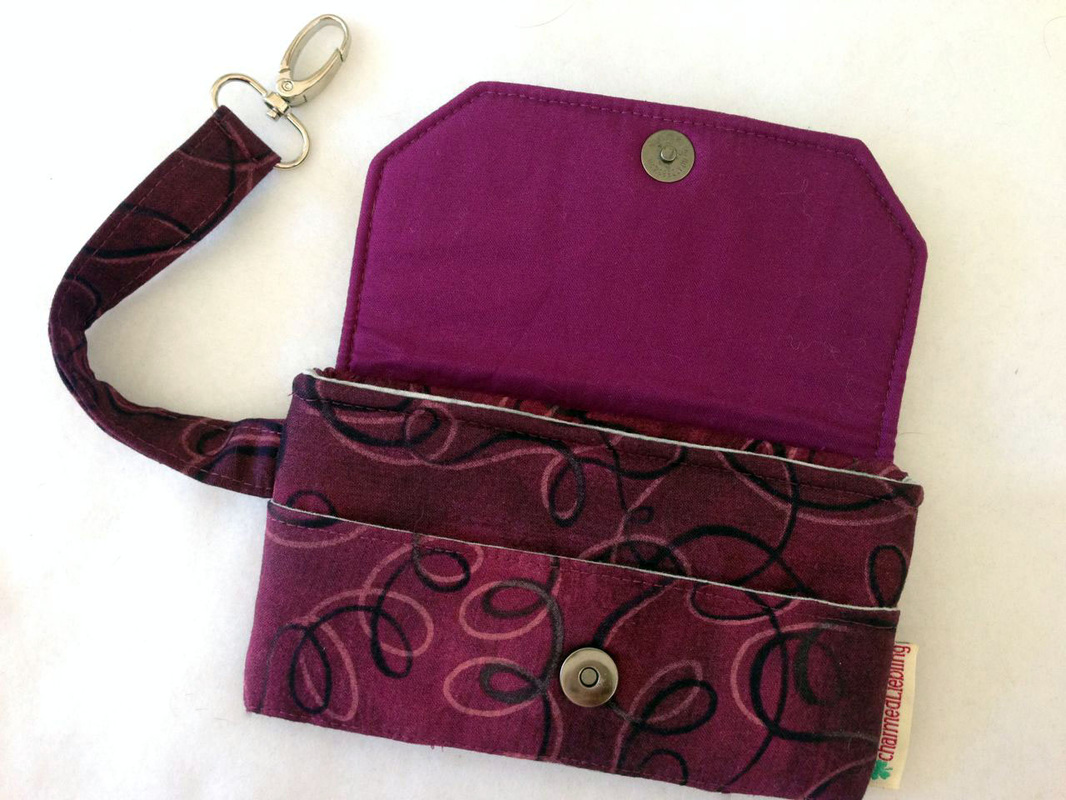
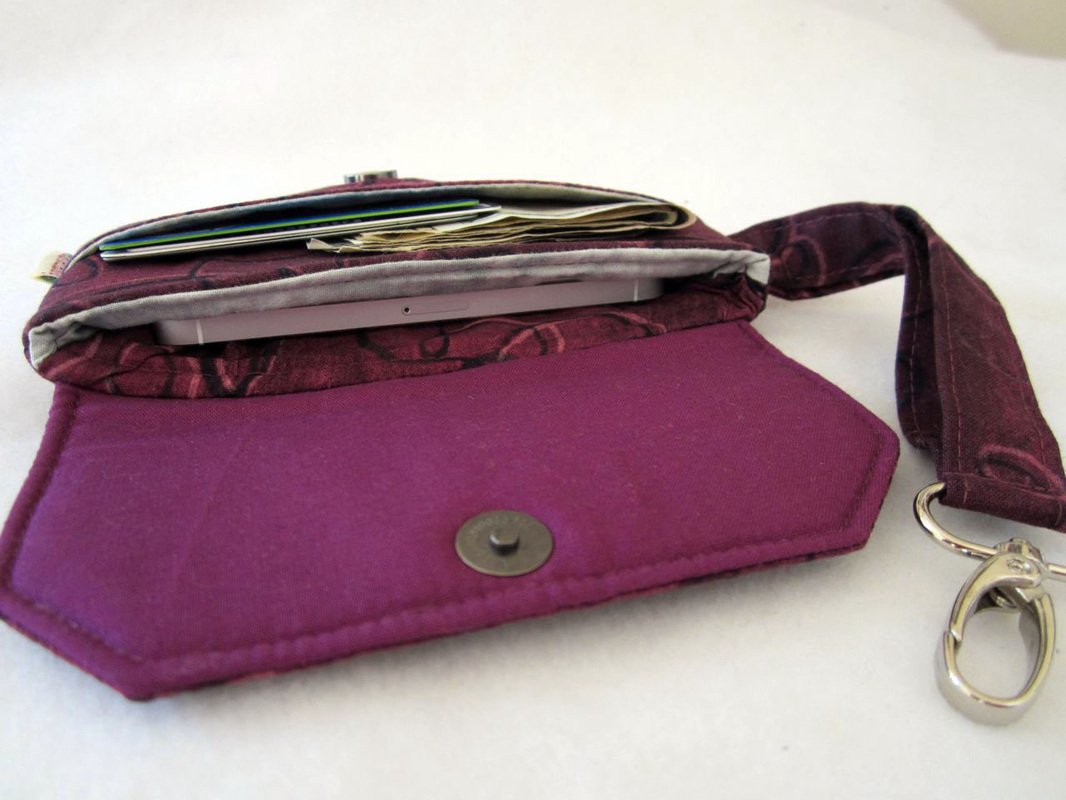
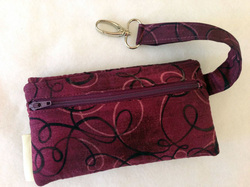
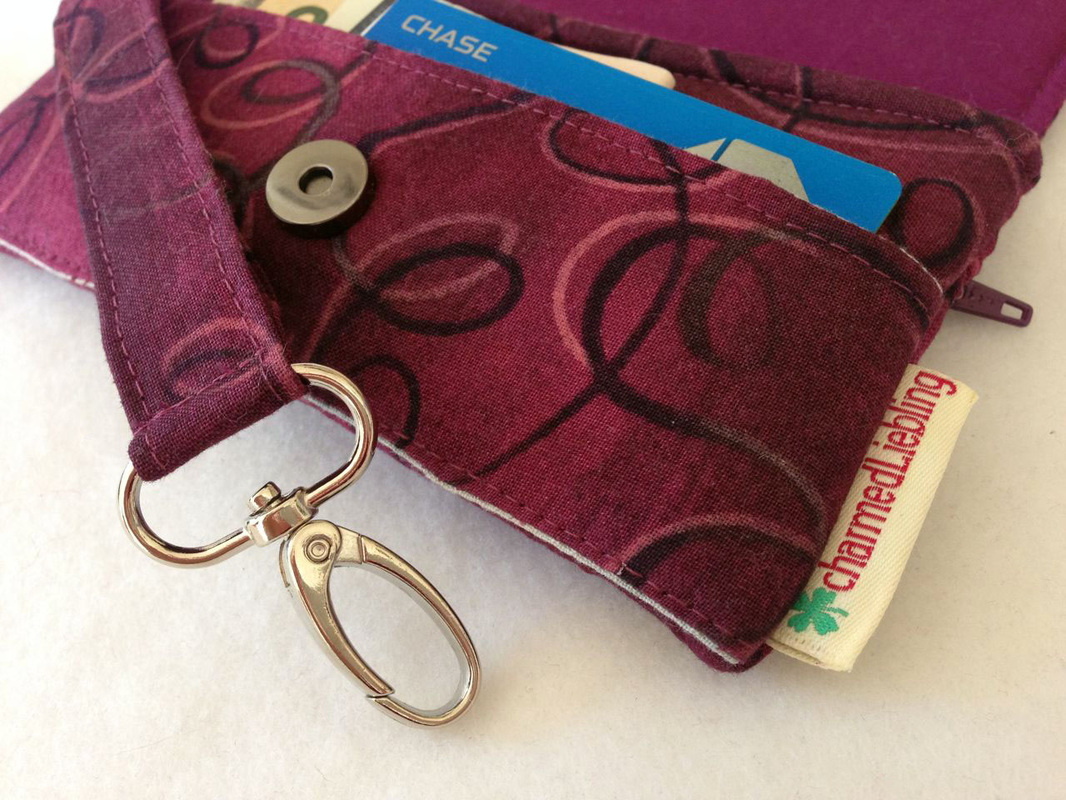
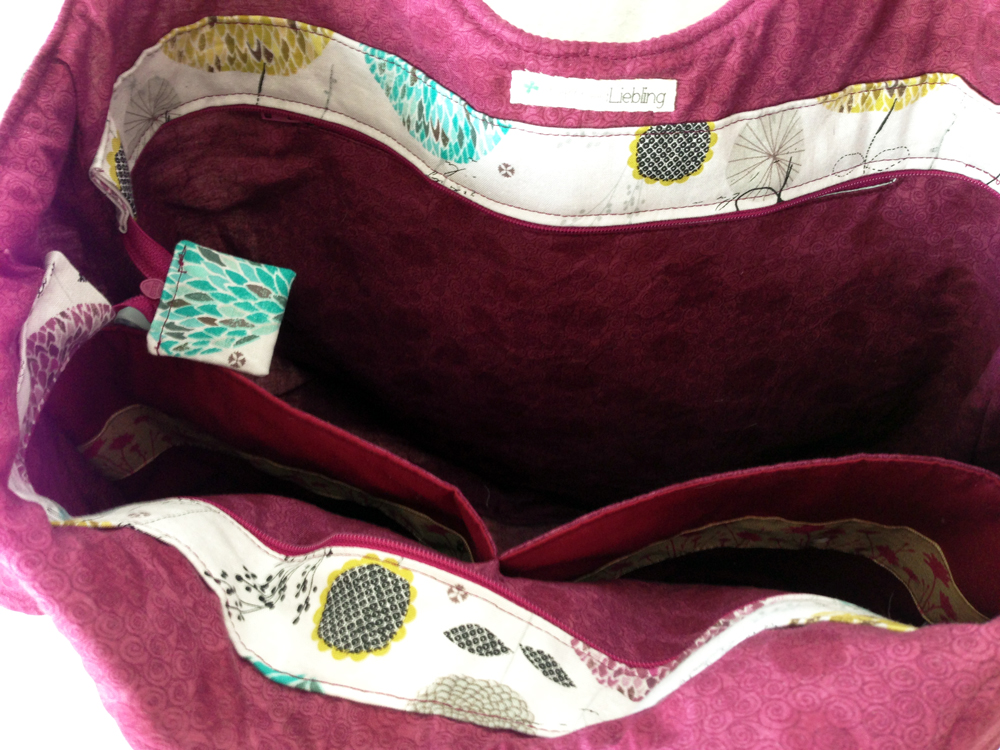
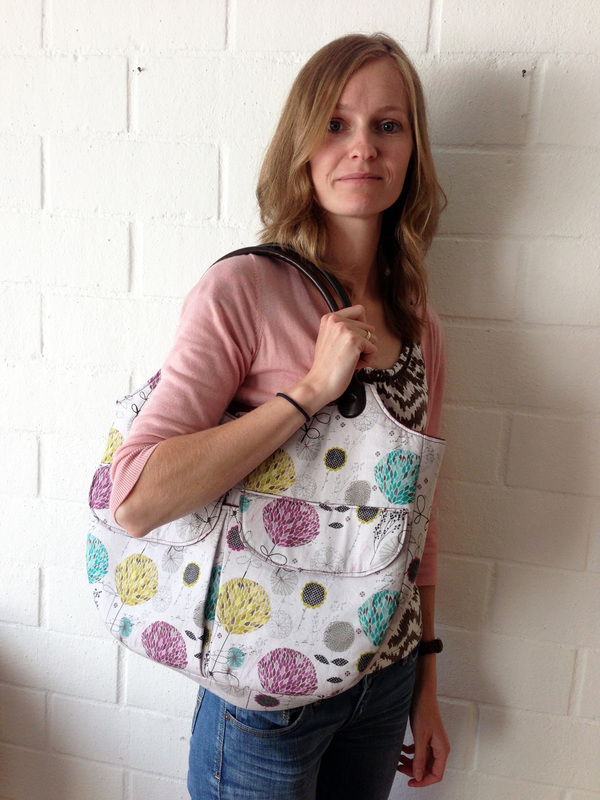
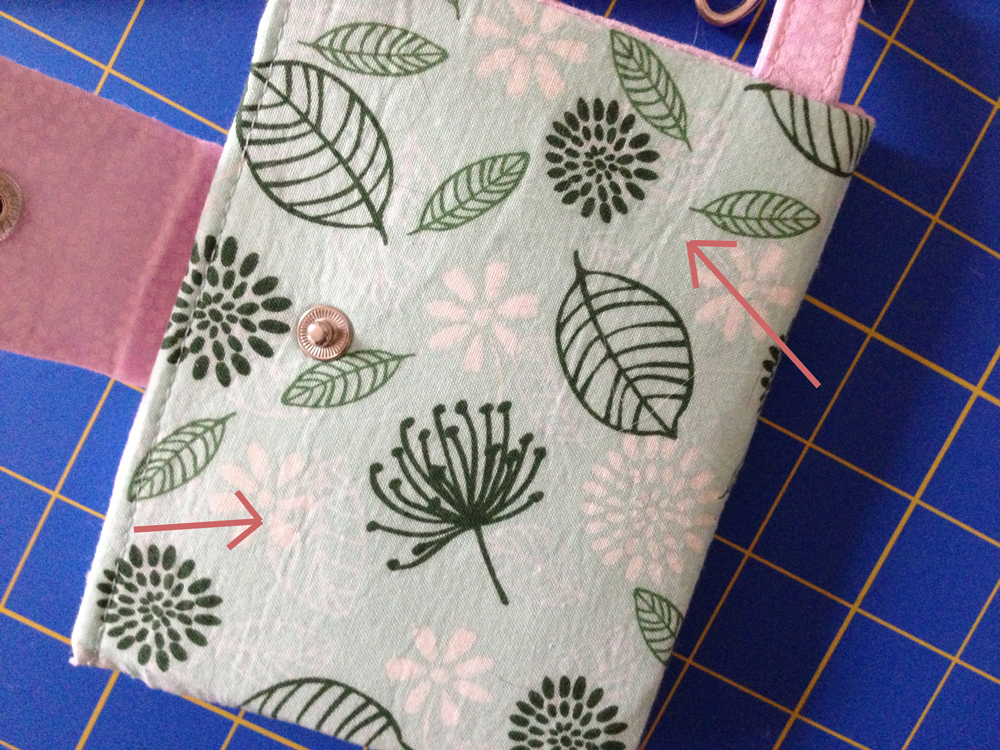
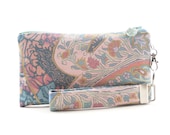
Here is just a small selection of the total of 15 bag and wallet patterns currently in my Etsy shop:
Bild
Bild
Bild
This offer is valid until July 21 2014, so don't wait too long!
I hope you are all having a great summer!
Happy sewing :)
Bild
2 Comments

Purses for Mama

4/22/2014

4 Comments

 
Hi there!
Today I would like to show you some purses I made recently. They are all gifts for my lovely Mom. She likes to sew as well and some time in January she actually sent me a package with seven (yes, that is 7!!) skirts she made for me. I thought that was very sweet and it was about time to make some things for her. I already made a small purse for her last year before I went home for a visit and she liked it a lot- well, both of it, the purse as well as me visiting :)
So I decided to make two more of these, but I changed them a little bit:
Bild
I basically used my Mini travel sleeve tutorial, but made these purses a little wider. The front pocket is divided, so that she can fit credit cards into either compartment. The main compartment is for her smartphone and bank notes.
Bild
I also added a zipper pocket to the back of both purses since in Germany people use a lot more cash and you always end up with lots of coins (also because there are 1-Euro and 2-Euro coins, not bank notes... I always disliked how all those coins added weight to my wallet). One of the purses is made of gray, black and white colored fabrics, so I added a little color to it with the turquoise zipper.
Bild
Mama also mentioned some time ago that she would like to have a small to medium-sized handbag in green shades. So I came up with this one:
Bild
Bild
She told me that she would love for the bag to have a zipper pocket on the inside, a compartment for her phone and an adjustable strap. Easily done :)
Bild
A zipper pocket and an elasticized pocket.
Bild
Adjustable strap
Bild
I also added a swivel clip to the inside, so she can clip on her wallet, her keys or her foldable shopping tote.
I hope my mom is going to like her new purses. And as luck would have it my husband is going to Germany tomorrow for business, but he will be able to stop by at my parents' place for one day and bring my mum her purses.


I am glad I was able to finish everything in time. In my next blogpost I will show you the new bag I made for my husband. He had the crazy, last-minute idea that it would be nice to travel to Germany with a new bag (that sounds so much like me! I think my behavior is rubbing off on him - ALWAYS travel with a new bag LOL!), so I had a make-it-work moment on the weekend.
I hope you all had a nice Easter weekend and found some spare time for sewing :)
Bild
4 Comments

Fabric shopping in New York City

1/3/2014

5 Comments

 
Happy New Year to all of you! I hope you had nice holidays. Before I flew to Germany for Christmas I treated myself to a short trip to NYC. I had never been there before so during the two days I spent there I wanted to do some sightseeing of course, but something else - not less important - was also on my list:
check out some fabric stores in the Garment District of Manhattan!!

I didn't really have too much time but I made it to three different stores. The first one didn't really impress me at all, which is why I won't share anything about it. But the two others were amazing!

Bild
Bild
Bild
1. Mood Fabrics
225 W 37th St 3rd Floor
New York, NY 10018

I doubt there will be any sewer who is not familiar with Project Runway or this awesome store. After riding the elevator to the third floor you will feel like entering paradise. At least if you are into making clothing. This store is huge but so well organized! There are actually two floors with an enormous selection of apparel fabrics. I was a little bit overwhelmed by the amount of bolts in each single aisle but they have a very good labeling system which made it easier to find what I was looking for. I particularly wanted to check for cotton knit fabrics and for tweed. I spent about 1.5 hours in the store and two different - very friendly - staff members helped me find the right fabrics for my purposes. This is what I bought:

Bild
Bild
Bild


Two knit fabrics both of which I am planning on making into some sort of summer dresses. I especially love the left one with this phenomenal print and color scheme.
They are both 100% cotton which I love since I am having a hard time finding knit fabrics in my local stores that are not made of polyester. I should have probably bought so much more. But I was scared my suitcase would be too heavy in the end. I guess I will have to come back some time :)

Bild

In the wool section I bought this purple tweed fabric. I was looking for something for my mom for her birthday which was at the end of December. She is a sewing addict as well (she is actually the one who got me into sewing, thanks Mama!) so I thought some nice fabric from Mood would be a perfect birthday gift. She likes making short jackets and coats and I think this fabric will look perfect on her.

Bild Swatch!!


At checkout they even signed me up for Mood Rewards. Now I have a pretty key chain which I carry around. Even though it might be a while until I come back :)

Bild
2. The City Quilter
133 W 25th St
New York, NY 10001

This store is perfect if you are a quilter or bag maker. It has a decent size with a nice selection of cotton fabrics and also some home decor fabrics. They are all sorted by colors which I loved! First of all it just looks really nice and second of all it saved me a lot of time since I would only check out the shelves with my preferred color schemes. I bought four different fabrics here which of course are all going to be made into some sort of bag :)


Bild
Bild
Bild
In case you are interested here's some information about the designers (from left to right):
1. Juggling Summer by Brigitte Heitland of Zen Chic for Moda.
2. Ladies' Stitching Club by Liesl Gibson of Oliver + S for Moda.
3. Twenty Three by Eric & Julie Comstock of Cosmo Cricket for Moda.
4. 1000 Cranes by Rashida Coleman Hale for Cloud 9 Fabrics.

I can't wait to get started on sewing with my new fabrics! What is your first project for the new year going to be?? Maybe you even got some new fabrics for Christmas? I would love to know what you are up to for the new year so just leave me a comment if you like :)
Bild
5 Comments

New sewing pattern: Rhine Valley Bag

12/6/2013

11 Comments

 
Just in time before I will leave for my trip home to Germany I am happy to introduce you to my latest sewing pattern which is now available in my pattern store: the Rhine Valley Bag!
Bild
Rhine River Valley

This bag is named after the region where I lived before I moved to the States. I actually grew up close to the area you see on the right-hand side picture and later moved to Mainz, which is a city right on the shore of the beautiful Rhine River, where I lived for eight years.

I actually made a similar version of this bag in the spring and took it with me to Germany. It was the perfect size for hand luggage on the long plane ride. I finally decided to create a sewing pattern and have to say I really love this bag! It is big, it is spacious but so handy at the same time! I hope you like it as much as I do :)
One of my favorite features is the recessed top zipper. Inside the bag there are two 3D shaped slip pockets which easily fit smaller items like your keys or your phone.
charmed Liebling Rhine Valley Bag recessed zipper
charmed Liebling Rhine Valley Bag inner slip pockets
charmed Liebling Rhine Valley Bag front pockets


Since I like making pleats I added two pleated pockets to the front of the bag. It is actually one large divided pocket, and each compartment closes with a flap and a magnetic snap.

I used store-bought (fake) leather handles for both of my bags but my instructions give you the option to attach fabric handles with rectangular rings in case you don't want to go with store-bought handles.
Rhine Valley Bag with fabric handles
optional: Rhine Valley Bag with fabric handles and rectangular rings
charmed Liebling Rhine Valley Bag
Rhine Valley Bag with store bought handles
The pdf file comes with 21 pages of instructions, 56 color photographs and 5 pattern pieces. All measurements are given in centimeters and inches.
The finished size of this bag is 30 x 45 x 10 cm/ 12 x 18 x 4 in (height x width x depth).

Supplies needed:

- Exterior fabric: 1 m or 1 yd
- Lining fabric: 1.30 m or 1 1/3 yd
- Fusible fleece e.g. Pellon 987F: 0.60 m or 2/3 yd
- Fusible interfacing, e. g. Pellon 931 TD:  4.20 m or 4.5 yd
- 1 zipper 46 cm (18”) or longer
- 2 magnetic snaps
- 2 faux leather handles, approx. 55 cm (22”) long

If not using store bought handles you will also need:
- 4 rectangular rings, 3 cm (1.25”) width
- Add 15 cm/ 5” of lining fabric to the amount given above!

Thanks to all the testers who helped me with this project! Have a look at their bags, aren't they all amazing??
Rhine Valley Bag Ree
Ree from Sincerely, Ree used an animal print for her bag. She says this bag will be perfect for travelling. She acutally made a cute hat using the same fabrics, so please make sure to pop over to her blog and have a look!
Rhine Valley Bag Cara
Cara from Early Bird Stitches made this wonderful bag. Her items are always so well-finished and I just love the color combo of this one. ,
Rhine Valley Bag Tracey
Tracey from Sew Chubby Cheeks made a "real" travel bag! Her fabric takes up the travel theme and I would say that this is a perfect bag to use as your carry-on luggage :)
Rhine Valley Bag PJ
This is PJ's bag. The yellow flaps of the front pockets make a really nice contrast to the blue floral print she used for the exterior. PJ also has an Etsy shop, so make sure to check it out!
Rhine Valley Bag Susan
How cute is the pattern of Susan's bag? I totally love all those happy dots :) Susan used fake leather handles for her bag which give her bag look a real professional finish.
Rhine Valley Bag Sarah
Sarah from Prairie Girl Knits chose this really great color combo for her Rhine Valley Bag. I mean, a big bag made entirely with pink lining? Awesome!!
Rhine Valley Bag Silvia
Silvia used a really cute animal print for her bag. The lining actually shows chicken and roosters! She used fake leather handles for the first time and they turned out really nicely.
Rhine Valley Bag Marcia
Marcia from Sew Inspired chose this really colorful floral print for her Rhine Valley Bag. Marcia teaches sewing classes so I am not surprised that her bags always look so well finished!
Rhine Valley Bag Erin
I love the pattern of Erin's bag! The tree theme is really fun and the colors match perfectly. I can totally see why Erin says she is a little sad to be giving this bag away!
Rhine Valley Bag Jenny
This is Jenny's Rhine Valley Bag. She chose a floral print for the exterior and says she especially loved making the recessed zipper, as it turns out they are not that hard to make. I am glad to hear that :)
Rhine Valley Bag Janet
Janet said the suede cloth she used for her bag was a little tricky to sew. She still managed to sew up a really cool Rhine Valley Bag!
Rhine Valley Bag Patti
Patti used braided handles for her bag. They go very well with the fabric she used, Heritage Studio Collection by Fabric Traditions.
Rhine Valley Bag Vicky
How gorgoeous is that leaf print of Vicky's bag?? She actually had two fabrics at first and couldn't decide which one to use. I like her choice :) Vicky sells awesome things and blogs at Vicky Myers Creations so make sure to stop by!
Rhine Valley Bag Tonya
Tonya used a fake leather for the exterior and matched it with a purple cotton for the lining and the pocket flaps. I agree with her that these two fabrics look wonderful together!
I really hope you like my new design. I always prefered smaller handbags but the big ones are really growing on me :) Are you more of a big bag or a small bag girl? I would love to know!
Bild
11 Comments

custom order for Mama :)

11/4/2013

2 Comments

 
charmed Liebling mini travel sleeve
A few weeks ago my mom got herself a smartphone! With her being far away in Germany I was very happy about it because now we can finally text each other again. The last time I was home, I had my mini travel sleeve with me, and she liked it a lot. Since I got a lot of free stuff when I was home - when you only visit your parents three weeks every year they tend to spoil you, isn't that great?!? - I promised to make her a few purses. The mini travel sleeve was the first thing on her list and it turns out it was actually a good thing I took my time because now I could make it to fit her new phone perfectly! She gave me the measurements of her Samsung and so her travel sleeve is a bit bigger than the one that I made for my free sewing tutorial.
charmed Liebling mini travel sleeve
charmed Liebing mini travel sleeve
charmed Liebling mini travel sleeve


My mom asked for fabrics in pink, purple or gray colors and I found this eggplant colored quilting cotton by Jennifer Sampou, from her line "Studio Stash" (for Robert Kaufmann Fabrics).

Bild

I added a zipper pocket to the back since she wanted to be able to store change somewhere. In Germany we pay a lot more in cash and therefore it is good to have a pocket for coins. My travel sleeve would have been to small to add a zipper pocket anyway but hers had just the right dimensions.

charmed Liebling mini travel sleeve
Instead of a button and string I used a small magnetic snap for the closure.

I hope my mom will like her new little purse. Since I will be going home again for Christmas this year (yay!!) she will have to wait a few more weeks until she gets it. I prefer to give it to her in person instead of shipping it. She can look at these pictures in the meantime :)

If you like this sleeve feel free to check out my free tutorial that I made back in February. Happy sewing :)

Bild
2 Comments

Hallo Deutschland!

5/20/2013

5 Comments

 
Yes, I'm in Germany to visit my family, yay! Haven't been there in a year, so it was about time.
As mentioned in previous blog posts, it just so happens that I like to make something new for myself every time I travel. Don't know why, but it is really becoming a well-loved habit of mine :)
(Read about my great getaway bag, my piping hot hobo and my mini travel sleeve to learn more about my previous pre-vacation projects!)
charmed Liebling handbag
When I went to Germany last year I traveled with the great getaway bag as my hand luggage. I really enjoyed carrying that colorful happy bag around but eventually decided not to use it this year, but to use a small suitcase as carry-on instead. Main reason: My big suitcase will be way too heavy when I fly back to the US due to all the Nutella, chocolate and other vital stuff you need in the US as a foreigner :) Last time I had to make my mom send me a package with all the stuff I bought, so this year I will just pack a lot of it into my hand luggage instead. Problem solved, the only thing is that I need a suitcase to pull, I would never be able to carry those heavy things on my arm in my bag.

I quickly decided that to make up for the boring carry-on I would need an exciting handbag. So I made one!
charmed Liebling handbag

I found this nice fabric and matched it with a burgundy colored lining fabric. I wanted a large bag that would carry all my essentials during the flight (you know, like phone, wallet, book, magazine, sweater…) and could be stored under my seat. My bag measures approx. 30 x 44 cm (12 x 17") and has a depth of 10 cm (4").


charmed Liebling handbag interior

I put in a recessed zipper, since I like my handbags to be "hermetically sealed", especially when I am hanging around airports and other places with lots of traffic… you never know.
On the inside there is one relatively large zipper pocket and two slip pockets. The handles (faux leather) are used, coming from an old (and ugly) bag that I found at a flea market last year.


charmed Liebling handbag front pockets
I love the pockets on the outside of the bag! They are basically made of one large piece of fabric, which is folded into pleats in the middle and then topstitched down onto the center of the main body piece of the bag. This creates two pockets on either side, each of which got its own flap with a magnetic snap! I found this kind of front pocket in my Lisa Lam book A bag for all reasons. She has a large diaper bag (called The Fashionista Baby Bag) in there that has those front pockets. They look super stylish but are really easy to make.
The bag is completely interfaced with "By Annie's Soft and Stable". It makes the bag look really professional, yet it it relatively easy to work with.

I love my new bag! My cats do too :-)
charmed Liebling - the finished bag
Cute little Oscar making sure the fabric gets all flattened out...
Picture
I love the size of this bag!
Picture
Awwww.... the day before I left the US for my vacation in Germany. I wish I could bring Henry as well!
5 Comments

review: my awesome burda style subscription

4/5/2013

4 Comments

 
Burda style magazines
When I was still living in Germany I used to buy Germany's famous "Burda style magazine" which is published monthly. The story behind that magazine is actually a really interesting part of German publishing history. I don't want to bother you with too many details but let me just tell you this:

There is this woman, Aenne Burda, who after World War II decides to publish a fashion magazine, known as "Burda Moden" (= Burda fashion). Soon after it was launched in 1950 this magazine became famous for adding sheets of paper with patterns for clothes. She had the perfect idea at the right time: the people in post-war Germany were able to create stylish and modern clothes even without having to invest a lot of money (which they didn't have to begin with). During the next 15 years, Burda Moden should become the worlds bestselling fashion magazine! Oh and did I mentioned that in 1987 it became the first western magazine to be (legally) published in the former Soviet Union? Not bad, huh?

Burda style Magazin
My German Burda style magazines...
So anyway, when I moved to the States I started to focus more on the tons of patterns I already had since I thought Burda style was not available here. By the way, yes, my Burda style magazine collection moved to the US with me, so I still have plenty of patterns to choose from, BUT: for my birthday which was in December, my lovely husband gave me a subscription of Burda Style - the English edition!
It's basically the translation of the German edition - now I like to hang on the phone with my mother and we talk about the variety of patterns of the current edition, me browsing through the English and her through the German one :-)

Burda style magazine


I like this magazine because it is very well structured and clearly arranged. I am going to show you some of the sections it has, so if you are thinking about getting a subscription, here's where you can get a sneak peek :-)  Of course the main part of the magazine is devoted to new sewing patterns, so you will find a lot of pages like the one above where you can see models showing the fashion. Each item has a small technical drawing and a number, which leads you directly to the sewing instructions in the middle part of the magazine.

Burda style instructions


Here are the instructions for the blouse you can see on the left. Most of the instructions don't come with pictures, so for a beginner of sewing it might sometimes be a bit tricky to understand what you have to do. As an advanced beginner it shouldn't be too hard to follow the instructions though.

Burda style sewing course


And... the good news for beginners: There is usually one "sewing course" in the instructions section of the magazine which comes with lots of pictures!


Burda style easy sewing


You will also find an "easy sewing" section with one project especially made for sewing beginners. This one is a "balloon top" which is fairly easy to make and there are a lot of pictures which show you exactly what to do.

Right in the center of the magazine you will find two large sheets with all the sewing patterns (in this issue there is a total of 53 patterns!). I admit, it looks a little wild on the first glance. Before I copy the patterns I like to use a pen or marker and trace the lines of my pattern, so they are better visible when I put my tissue paper on top. Of course, if you copy them with wax tracing paper it should be easier. I don't even know if you can buy Burda tissue paper in the US?
Picture
Burda style patterns
Burda tissue paper
More sections in the magazine:
Burda style plus sizes


Patterns for plus sizes which come in German sizes 44 - 52 (14 - 42 in the US).

Burda style size chart


There is a huge chart with all the size conversions which is very useful. Also, I find the sizes being rather large, so before you start cutting out a pattern and sewing something you might want to check the size chart with your own body measurements.


Burda style subscription review
Usually towards the end of the magazine there are sections about current fashion trends, home decoration, designers or various other things.

Burda style subscription review


Overview on all the different styles you will find the patterns for in this magazine. Quite a few!

If you're thinking about subscribing to the magazine, here's where you can find more information about Burda style and the current rates. You can subscribe for three months, six months ore a whole year (the rates per issue get cheaper the longer you subscribe of course). The magazine is published monthly.
All prices are subject to change!
4 Comments

one of my favorite sewing products: Decovil by Freudenberg Vlieseline

3/2/2013

7 Comments

 
Decovil I and Decovil I light
I've been using the above mentioned product for quite a while now but since it's still hard to get in the US and I've stumbled upon far too many entries and questions about it in online forums I decided to blog about it, to introduce it to the American sewing community and to shed some light on all the mysteries ;-)
Decovil is a special kind of non-woven interfacing with a leatherlike handle and perfect when you make bags and wallets but also hats or decorative items. This stuff is really awesome which is why I can't stop mentioning it again and again (see also my older blogpost about Decovil).
I buy it in Germany during my trips home but I hope there will be more vendors that sell it in the US in the future. Because I'm addicted!!
At first there was only "Decovil I" but a few months later I found a second version called "Decovil I light" as you can also see above on the picture. You can already tell by the name that the second one is a little bit thinner, softer and more flexible than the first one.
For most of the handbags I make and basically for all my wallets I use the first version, Decovil I. That's the thicker one, it's a little sturdier and feels a bit like leather. Both types of Decovil have one fusible side, so you can iron it onto the wrong side of your fabric.
Picture
This is Decovil I. You can see it's actually not as thick as most of the heavy stabilizers you might know (it's about 1mm, so not even 1/16"), but still quite sturdy!

Decovil I light
Decovil I light appears to be almost as thick as Decovil I on the picture, but you can tell by the cutting mat that shines through that it is actually a lot thinner.

Picture

Decovil is really flexible and bendable compared to "regular" interfacing or especially heavy stabilizer you would use for bags, that should be less slouchy and have a nice "body". It doesn't deform, it stays flat no matter how much you bend it, and your items will end up having a really smooth surface and a great shape.

Heavy stabilizer gives me a hard time because it tends to create wrinkles when you bend it which will show through your fabric later, especially if you don't use thicker fabric like home dec fabric but for instance a lightweight quiliting fabric. And that's what I love about Decovil: it gives your items a real professional look AND touch, just like you would find it with storebought bags or wallets.
wallet interfaced with heavy stabilizer
This wallet I interfaced with heavy stabilizer.

charmed Liebling wallet interfaced with Decovil I
This is one of the wallets currently for sale in my charmed Liebling Etsy shop which I interfaced with Decovil I.

You can see on the first wallet that there are some pleats on the fabric, and no, these are not due to laziness of ironing my finished items, it's the heavy stabilizer that shows through and the wallet has this kind of crinkly look.. not ideal! Now, I admit that it's not totally unacceptable, and using heavy stabilizer will still help you give your bags or wallets the strength they need, but: once you've tried Decovil, you don't want to go back using anything but Decovil! The surface feels smooth and flat and you can even bend it and there still won't be any pleats showing on the fabric!
To sum it up: Decovil can help you draw the tiny but important line between your items looking handcrafted instead of "homemade".
sewing with DecovilStitch along the edge of Decovil.

One helpful hint if you decide to give it a try: always make sure you don't stitch directly on Decovil, since you will find it hard to turn your finished item right side out in the end and still have a neat and clean edge. What I recommend is to cut the Decovil piece without the seam allowance, then put it centered onto the wrong side of your fabric piece, making sure that there is no Decovil on the seam allowance of your fabric. When sewing, make sure to let the needle run exactly along the edge of the Decovil part (I always put the pieces underneath my sewing foot with the Decovil side up, so that I can acutally see where I have to sew).
(What I even do sometimes is NOT sew the Decovil onto my fabric at the beginning. Usually you will have to turn your bag or wallet right side out as one of the last steps and due to Decovil's sturdiness this can be a little tricky. Instead what I do is I turn the item right side out, then slip the Decovil inside before closing it up. I make sure it is all flat and sits perfectly in the item and then I close the seam and iron it.)

I hope you enjoyed this little insight into Decovil. Finally, here's my list of online stores that sell it to the US. Note that not all vendors sell both types though, some only carry Decovil I and not the light version.

If you want to try it out these are some of the places you can order from:
u-handbag: $11.90 per 1/2 yard plus shipping (from GB)
creative-sewing-shop.com: $ 15.00 per meter (39") + shipping (from France)
TOKO Kurzwaren via amazon.com (see link below): $14.10 per meter (39") + shipping (from Germany)
All prices are subject to change!
7 Comments

letterpress printed business cards!!!

9/23/2012

0 Comments

 
Whoa, four weeks later and fall is here…  BUT: I've been pretty busy and one of the things I did was this:
charmed Liebling business card front
Anna working the printing press
Yes, I finally had some business cards printed, yay!! And these are not just ordinary cards: I worked with one of my friends here in Rochester, who is a true artist and one of the loveliest people I have met here so far. Amy helped me find the perfect design for my cards and we had entirely too much fun finalizing everything and - the most important step - printing a whole pile of cards with the printing press at the Genesee Center for the Arts and Education.

Letterpress is special to me, since I have worked at the Gutenberg museum in Mainz, Germany, the city where I had lived for eight years until I moved to the States. And I am not lying if I tell you, the Gutenberg museum is one of the nicest museums on printing history and books arts you will ever find! 

So back to my business cards, since they would have a front and a back side, each card had to go through the press twice; I was using three colors for my design and you can only print one color at a time. My goal was to print 300 cards and I printed two cards at a time (on one sheet of paper which at the end had to be cut down). That means on the whole I had to feed the press about 900 times. You have no idea how much my arm hurt afterwards, but it was totally worth it! I am totally in love with the result!
Please check out Amy's website at greengirlpress.com and her wonderful designs as well.

Picture
working the press. LOVE it!
Picture
cards are printed and ready to be cut down
Picture
Amy's dog Max. It was his birthday by the way!!
charmed Liebling pile of business cards
300 finished business cards
0 Comments

a weird band, a great song and a new treasury list

8/19/2012

0 Comments

 
Lately I started listening to some of my old CDs again which I haven't done in a very long time. You know, like, with a CD in a CD player? One of my all time favorite CDs is the second album of the British band Oasis.
And yes, I agree, the Gallagher brothers may not be the guys you wanna hang out with or invite to a party, but as so often talent is not the same as character, as we like to say in Germany. Or at least my mum always does, I'm not sure if this is one of her very own special quotations ;-)

The first Oasis song I ever heard was "Don't Look Back in Anger" and it was during the European soccer Championchip in 1996 (where Germany first kicked some English ass in the penalty shootout and then later won the final game, yay!!). After that I bought every CD they released but a few years ago, when everyone stopped buying CDs anyway I kinda lost track of the music. The CDs made it through three moves within Germany and even got a spot in one of the 43 boxes we had shipped to the US last year. But only to always end up in a CD stand that is nothing but a dust catcher to us. Last week I suddenly felt like listening to that music again and since we don't even own a stereo anymore, I was very happy to find out that our DVD player is able to play CDs as well ;-)

Anyway, here's my weekly treasury (w33), its title and the inspiration for it coming from one of many great Oasis songs! Enjoy!

'What's the story...' by annalankeshofer

inspired by those soft peachy mornings in the fall ;-)


Morning Glory Tags Morp...
CatnipStudioTo...
$5.00

butterfly hairpin bobby...
Giftsandbobs
$5.80

Soviet alarm clock USSR...
SovietUnionStu...
$17.00

2 birds on a wire peach...
NostalgiaCaptu...
$25.00

Periwinkle Blue and Cor...
ClairdeLuneJew...
$33.00

Paris Collage Mug-11 oz...
DigitalCarouse...
$12.50

PEACH "Frankincens...
SecretScentSoc...
$25.00

Pastel Flower Decor Bri...
BreeMadden
$25.00

Southwest Desert Colorf...
inlightfulimag...
$25.00

Blood Orange Soap - She...
ABreathOfFrenc...
$6.00

Pastel paisley wristlet...
VictoryBags
$20.00

Peach Moonstone Earring...
JewelryBySonja...
$72.75

Peach Ceramic Dinnerwar...
PatsPottery
$149.00

Pendant, Lucite Drop a...
BytheGulfCreat...
$12.00

Vintage Nightgown
BubblegumMeow
$38.00

Mug Octopus SALE, Squid...
skybirdarts
$54.00

Treasury tool supported by the dog house

0 Comments
<<Previous

    Enter your email address:

    Delivered by FeedBurner


    Follow on Bloglovin

    RSS Feed

    Anna

    anna's blog -

    Welcome to my blog! I am an accountant who once started out her "career" in the US by designing bag and wallet sewing  patterns! My patterns are available on Etsy and occasionally I will share some of my sewing projects that I work on in my spare free time on my website.  Happy sewing :)

    Categories

    All
    Bags
    Bargains
    Dresses
    Fabric
    Fashion
    Germany
    Giveaway
    Home Dec
    Interfacing
    Review
    Sale
    Seasonal
    Sewing Patterns
    Sewing Tips
    Smartphone Cases
    Special Occasions
    Treasury
    Trips
    Tutorial
    Vacation Projects
    Wallets

    Threading My Way_Featured
    Pattern Spot dot com
    This page contains affiliate links. See my disclosure policy.
    Online Sewing Class
    Craftsy

    Archives

    December 2021
    May 2020
    April 2020
    January 2020
    January 2015
    October 2014
    September 2014
    August 2014
    July 2014
    June 2014
    May 2014
    April 2014
    March 2014
    February 2014
    January 2014
    December 2013
    November 2013
    October 2013
    September 2013
    August 2013
    July 2013
    June 2013
    May 2013
    April 2013
    March 2013
    February 2013
    January 2013
    December 2012
    November 2012
    October 2012
    September 2012
    August 2012
    July 2012
    June 2012
    May 2012

Powered by Create your own unique website with customizable templates.