
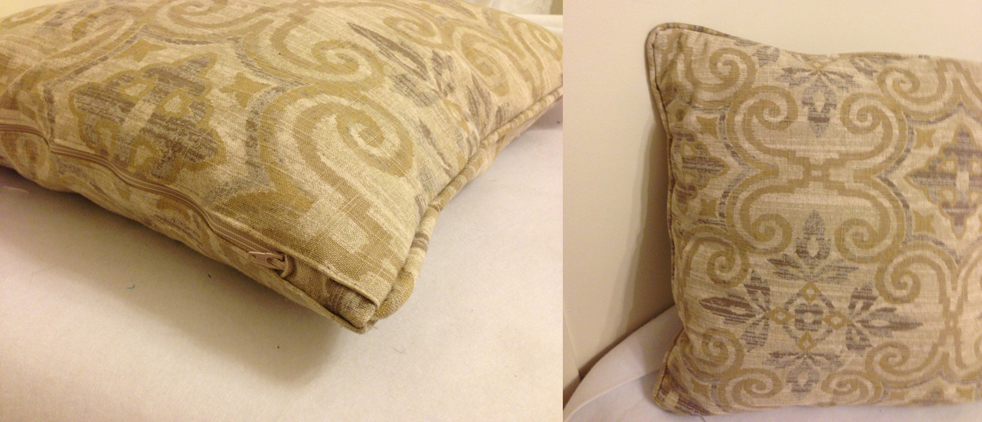
Since my last project was making pillow cases for a friend of mine, I decided to make a tutorial on how to make decorative pillow cases with piping. Piping looks really neat and professional but at the same time it's not too difficult to make it!
Please note: this tutorial is free but if you would rather prefer to download this complete tutorial as a pdf file you may purchase it here for only $2.
Please note: this tutorial is free but if you would rather prefer to download this complete tutorial as a pdf file you may purchase it here for only $2.
 material you need for this project
 You need:
- 2 pieces of fabric for your pillow case
- fabric for the piping
- cord for the piping (I used Wrights cotton filler
cord)
- 1 zipper
- 2 pieces of fabric, 9 x 4 cm (3.5 x 1.5") each,
for the zipper tabs
The size of the 2 fabric pieces for the pillow case depends on the size of your pillow:
- Measure length and width of your pillow. Add two slots of seam allowance of 1,5 cm (5/8") to either side. E. g. if your pillow is 40 x 40 cm (15.75 x 15.75"), your 2 fabric pieces for the pillow case would have to be 43 x 43 cm (17 x 17"). Now cut 2 pieces of fabric according to your own measurements.
- Size of the piping fabric: Make it 4 cm (1.5") wide.
For the right length of the piping fabric use this formula: count 1x width of pillow case fabric + 2 x length of pillow case fabric; in my case, the fabric would be 3 x 43 cm (3 x 17") = 129 cm (51"). I like to add about another 5 cm (2") just to be one the safe side, so the piping won't end up being too short!
Cut the piping cord to the same length, so in this case at least 129 cm (51").
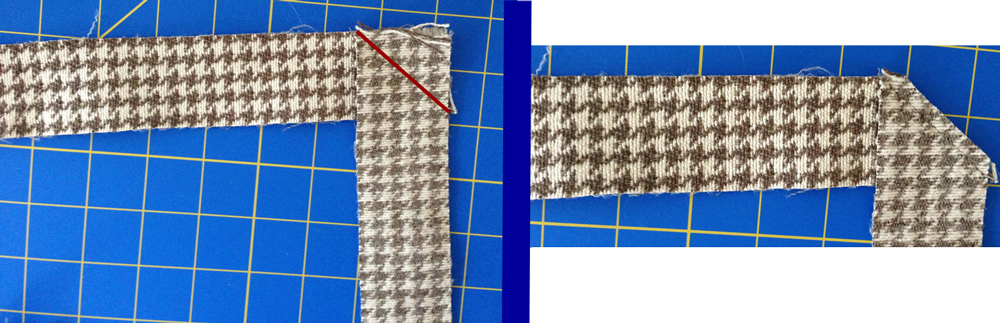
If the fabric piece you counted with this formula is too long to be cut out of your fabric you might just divide it by 2 and sew two pieces of fabric together. Put them right sides together in a 90° angle like shown in the picture below. Stitch across the fabric from corner to corner like illustrated with the red line. Trim the seam allowance:
- Measure length and width of your pillow. Add two slots of seam allowance of 1,5 cm (5/8") to either side. E. g. if your pillow is 40 x 40 cm (15.75 x 15.75"), your 2 fabric pieces for the pillow case would have to be 43 x 43 cm (17 x 17"). Now cut 2 pieces of fabric according to your own measurements.
- Size of the piping fabric: Make it 4 cm (1.5") wide.
For the right length of the piping fabric use this formula: count 1x width of pillow case fabric + 2 x length of pillow case fabric; in my case, the fabric would be 3 x 43 cm (3 x 17") = 129 cm (51"). I like to add about another 5 cm (2") just to be one the safe side, so the piping won't end up being too short!
Cut the piping cord to the same length, so in this case at least 129 cm (51").
If the fabric piece you counted with this formula is too long to be cut out of your fabric you might just divide it by 2 and sew two pieces of fabric together. Put them right sides together in a 90° angle like shown in the picture below. Stitch across the fabric from corner to corner like illustrated with the red line. Trim the seam allowance:
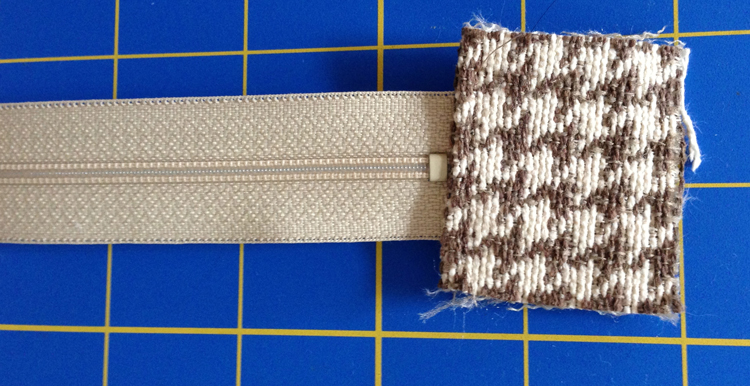
1. Prepare the zipper:
For the right length of your zipper subtract approx. 8 cm (3") from the width of your fabric. Take one of the small zipper tab fabric pieces and bend one of the short edges down by 1 cm (3/8") towards the wrong side and put this edge onto the right side of one end of the zipper. Topstitch the fabric tab onto the zipper. Take the other small fabric piece and repeat and topstitch it onto the other end of the zipper.
For the right length of your zipper subtract approx. 8 cm (3") from the width of your fabric. Take one of the small zipper tab fabric pieces and bend one of the short edges down by 1 cm (3/8") towards the wrong side and put this edge onto the right side of one end of the zipper. Topstitch the fabric tab onto the zipper. Take the other small fabric piece and repeat and topstitch it onto the other end of the zipper.
2. Prepare the piping:
Take your cord and place it centered onto the wrong side of your piping fabric piece. Close the fabric, so that the cord is hidden in between:
Take your cord and place it centered onto the wrong side of your piping fabric piece. Close the fabric, so that the cord is hidden in between:
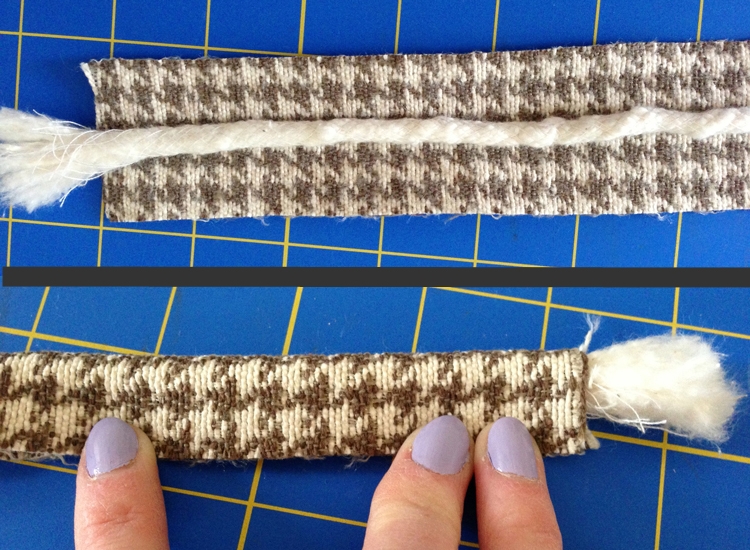
Now replace your regular sewing foot with your piping foot and place the fabric underneath the sewing foot, so that the cord is "covered" by the groove of the piping foot. Now it will be easy to stitch exactly along the edge of the piping and sew it up.
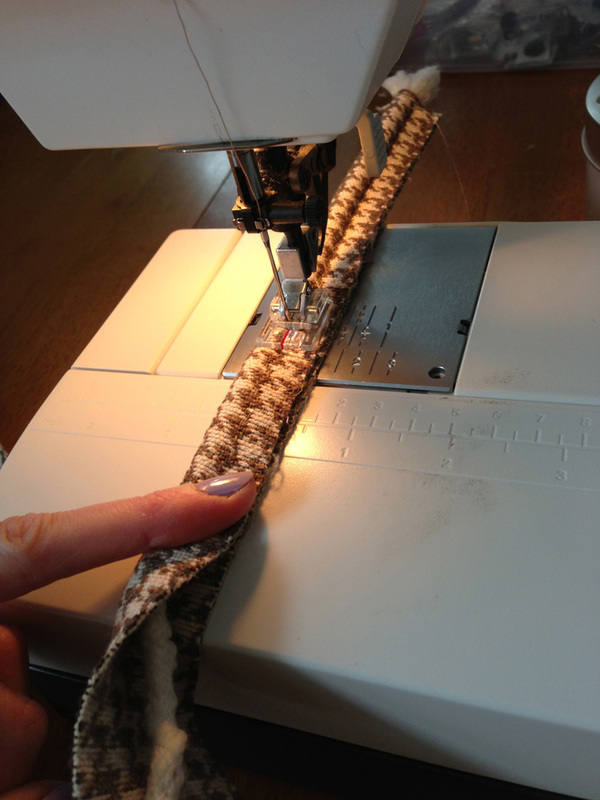 A piping foot makes it very easy to sew exactly along the edge of the piping without getting out of place. |  The cord is hidden inside the fabric. |
3. Make the zipper closure:
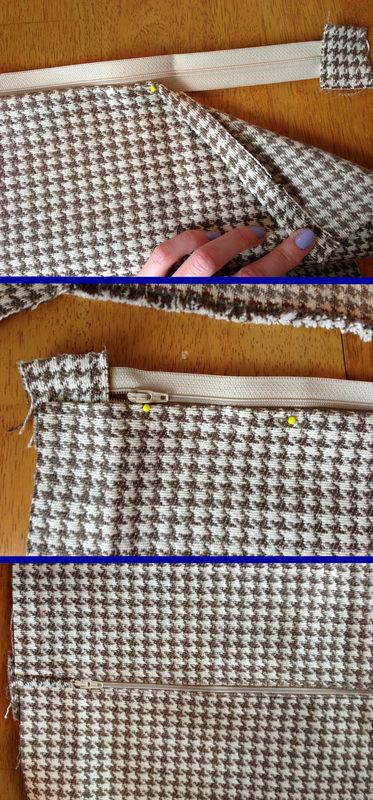
Take the zipper with the tabs at the end and place it right side up. Take one of the pillow case fabric pieces and bend the upper edge down towards the wrong side by 1 cm (3/8"). Now place the fabric with this edge onto one the zipper tape. The clean edge of the fabric should be placed as close to the zipper teeth as possible. Pin in place and (while using the zipper foot of your sewing machine) topstitch all along the edge, approx. 0,3 cm (1.8") down from the zipper teeth.
Take the other pillow case fabric piece and repeat with the other side. Your result should look like the bottom picture of the next picture:
4. Attach the piping:
Take the prepared piping piece and put it as follows onto the right side of one of the pillow case fabric pieces: Place the raw edge of the piping approx. 0,5 cm (0.25") down from the raw edge of the pillow case fabric. The piping cord will face towards the inside of the pillow case fabric. Start at one of the top edges and pin the piping in place, all around the three edges of the pillow case fabric.
Take the prepared piping piece and put it as follows onto the right side of one of the pillow case fabric pieces: Place the raw edge of the piping approx. 0,5 cm (0.25") down from the raw edge of the pillow case fabric. The piping cord will face towards the inside of the pillow case fabric. Start at one of the top edges and pin the piping in place, all around the three edges of the pillow case fabric.

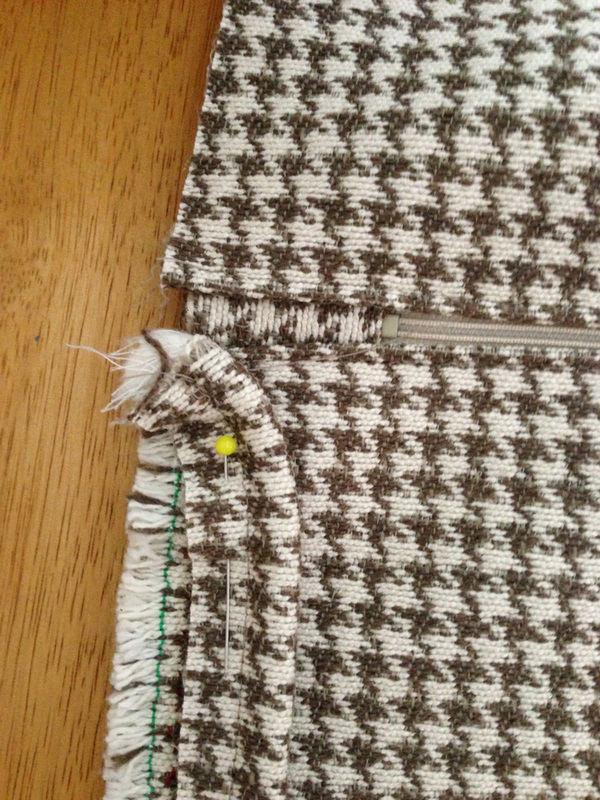
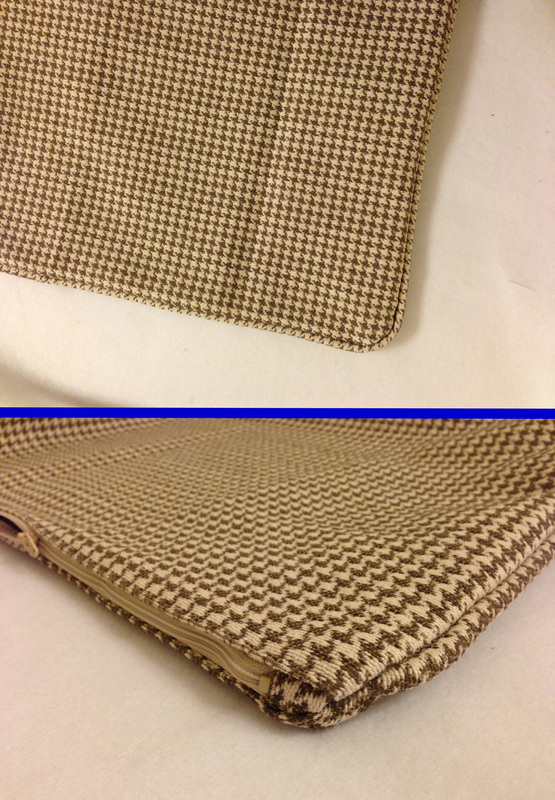
At the corners it is helpful to cut v-shapes into the seam allowance of the piping, which makes it easier to bend it smoothly around the corner. Make sure you don't cut into the stitching of the piping though. At the top corners try to bend the piping slightly towards the outside.
 |  |
Take your piping foot again and stitch all around the piping as before. I usually only baste at this step, since you only want to make sure that your piping stays in place for the next step to follow:
5. Assemble the pillow case:
Open the zipper. Put the two pillow case fabric pieces on top of each other, right sides together. The piping is now hidden in between the two fabric pieces. At the top corners, the piping should still be bent towards the outside. Pin in place and again, using the piping foot, stitch all along the three sides of the pillow case. Start at one top edge and sew straight down at first, going right over the end of the piping (careful, this can be little bumpy) and then smoothly let your piping foot find and cover the piping and keep on sewing as in the two previous steps.
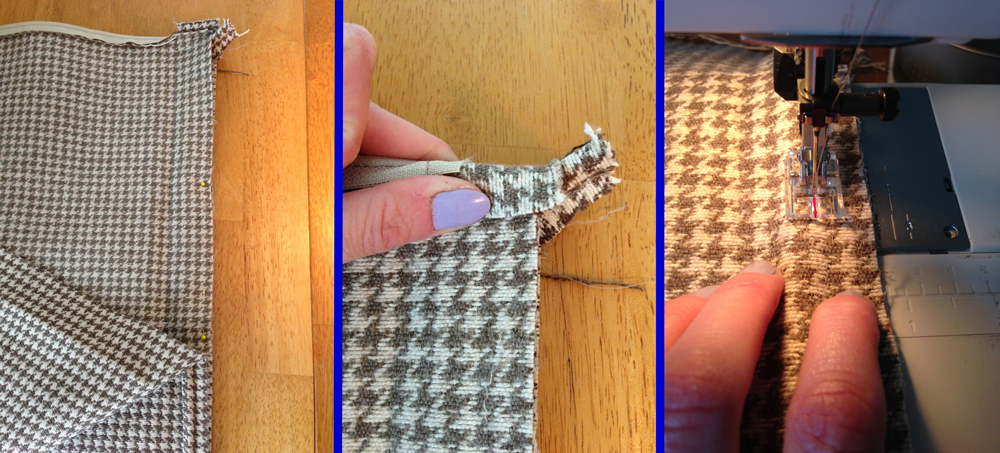
left: the two fabric pieces right sides together with the piping in between/ middle: start stitching at the top edge which means you have to sew over the piping cord/ right: sewing the pillow case fabric pieces together, along the piping with the piping foot
Helpful hint: I like to stitch from the side of the fabric with the piping attached. This way you can use the seam of the attached piping as orientation and sew right ontop of it.
Be careful at the corners, so that the piping comes out neatly at the end. Reaching the other upper corner, again sew straight up, at the same time going over the piping cord. Turn your pillow case right side out and poke out the corners with something pointy.
Be careful at the corners, so that the piping comes out neatly at the end. Reaching the other upper corner, again sew straight up, at the same time going over the piping cord. Turn your pillow case right side out and poke out the corners with something pointy.

Your pillow case is now complete. Enjoy!
If you enjoyed this tutorial I would be happy about a comment below :)
And if you would rather prefer to download this complete tutorial as a pdf file you may purchase it here for only $2.


 RSS Feed


