
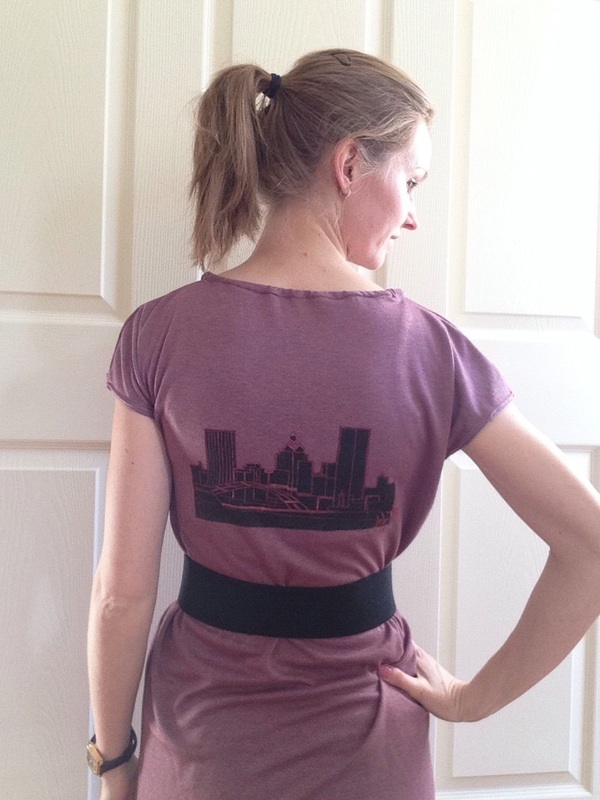
I remember that a few years ago there was this cool tutorial in one of my Burda magazines which showed you how to paint a city skyline onto a scarf. There was a stencil included in the magazine which portrayed some random fake city skyline. I thought the idea was pretty cool but if I am going to have a skyline on my clothing I want it to be a real one! So why not put Rochester, NY onto a dress?? If you are interested in making something like this for your city, here's what I did:
You need:
- a picture of your city. Print it onto a letter size sheet of paper
- tracing paper
- cardboard
- scissors and ideally a carpet cutter
- doublesided tape
- black fabric spray paint (I used Tulip Fabric Spray Paint "Asphalt")
- a fabric pen matching your fabric - I used a red one with glitter effect (make sure it is a "pen" and not "slick" fabric paint which is dimensional!)

1. Trace the outlines of the city onto tracing paper. Then cut out the interior parts and discard them. Place the cut out picture onto your cardboard
(You may also cut the original picture if you don't have tracing paper or don't want to do the extra step but I thought using tracing paper was a little easier)
Trace the outlines onto the cardboard and then cut out the interior parts of the cardboard. This is going to be your stencil.
(You may also cut the original picture if you don't have tracing paper or don't want to do the extra step but I thought using tracing paper was a little easier)
Trace the outlines onto the cardboard and then cut out the interior parts of the cardboard. This is going to be your stencil.
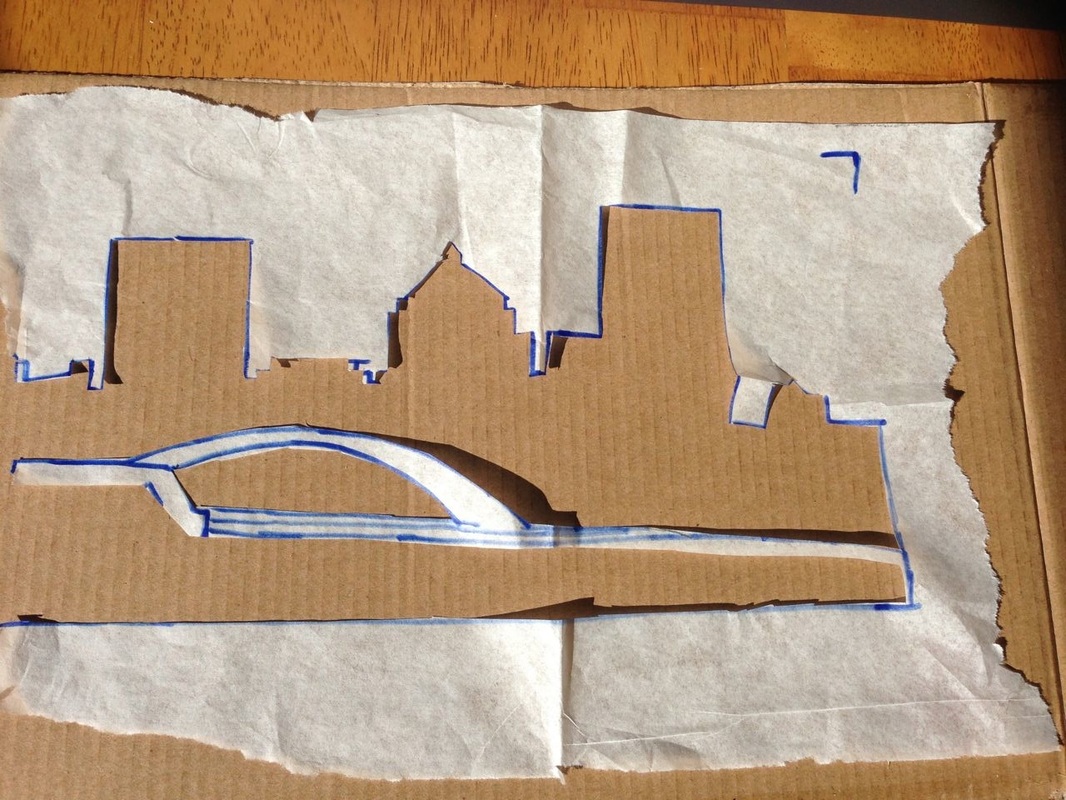
Before proceeding: I highly recommend trying your stencil on an old piece of fabric or muslin. You want to make sure you like the silhouette before you spraypaint the fabric of your garment! I am glad I used some simple yellow lining fabric to try out my stencil and my pens. I accidently bought a slick fabric paint pen which is dimensional and the result didn't really look nice. And I had cut out the bridge in the foreground of the cardboard at first which I also did not like. I removed the bridge part from the stencil so that I would have exclusively the outlines of the skyline. Everything structuring the skyline would have to be painted in later with a fabric pen.

2. Tape the stencil to the fabric with doublesided tape. Make sure to cover all edges of the stencil with tape. It is important that the stencil will be attached securely to the fabric to prevent the spray paint from running over the edges. You also want to make sure to cover up the rest of the fabric with newspaper or some old fabric from your stash. For my garment I found this cotton/rayon knit fabric and love the pinkish/purplish color. I only bought a yard and thus knew that I only had one try to make this happen. No pressure at all :-)
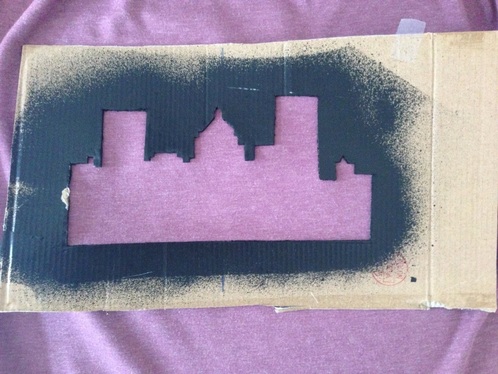
Spray paint your fabric. Make sure to evenly distribute the paint and to get every corner. Let your fabric dry for at least a few hours before proceeding.
3. Take off the stencil and admire your work! So far so good - I actually procrastinated for about two days before proceeding to the next step. I was too scared I would screw up my nice skyline silhouette.
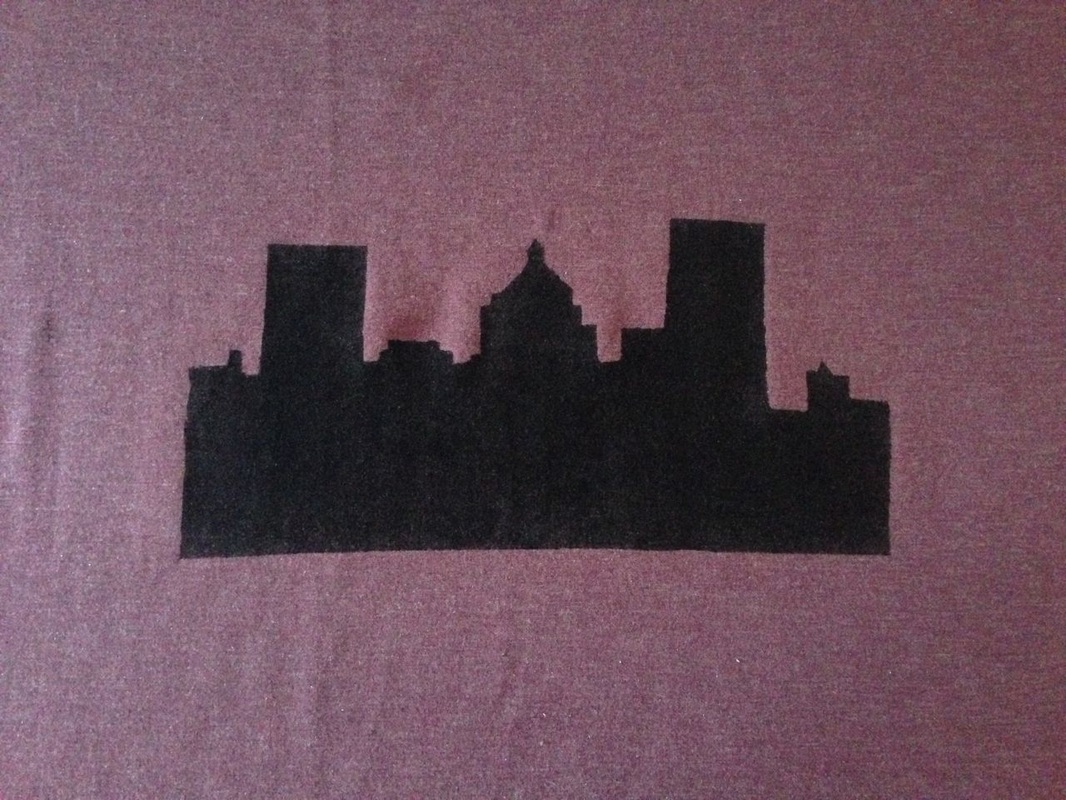
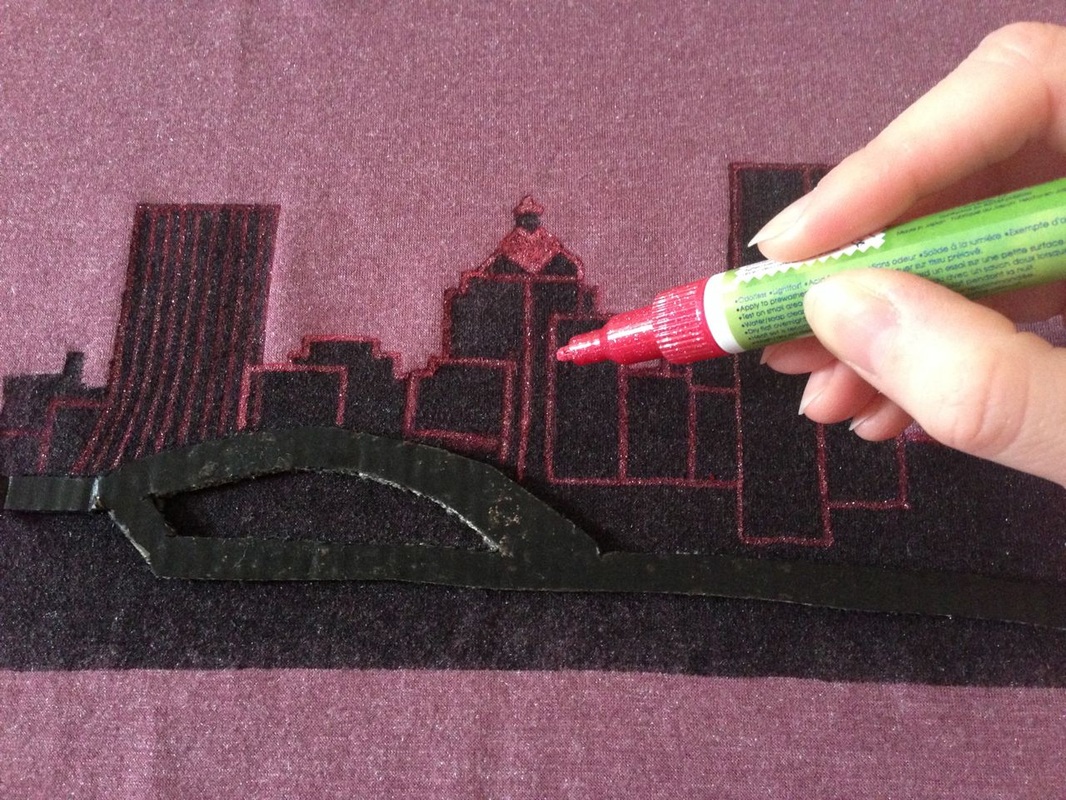
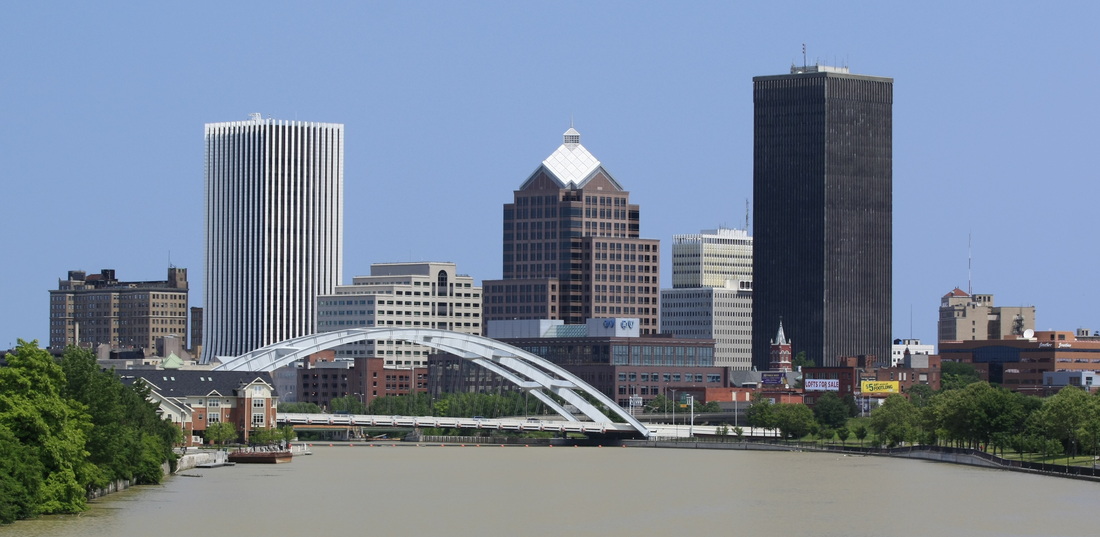
4. Now it's time to turn the silhouette into an actual skyline. I used the picture of Rochester for help and looked for significant details on the skyscrapers. E. g. the one in the center has a roof with slanted edges that reflects the sun. This part would be painted red to stand out more. The building on the left-hand side again has a very structured look with all those vertical lines, so I tried to draw in as many red lines as possible. The building on the right-hand side however is very dark, so I just draw the outlines and nothing else. As you can see I used the original stencil part to draw the bridge. I didn't want to eyeball this one since I am pretty sure I would have messed up on the proportions.
All done! After letting the paint dry for another few hours it was time to sew up the dress.
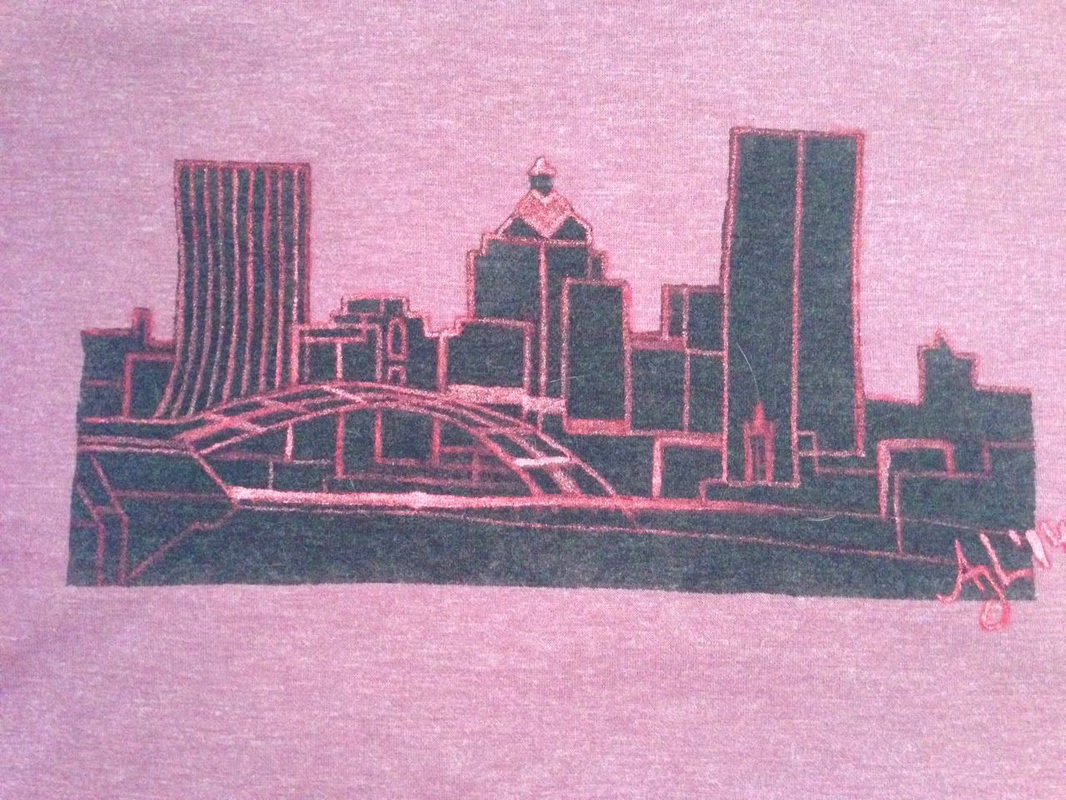 |  Not too bad! "Freddie-Sue Bridge" with Chase Tower, Bausch & Lomb Place and Xerox Tower (from left to right) |
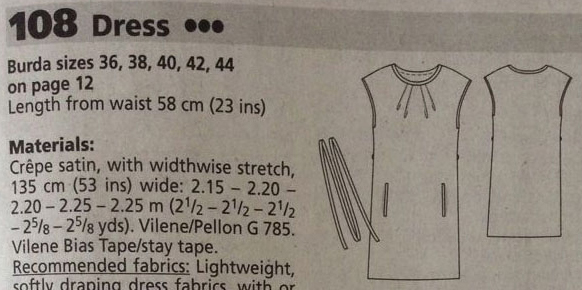
As for the dress I made with the fabric: it is a very simple pattern taken from Burda style magazine (April 2013, but they have the same pattern in the Spring 2014 edition which is available in stores right now). The pattern just uses one panel (cut on the fold) for the front and back and two facing pieces for the neckline. There are four pleats folded into the upper front part but I went with six since the neckline was a little too wide. I neglected the pockets. I like this pattern a lot and think the dress looks really good with a belt. Otherwise I would have probably made a more fitted version.
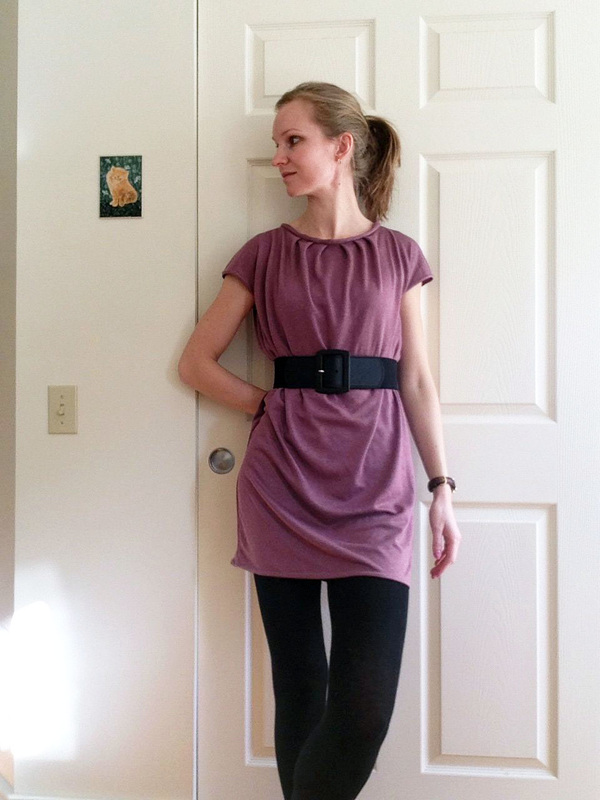 | 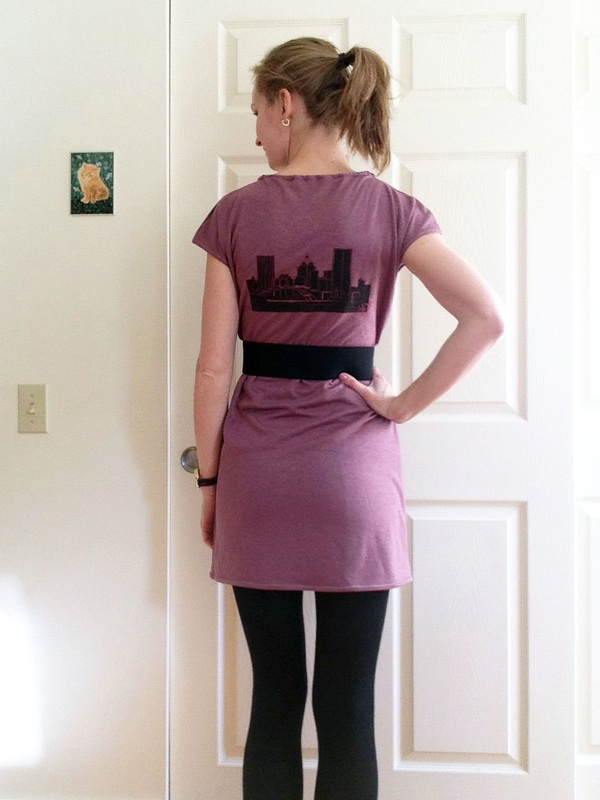 |
And I really do like the skyline on the dress! Not everybody carries their city on their back :) Thanks for reading and if you like this tutorial please leave me a comment below!
Have a great week everyone!
Have a great week everyone!


 RSS Feed


