charmed Liebling
  • home
  • pattern shop
    • wallet patterns
    • bag patterns
    • laptop and messenger bag pattern
  • items for sale
    • custom orders
  • free tutorials
  • contact
  • about

custom order for Mama :)

11/4/2013

2 Comments

 
charmed Liebling mini travel sleeve
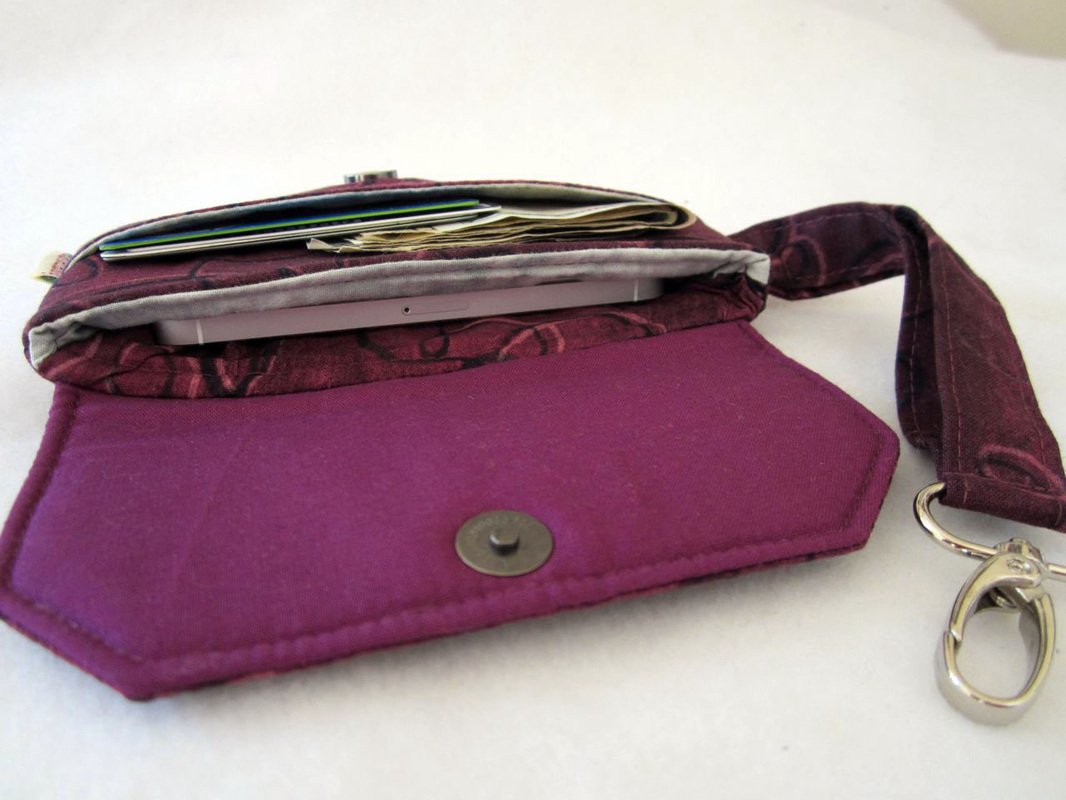
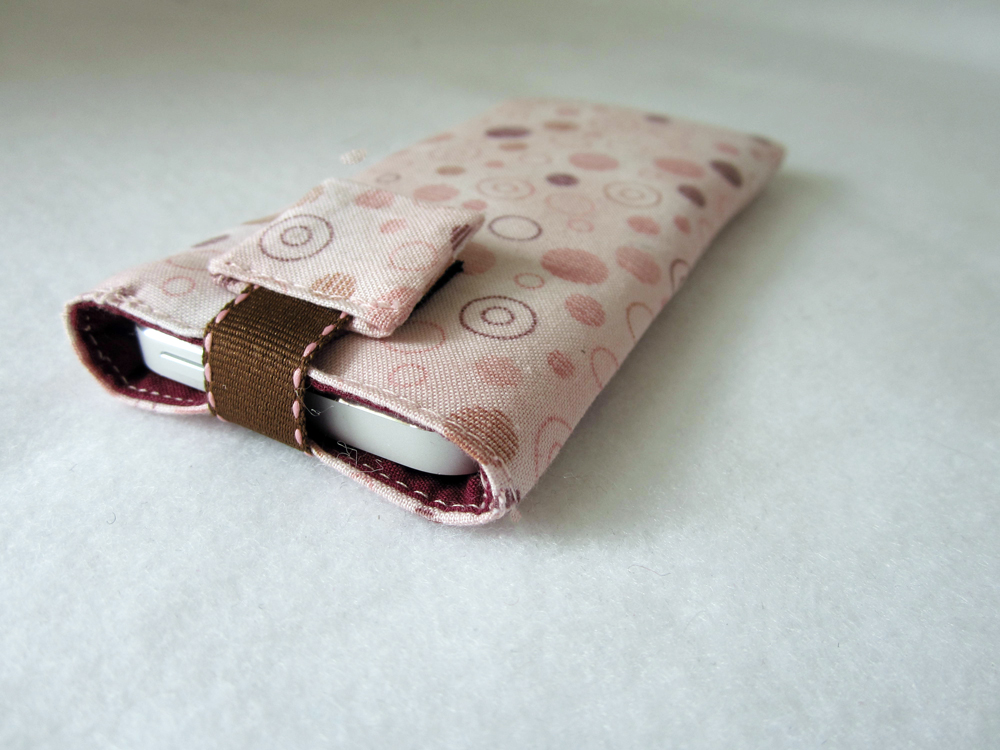
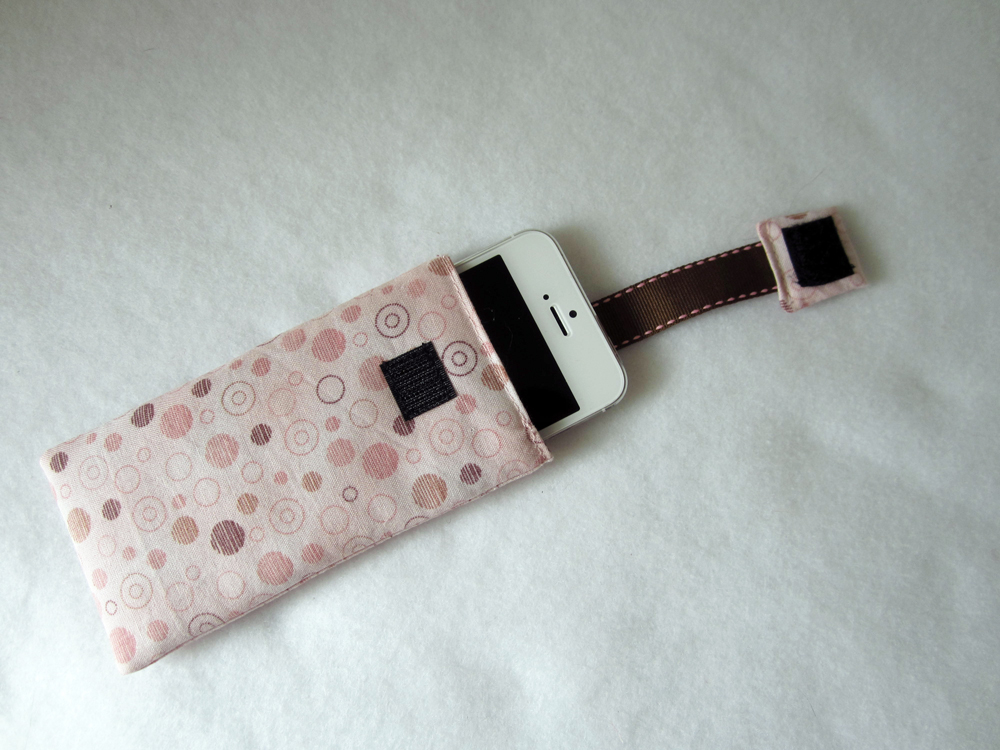
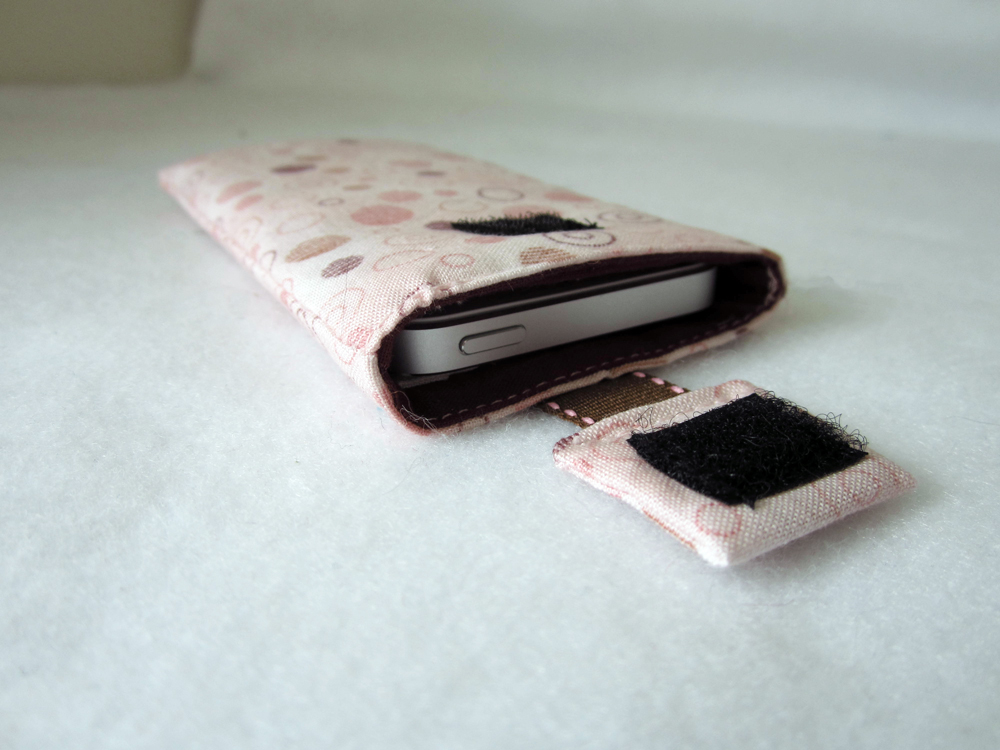
A few weeks ago my mom got herself a smartphone! With her being far away in Germany I was very happy about it because now we can finally text each other again. The last time I was home, I had my mini travel sleeve with me, and she liked it a lot. Since I got a lot of free stuff when I was home - when you only visit your parents three weeks every year they tend to spoil you, isn't that great?!? - I promised to make her a few purses. The mini travel sleeve was the first thing on her list and it turns out it was actually a good thing I took my time because now I could make it to fit her new phone perfectly! She gave me the measurements of her Samsung and so her travel sleeve is a bit bigger than the one that I made for my free sewing tutorial.
charmed Liebling mini travel sleeve
charmed Liebing mini travel sleeve
charmed Liebling mini travel sleeve


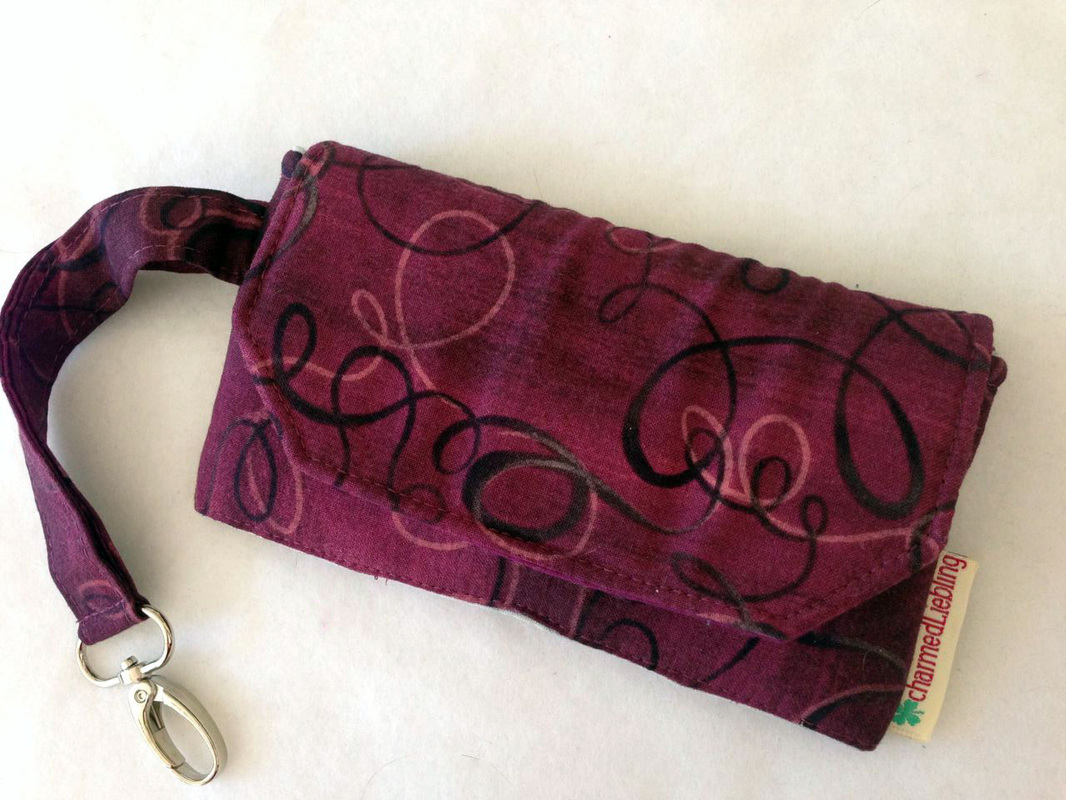
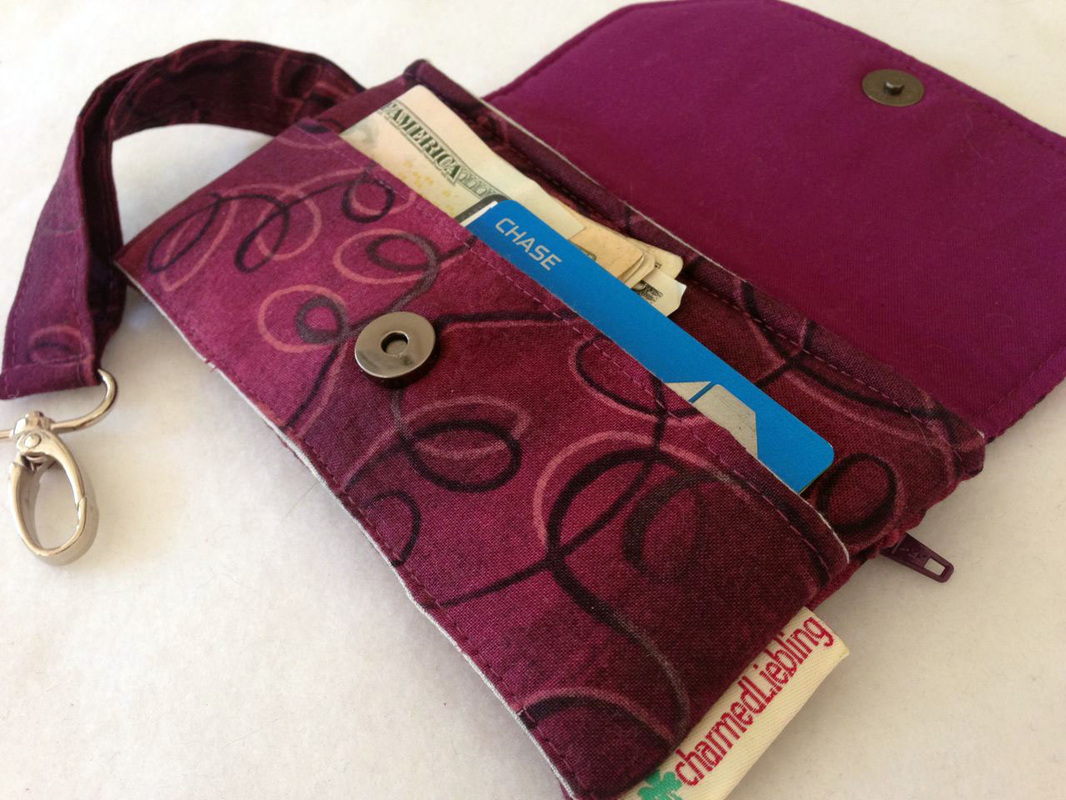
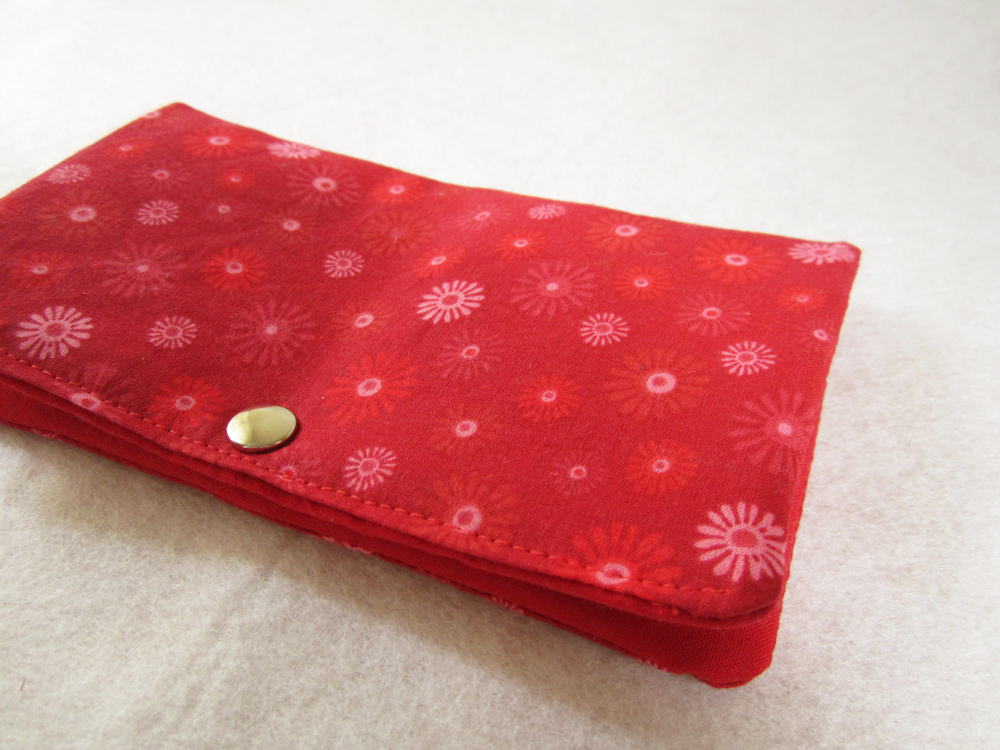
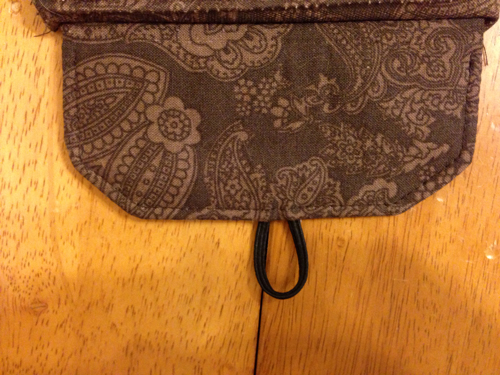
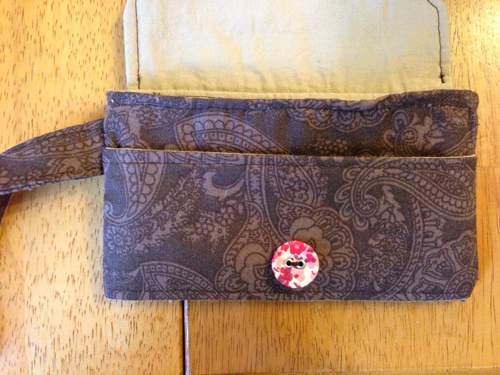
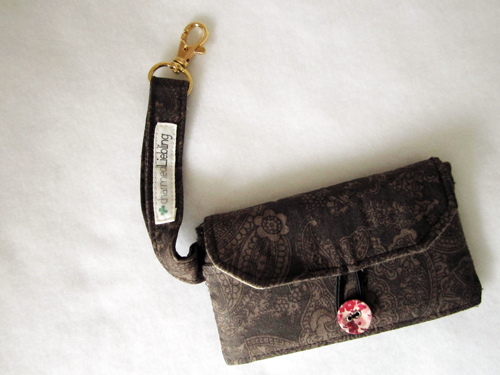
My mom asked for fabrics in pink, purple or gray colors and I found this eggplant colored quilting cotton by Jennifer Sampou, from her line "Studio Stash" (for Robert Kaufmann Fabrics).

Bild

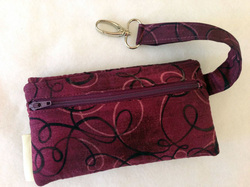
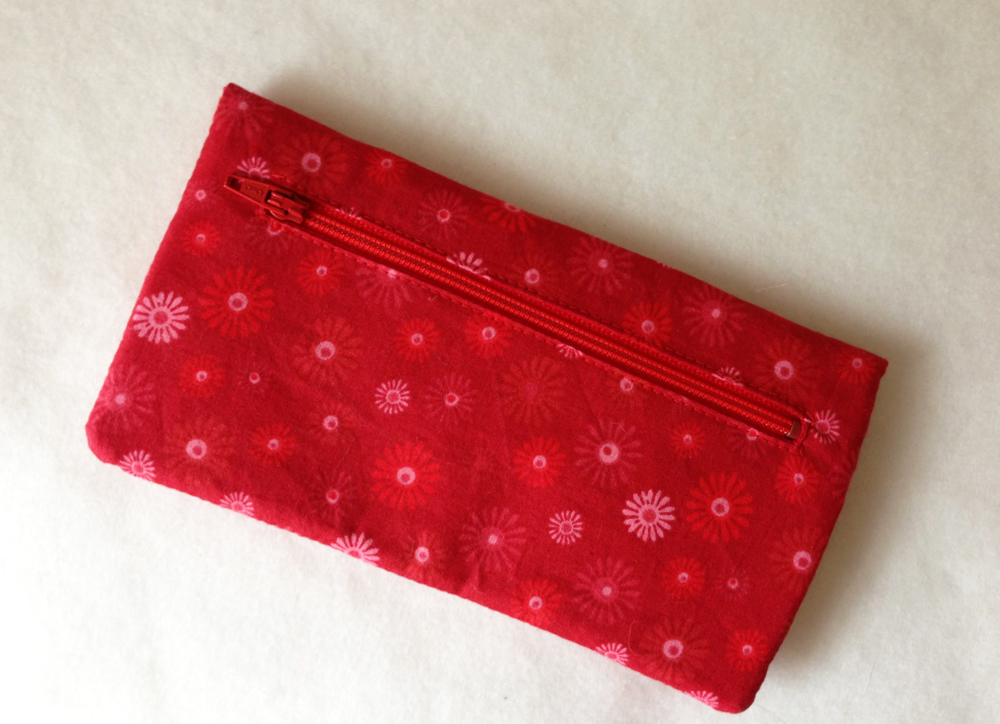
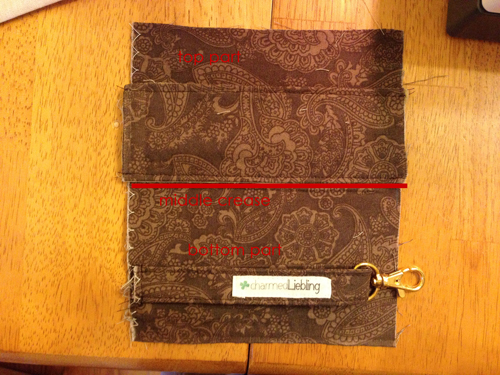
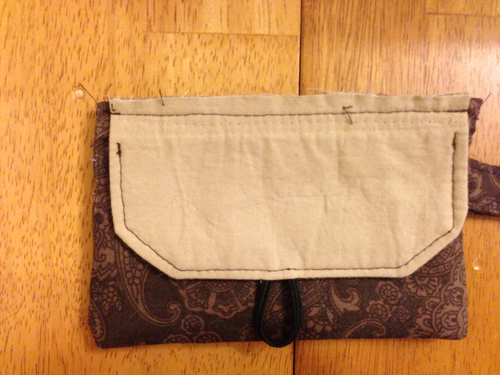
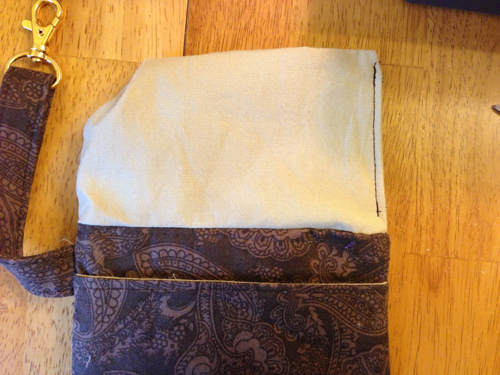
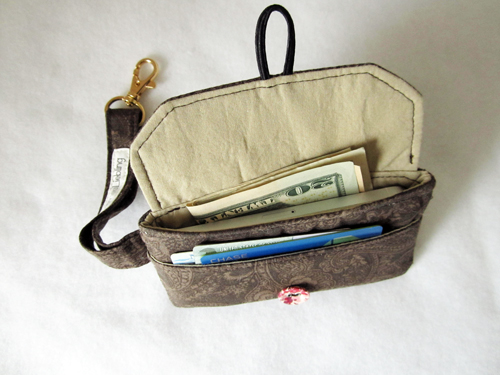
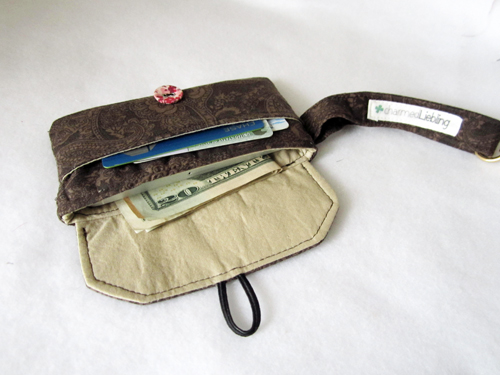
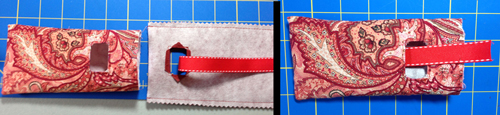
I added a zipper pocket to the back since she wanted to be able to store change somewhere. In Germany we pay a lot more in cash and therefore it is good to have a pocket for coins. My travel sleeve would have been to small to add a zipper pocket anyway but hers had just the right dimensions.

charmed Liebling mini travel sleeve
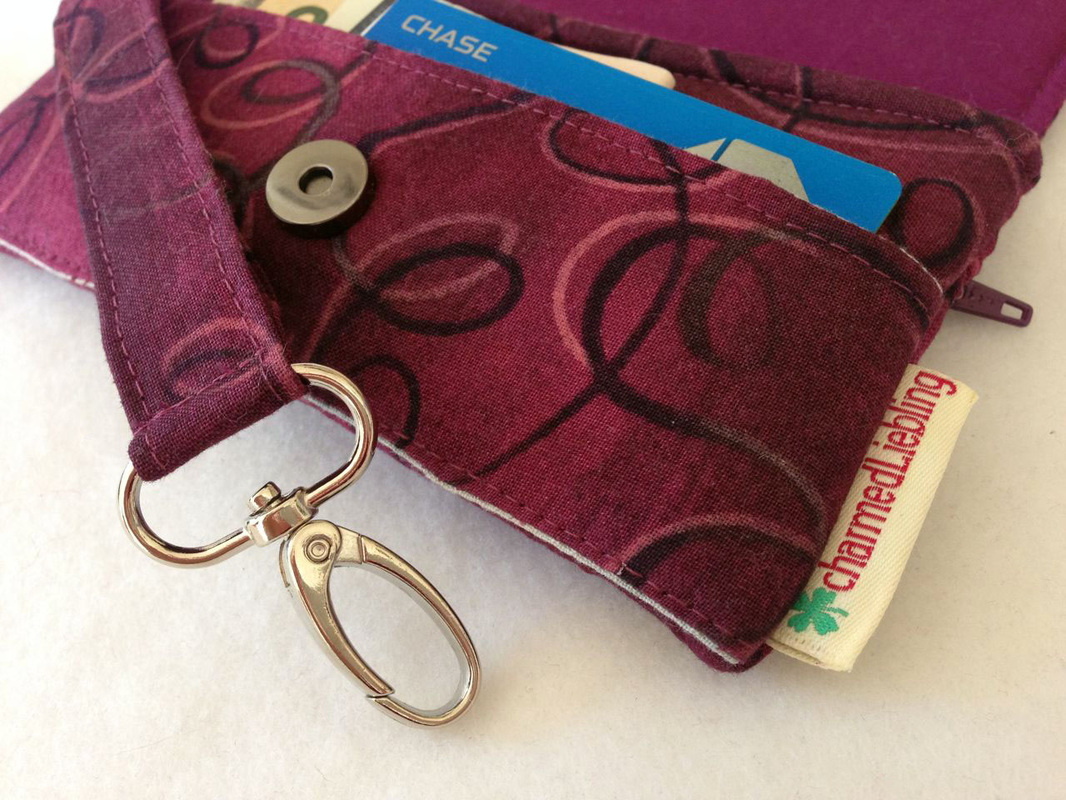
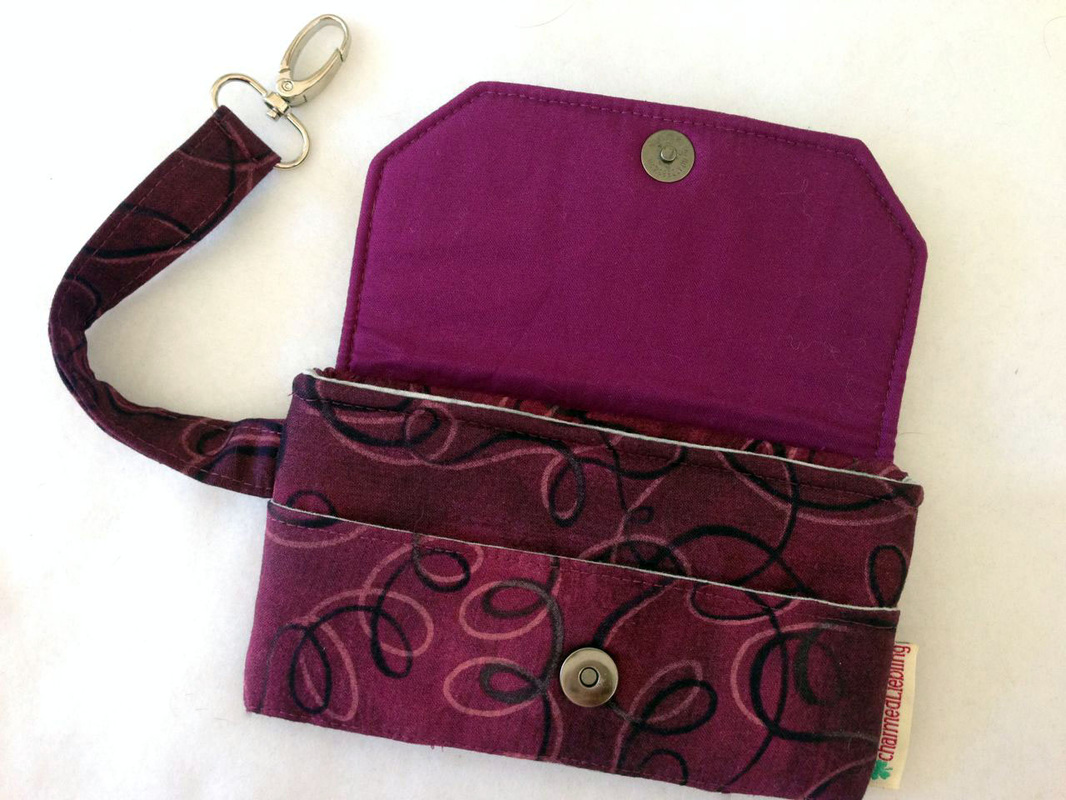
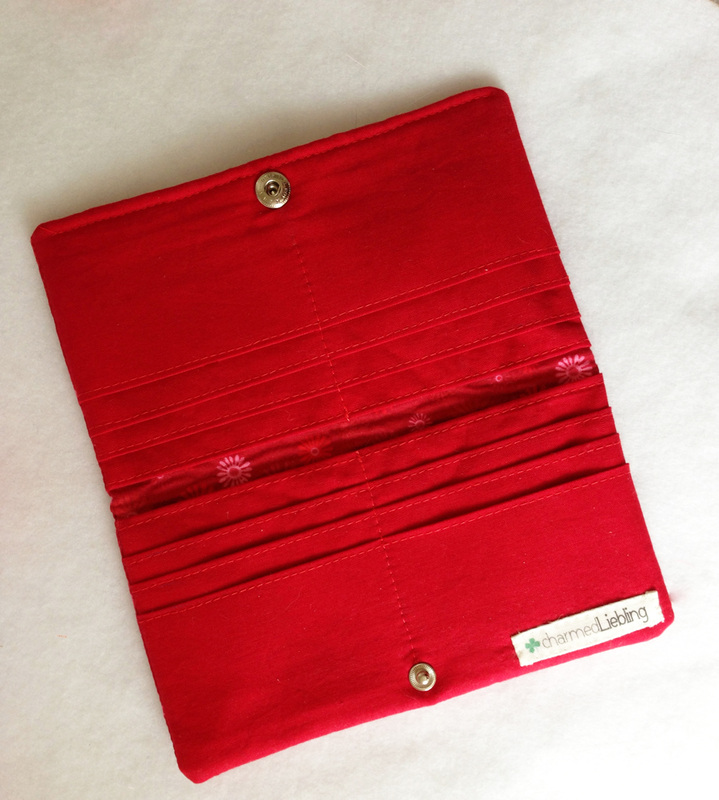
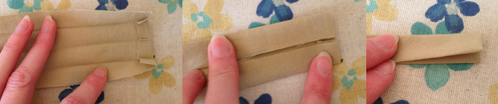
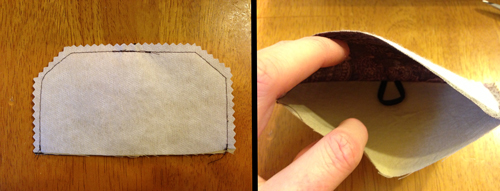
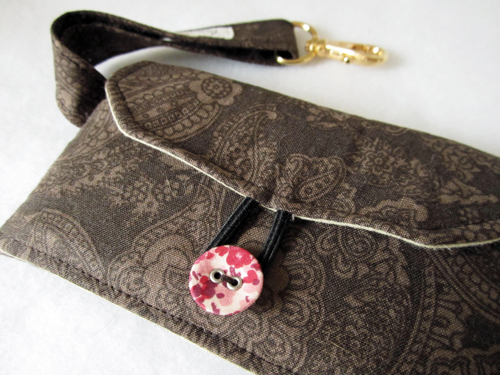
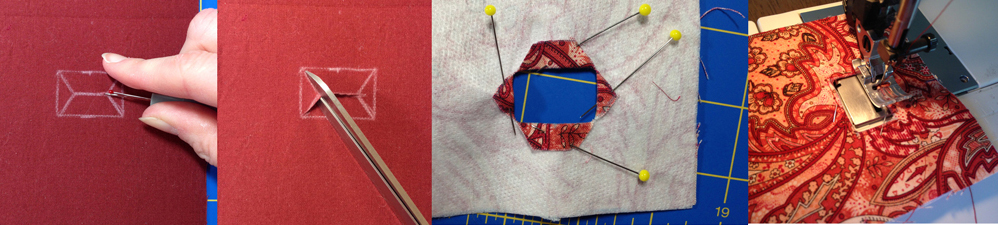
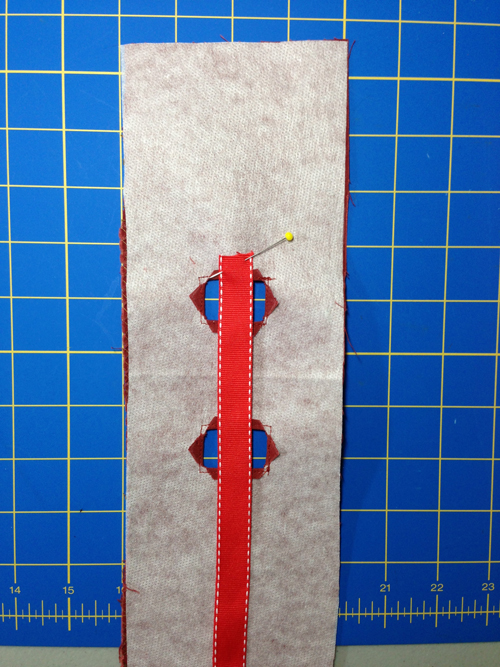
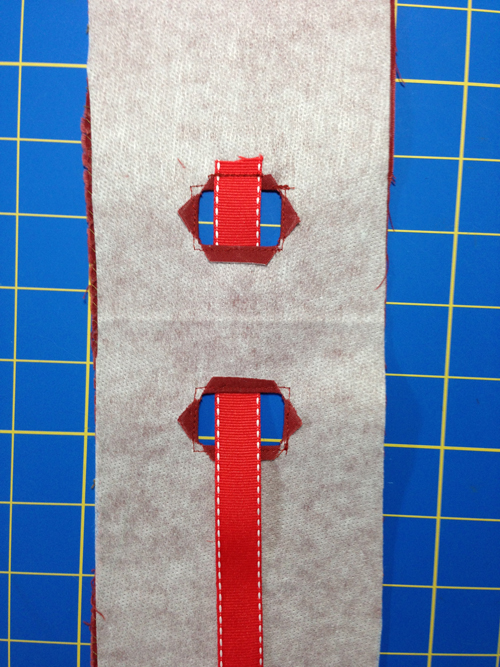
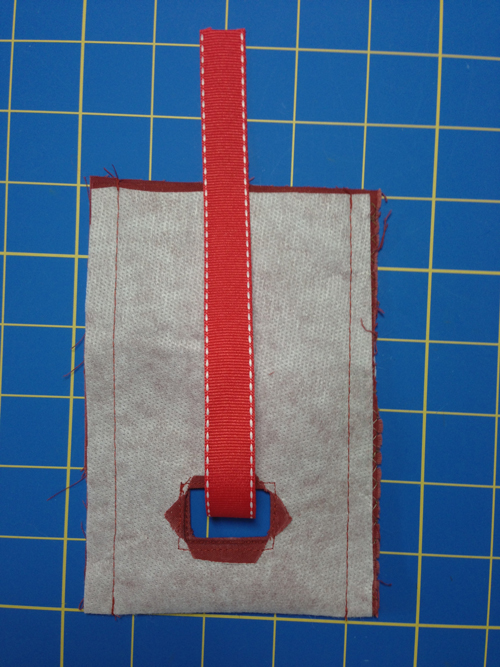
Instead of a button and string I used a small magnetic snap for the closure.

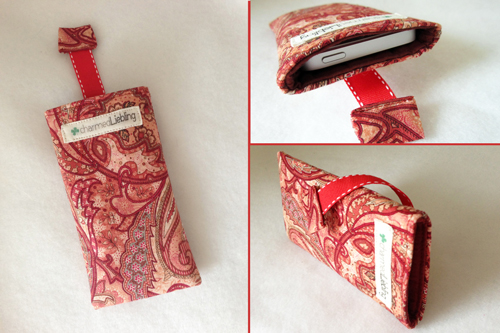
I hope my mom will like her new little purse. Since I will be going home again for Christmas this year (yay!!) she will have to wait a few more weeks until she gets it. I prefer to give it to her in person instead of shipping it. She can look at these pictures in the meantime :)

If you like this sleeve feel free to check out my free tutorial that I made back in February. Happy sewing :)

Bild
2 Comments

charmed Liebling items at a silent auction

4/12/2013

2 Comments

 
classical Idol Rochester
charmed Liebling donated items
As mentioned in my previous blogpost about my Amy Butler blossom handbag, I was going to donate the bag for a local silent auction here in Rochester, NY. The auction is part of a really exciting event on April 20, 2013 called "classical idol": a vocal competition with jury and audience participation who search for new talents in the classical music genre. The first prize is $ 2,000 and the opportunity to perform a solo in concert with the Rochester Oratorio Society. That is the choir I am currently a member of, hence my contribution to the silent auction :)

charmed Liebling iPhone case
So I had the handbag, but I felt like I would want to make it like a nice esemble of things, for people to be more likely to donate for it. I decided I would make another one of my iPhone cases (for iPhone 5) but I changed it a little bit from the one I made for myself and added a small velcro closure to it. The salmon color matches nicely with the shades of the handbag.

charmed Liebling iPhone case
charmed Liebling bifold wallet


Finally I made a bifold wallet in bright red colors. It has a lot of slots for credits cards and a zip pocket on the backside.


charmed Liebling bifold wallet
There will not only be a silent auction at this event but also hors d'oeuvres, cash bar and - most important of all - beautiful singing! The festivities start at 6 PM, the Idol competition at 7:30 PM. Tickets for the event are $40, and there also will be student "Theater Seating" available for $15.
To read more about this event please visit the website of the Rochester Oratorio Society. 
2 Comments

My miniature travel sleeve - FREE DIY TUTORIAL

2/3/2013

6 Comments

 
charmed Liebling mini travel sleeve
I promised to post this tutorial for my cute little travel sleeve before I go on vacation, so here it comes! It should be easy enough for a confident sewing beginner, but you should be familiar with the basic sewing terms ;-) Happy sewing!
This tutorial is free but if you would rather prefer to download this complete tutorial as a pdf file you may purchase it here for only $2.

You need:
Exterior fabric
Lining fabric
Fusible fleece (thin)
Fusible interfacing
1 button
1 snap hook
1 piece of elastic string, approx. 8 cm (3.25”)

Cut:
Note: these measurements are for iPhone 5 but you can adjust the size to your phone:
For the case take the measurements of your phone and add 5 cm (2”) to both length and width. Cut out your main fabric piece according to this size.
For the flap subtract 1 cm (3/8“) from the width of your main fabric piece. The length should be a little more than the third of the length of the main fabric piece.
For the front pocket take the width of your main fabric piece. As with the flap, the length should be a little more than the third of the length of the main fabric piece.

All measurements are length x width and fit an iPhone 5
exterior fabric:
for the case (main fabric piece): 1 piece of fabric 18 x 16 cm (7.25 x 6.25”)
for the flap: 1 piece of fabric 8 x 15 cm (3.25 x 5.75“)
for the front pocket: 1 piece of fabric 7 x 16 cm (2.75 x 6.25”)
for the strap: 1 piece of fabric 8 x 27 cm (3.25 x 10.75“)

lining fabric:
for the case (main fabric piece): 1 piece of fabric 18 x 16 cm (7.25 x 6.25”)
for the flap: 1 piece of fabric 8 x 15 cm (3.25 x 5.75“)
for the front pocket: 1 piece of fabric 7 x 16 cm (2.75 x 6.25”)

fusible interfacing:
for the lining case: 1 piece 18 x 16 cm (7.25 x 6.25”)
for the exterior flap: 1 piece 8 x 15 cm (3.25 x 5.75“)
for the lining front pocket: 1 piece 7 x 16 cm (2.75 x 6.25”)

fusible fleece:
for the exterior case: 1 piece 18 x 16 cm (7.25 x 6.25”)

Instructions:
All seam allowances are 1 cm (3/8“) unless stated otherwise.
Interface all the fabric pieces with the respective interfacing and fleece pieces.
1. Make the strap:
Fold the fabric in half lengthwise and press. Open up again and fold the two long edges towards the center crease. Press again. Put the two long edges on top of each other and press again. Now topstitch along both long edges, approx. 0,3 cm (1/8“) from the edges. Slide a snap hook over the strap and set it aside.
Picture
Use this pic from another pattern for help with the strap. Note that you DON'T have to fold down the short edges like it's shown here since they won't be visible later.
2. Make the flap:
Take your elastic string, fold it in half and put it onto the center right side of one of the long edges of the exterior flap fabric, with the loop lying on the fabric, and the open ends being aligned with the fabric raw edge. Baste in place.
Put the two flap pieces (lining and exterior) right sides together. Stitch along both short edges and the long edge on which you attached the elastic string. If you like, you can try a shape with an angle like I did (see first picture below).
Picture
Left: Try sewing an angle at the corners of the flap for a nicer look. Right: Here you can see how the elastic string has to be positioned onto the exterior fabric right side.
Picture


Trim the seam allowances, turn right side out and press. Topstitch all around the edges of the flap, except for the raw edge, with a 0,3 cm (1/8“) seam allowance.


Picture
3. Make the front pocket:
Put the two front pocket pieces right sides together and stitch along both long edges. Turn right side out and press. Topstitch along one of the long edges, with a 0,3 cm (1/8“) seam allowance. Place the front pocket with its wrong side (lining side) onto the front part of the exterior main piece. The bottom edge of the pocket should be aligned with the middle crease of the exterior main piece (see picture below). Sew the pocket onto the fabric by topstitching along the bottom long edge of the pocket.
Put the strap onto the exterior main fabric like shown on the picture and baste in place (it should be positioned approx. 2,5 cm (1“) down from the bottom corner).

4. Make the exterior case:
Fold the exterior fabric piece right sides together and stitch along both short edges. Make sure the strap is hidden between the two layers. Turn right side out and press.

Take the flap and put it onto the back of the case, right sides together, with the raw edges aligned. Check the lenght of your flap by bending it over as if closing your case. If it appears too long, shorten it by cutting off from some fabric from the raw edge.
Pin in place and stitch with a 0,5 cm (0.25“) seam allowance.
Picture
The exterior fabric piece folded in half, right sides together
Picture
The flap stitched onto the top edge of the exterior back
Picture

4. Make the lining case:
Fold the lining fabric piece right sides together and stitch along both short edges but leave an opening of approx. 7 cm (2.75“) on one side. Leave wrong side out.

5. Assemble the case:
Take the exterior case right side out and put it into the lining case. Both right sides should now be touching. Pin in place and stitch all around the top corner. Make sure the flap is tucked inside and hidden between the two layers.
Picture
Picture
Picture

Pull the exterior case through the opening in the lining case. Fold the seam allowances down towards the inside of the opening and topstitch/close it.

Picture
Tuck the lining case back into the exterior case and iron well, make sure to flatten out all bumps. Topstitch all around the top edge with a 0,3 cm (1/8“) seam allowance.

Take your button and handstitch it onto the center front pocket.

...And it's done! Have fun with this cute iPhone sleeve/travel case or whatever name you think fits best! ;-)

I ended up using this little sleeve almost everyday.. and not only on vacation! I love the fact that I can carry it around as a small yet stylish purse but still have all my essentials with me. How did your "travel sleeve" turn out? I would love to hear your feedback on this tutorial!

If you would rather prefer to download this complete tutorial as a pdf file you may purchase it here for only $2.
Bild
6 Comments

My miniature travel sleeve – tutorial soon to come!

1/31/2013

0 Comments

 
Edit: find the free sewing tutorial here :)
------------------------------------------------------------------------------------------
charmed Liebling mini travel sleeve
charmed Liebling travel sleeve
It seems like every time I get ready to go on vacation I feel the urge to make a new item that I can take along:  first my gorgeous travel bag for my trip to Germany last spring and then my super practical handbag, which I took to Berlin. This time I came up with an idea that is clearly related to my (slightly exaggerated) fear of pickpockets… but in my defense: I’ve been there, I know what it feels like to notice that your wallet is gone... and the thief even had the audacity to tie the strings of my backpack in a bow after taking out the wallet!

Anyway, I tried to think of some case or sleeve that would carry only my essentials, since I hate being stuck with a heavy handbag when I do sightseeing or go on a hike. Apart from my phone these essentials turn out be only my driver’s license/ID, green card and credit card plus a little bit of cash. You might even recognize the pattern, it's a mini version of the laptop cases I sell in my charmed Liebling Etsy shop. I basically made a cell phone case, measuring only 8 x 14 cm (3.25 x 5.5"), but I added a strap with a snap hook, so that I can put the case into my pocket and tie it to the belt loop of my pants! Pretty smart, huh? Ok, seriously, I have no idea if this is going to protect me from being robbed. But at least there won’t be any bows as a farewell greeting this time! AND this mini sleeve just looks really cute ;-)
charmed Liebling travel sleeve
charmed Liebling mini travel sleeve
0 Comments

FREE sewing tutorial: iPhone case with pull-tab

1/23/2013

9 Comments

 
--- This tutorial is FREE but for your convenience I decided to offer the complete tutorial as a PDF for download for only $2, if you prefer to have everything in one structured document --- 
smartphone sleeve diy tutorial
So, I've been asked quite a few times how I made my cute iPhone case, that I finally decided to make a tutorial! This project is fairly easy, someone with basic sewing skills should have no problem, even though I have to say that it involves a little bit of fiddly work... but you'll see later ;-)

I've also posted about those sleeves before, first when I came up with the design (read here) and the second time when I made the one for my new iPhone (read here).

You need:
exterior fabric
lining fabric
fusible interfacing (e. g. Pellon 950F)
optional: fusible fleece (some that is rather thin) if you want to add extra strength
a piece of ribbon: 1,5 cm (5/8”) wide

All seam allowances are 1 cm (3/8”) unless otherwise stated!

O.k. there’s gonna be exactly two tricky parts to this smartphone sleeve, but don’t worry, if I can do it, so can you! Since every phone has a different size I can’t give you the exact measurements for your phone case, you will have to figure them out by yourself. I’ll provide you with the right formula though, so the first thing you wanna do is a little math (also known as the first tricky part):
measurements iPhone
step a) The right size of exterior and lining fabric depends on the size of your phone. Let’s take the measurements of my phone as an example:

height (12.5 cm or 5")
width (6 cm or 2 3/8 ")
depth (0.8 cm or 0.25")

Note: Forgive me America, but I still get confused about how you guys count inches correctly since they are counted in eighths, so to prevent mistakes I will only use centimeters in my example. What's important is the formula anyway, so I'm sure you will figure it out for inches just as easily :-P

1. To determine the width of your fabric:
take 1 x the width of your phone + 2 x the depth of your phone + 2 x seam allowance of 1 cm (3/8”)

in my case I'd have to count:
6 cm (1x width) + 2 x 0.8 cm (2 x depth) + 2 x 1 cm (2 x seam allowance) = 9.6 cm
total

2. To determine the height of your fabric:
take 2 x the height of your phone + 1 x the depth of your phone + an extra 2 cm (0.75”) + 2 x seam allowance of 1 cm (3/8”)

in my case I'd have to count:
2 x 12,5 cm (2 x height)+ 0.8 cm (1 x depth) + an extra 2 cm + 2 x 1 cm (2 x seam allowance)
= 29.8 cm total


→ in my case, the fabric piece should measure 9.6 x 29.8 cm (3.75 x 11.75”)
Now cut out your exterior fabric piece and your lining fabric piece according to your own
measurements


step b) Find out the right length for the piece of ribbon:
take the heigth of your phone and add about 8 cm (3”) 

in my case: 12.5 cm/5” (height) + 8 cm/3" = 20.5 cm/8"
→ the ribbon I need would be about 20.5 cm (8”) long. Add some extra cm/inches to be on the safe side, if you are not quite sure. You can still adjust the right length later.

step c) Interface the wrong sides of the exterior and the lining fabric pieces with your interfacing (and fusible fleece if you're using it. I recommend cutting 1cm (3/8”) off all the edges of the fusible fleece to prevent too much bulk on the seam allowance).

Picture


This is what you should have ready by now:
the ribbon, the lining fabric (on the left) and the exterior fabric (on the right), both with fusible interfacing attached onto the wrong side. I didn't use fusible fleece for this phone case.

step d) Make the openings for the ribbon pull-tab:
Take your exterior fabric, measure and mark 3 cm (1.25”) down from the top edge center. This is where to the top edge of the opening will be. Now draw a rectangle of 2 x 3 cm (0.75 x 1.25”) onto the fabric, make sure it’s right in the middle.
diy smartphone sleeve tutorial: openings
The lining will have two openings for the pull-tab:
Take your lining fabric, fold it in half with the short edges right sides together and press, so you know where the middle of the piece is. Open up again and measure and mark 2,5 cm (1”) from this ironed crease towards both sides. Again draw rectangles of 2 x 3 cm (0.75 x 1.25”) onto the fabric, make sure, they’re right in the middle.

Draw a horizontal line across the rectangulars, with both ends merging into a triangular shape.
This is where you are going to be cutting to make the opening: take your seam ripper to get a small hole started and then cut all along the horizontal and the triangular lines.

Fold the fabric down and pin in place. Topstitch close to the edges of the rectangular (approx. 0,2 cm or 1/8 “), at the same time stitching the little fabric pieces to the wrong side of the fabric, so that they are out of the way and you create a neat opening.
diy smartphone sleeve tutorial: cutting
diy smartphone sleeve tutorial: ribbon placement

step e) Attach the ribbon to the lining fabric:
Put one end of the ribbon onto the wrong side of the lining fabric. It should be positioned above the top edge of the opening, like you can see it on the right picture.


Pin in place and stitch the ribbon to the lining fabric.
Now pull the other end of the ribbon through BOTH openings of the lining fabric, like this:

Picture
Picture
step f) Fold the lining fabric right sides together, pin and stitch both long edges (see picture on the left).

Now is a good time to check if your case really fits our phone. Take your phone and put it inside the lining case that you have just made (don’t turn the lining case right side out, leave it like it is, wrong side out). Your phone should fit snug in there, it should neither be shaking around nor sit all too tight inside the case. If necessary fix the width of your case.
Trim the seam allowances and put the lining case aside.


Do the same with the exterior fabric piece: fold the exterior fabric right sides together, pin and stitch along both long edges (make sure the width is the same as with the lining case, in case you adjusted it). Trim the seam allowances and turn it right side out. You should now have two cases.

step g) Put it all together:
Take the lining case and put it into the exterior case, both wrong sides should touch. Take the end of the ribbon and pull it through the opening of the exterior case:
Picture
If necessary, trim your piece of ribbon. Put your phone into the case to make sure the ribbon is all the way inserted into the case. I like mine not to be longer than 6 cm (2 3/8"), measuring from the bottom edge of the exterior opening (basically measuring from where the ribbon is visible/comes out of the exterior opening).

Now comes tricky part number 2 (also referred to as the fiddly work): fold the top raw edges of your phone case towards the inside (lining and exterior fabric are touching with their right sides) and topstitch all around the top edge. Try using pins and/or your fingers to hold the two fabric layers in place while sewing around. Take your time. Don’t freak out (I do sometimes). It’s not that easy to create a neat stitching line, because of the small dimensions of the opening of the sleeve but you’re gonna make it happen! ;-)
diy smartphone sleeve tutorial: assembling the sleeve
step h) Yay, you’re almost finished! Make a nice tab for the ribbon:
Take a small piece of exterior fabric of 6 x 4 cm (2.5 x 1.5”).
Fold it in half by putting the short edges right sides together. Stitch along both sides edges. Fold the raw open edges down and press. Turn right side out.
Take this little "cover" and put the end of the ribbon inside. Topstitch the open end, this way attaching the ribbon to the tab and at the same time closing the open end.
diy smartphone sleeve tutorial: making the pull-tab
Congratulations! Your smartphone sleeve is finished!
Did you enjoy this tutorial? Or do you have any suggestions for improvement? I would love to hear your opinion :-)
Bild
diy smartphone sleeve tutorial: finished iPhone sleeve
9 Comments

    Enter your email address:

    Delivered by FeedBurner


    Follow on Bloglovin

    RSS Feed

    Anna

    anna's blog -

    Welcome to my blog! I am an accountant who once started out her "career" in the US by designing bag and wallet sewing  patterns! My patterns are available on Etsy and occasionally I will share some of my sewing projects that I work on in my spare free time on my website.  Happy sewing :)

    Categories

    All
    Bags
    Bargains
    Dresses
    Fabric
    Fashion
    Germany
    Giveaway
    Home Dec
    Interfacing
    Review
    Sale
    Seasonal
    Sewing Patterns
    Sewing Tips
    Smartphone Cases
    Special Occasions
    Treasury
    Trips
    Tutorial
    Vacation Projects
    Wallets

    Threading My Way_Featured
    Pattern Spot dot com
    This page contains affiliate links. See my disclosure policy.
    Online Sewing Class
    Craftsy

    Archives

    December 2021
    May 2020
    April 2020
    January 2020
    January 2015
    October 2014
    September 2014
    August 2014
    July 2014
    June 2014
    May 2014
    April 2014
    March 2014
    February 2014
    January 2014
    December 2013
    November 2013
    October 2013
    September 2013
    August 2013
    July 2013
    June 2013
    May 2013
    April 2013
    March 2013
    February 2013
    January 2013
    December 2012
    November 2012
    October 2012
    September 2012
    August 2012
    July 2012
    June 2012
    May 2012

Powered by Create your own unique website with customizable templates.