charmed Liebling
  • home
  • pattern shop
    • wallet patterns
    • bag patterns
    • laptop and messenger bag pattern
  • items for sale
    • custom orders
  • free tutorials
  • contact
  • about

Sewing an easy wool sweater

12/29/2021

0 Comments

 
Picture
I am lucky enough to have two weeks off over Christmas and New Year's and took the opportunity to get my sewing machine back out. Today is my mom's birthday, she would have been 79 today and I have been thinking about her more than I usually do these past few days. She was an avid sewer and I learned my first sewing skills from her. So, for me sewing will forever be something that makes me reconnect with her in my mind. Rest in peace, Mama. I dedicate this project to you <3  
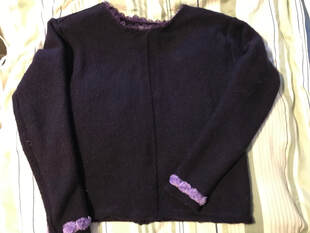
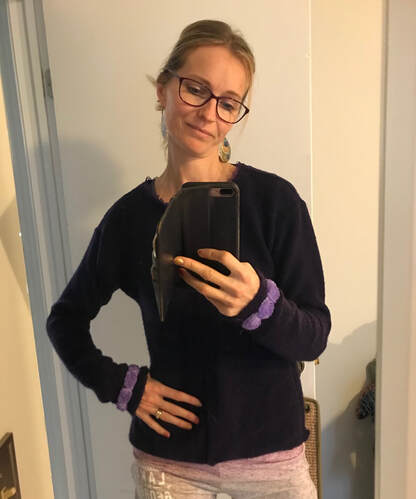
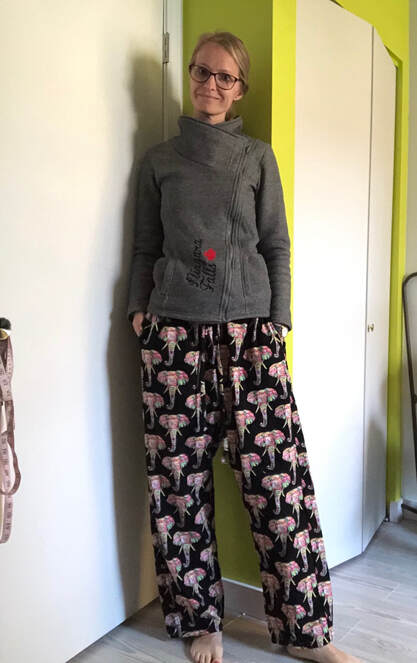
Anyways, the last time I went home to see my dad I went through my mom's fabric stash and found this really nice and warm, dark purple wool fabric. I took it with me and finally figured out what to make with it. Since it was only one meter of fabric - a little more than a yard - my options were limited but I managed to create a short sweater.
Picture


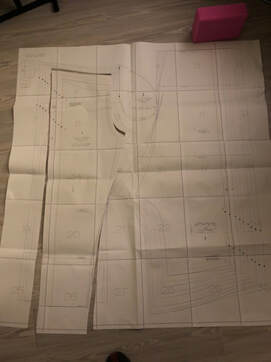
​​I used a super simple (pun intended) Simplicity pattern (S8988A), which gives you different options for style (if I had had enough fabric I would probably have added a collar) but I chose the simplest one. I only had to cut two sleeves and two pieces for front and back each. Done!

Picture
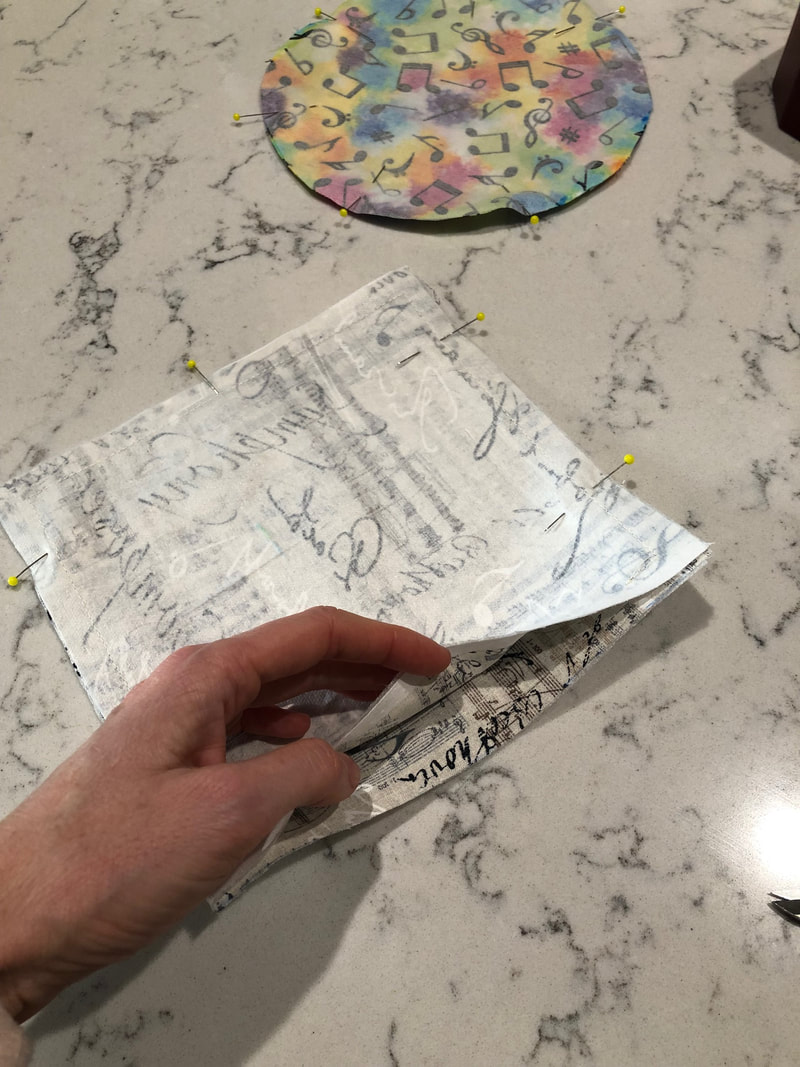
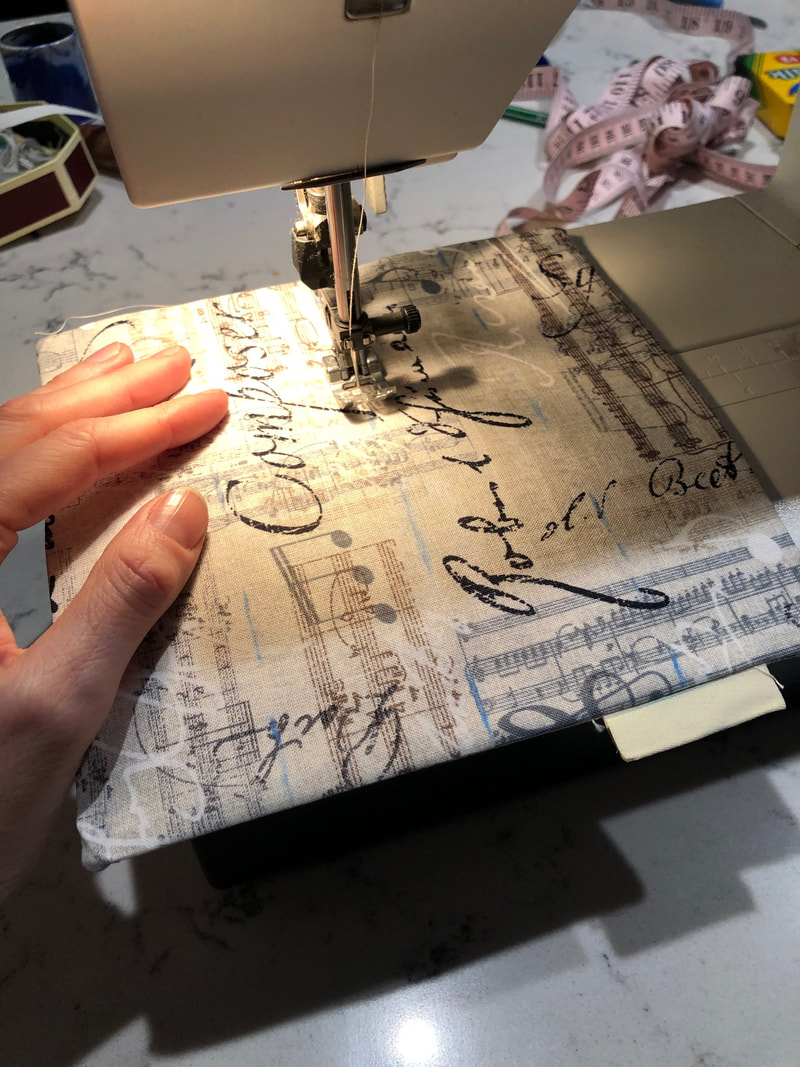
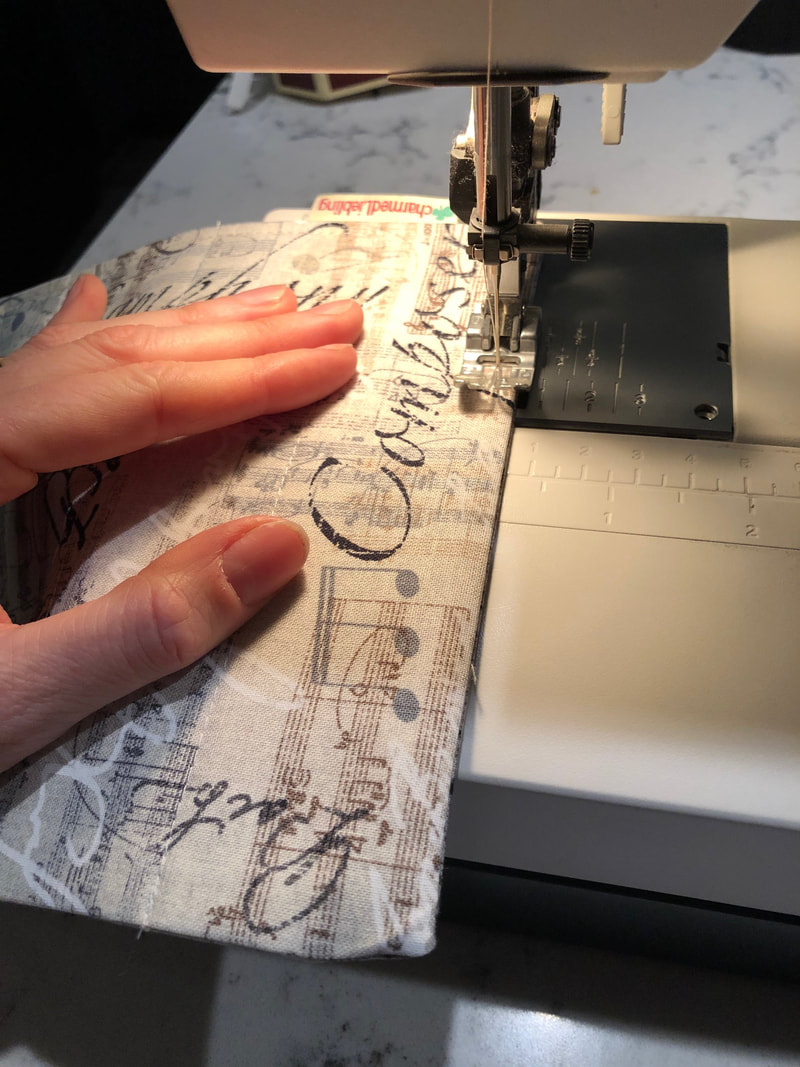
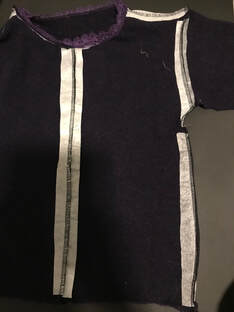
The sweater has a middle seam on both the front and back. The original pattern asks for sewing the right sides together, so that the seam allowance shows on the outer side but I did not like that much, plus I was planning on using my serger instead of my regular sewing machine and it would not have made sense to do it that way in that case. 
What I realized is that the fabric was pretty flimsy when I used my serger on it, so I added some lightweight interfacing to all of the seams, which was quite a bit of cutting but it made the seams look much better. 
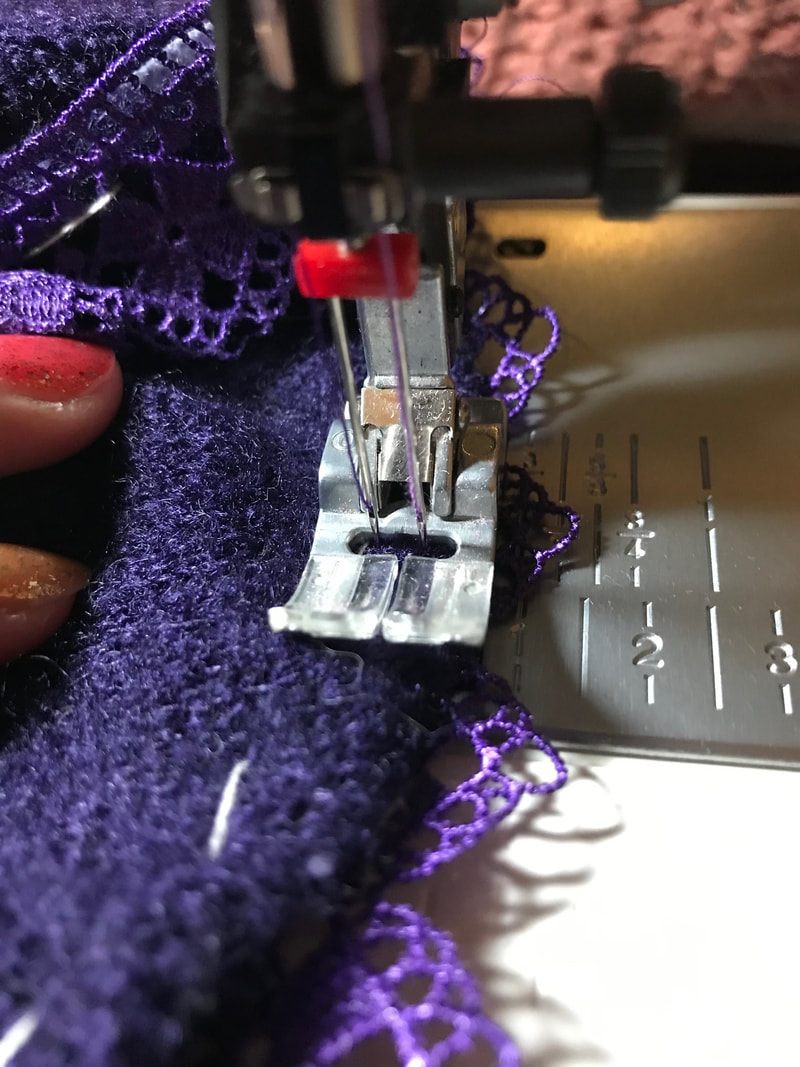
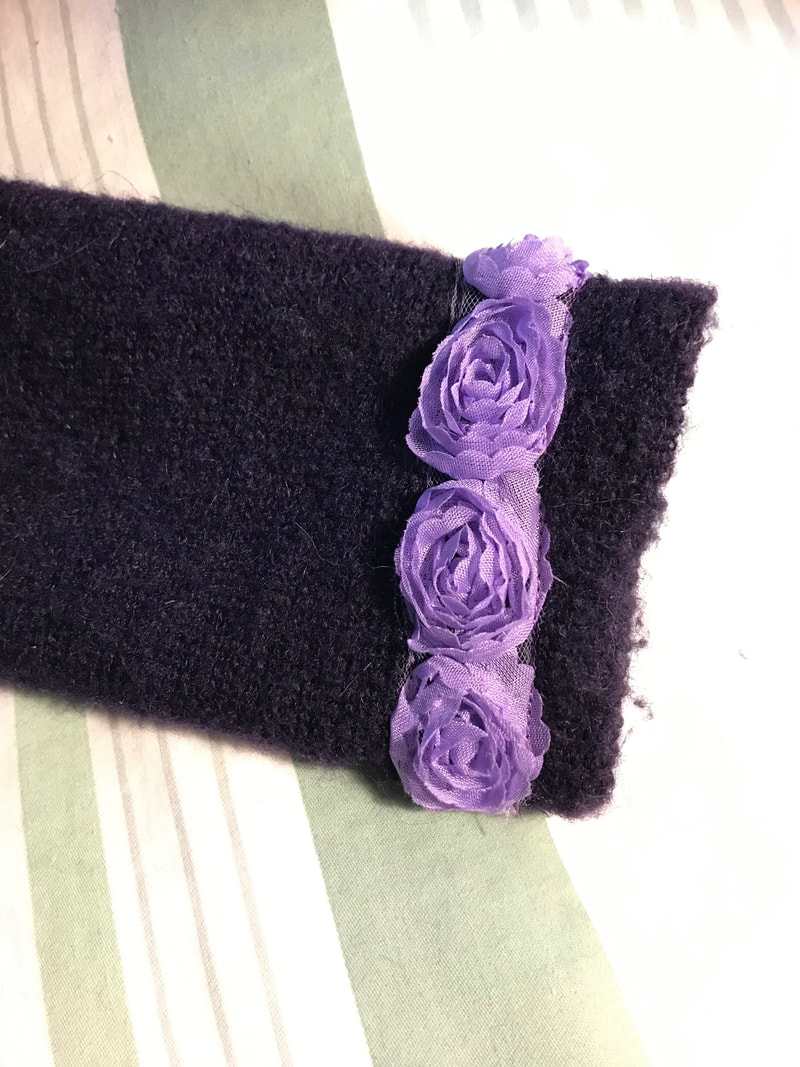
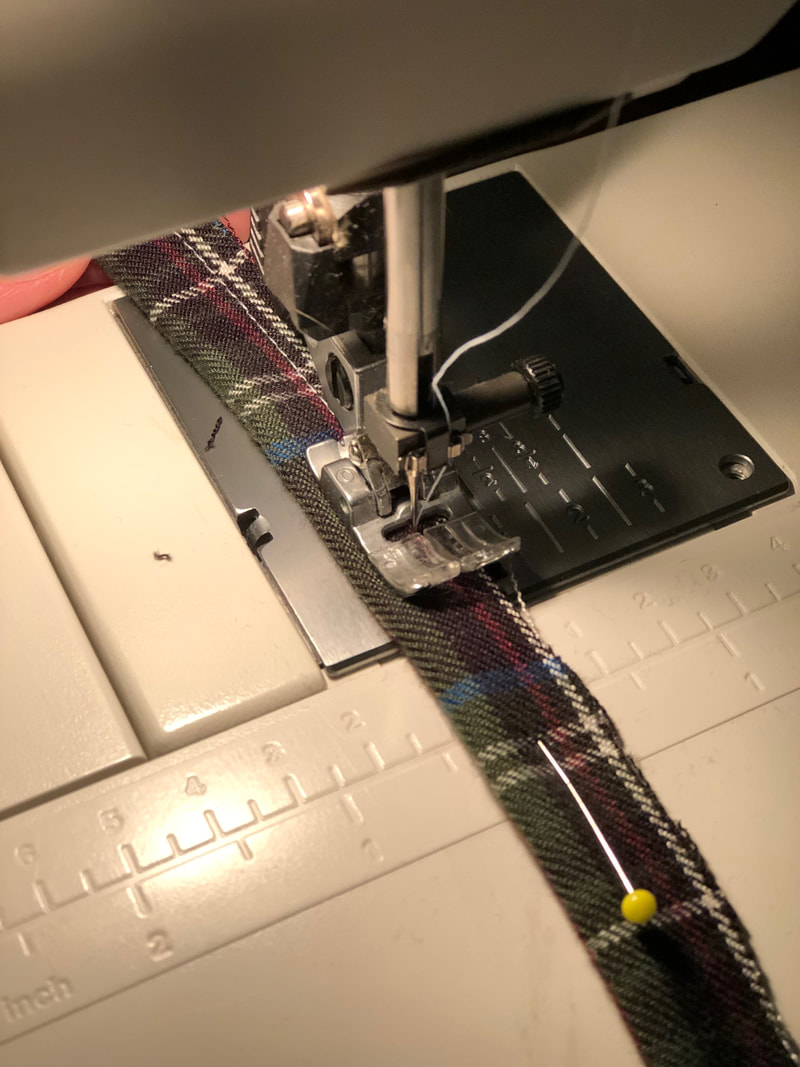
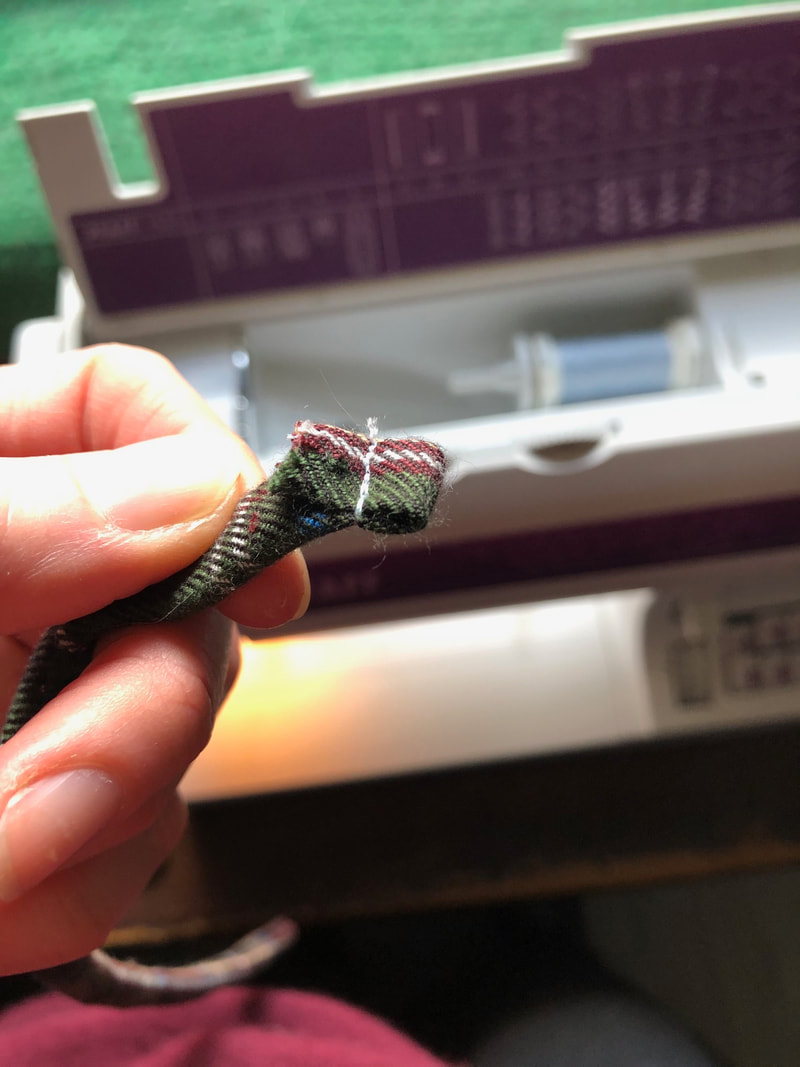
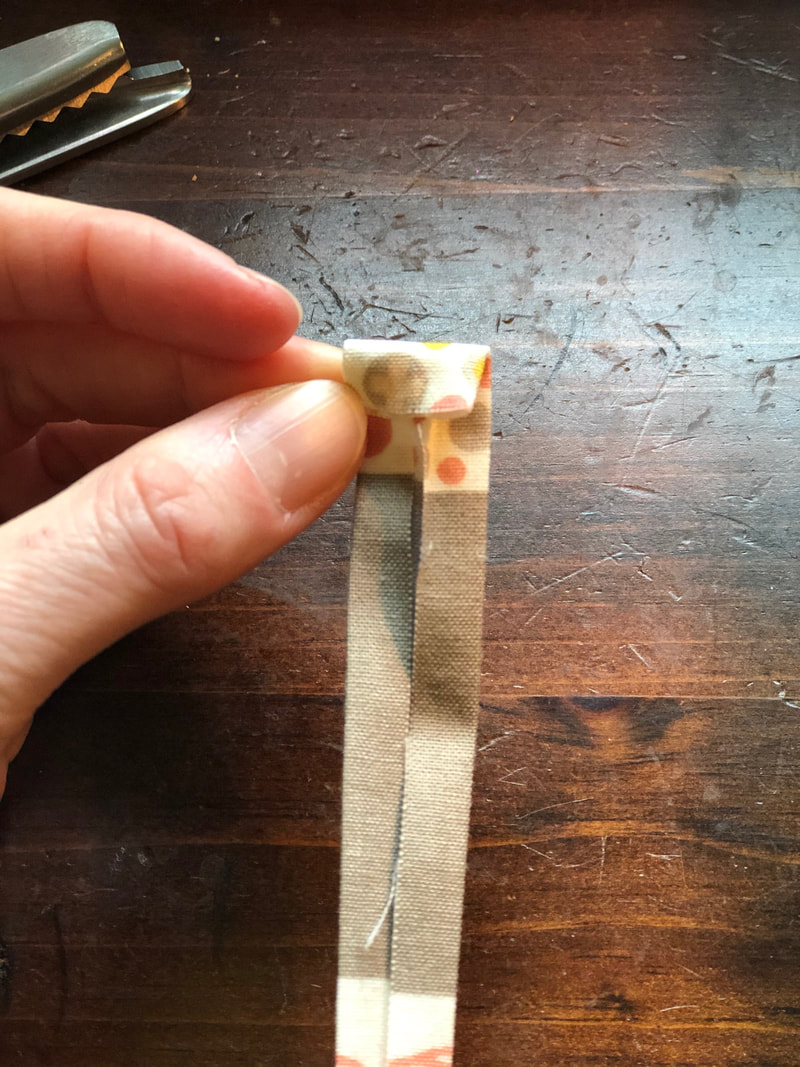
To add some interesting features to the sweater I added a trim to the neckline, as well as some rose shaped ribbon to the sleeves. I used my sewing machine for this, the roses I simply topstitched and for the trim around the neckline I used a twin needle while sewing down the raw edge of the fabric to the inside at the same time.
Picture
Picture
I'm pretty happy with how it turned out. What saved me some time at the end was the fact that I did not have to sew any hemlines since I was able to cut the pattern pieces using the selvedge of the fabric, which is barely noticeable on the finished product, even if you look closely. So no finishing of hems required! 
Picture
0 Comments

And just like that I got hooked on sewing apparel again

5/17/2020

0 Comments

 
Two great weeks of sewing projects are behind me! I basically hadn't been sewing since 2015, I didn't have the time, I didn't have the energy, and frankly, I wanted to leave my old life as I had known it behind me and that included my sewing. But if you love something truly it will come back to you at the right time in your life, right?

So, here I was, finally done with college and in the midst of a pandemic, which forced us all to stay home as much as we could. So for me, this coincidence in events (and I don't really believe in coincidences) gave me back a big chunk of free time back that I had not had in that way for the previous five years. And then there were the face masks, and after a couple of weeks of what seemed like our politicians going back and forth on the sense of wearing face masks in order to protect yourself from corona virus, we were finally told we all had to wear them in public. Of course I made my own. Duh. 

Corona really was the reason I got my sewing machine back out and started sewing. First I only made a few masks for myself, my boyfriend and some friends. Then Etsy posted on Instagram that they encourage all their sellers to make face masks due to the high demand. My Etsy shop! Yes, it was still existent. I was still selling a few patterns every month. But other than that I had pretty much neglected my shop. I thought to myself: why not make a few extra masks from those nice fabrics that I still had in my stash? So that's what I did. And they sold out. Quickly. So I made more. And those sold out as well. I wasn't pricing them very high because my intention was not to make a huge profit off of those things but rather to make sure people can get the masks they need AND have a fashionable item at the same time. While covering my cost. Since April 2, I have sold about 100 masks. That's a lot of mask sewing!! 
Picture
And then this happened: seeing how much fun I was having making the masks, my boyfriend surprised me with an order of fabrics from Mood Fabrics in NYC. I still love that store, they just got the best selections of fabrics, anything you can imagine (If you like to read about my trips to Mood in New York City and Los Angeles, you can click here (NYC) and here (LA)). I'm not lying, once I saw those gorgeous fabrics that he ordered, I know I wouldn't be using them for masks. I mean look at those great prints! Btw, one fabric is missing in this picture because I had already made it into a garment :) But see below!
Unfortunately I only have 1 yard of each, which is not enough for most clothing patterns. I was able to make a blouse of one of the Mood fabrics, so at least I got a good start. And of course I had to place another order with Mood and buy more fabric because I have big plans with those other fabrics :) In the meantime I also looked through my stash of fabrics from way back when, and found some really cool material I had forgotten about. And then finally I bought some flannel at Joann's because I wanted to make pajama pants for my boyfriend. So here are last week's projects: ​

1. Pajama pants for a bear 
My boyfriend's birthday is coming up so I want to surprise him with a new pair of pajama pants. He likes elephants and bold, colorful prints (he is an old hippie, so that explains a lot) and I found this cozy flannel at Joann's. The pattern was a free pattern for download at 5 out of 4. 
Picture
photo courtesy of Joann
Picture
Everybody with some sewing experience will know that pants with elastic are a breeze to sew! Easy and uncomplicated. I decided to use elastic and add strings as well, so he can tie the pants up if he wants. Plus I think pants like this look better with ties anyway. Here's the finished project. We are the same height but he is a big guy (I call him a bear), so naturally the pants are a little large on me. They look cool though! I hope he will like them. 
Picture

​2. A blouse made with Mood fabric (call it a 1-yard-wonder)

Like I said before, one yard of fabric does not get you far in most cases. At least in terms of clothing items. But I managed to squeeze a blouse pattern (front and back panels, no sleeves) out of this gorgeous floral pattern fabric, which was in the shipment of Mood fabrics that the boyfriend ordered for me. It's super soft and so light-weight, it feels like wearing nothing. Perfect summer blouse! 
Picture
Picture
The pattern was an old Burda pattern that I still had and made once before (Burda Style 7521). It was pretty easy to make since there were not a lot of pattern pieces required and I didn't even add sleeves or the bow in the front. 
3. A knit-dress which I started 5 years ago and never finished 
When I found this fabric in a bag, it was already partially cut up (I had the two skirt panels plus one bodice part cut) and included pattern pieces from tissue paper and I had absolutely no clue where the pattern came from. I had to think really hard and put some pieces together in my overwhelmed brain but then I finally figured it out. Years ago I had this cute little summer dress from Aeropostale, and I figured it should be easy enough to make my own pattern for it and sew another one of those dresses. 
Picture
photo courtesy of Poshmark
Picture
I doubled the bodice, which means I had to cut two pieces for the front and two pieces for the back. Lining the bodice makes it looks so much more professional and it's nice to have that additional layer of fabric anyway. You can head over to my tutorial from 6 (!) years ago if you would like to know how to double a bodice easily! 
Picture
Picture
Picture
Henry inspecting my work                                            The finished bodice    

After the bodice was done all I had to do was sew the skirt front and back panels together and then attach the skirt part to the bodice. I did it all with my serger, which not only looks super neat but is also so much quicker than using a regular sewing machine.  
Picture
The finished dress. This was so easy and took me maybe three hours total to make. I would have liked it to be a bit longer but this was all the fabric I had! I might add a strip of black fabric to the bottom of the skirt, to give it a nice contrast and have it end just above my knees.  
I already have three more projects started... two of which I have to wait for my second shipment from Mood :) There's nothing stopping me now!! 
Picture
0 Comments

Living in the age of face masks...

4/4/2020

0 Comments


And suddenly mankind finds itself in the midst of a health crisis. I refuse to mention the c word here. You all know what I am talking about. I can only hope that all of you who are reading this are safe and healthy, and that we will all get out of this very soon... 

In the meantime, more and more states are encouraging their citizens to wear face masks when going outside, e. g. to the grocery store. 
I found this very simple but great pattern on a German website and made masks for myself and my boyfriend (link below). You can head over there and download the pattern, and come back here to see how it's assembled if you need a little bit of help. It is a fairly easy to make pattern though, if you have some basic sewing skills. 

****Prior to making your mask you will have to make four fabric ties. I will show you two different ways to make those below, simply scroll to the bottom of this blog post**** 

Download pattern piece here (scroll all the way down to "Schritt 1" and click the purple link): https://naehfrosch.de/mundschutz-selber-naehen/

All seam allowances are 1/4” unless otherwise stated. All measurements given are height x width. Please read all instructions before you begin.

You need:
–   Two different kinds of fabric (or just one if you want both sides of your mask to look the same, a fat quarter is sufficient, or any scraps you have)
–   Fusible interfacing (mid-weight)   

Cut from:
Fabric #1, fabric #2 and fusible interfacing:
– (2 x) pattern piece (mirrored)

Instructions:
1. Iron fusible interfacing onto the wrong side of either fabric #1 or fabric #2. 
2. Put the two fabric pieces right sides together, make sure all edges match up. 
3. Stitch along the round part that has sort of a curve. Trim the seam allowance. Repeat the sewing for the two pieces of the other fabric. Iron along the seam of both fabric pieces to flatten it out.
Picture
Picture
4. Put both mask parts right sides together, make sure all edges match up. Stitch along both the long long sides of the mask and trim the seam allowance. 
Picture

5. Turn the mask inside out, so that the right sides are on the outside now. Flip the edges of the open sides towards the inside, as shown below. Give it a good ironing. 
7. Take your ties and place two of them into one of the open sides of the mask. Make sure that about 1/2" of the tie end with the raw edge "sits" inside the mask. Fasten the ties in place with some pins. 
8. Repeat for the other side, using your two remaining ties.
Picture
Picture
9. Topstitch all around the mask, approximately 1/8" from the edge, at the same time stitching the ties in place. I recommend stitching back and forth for a couple times when sewing over the ties, to make sure they cannot loosen. 
Picture
Picture
​Congratulations! Your face mask is done! 
Please be aware that it will give you an additional level of protection but is NOT a medical item and should not be used as such. I also recommend having one side designated to go on your face, and one to be on the outside. Please wash after using outside in public, to eliminate any potential contamination)
Picture
Picture


****HOW TO MAKE FABRIC TIES FOR YOUR MASK****

Method #1
(this is a little simpler but you will need a TURN TOOL, to turn your fabric tube inside out)

Cut from either fabric #1 or #2:
–   (4 x) 13" x  6/8" 

1. Fold one of the four fabric pieces along the long edge, right sides together and pin in place. Stitch all along the long edge, with a 1/4" seam allowance. Then use your turn tool to turn the fabric right side out. Fold down one of the raw edges and topstitch, or simply tie a knot.
2. Repeat for the three remaining fabric pieces. You now have four ties for your mask. 
Picture
Picture


​Method #2 (this is a little more time consuming, but your result will be neat looking ties; there are tools that can help you - like a bias tape maker - but I don't own any, so this is how I do it)

Cut from either fabric #1 or #2:
–   (4 x) 13" x  1 1/2"

1. Fold one of your fabric pieces along the long edge, WRONG SIDES TOGETHER, and iron. You will now have a middle crease. Now fold both long outer edges toward the middle crease and iron again. Finally, fold both long edges so that they are on top of each other.
2. One one end, fold the short end toward the middle, so that you have a neat and clean looking edge. Topstitch all along the long edge, as close to the edge as possible. 
3. Repeat previous steps for the three remaining fabric pieces. 
​
Picture
Picture
0 Comments

Make a scented trivet

1/5/2020

1 Comment

 
Picture
And then it’s 2020. For all of you that are still here: Hi! And thanks for waiting. It’s been almost 5 years since my last blog post. What happened? Well, life. A divorce, a career change, 2 moves, 2 college degrees and 1 citizenship. The reason I stopped blogging was mostly because I wasn’t able to focus on sewing and my little pattern business anymore. I started a full-time job while working on my Associates and Bachelor’s degree in accounting and finance. I now work full-time as a staff accountant. There was simply not much time for sewing projects. But: in the past couple weeks I’ve been able to work on a little project which I would like to share with you today. This trivet is filled with a mix of rice, cinnamon, cloves and orange peel, which makes for a wonderful smell once it heats up when you put your hot tea pot on it. Perfect for winter! And also a nice way to use some of that scrap fabric that has been laying around. Enjoy! 

Finished measurements:
Approx. 7” x 7”
All seam allowances are 1/2” unless otherwise stated. All measurements given are height x width. Please read all instructions before you begin.

You need:
–   Exterior fabric (a fat quarter should be sufficient, or any scraps you have)
–   Fusible interfacing (mid-weight)   
–  A mix of rice, orange peel, ground cinnamon and ground cloves (or whatever else you prefer)

Cut from:
Exterior fabric:
– (2 x) 8” x 8”

Fusible interfacing:
– (2 x) 8” x 8”

​Instructions:
  1. Iron fusible interfacing onto the wrong side of the fabric pieces.
  2. Put the two fabric pieces right sides together, make sure all edges match up. 
Picture
3. Stitch along three of the four sides. On the fourth side, only stitch towards the middle for about 3/4" from the side. Clip the corners and trim the seam allowance.
Picture
Picture
4. Turn inside out, fold the seam allowances of the open side down towards the inside, make sure everything is lined up properly and iron. 
5. Measure and draw a line right in the middle of the fabric piece (attention: make sure to not measure from the open side. The open side should be at the top or bottom when you measure). Then measure and draw a line in the middle of the two halves that you created by drawing the first line. 
Picture
Picture
​6. You should now have three lines marked on your fabric. Top stitch on all three lines (you will be sewing through both fabric pieces). 
​7. Then top stitch along the three finished edges, with a 1/8” seam allowance. 
Picture
Picture
8. Now it’s time to fill your trivet with the rice mix. This can be a little cumbersome, especially with the two outer compartments. I recommend using a funnel, to avoid spilling rice all over your room :) Fill all four compartments of your trivet. 
Picture
Picture
Picture
9. Fill it up as much as you can but leave enough room so that you can still sew along the open edge. Top stitch the opening close. This can be a little tricky when the rice mix wants to sneak out but you can do it. 
Picture
Picture
Picture
You are all set! Enjoy your trivet. You can also put it in the microwave for about 1.5 minutes and to heat it up, and have the scent spread through the room. If you ever want to wash your trivet, you can open up the top stitched seam, remove the rice mix, wash it in your washer on gentle cycle, re-fill it and top stitch close again. 

Happy sewing!
Picture
1 Comment

Miss Miracle Bag pattern in Stitch magazine

1/16/2015

7 Comments

 
Picture
Hey everybody!
Today I would like to introduce you to my latest bag pattern design - the Miss Miracle Bag which is featured in the spring edition of Stitch magazine!
I was beyond thrilled when they picked up my submission back in September.
Stitch always has a list of themes for each upcoming issue with corresponding color schemes. When I saw that one of the themes is "Return to Retro" I immediately knew I would create a bag design which picks up the style of the 1950s.
The name Miss Miracle is a reference (or rather the literal translation) of the German word "Fräuleinwunder" - a term that was widespread in Germany in the 1950s, when women became more powerful and confident.

Picture
In this bag design I tried to unite several design elements as they were common in the 1950s:  

The bag comes in a trapezoidal shape and was inspired by the Kelly purse. It has a very spacious main compartment and a zipper pocket inside. There is a second zipper pocket on the back. The bag closes with a magnetic snap on the wave-shaped flap.
The single strap is attached to the top of the flap. This bag is supposed to be held by the hand or over the arm. I used purse feet on this bag to give it more structure and to provide another bag making technique that helps make your handmade bags look even more professional.

Picture
Picture
I chose mint and orange colors for the bag. I enjoyed playing with those two contrasting colors: They are reminiscent of spring but they also convey the colorful fashion of the 50s.

Since polka dots were seen everywhere in 50s fashion I decided to add them to the handbag. For the flap, the bottom panel and the bottom accents of main body panels and side panels I used polka dot fabric in mint green.
Picture

You can order your Stitch issue online or buy it at most
Joann's, Hancock's and Barnes and Nobles. The cost is $14.99 which is a really good price considering that you will get more than 30 sewing patterns. The templates are either provided on the pattern insert or you can download them online. There are a lot of awesome projects in this edition which I am sure you will enjoy.

I am so happy to share this with you. Thanks for reading and I hope you will enjoy the magazine!

Happy sewing!
Picture
7 Comments

Giveaway: win 5 of my sewing patterns

10/8/2014

1 Comment

 
Bild
Hey there everyone!
I just wanted to let you know about this amazing chance to win five of my sewing patterns of your choice! That's right, you can pick any sewing pattern currently in my shop. But hurry, the giveaway ends Friday night :)
To win, simply head over to Sara's blog at Sew Sweetness. Sara is currently holding Purse Palooza, an annual event with awesome prizes and sewing pattern reviews!
Good luck everbody!
Bild
1 Comment

National Sewing Month: The Flip Flap Purse - FREE pattern

9/29/2014

3 Comments

 
Hey there everyone!
Today I am excited to introduce another free bag making sewing pattern to you!
The Flip Flap Purse is a cute little handbag that I designed for Seams and Scissors, the new blog of AllFreeSewing. We are celebrating National Sewing Month 2014 and they currently have daily giveaways going on with awesome prizes, so please do check out their website.
Bild
This fun bag sewing pattern is perfect for an advanced beginner. The asymmetric shape of the fold over flap makes this bag a real eye catcher! There is an additional zipper pocket on the back of the purse. This project will also teach you how to install a top zipper closure.
If you are interested in giving this pattern a try please hop over to my guest blog post over at Seams and Scissors.
Bild
3 Comments

National Sewing Month: The fabulous farmers' market tote

9/20/2014

1 Comment

 
Picture
Hey there everybody!
September is National Sewing Month and today I wanted to post this fun tutorial which I contributed to the Favecrafts Blog of AllFreeSewing last year as a guest poster! I am still using this tote when I go grocery shopping and like it a lot, especially the happy strawberry print! I never posted this on my website so I thought this is the perfect time to do it. So here we go, please find the original post below. And while your at it, do go check out all the awesome posts on Seams and Scissors for National Sewing Month this year (that's the new blog of AllFreeSewing). Hint: I will have a free bag making tutorial coming up there very soon!!

Go shopping at the farmers market in style! This bag holds all the groceries you can carry. There is a divider inside the bag to keep everything organized. The hidden slip pocket on the front side of the bag is perfect to fit in your wallet, phone and keys.
This bag is great for laminated cotton or oilcloth, but you could also use home decor fabric or just simply lightweight quilting fabric. If you do, I recommend interfacing the exterior fabric pieces as stated below in the instructions.

All seam allowances are ½” unless otherwise stated. All measurements given are height x width.  Please read all instructions before you begin.


You need:
-    Exterior fabric: 1 1/8 yd (44" width)
-    Lining fabric: 1 yd (44" width)
-    1 piece of hook and loop tape (self-adhesive or sew-on): 1”

Helpful hints:
- I made this tote completely out of laminated cotton. If you decide to do so too, please be careful when ironing parts of your fabric while sewing. I usually place a kitchen towel on top of the fabric, which is folded twice. I like to sprinkle the towel a little bit with water and used less steam than usual. I also don't use the highest setting of the iron and I don't press too long at the same spot.
- I also recommend using sewing clips instead of pins as they won’t leave holes in your laminated cotton or oilcloth.

Cut from:
Exterior fabric:
-    (2x) 16" x 12.75” – main body
-    (2x) 16" x 9” – side panel
-    (1x) 9" x 12.75” – bottom panel
-    (1x) 10" x 21” – interior divider
-    (2x) 29" x 5.5” – strap

Lining fabric:
-    (2x) 16" x 12.75” – main body
-    (2x) 16" x 9” – side panel
-    (1x) 9" x 12.75” – bottom panel
-    (1x) 10" x 21” – interior divider
-    (2x) 8" x 9” – slip pocket

I didn’t use any interfacing on this tote since I used laminated cotton throughout and intended a slouchy look. If you use lightweight cotton fabric you might want to interface parts of your tote. In this case, cut the following pieces from fusible interfacing:
-    (2x) 16" x 12.75” – main body
-    (2x) 16" x 9” – side panel
-    (1x) 9" x 12.75” – bottom panel

If you don't need to fold your tote when not using it, you may also think about interfacing the interior divider with heavy stabilizer. In this case cut the following piece from heavy stabilizer:
-    (1x) 10" x 21” - interior divider

Interface the wrong sides of the exterior parts of your tote.

Instructions

a)    Make the straps

- Fold one of your strap fabric pieces in half lengthwise, with the wrong sides together and press. Open up again and fold both long edges towards the middle crease and press again.
Picture

Picture
Repeat the folding and stitching with the second strap fabric piece.

- Place one of the straps onto one of the exterior main body panels. The outer edges of the strap should be placed 2.5” in from the side edges of the bag. The loop of the strap should face to the bottom and the raw edges of both main body panel and straps should be aligned. Pin in place and baste the strap end to the main body using a ¼” seam allowance.

- Repeat for the other strap and the other main body panel.

Picture
b) Prepare the slip pocket
- Place the hook part of your piece of hook and loop tape onto the right side of one of the slip pocket pieces. It should be positioned centered and 1” down from the top edge. Tape it down or sew it onto the fabric (depending on what kind of hook and loop tape you are using).
- Repeat with the loop part of the hook and loop tape and the other slip pocket piece.
Picture
- Take one of the slip pocket pieces and put it onto one of the exterior main body panels, right sides together. It should be positioned centered on the main body panel and the top edges of both fabric pieces should be aligned. (Since you already attached the straps to the exterior main body fabric panels, your slip pocket will partially cover the straps).
- Pin in place and stitch along the top edge using a 1/4” seam allowance, starting and stopping 1/2” from the outer edges of the slip pocket fabric piece.
- Repeat the previous step with the second slip pocket fabric piece and one of the lining main body panels.
- Set both main body panels aside.
Picture
c) Make the interior divider

- Take both of your interior divider pieces and put them right sides together. Pin in place and stitch along both long edges.
Picture
- Turn right side out and press. Topstitch along both long edges using a 1/4” seam allowance.
Picture
- On both the top and the bottom edge, measure and mark 6” in from the side edges. Fold the divider towards what will be the wrong (= inner) side of the divider.
Picture
- Topstitch along the folded edge using a 1/4” seam allowance.
- Repeat the 6” markings, folding and topstitching on the other side of the divider.
Picture
This is what you should have after folding and topstitching along both folds:
Picture
- Take one of the lining main body side panels and place it right side up. Put your divider right (= outer) side up onto the side panel. Match the side edges of both fabric pieces and position the divider approx. 1” up from the bottom edge of the lining side panel. Pin the divider in place and stitch along the side edges using a 1/4” seam allowance.
Picture
This is what you should have after stitching both side seams of the divider to the lining side panel:
Picture
- On the lining main body panel with the slip pocket piece attached, fold the slip pocket over so that the wrong sides of both slip pocket and main body panel are now touching. Topstitch along the upper edge of the slip pocket, starting and stopping 1/2" from the outer edges.
- Repeat the previous step with the other slip pocket piece on the exterior main body panel.
Picture
d) Assemble the bag lining:
Take one of the lining main body panels and place it right side up. Take one of your lining side panels and put it on one of the side edges of the main body panel, right sides together, the edges of both pieces should be aligned. Pin in place and stitch along the edge, but stop 1/2" up from the bottom end (this 1/2" is important later, when you are going to sew the bottom panel onto the bag).
- Repeat with the second side panel and the other edge of the main panel (when stitching the side panel with the divider attached, make sure to fold the divider together so it won't get caught in the stitching).
- Take your second main panel and repeat the previous steps.
Picture
Picture
On the picture above you can see one of the lining main body panels with the two lining side panels (one of them includes the interior divider) already attached. You can also see how the side seam stops about 1/2" from the bottom edge.
- Place the bottom panel with its four edges onto the bottom edges of the bag, right sides together. Pin in place and stitch along the first edge, starting and stopping 1/2” from the edge. Since you left the seam open by 1/2" when sewing the side panels to the main body panels, you should be able to have your bottom panel seams start and stop exactly at the end of these seams (see on the next picture - note that I chose exterior fabric for the bottom panel of my bag lining).
Picture
This is what your bag lining should look like on the inside after stitching all the pieces together:
Picture
e) Make the bag exterior:
- Repeat step d) to assemble the bag exterior.
f) Finish the slip pocket:
- Place your two slip pocket fabric pieces right sides together (since they are already attached to the exterior and lining main body you will have to bend those parts out of the way for this step). Pin in place and stitch around the three edges of the slip pocket. Make sure to start and stop the stitching right beneath the topstitching of the top edge of the slip pocket pieces.
Picture
Picture
g) Assemble the bag:
- Due to the finished slip pocket, the bag exterior and the bag lining are already attached to each other. The bag exterior should be right side out, the bag lining wrong side out. Put the bag lining into the exterior. The slip pocket will be hidden between the layers. Make sure to fit the lining correctly into the exterior. Match the side seams and flatten the bottom panels, so that the lining sits snug inside the bag.
- Fold down the seam allowance of the top edges of both exterior and lining towards the inside. Pin in place and stitch along the top edge using a 1/4” seam allowance. Start and stop right before you reach the slip pocket.
Picture
Picture
Picture
Congratulations, your farmers' market tote is finished!
Bild
1 Comment

Curtain projects in my new house and advice needed

9/8/2014

10 Comments

 
Hi everyone!
So, as some of you know my husband and I recently moved into our new house, on August 23 to be exact. We are loving it and the good thing about a new home is you get to decorate again :-)))
For our old apartment I had sewn up all the curtains and I was rather pleased to see that some of them would also fit the windows in the new house. At least anyway :) Most of the windows are a bit shorter now, so I decided to shorten the curtains which is hardly any work at all. I admit, I first even hung them up the way they are and I think I even could have lived with it but hubby hated it so much and repeately asked me to do something about it... So last week I fixed the issue.
Bild
Bild
The curtains in our bedroom and in my husband's office (both are sheer organza fabrics), the one on the left side has soft green and purple stripes as a pattern). I can see how that is not really working...
Bild
Bild
While still hanging I measured them to be about an inch longer than the edge of the window frame and then added another inch for seam allowance. Then I took them down and cut the excess fabric off. Next I folded down the raw edge twice again, which for organza always presents some kind of a challenge because the fabric is just sooo slippery. Not a big fan! With the bedroom curtains I could at least use the vertical colored lines for help. With the sheer fabric I had to trust my instincts that the bottom edge wouldn't end up crooked. I stitched along the bottom edge and as the last step inserted the leaded drapery tape which I had taken out of the old seam.
Bild
The leaded tape ready to be taken out the old curtain seam.
When using light-weight fabric like organza for curtains you want to make sure to add some kind of curtain weight, so your curtains will drape in a nice way. I had used leaded tape in the bottom seam of the curtains which I only had to take out and insert into the new seam. I pulled it through the seam with the help of a safety needle and then simple handstitch the ends down to the curtain - on the wrong side, so it won't show.
Bild
bedroom window #1
Bild
bedroom window #2
Bild
One of two office windows
Well, I gotta admit, this does look much better. The husband likes it a lot. And you know how they say "happy husband, happy..." no wait...?? :-P
So now I only have to figure out what to do with the curtains in my new sewing studio. As in the bedroom there are two window, so one of them is really short. I am not sure if I want to cut off that much of my gorgeous fabric... but have a look:
Bild
This one doesn't even look wrong, does it?
Bild
Well, the short window.. what to do? Cut off almost a yard of fabric?
The fabric is a mid-weight cotton fabric, so I am not even sure if it would look good when cut too short, especially with the large scale pattern. What do you think? Any advice? I appreciate any input you can give me. Just leave a comment below. Thank you so much for your help!
Happy sewing!
Bild
10 Comments

New sewing pattern: Summer Moves On Hobo

9/1/2014

2 Comments

 
Yes, summer moves on and I can't believe it is September already. I've promised this pattern for a couple weeks now and - with the move to our new house finally behind us - I am happy to finally announce the release of the Summer Moves On Hobo, which is now available in my pattern store!
Bild
If you have read my blog hop post from last week you might have already seen a few pictures of this new bag design. I tried to go a little crazy adding pockets to the bag exterior: there are six of them (plus another two on the inside)! Four of the six exterior pockets are slip pockets and then I added another two small zipper pockets, to make the bag look more interesting and to kind of have a designated front side of the bag.
Bild
The slip pockets and zipper pockets on the bag front
Bild
This bag has a top zipper closure
The zipper has a top zipper closure and one handle that is connected to the bag with two handle extenders and two O-rings. I also added accents to the top corners of the bag.
Bild
Inside there are two spacious slip pockets which help keep your things organized in this large hobo bag!
Bild
So many pockets!
Have a look at all the bags my pattern testers made, aren't they all gorgeous? :)
Bild
Bild
First up is Ree from Sincerely, Ree. I recently called her the fastest sewer on this planet and I think she really deserves this moniker! She completed her Summer Moves On Hobo in no time and yet again I am amazed by her awesome fabric choices!
Bild
Bild
This is the first time that Tammy tested for me and she also did an awesome job. I love the contrast that the bright accents and the zippers create on her bag!
Bild
Bild
Tonya made this colorful bag, at a time she way very busy harvesting and canning veggies from her backyard. I am very glad she still decided to participate in testing this pattern for me. Thanks Tonya!
Bild
Bild
Bild
Look at this awesome fabric pattern of Erin's bag! I am loving this, the color contrasts are amazing and that giant red fish on the back side looks so cool!
Bild
Bild
Jenniffer picked this very elegant fabric for her Summer Moves On Hobo. The red and brown shades look great together and I also love the little heart shaped tag on the zipper!

I have long wanted to make a hobo, so I hope you like this new design.
Enjoy the end of summer everyone. While being a little sad that those gorgeous summer days will be over soon I still always enjoy this part of the year. It might have been a little influential on the name I chose for the bag I admit :)

Happy Labor Day!
Bild
2 Comments
<<Previous

    Enter your email address:

    Delivered by FeedBurner


    Follow on Bloglovin

    RSS Feed

    Anna

    anna's blog -

    Welcome to my blog! I am an accountant who once started out her "career" in the US by designing bag and wallet sewing  patterns! My patterns are available on Etsy and occasionally I will share some of my sewing projects that I work on in my spare free time on my website.  Happy sewing :)

    Categories

    All
    Bags
    Bargains
    Dresses
    Fabric
    Fashion
    Germany
    Giveaway
    Home Dec
    Interfacing
    Review
    Sale
    Seasonal
    Sewing Patterns
    Sewing Tips
    Smartphone Cases
    Special Occasions
    Treasury
    Trips
    Tutorial
    Vacation Projects
    Wallets

    Threading My Way_Featured
    Pattern Spot dot com
    This page contains affiliate links. See my disclosure policy.
    Online Sewing Class
    Craftsy

    Archives

    December 2021
    May 2020
    April 2020
    January 2020
    January 2015
    October 2014
    September 2014
    August 2014
    July 2014
    June 2014
    May 2014
    April 2014
    March 2014
    February 2014
    January 2014
    December 2013
    November 2013
    October 2013
    September 2013
    August 2013
    July 2013
    June 2013
    May 2013
    April 2013
    March 2013
    February 2013
    January 2013
    December 2012
    November 2012
    October 2012
    September 2012
    August 2012
    July 2012
    June 2012
    May 2012

Powered by Create your own unique website with customizable templates.