
--- I have received many emails with questions, tips and tricks on my tutorials. Thank you all! If you would like to weigh in with a short comment please feel free to let me know what you think of my tutorial below. I am interested to hear your feedback! ---
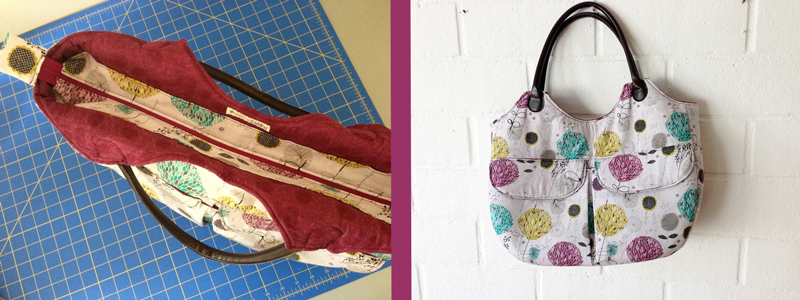
Today I want to share my version of how to insert a recessed zipper into the top of your bag. (Click here if you want to read more about this particular bag)
This tutorial is free but if you would rather prefer to download this complete tutorial as a pdf file you may purchase it here for only $2.
The zipper will be sewn onto the lining part of the bag, so in order to determine the length of the zipper and the fabric for the zipper cases, please take your lining main body pieces of your bag and measure the following:
Take the lining main body piece of your bag and measure the width. Then subtract 2 cm (0.75"). This is the width that EACH of your zipper case fabric pieces will have.(This is to have enough room at the edges, so that the zipper won't be squeezed into the sides of the bag AND considering the edges of the zip case which will be bend down to get a clean edge.)
example:
width of the lining: 15"
subtract 0.75" = 14.25"
→ The width for your two zip cases has to be 14.25".
The length is determined by the depth of your bag. Measure the depth (usually you do this by measuring the width of the side panel of your bag) and then multiply this number by 2. This is the length that EACH of your zipper case fabric pieces will have. (This will be plenty of fabric since each case will be folded four times to get a stable, sturdy zip case)
example:
depth of bag: 5”
Multiply by 2 = 10”
→ The length of your two zip cases has to be 10".
All seam allowances are 1 cm (3/8") unless otherwise stated.
1) Cut your two fabric pieces according to your own measurements (in my case, my two fabric pieces for the zipper cases have to be 14.25 x 10” each).
Also: cut a small fabric piece, approx. 8 x 4 cm (3 x 1.5") to make a zipper tab for the end of the zipper.
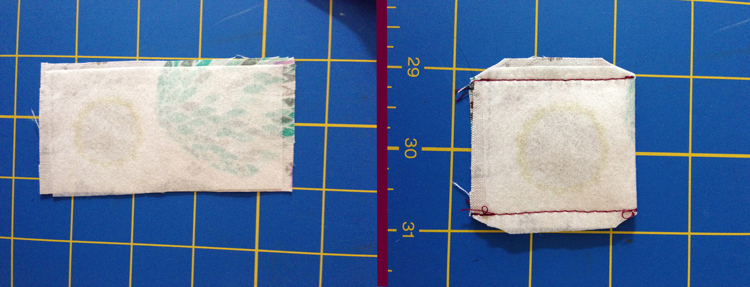
2) Attach a zip tab to the bottom end of the zipper
For more convenience when using the zipper later, put a zipper tab onto the end of the zipper. Take your zip tab fabric piece and fold it in half along the short side, right sides together. Stitch along both side edges, trim the seam allowance and turn right side out.
For more convenience when using the zipper later, put a zipper tab onto the end of the zipper. Take your zip tab fabric piece and fold it in half along the short side, right sides together. Stitch along both side edges, trim the seam allowance and turn right side out.
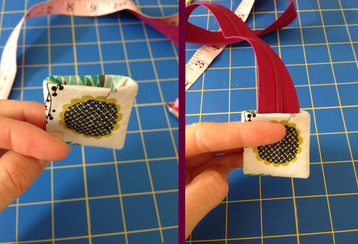
Fold the raw edge down towards the inside and press. Take your zipper and put the tab over the end of the zipper, just so that the end of the zipper tape touches the middle crease of your zip tab. Pin in place and topstitch along the open edge of the zipper tape, this way closing the zipper tape and at the same time attaching it to the zipper.
3) Make the zipper cases
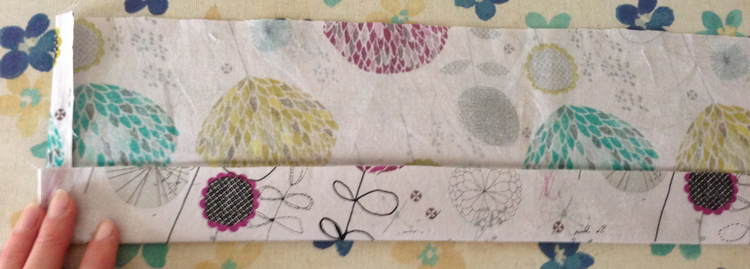
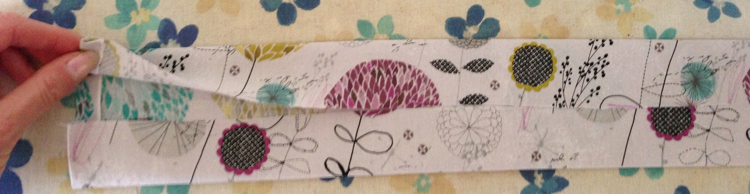
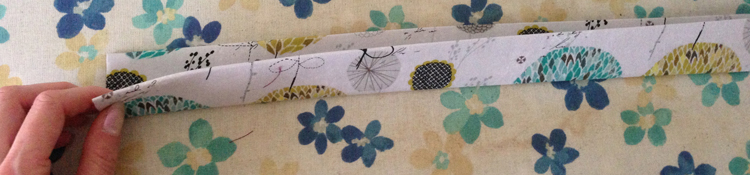
Take one of the zip case fabric pieces and fold down both short sides (wrong sides together) by 1 cm (3/8").
Now fold the fabric in half along the long sides, wrong sides together. Press. Open the fabric again and fold the two long sides towards the middle crease. Press and then fold in half again:
Take one of the zip case fabric pieces and fold down both short sides (wrong sides together) by 1 cm (3/8").
Now fold the fabric in half along the long sides, wrong sides together. Press. Open the fabric again and fold the two long sides towards the middle crease. Press and then fold in half again:
4) Attach the zipper to the zipper cases
Place your zipper right side up. Take your folded zipper case and put the zipper tape inside the open edge of the zipper case. The open edges of the case should end approx. 0,3 cm (1/8“) before the zipper teeth.
At the end of the zipper (where you attached the zip tab), make sure that you leave some space of approx. 1,5 to 2 cm (0.5 to 0.75”) between the zip case and the zip tab:
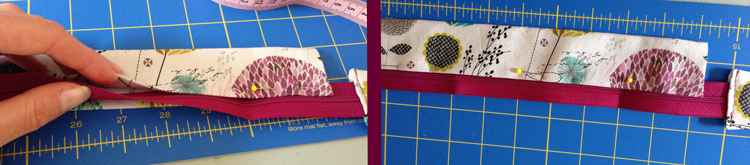
At the top of the zipper (where the zipper opens), bend down the zipper teeth and hide them in between the layers of the zipper case.
Using the zipper foot of your sewing machine, stitch all along the open edge of the zipper case with a 0,5 cm (3/16”) seam allowance, at the same time attaching the zipper to the case:


Also, topstitch along both short edges of the zipper case. You can either do this with your zipper foot or switch back to your regular sewing machine foot.
Take your second zip case fabric case and repeat steps 3 and 4 for the other side of the zipper.
Take your second zip case fabric case and repeat steps 3 and 4 for the other side of the zipper.
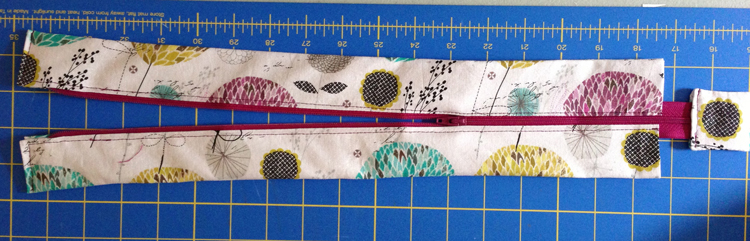
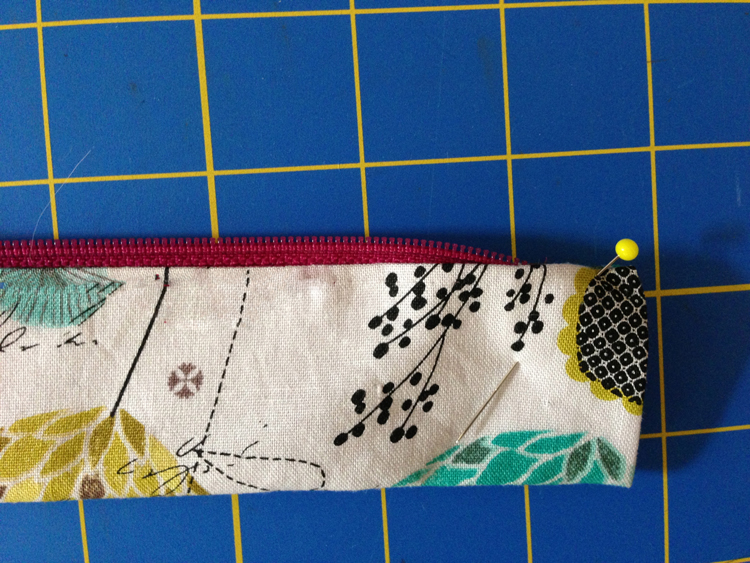
This is what your zipper should look like now, after attaching the zipper cases and the zipper tab
5) Attach the zipper to the lining fabric of your bag
Place one of your lining fabric pieces right side up. Take your assembled zipper and put it right side up onto the lining fabric. Place it approx. 4 cm (1.5”) beneath the top edge of the lining and place it centered, so that there is the same amount of space from the outer edges of the lining fabric piece to the edges of the zipper case (which should be about 2 cm (0.75") in from each side edge):
Place one of your lining fabric pieces right side up. Take your assembled zipper and put it right side up onto the lining fabric. Place it approx. 4 cm (1.5”) beneath the top edge of the lining and place it centered, so that there is the same amount of space from the outer edges of the lining fabric piece to the edges of the zipper case (which should be about 2 cm (0.75") in from each side edge):

Pin in place along the long edge of the zipper case (that's the one opposite from the one with the zipper teeth) and topstitch the zipper case onto the lining fabric with a 0,5 cm (3/16”) seam allowance.
Repeat step 5 with the other side and the second lining fabric piece.
Repeat step 5 with the other side and the second lining fabric piece.
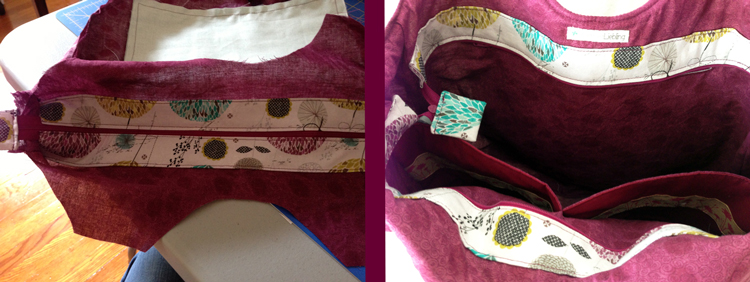
Your recessed zipper is all set! Proceed with assembling the lining part of your handbag.
If you would rather prefer to download this complete tutorial as a pdf file you may purchase it here for only $2.
Happy sewing!
If you would rather prefer to download this complete tutorial as a pdf file you may purchase it here for only $2.
Happy sewing!


 RSS Feed


