charmed Liebling
  • home
  • pattern shop
    • wallet patterns
    • bag patterns
    • laptop and messenger bag pattern
  • items for sale
    • custom orders
  • free tutorials
  • contact
  • about

Free tutorial: Making a book cover for sheet music

6/11/2013

13 Comments

 
charmed Liebling book cover for sheet music
I've been a member of a choir for the last three years but still haven't managed to get a decent folder for my sheet music. Usually I would just cover it up with black paper which isn't really professional and also, I kind of got annoyed by having to buy new paper for every piece of music...
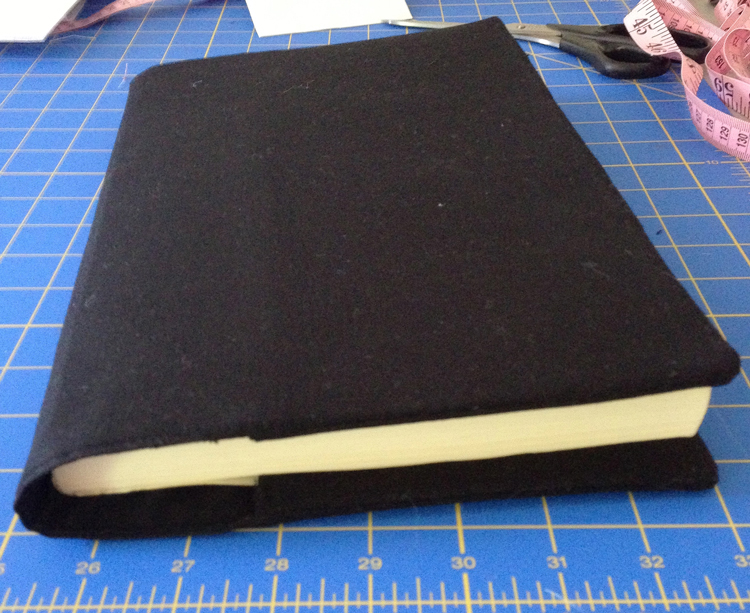
I finally made myself a book cover for my music which is just plain black and makes it perfect for concerts. The pattern is super easy.

--- This tutorial is free but for your convenience I decided to offer the complete tutorial as a PDF for download for only $2, if you prefer to have everything in one structured document ---

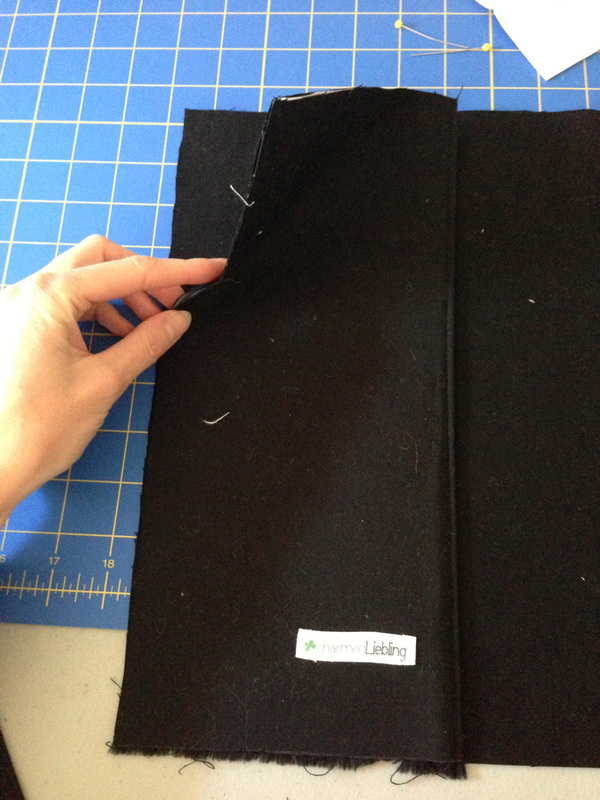
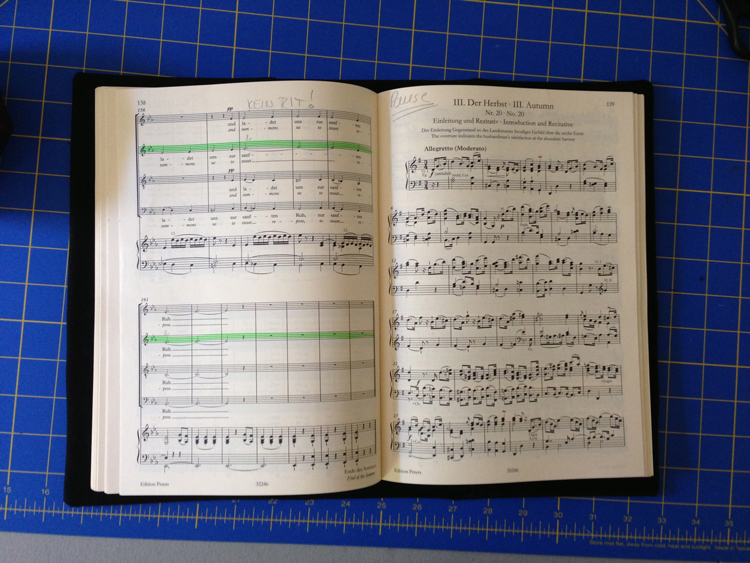
First measure the length and width of your music. They come in different sizes but I used the biggest one I have, which measures 10.5 x 15" (26,5 x 38 cm) and has a depth of 1.75" (4,5 cm)…and now imagine holding this thing for 1.5 hours! Pretty exhausting :) Add a lot of seam allowance on all four sides and then cut your rectangular piece of fabric according to these measurements. With a seam allowance of 0.5" on each side, mine ended up being 11.5 x 16". Cut two of these.
measuring your sheet music
measure the length and width of your book or your music and add a lot of seam allowance on ALL four sides.
measuring the sleeves
Now you will need sleeves to put your book in.
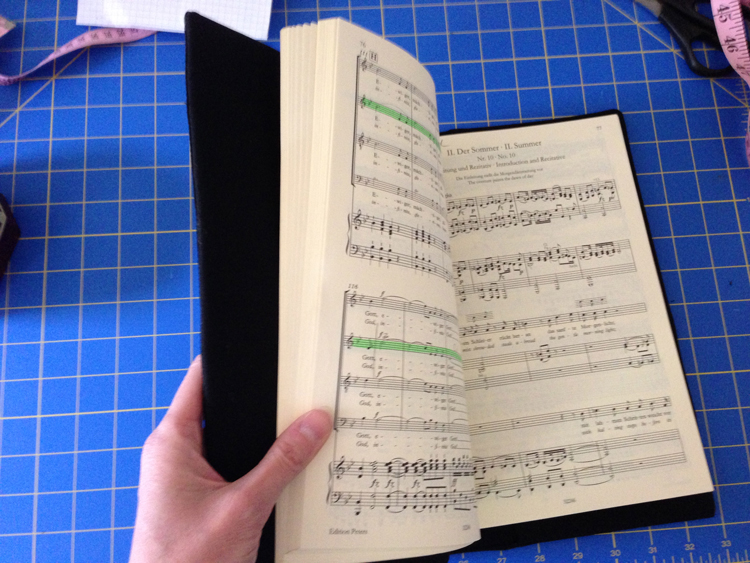
Therefore open the cover of the book and measure in from the edge for a little bit more than half the width of the page, in my case it is about 4.5". Again add two lots of seam allowance and for the length use the same measurements as for the main body parts (including seam allowance). This would make it 11.5 x 5.5". Cut four of them.

fabric pieces for book cover
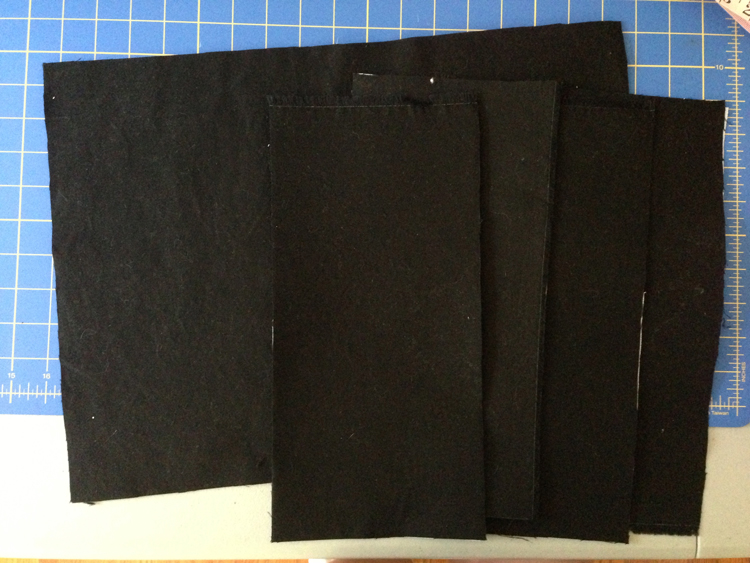
This is what you come up with: four pieces of fabric for the sleeves and two pieces of fabric for the main body.
interfaced sleeve parts

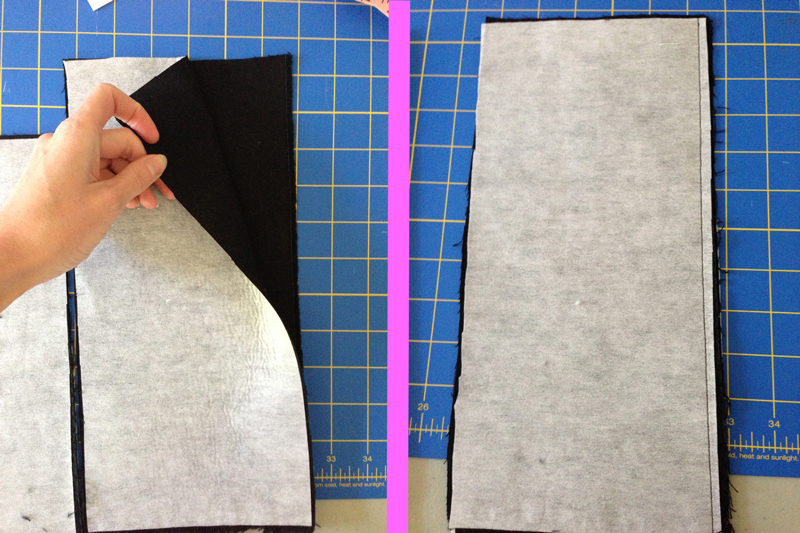
Interface the four sleeve parts with fusible interfacing.


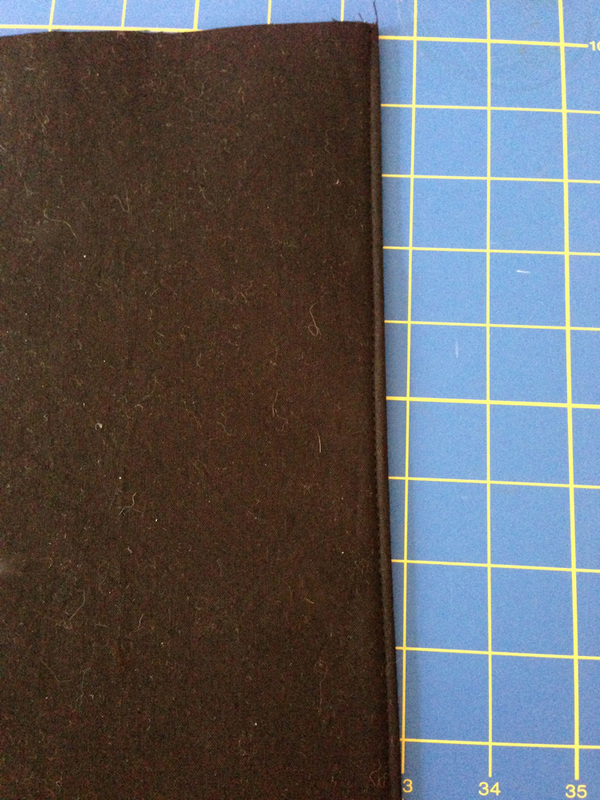
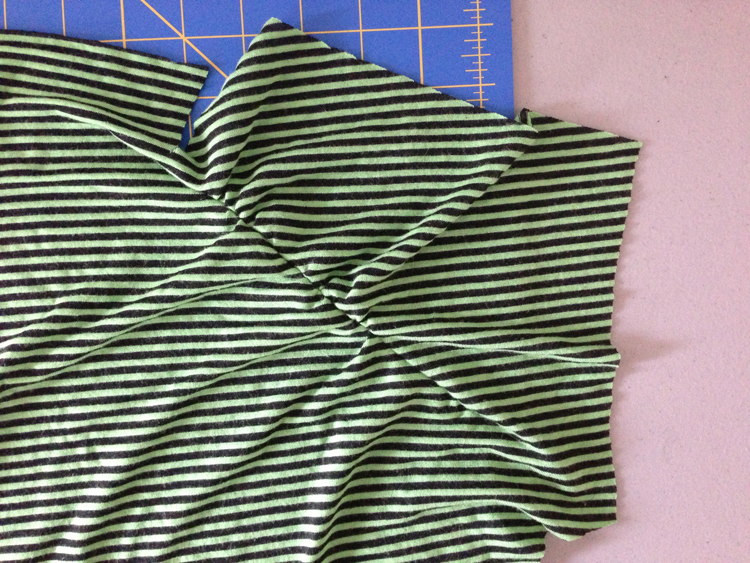
Put two of them right sides together and sew along on of the long edges. Turn right side out, press and topstitch along this edge. Repeat with the remaining two sleeve parts:

making the sleeves
topstitching the sleeve
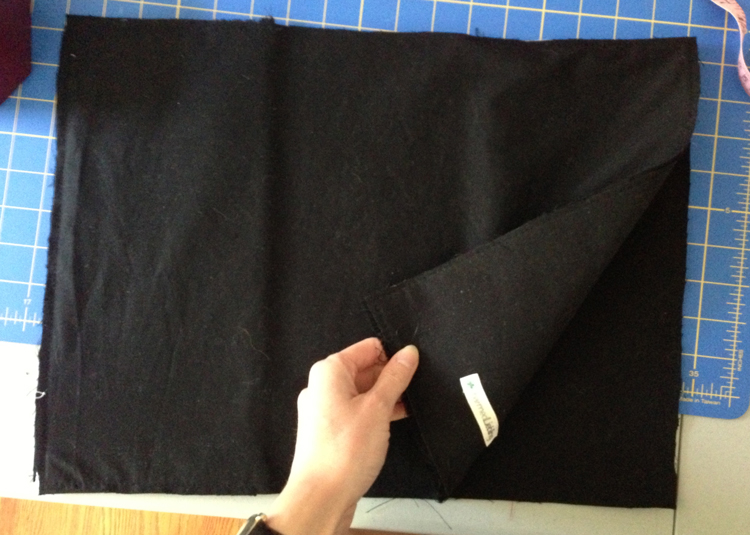
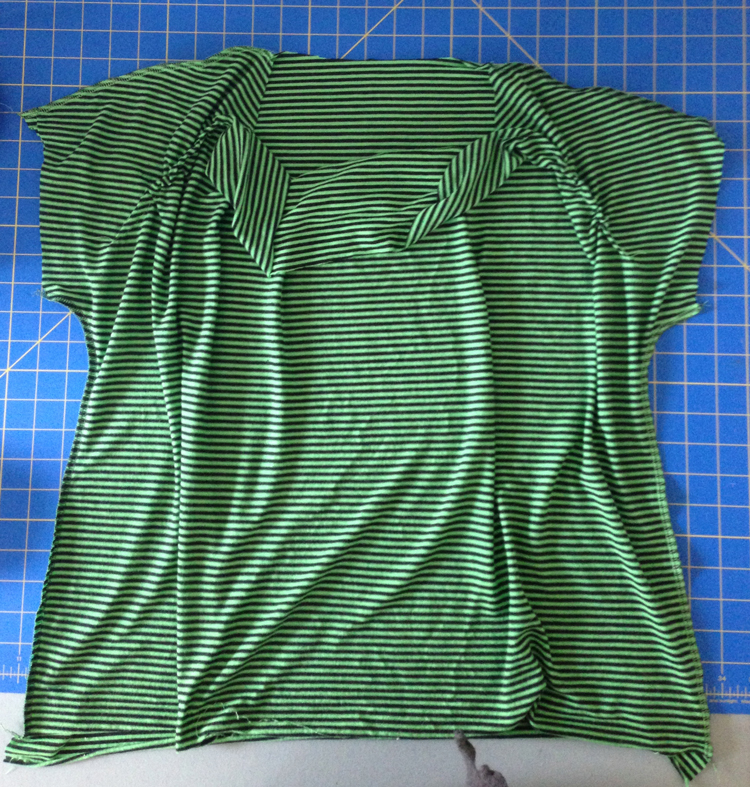
Take one of the main body parts and put it right side up. This will be the interior body part. Take one of the sleeve parts and put it onto the left hand side of the body part, with the finished edge facing to the inside of the body part. The raw edges of sleeve part and main body part should be aligned. Pin in place and baste all along the raw edges to secure them in place.
Repeat with the other sleeve part on the right hand side of the main body part:
sleeve on lining
Make sure the raw edges of both fabric pieces are aligned.
both sleeves on lining
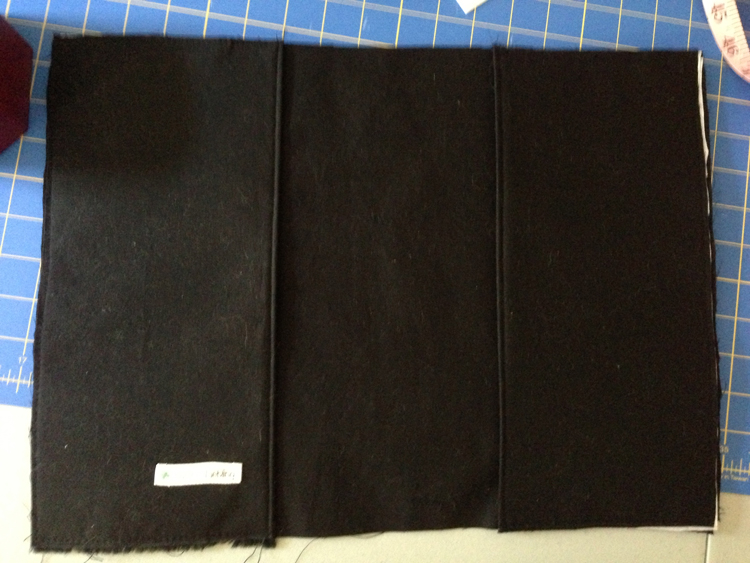
Both sleeves are basted onto the interior main body part.
interface the exterior


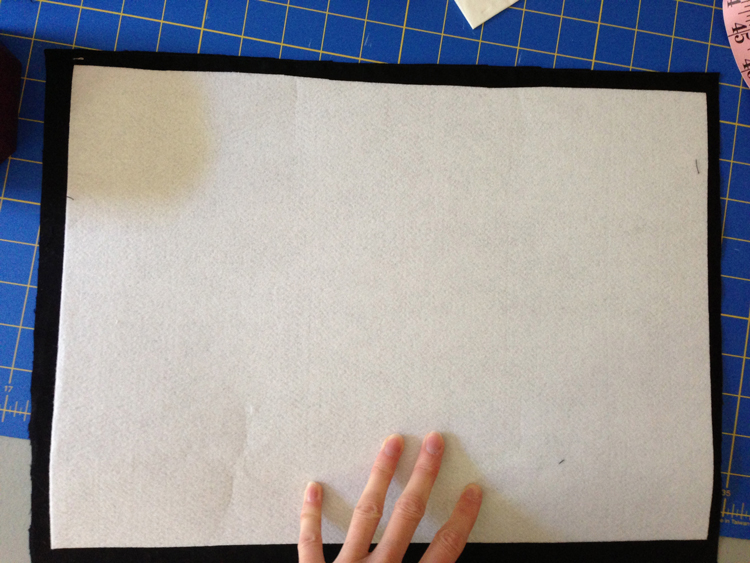
Take the other main body part (which will be the exterior body part) and interface it with heavy stabilizer to add more strength. The heavy stabilizer should not lie on the seam allowances, so before ironing it down cut off 0.5" (1,25 cm) on either side.

exterior and lining right sides together

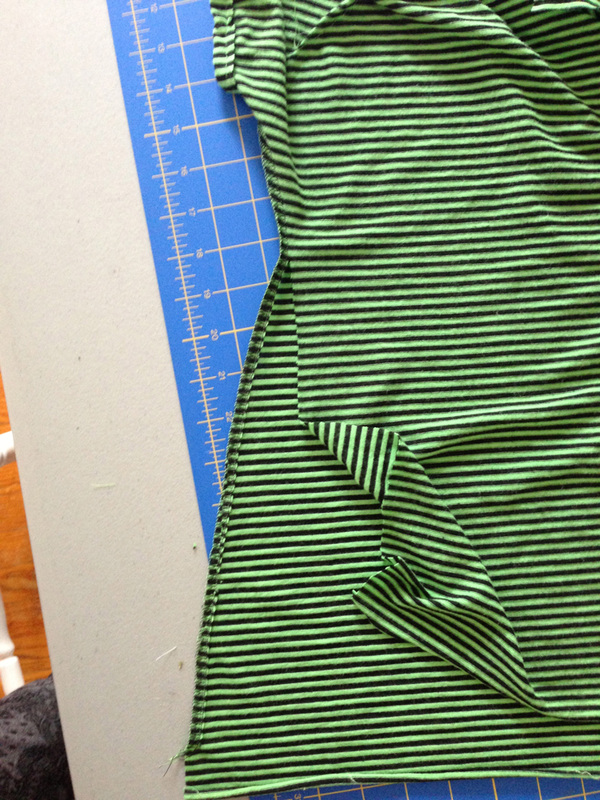
Place the interfaced main body part right side up and put the interior body part with the sleeves on top of it, right sides together. Make sure all the edges are aligned. Pin in place and stitch all aroung the edges, but leave an opening of about 4" (10 cm) at the bottom center.
Trim down the seam allowance to reduce bulk and clip the corners.


topstitch the openingTopstitch/close the opening at the bottom.

Turn the book cover right side out through the opening. Make sure to poke out the corners and then iron is to make it nice and flat.
At the opening fold the seam allowances down to the inside and topstitch it close.


Put your sheet music into the cover and you're ready for your next concert!
charmed Liebling sheet music cover
13 Comments

Giveaway day: the lucky winners!

5/11/2013

0 Comments

 
Picture
Thank you all for participating in my very first giveaways! What a week of fun it was!
I was really overwhelmed by all the comments. Thanks to those who also gave me a like on my Facebook page, it is very much appreciated :)

So here's the winner of my giveaway #1:
Picture
Picture
Congrats Emily, my red bifold wallet will go to you!
I will send you an email right away to get your address!

As for my giveaway #2, here's the result:
Picture
Picture
Congrats Karrie! You will be receiving five of my sewing patterns via email! Happy sewing!

Thanks you all for making this giveaway week a really fun week! I hope you come back to my blog or my charmed Liebling Etsy shop every now and then, to see what's new. I'm also planning on doing more giveaways in the future since it is just such a nice way to connect with other fellow crafters.
Have a nice weekend everyone!
0 Comments

charmed Liebling items at a silent auction

4/12/2013

2 Comments

 
classical Idol Rochester
charmed Liebling donated items
As mentioned in my previous blogpost about my Amy Butler blossom handbag, I was going to donate the bag for a local silent auction here in Rochester, NY. The auction is part of a really exciting event on April 20, 2013 called "classical idol": a vocal competition with jury and audience participation who search for new talents in the classical music genre. The first prize is $ 2,000 and the opportunity to perform a solo in concert with the Rochester Oratorio Society. That is the choir I am currently a member of, hence my contribution to the silent auction :)

charmed Liebling iPhone case
So I had the handbag, but I felt like I would want to make it like a nice esemble of things, for people to be more likely to donate for it. I decided I would make another one of my iPhone cases (for iPhone 5) but I changed it a little bit from the one I made for myself and added a small velcro closure to it. The salmon color matches nicely with the shades of the handbag.

charmed Liebling iPhone case
charmed Liebling bifold wallet


Finally I made a bifold wallet in bright red colors. It has a lot of slots for credits cards and a zip pocket on the backside.


charmed Liebling bifold wallet
There will not only be a silent auction at this event but also hors d'oeuvres, cash bar and - most important of all - beautiful singing! The festivities start at 6 PM, the Idol competition at 7:30 PM. Tickets for the event are $40, and there also will be student "Theater Seating" available for $15.
To read more about this event please visit the website of the Rochester Oratorio Society. 
2 Comments

St. Patrick's Day - party outfit!

3/11/2013

1 Comment

 
charmed Liebling St. Patty's Day outfit with Oscar
Too much green for Oscar :)

Only a few more days until St. Patty's Day, the second one I'm going to be celebrating here in the US. We got invited to a party and of course my first thought was: "OMG, what am I gonna wear??" followed by "I don't have anything". (These are probably the two most common thoughts of women after they got invited to... well, pretty much anything) Since I haven't made any clothing in months this turned out to be a really good opportunity for me to finally sew something that is not a bag or a wallet.

I found a really nice green and black striped jersey fabric, a rayon/polyester mix, at a local fabric store. The idea for my outfit was to make a simple short sleeved shirt with the jersey fabric, wear some of my short pants with it as well as some green leggings. That should be enough green to not get pinched ;)

Picture
I looked through my sewing magazine collection for a nice pattern and found one in Burda Style 3/2010 which didn't look to complicated. Well turns out I had not quite enough fabric (I bought like 6 inches too little…urgh!) but so the shirt would have to be a bit shorter.

The first step was to make the very decorative pleats at the front part. Therefore I had to baste along the marked lines first, to be able to gather the fabric. After gathering I folded and stitched the darts.
Then the instructions tell you to stitch both the shoulder and the side seams. The front piece looked really wide from the beginning and after stitching it together with the back part, I tried it on and didn't like it at all. Yes, this shirt is supposed to be loose-fit but this way it just looked weird on me. I decided to make it a bit tighter by cutting off approximately 5 cm (2") from the front part. Since I used my serger machine I simply cut the seam open again. There is no use in trying to open a serger seam with a seam ripper. A lot of work with poor results ;-) After reducing the width and sewing both parts together again the shirt already fit much better!

Picture
The gathered dart at the left shoulder/sleeve part.
Picture
This is never going to fit me.
charmed Liebling green shirt
And there goes the first side seam. I had to cut it open almost all the way to the sleeve
Picture
What...??? Very decorative burn hole in my fabric.

The next step was stitching the sleeves. Those had to be gathered as well and then trimmed with a cuff. This part was a little annoying because jersey fabric is not the easiest one to make sleeve cuffs with. The fabric has to be folded in half with the wrong sides together and ironed, so that you have a crease at the middle. This has never happened to me before but I seriously managed to iron a hole into my cuff fabric!! Unbelievable.. I quickly decided that ironing is for losers and I would manage to get the cuff straight onto the sleeve without all that, which luckily worked out pretty well.

Next I folded down the seam allowance around the neck area and stitched it with a twin needle. I did the same with the hem and now my shirt was actually done.. at least according to my Burda pattern, but… the neckline was just way too wide for me ;-) I had to change that as well and used a piece of elastic ribbon which I slid into the seam allowance of the front part. This way the fabric gathers and the neckline gets a little tighter which is totally the better way to go! I finally folded another pleat at the right side and handstitched a leaf button onto it.
Yesterday I finally managed to drag myself to the mall and buy some green tights. Since their only purpose is to be worn on St. Patty's day I couldn't care less about the rather bad quality :) The shirt however is really comfortable and I'm sure I'm going to wear it a lot during the summer!
Picture
The shirt is finally finished! The gathering at the neckline is made with a piece of elastic ribbon.
Picture
My outfit for St. Patty's Day. I look a bit like Peter Pan. But that's probably not the worst :-)
charmed Liebling - detail leaf button
It's not a shamrock but the colors of this cute leaf button match the shirt just perfectly!
1 Comment

    Enter your email address:

    Delivered by FeedBurner


    Follow on Bloglovin

    RSS Feed

    Anna

    anna's blog -

    Welcome to my blog! I am an accountant who once started out her "career" in the US by designing bag and wallet sewing  patterns! My patterns are available on Etsy and occasionally I will share some of my sewing projects that I work on in my spare free time on my website.  Happy sewing :)

    Categories

    All
    Bags
    Bargains
    Dresses
    Fabric
    Fashion
    Germany
    Giveaway
    Home Dec
    Interfacing
    Review
    Sale
    Seasonal
    Sewing Patterns
    Sewing Tips
    Smartphone Cases
    Special Occasions
    Treasury
    Trips
    Tutorial
    Vacation Projects
    Wallets

    Threading My Way_Featured
    Pattern Spot dot com
    This page contains affiliate links. See my disclosure policy.
    Online Sewing Class
    Craftsy

    Archives

    December 2021
    May 2020
    April 2020
    January 2020
    January 2015
    October 2014
    September 2014
    August 2014
    July 2014
    June 2014
    May 2014
    April 2014
    March 2014
    February 2014
    January 2014
    December 2013
    November 2013
    October 2013
    September 2013
    August 2013
    July 2013
    June 2013
    May 2013
    April 2013
    March 2013
    February 2013
    January 2013
    December 2012
    November 2012
    October 2012
    September 2012
    August 2012
    July 2012
    June 2012
    May 2012

Powered by Create your own unique website with customizable templates.