charmed Liebling
  • home
  • pattern shop
    • wallet patterns
    • bag patterns
    • laptop and messenger bag pattern
  • items for sale
    • custom orders
  • free tutorials
  • contact
  • about

Messenger bag made of vinyl

5/3/2014

14 Comments

 
Hello friends!
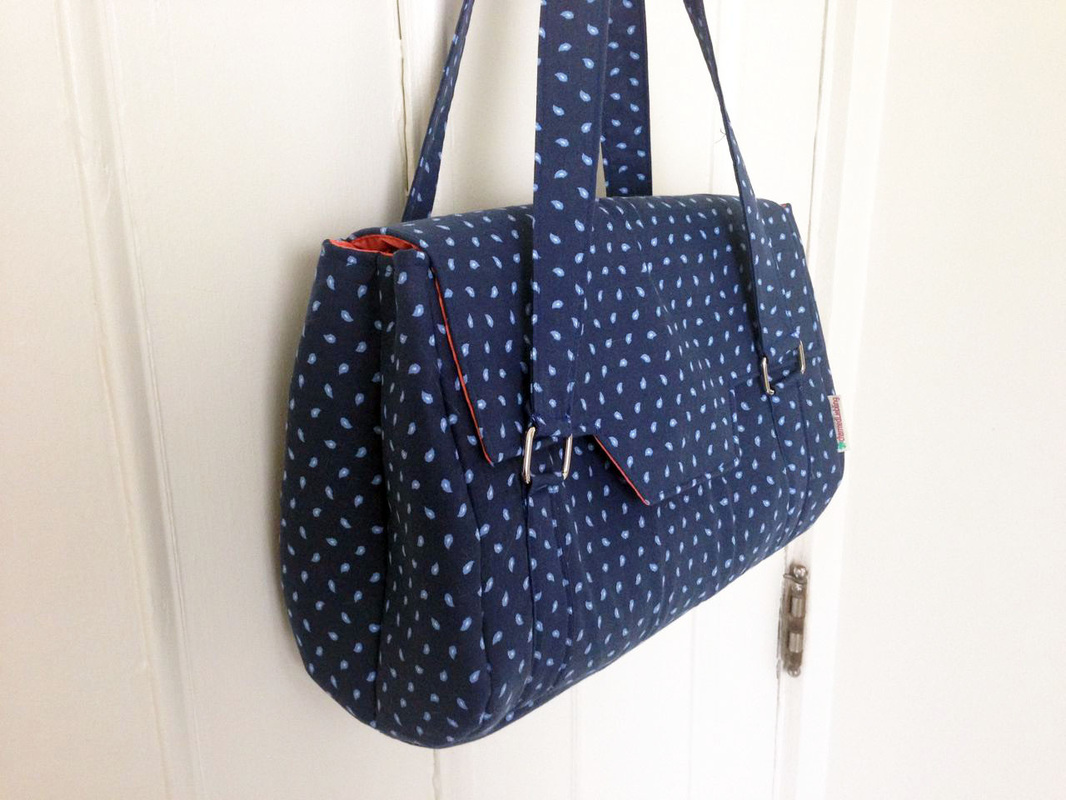
As promised in my last blog post I would like to show you the new bag I made for my husband Chris. He actually sketched the design himself (!) and told me exactly what he wanted in terms of pockets, compartments and the shape of the bag.
charmed Liebling vinyl messenger bag
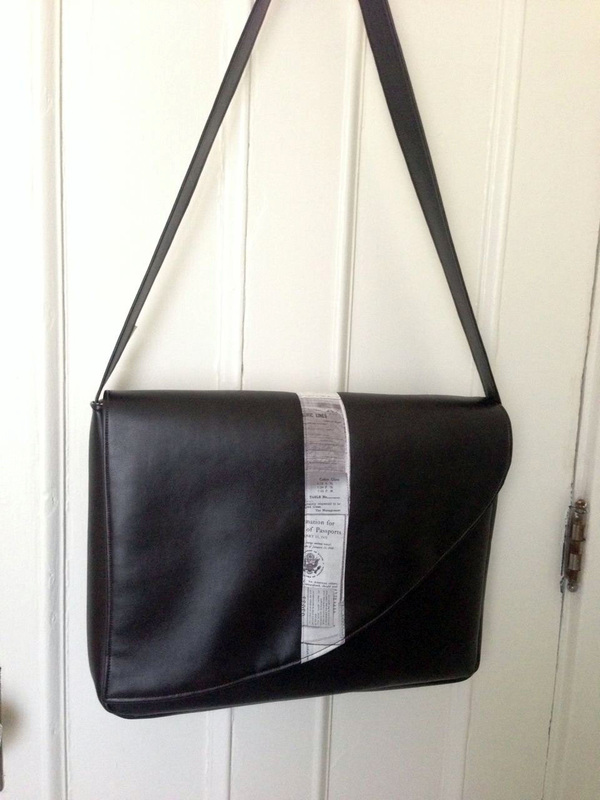
The fabric: I was pleasantly surprised that he actually picked something that is NOT black. Not that I don't like black but his wardrobe is dominated by black and the last bag I made for him was black and I just find black fabric incredibly boring and difficult to work with - have you ever tried to sew black fabric in the evening without natural light? Not fun at all...
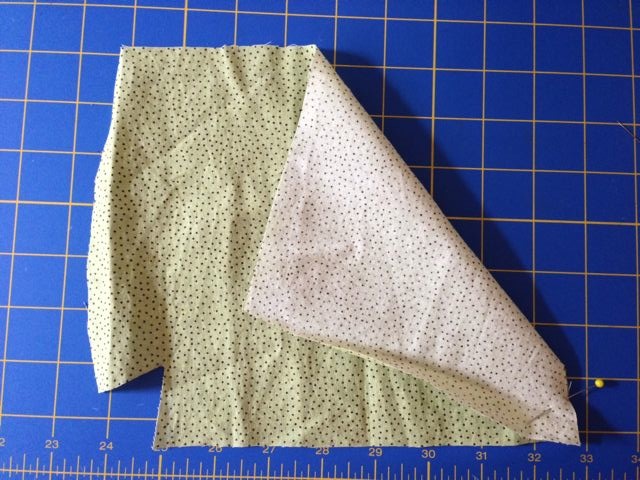
So, he picked a dark brown vinyl for the exterior and matched it with a cotton fabric for the lining.
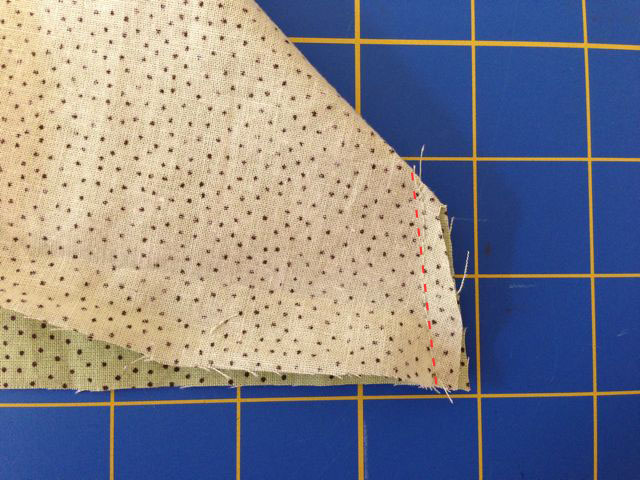
As for sewing the vinyl: I have to say it was easier than I thought and I didn't have any problems with the fabric at all. I used a leather needle (14/90) and Coats & Clark Extra Strong Nylon Thread. And yes, this thread IS strong: at some point this thick thread cut into the plastic of my sewing machine and I will have to get it fixed soon since it is not working properly any more... I suppose this project was a little bit too ambitious for my poor machine after all (I have to admit I still sew on a pretty simple model - maybe it is just time to upgrade?).
charmed Liebling vinyl messenge bag
charmed Liebling vinyl messenger bag zip pocket
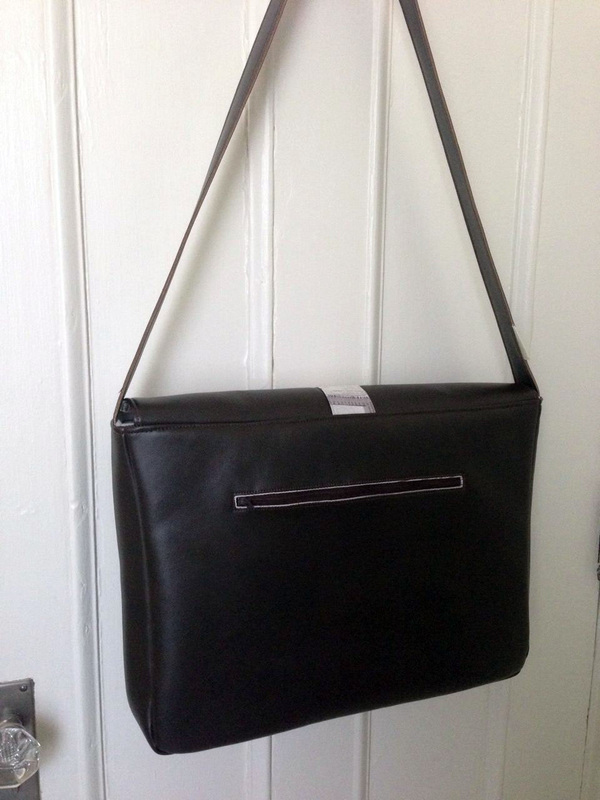
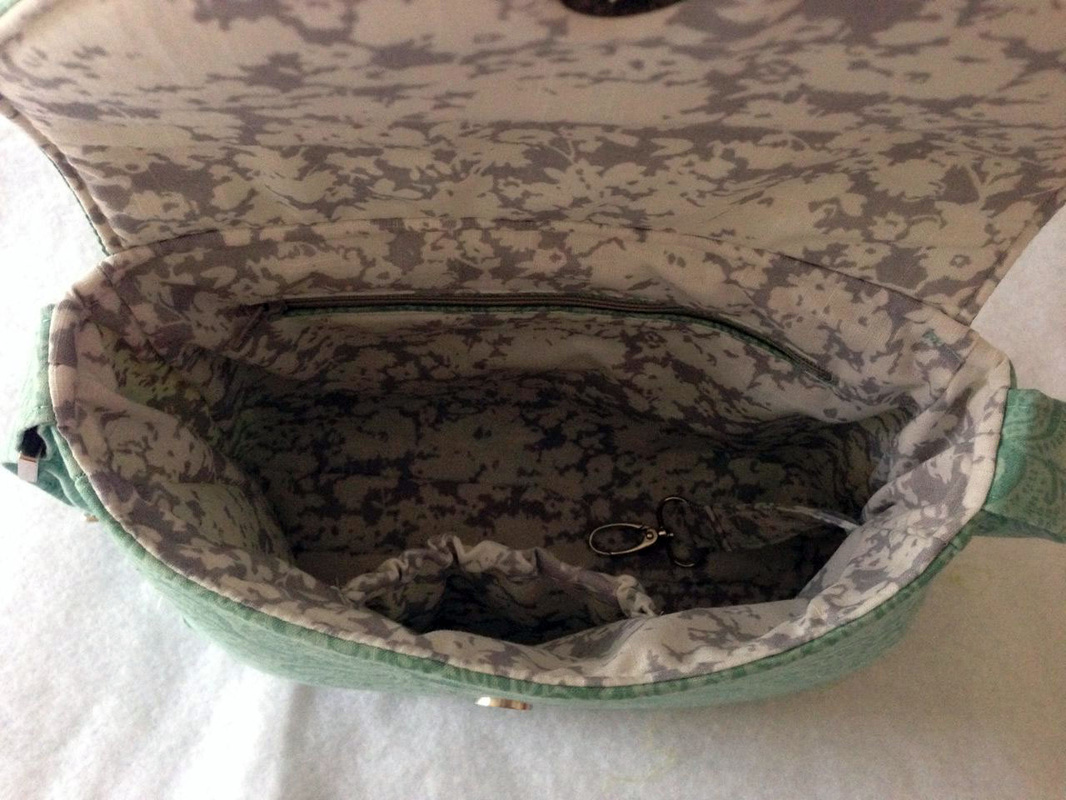
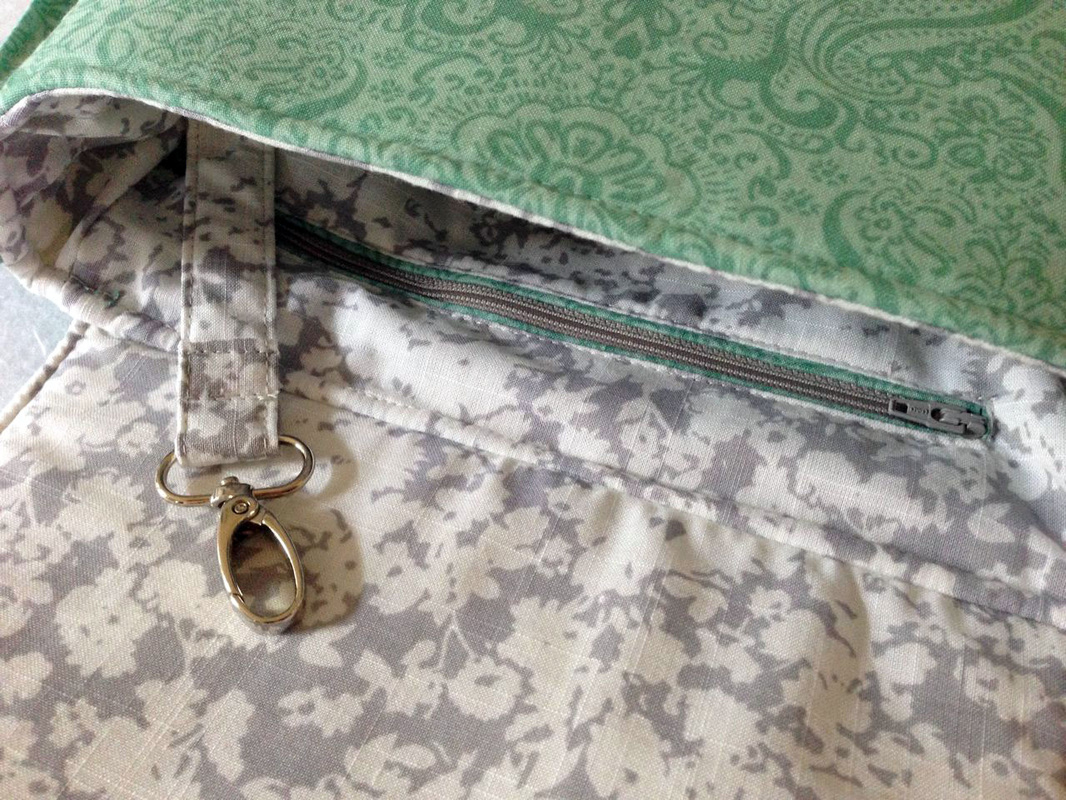
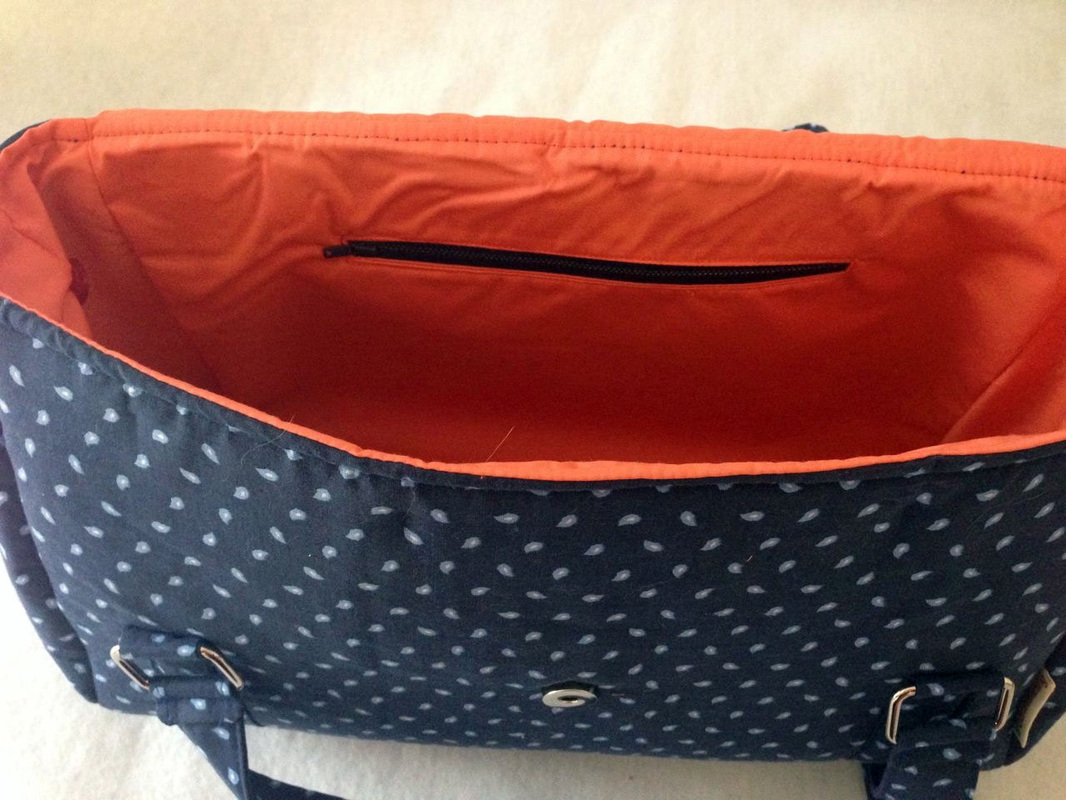
There is a zip pocket on the back of the bag which I extra sewed in a way that the cotton fabric used for the pocket pieces would show a bit. It kind of looks like piping and again I was so surprised how easy it was to sew the zipper into the vinyl!
charmed Liebling vinyl messenger bag flap


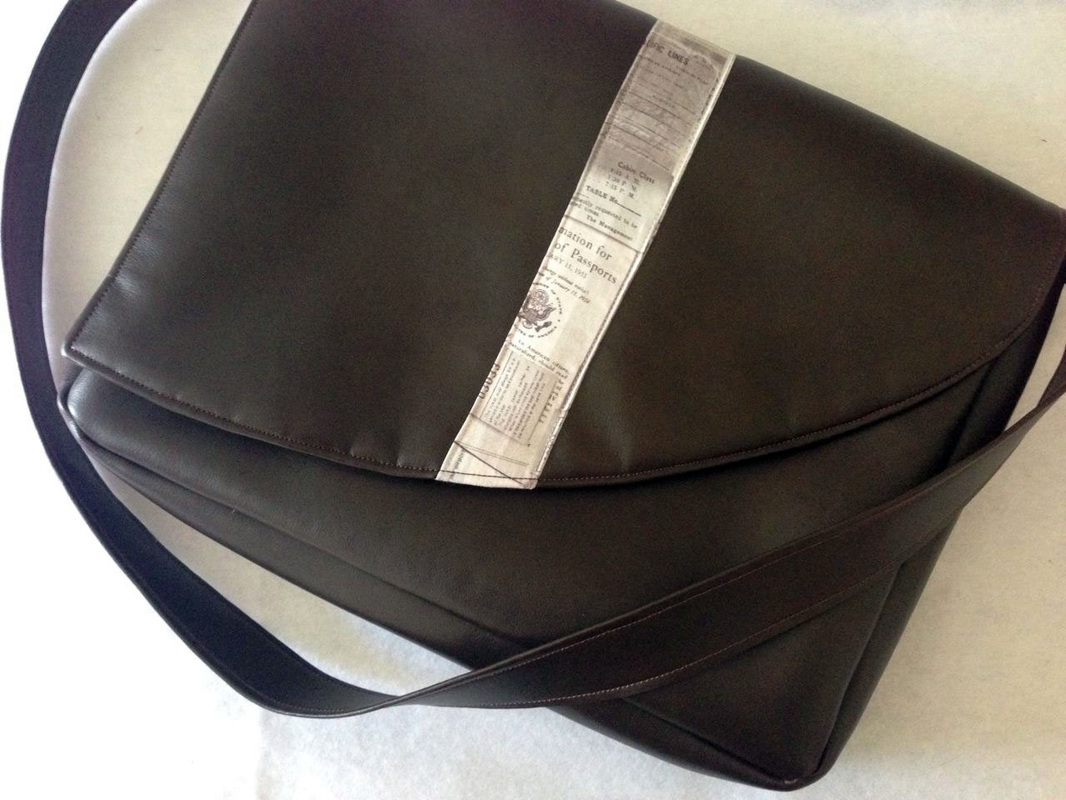
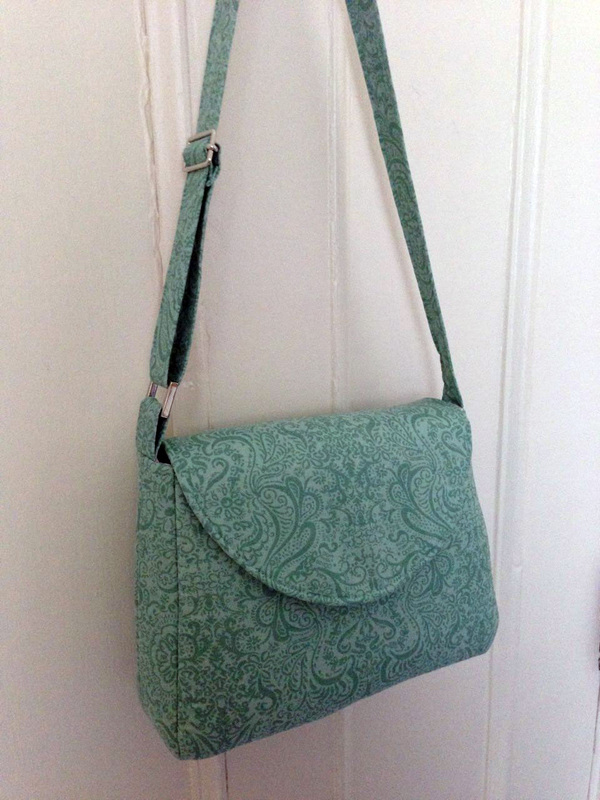
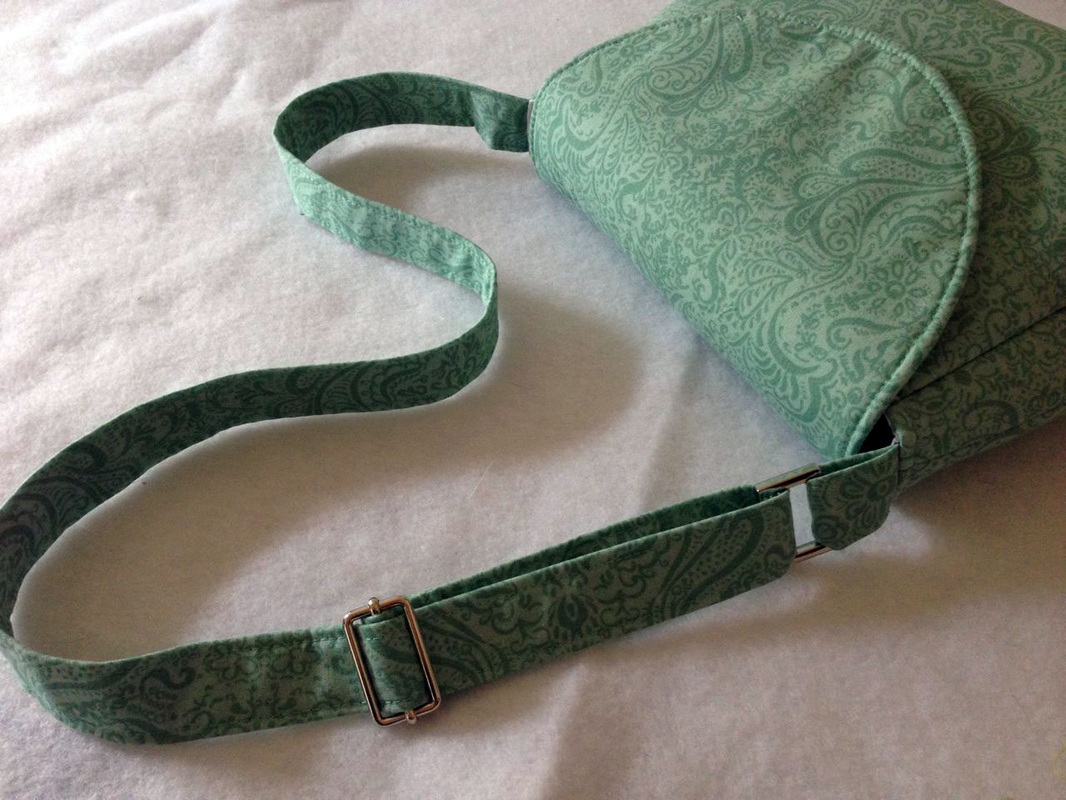
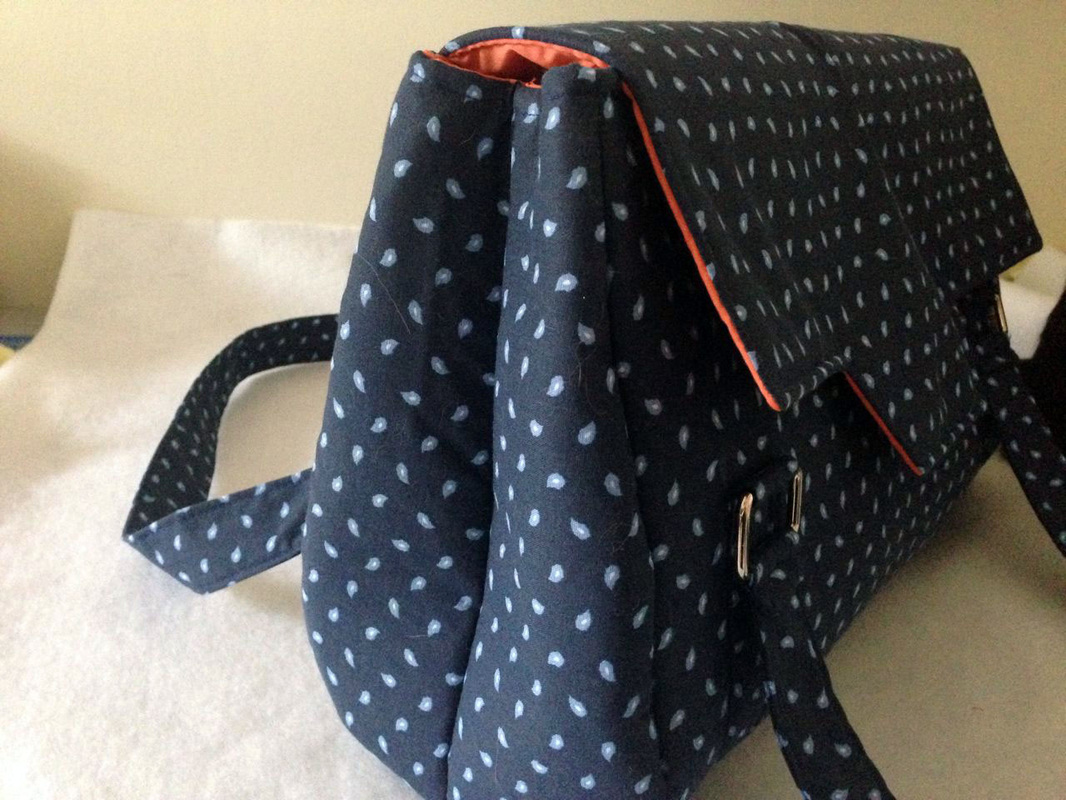
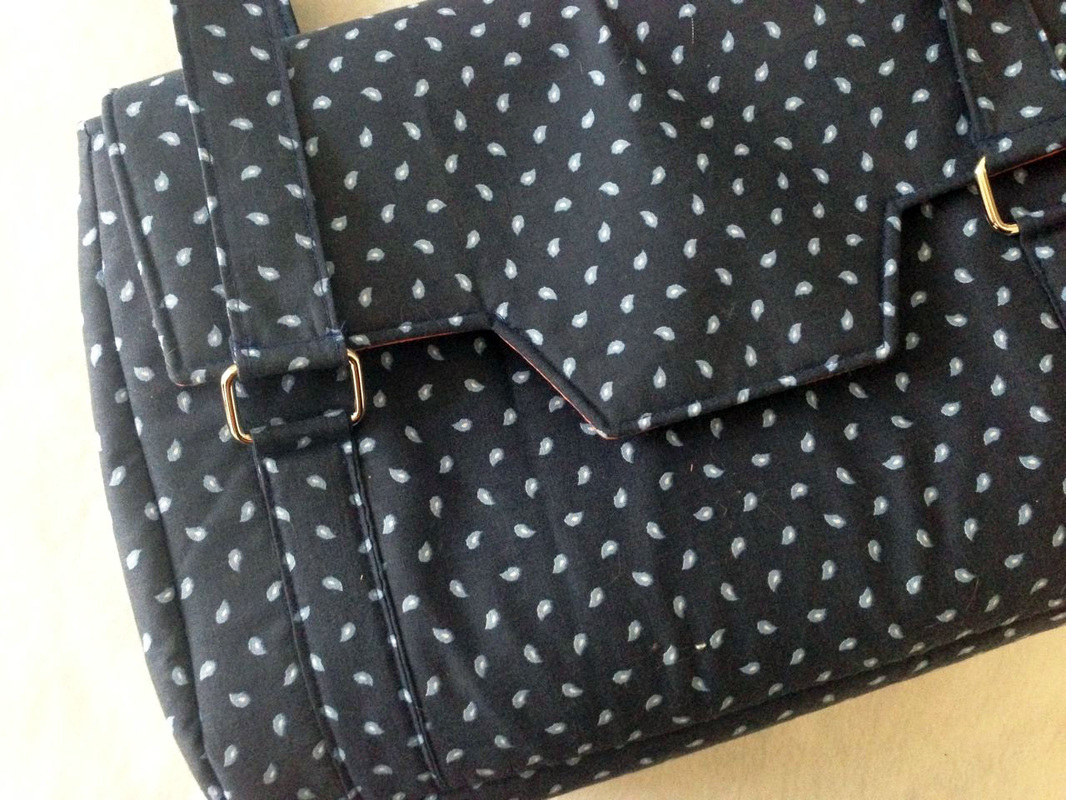
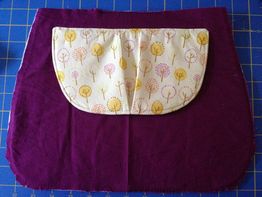
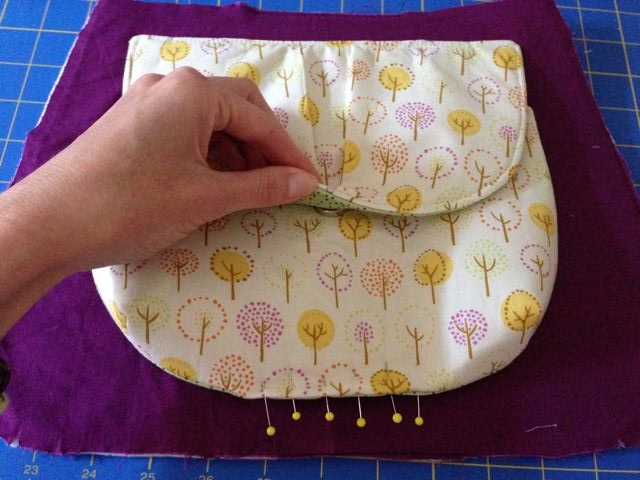
As you can see Chris wanted an asymmetric shape for the flap. The funny thing is that he is still convinced that he came up with this feature even though I am pretty sure he "copied" the flap of my Rose Petal Bag, haha! Oh, well, I let him have his moment :) The strip of lining fabric on top of the flap was my idea and he liked it, since it brings a little diversion to the exterior which otherwise would only be dark brown.
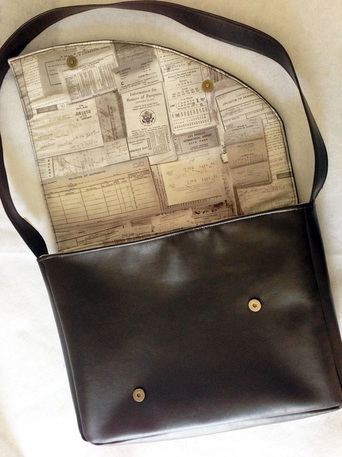
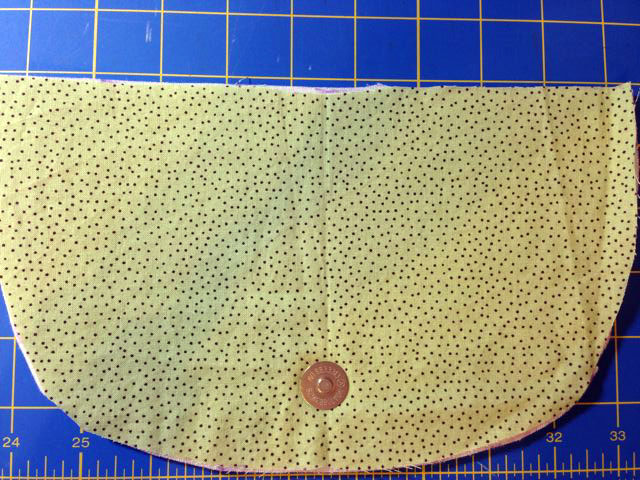
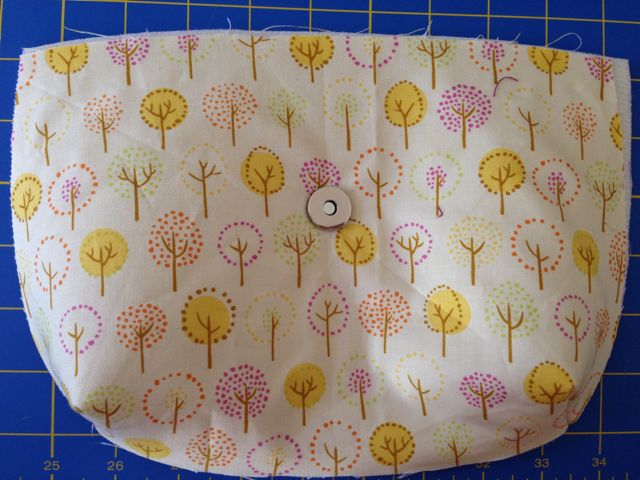
I think it looks really funny when the flap is up to see the positioning of the magnetic snap closures.

charmed Liebling vinyl messenger bag interior

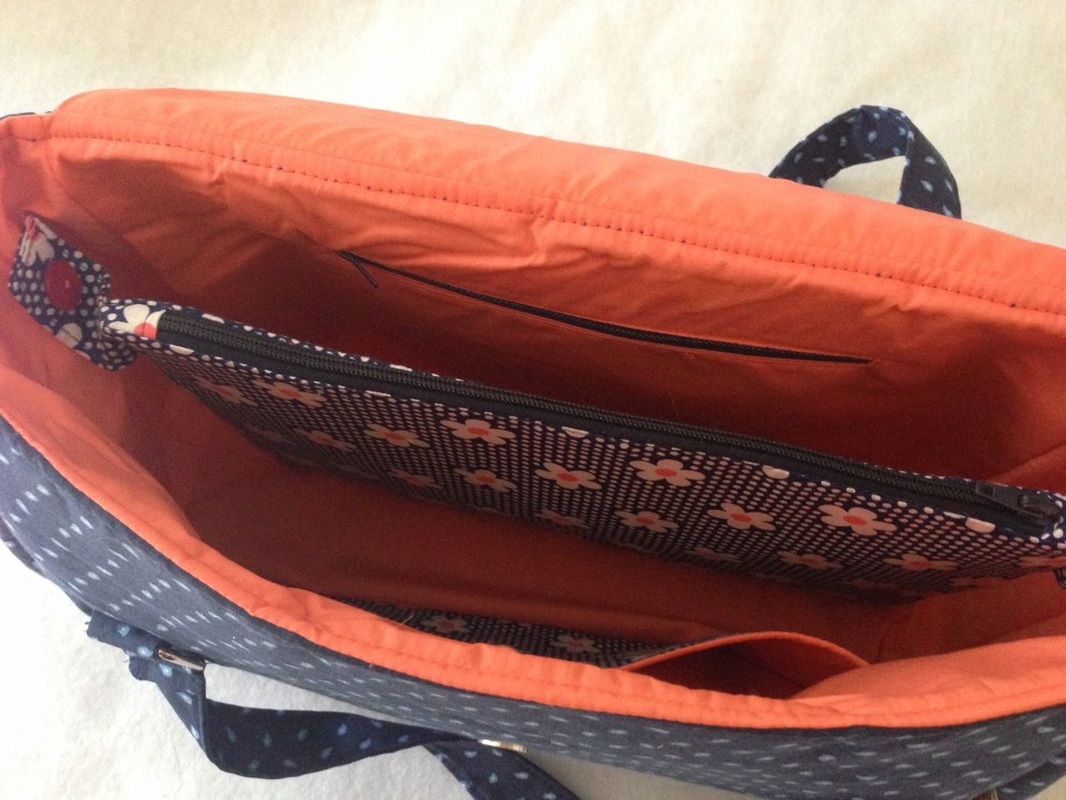
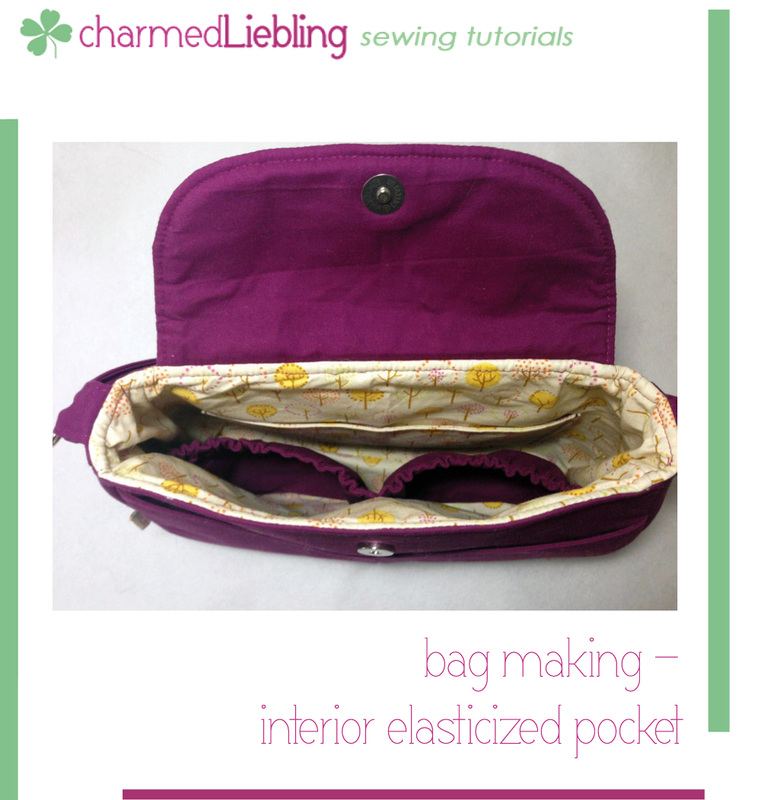
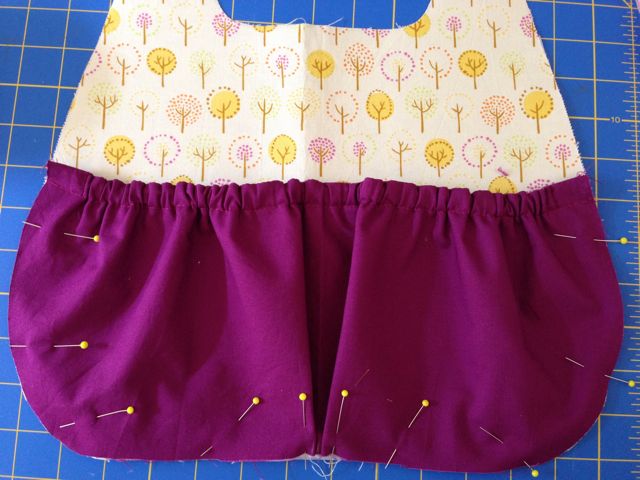
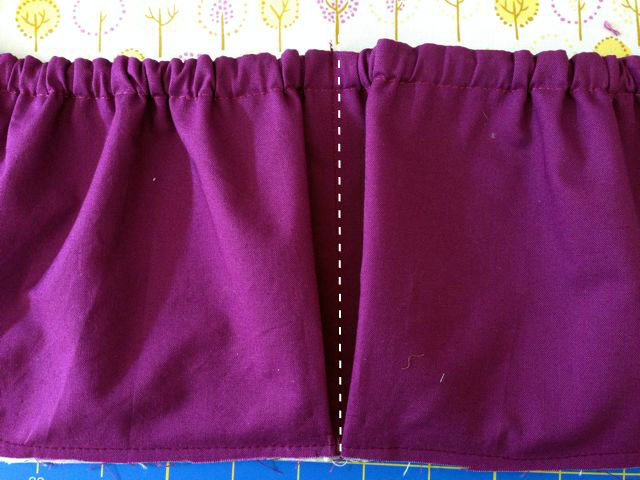
Inside there are several compartments:
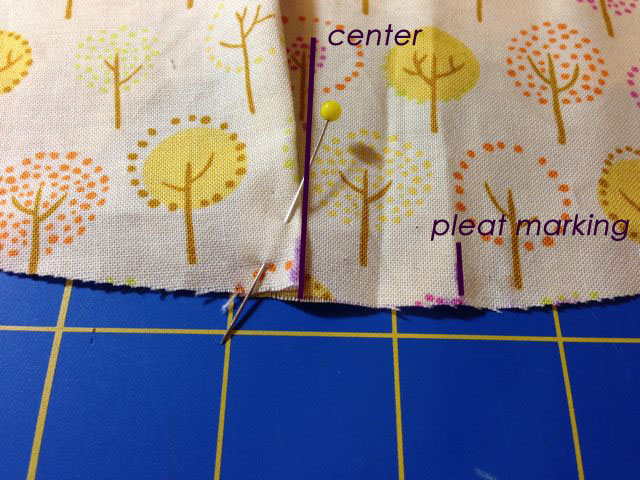
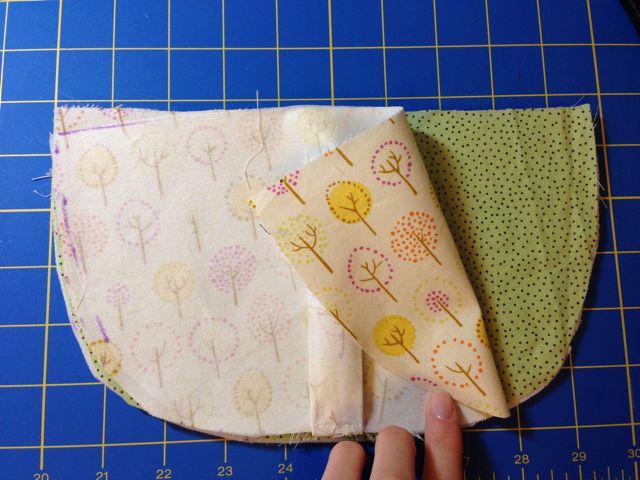
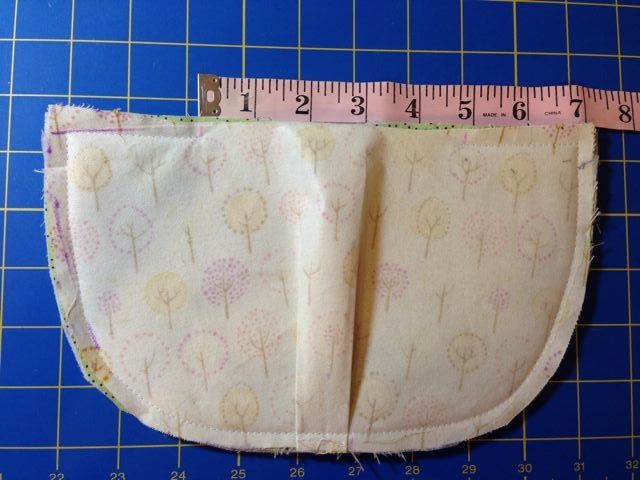
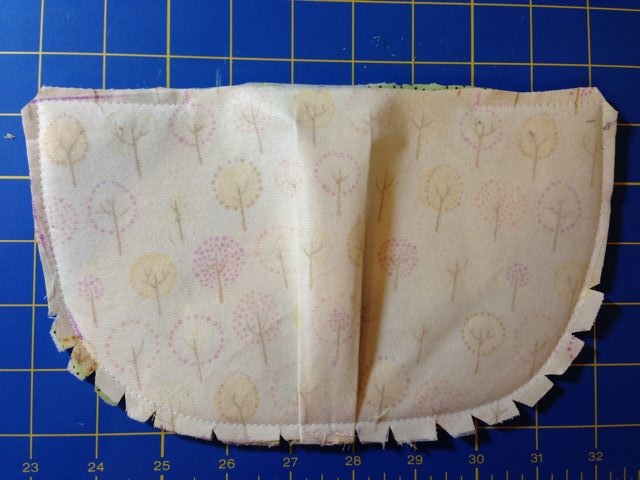
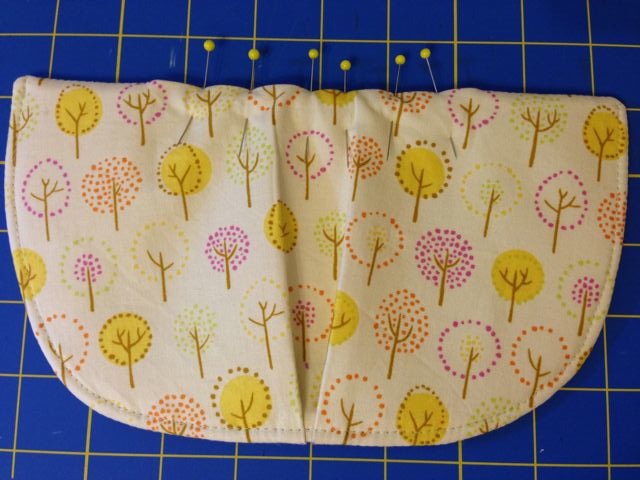
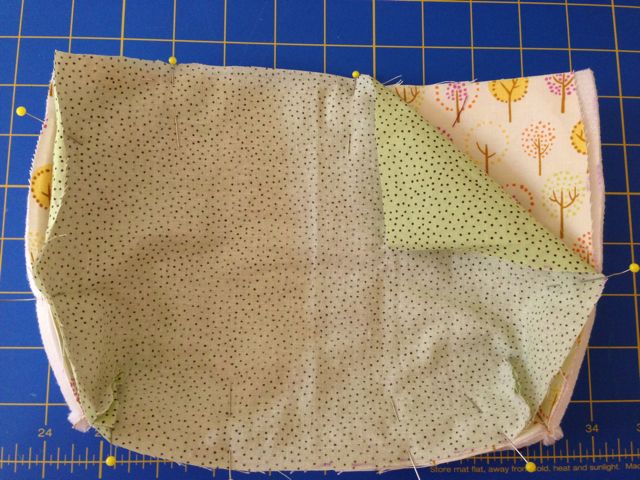
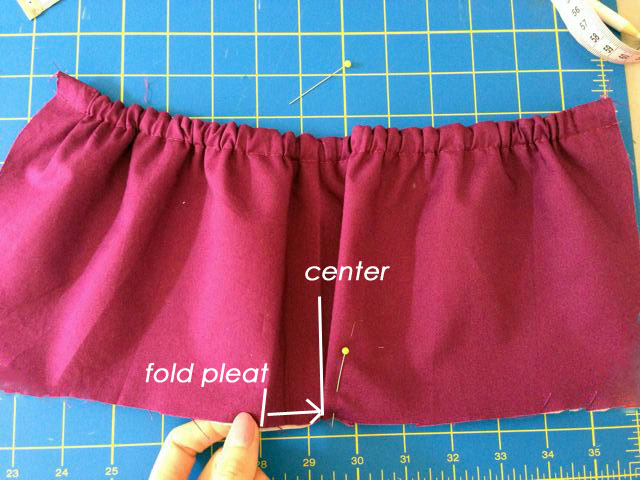
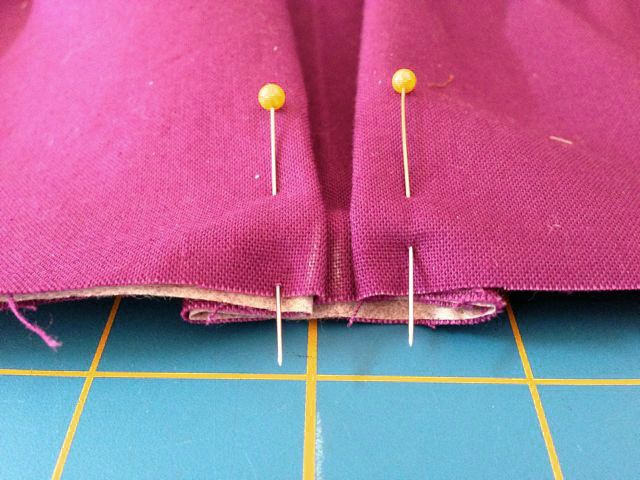
There is a divider in the center of the bag. It is the first time I made a divider that reaches across the whole width of the bag and is attached to the sides and the bottom panel (meaning the two parts of the bag are entirely seperated and there is no opening at the bottom like you would sometimes find it with dividers in sewing patterns).
The divider is padded with Annie's Soft and Stable to protect a MacBook.
On the one side of the divider I added two slip pockets. These are the perfect size to hold a notepad and a NOOK.
I also added three pen holders and two compartments for a bunch of business cards, Chris' and mine - he always carries my business cards around and passes them on to people whenever he can. I find that very sweet of him.

charmed Liebling Chris with his bag

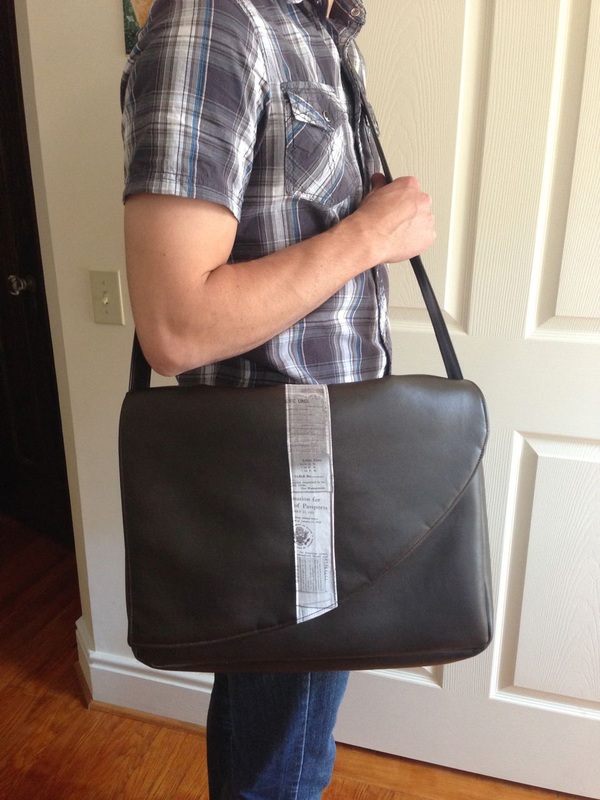
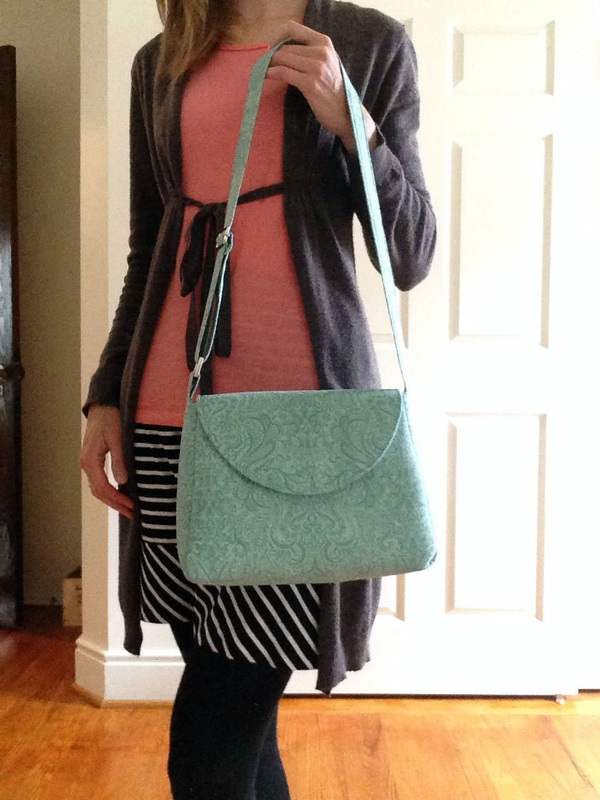
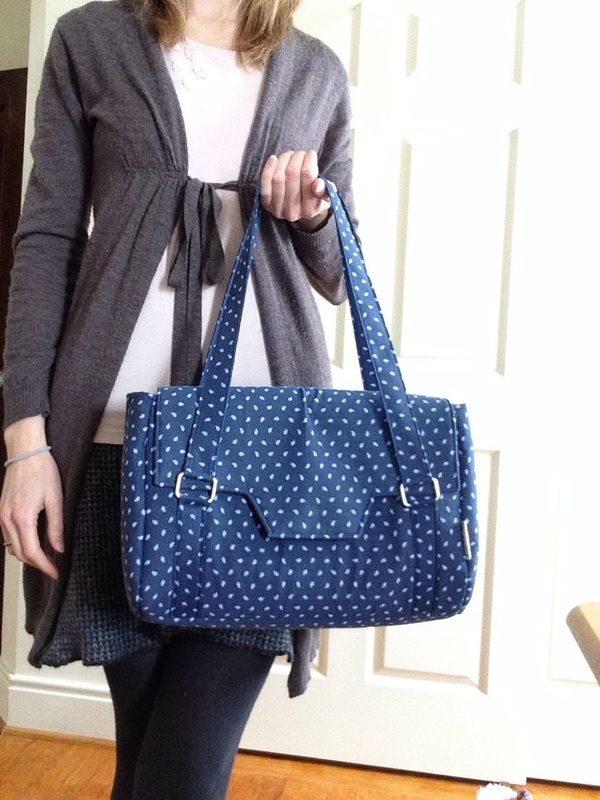
That is Chris carrying his new bag. He did not want me to show his face :( He's usually never shy like that but oh well.. I respect his wish for privacy of course. At least you can see the proportions of the bag.

I hope you like this bag. Chris took it to a business trip to Germany and told me that he is getting a lot of compliments for it. I don't know if he is making this up but I am happy that he is enjoying it so much. He has always been so supportive of my business and I like the fact that he comes to me when he wants a new bag or wallet :)


I may turn this bag into a sewing pattern some time soon. Would you be interested in a pattern for this bag? Do you have other features that would be important to you for this kind of office/messenger/laptop bag? Just let me know and I'd be happy to include this in my design.

I hope you all have a lovely Sunday!
Bild
14 Comments

Purses for Mama

4/22/2014

4 Comments

 
Hi there!
Today I would like to show you some purses I made recently. They are all gifts for my lovely Mom. She likes to sew as well and some time in January she actually sent me a package with seven (yes, that is 7!!) skirts she made for me. I thought that was very sweet and it was about time to make some things for her. I already made a small purse for her last year before I went home for a visit and she liked it a lot- well, both of it, the purse as well as me visiting :)
So I decided to make two more of these, but I changed them a little bit:
Bild
I basically used my Mini travel sleeve tutorial, but made these purses a little wider. The front pocket is divided, so that she can fit credit cards into either compartment. The main compartment is for her smartphone and bank notes.
Bild
I also added a zipper pocket to the back of both purses since in Germany people use a lot more cash and you always end up with lots of coins (also because there are 1-Euro and 2-Euro coins, not bank notes... I always disliked how all those coins added weight to my wallet). One of the purses is made of gray, black and white colored fabrics, so I added a little color to it with the turquoise zipper.
Bild
Mama also mentioned some time ago that she would like to have a small to medium-sized handbag in green shades. So I came up with this one:
Bild
Bild
She told me that she would love for the bag to have a zipper pocket on the inside, a compartment for her phone and an adjustable strap. Easily done :)
Bild
A zipper pocket and an elasticized pocket.
Bild
Adjustable strap
Bild
I also added a swivel clip to the inside, so she can clip on her wallet, her keys or her foldable shopping tote.
I hope my mom is going to like her new purses. And as luck would have it my husband is going to Germany tomorrow for business, but he will be able to stop by at my parents' place for one day and bring my mum her purses.


I am glad I was able to finish everything in time. In my next blogpost I will show you the new bag I made for my husband. He had the crazy, last-minute idea that it would be nice to travel to Germany with a new bag (that sounds so much like me! I think my behavior is rubbing off on him - ALWAYS travel with a new bag LOL!), so I had a make-it-work moment on the weekend.
I hope you all had a nice Easter weekend and found some spare time for sewing :)
Bild
4 Comments

Shopping at Mood Fabrics - again!

4/13/2014

5 Comments

 
Bild
Hello everybody!
It's been a while since I have last posted but I was out of town and exploring my new country again. And to be quite honest, I was totally sick of the looooong winter of upstate NY, so I escaped to California for a little bit. One of the most awesome things I did was this:
Shopping at Mood Fabrics, Los Angeles!
I love love love this store and you might remember that I went to the store in New York City for the first time, in December of last year. I knew that if I ever make it to Los Angeles I would have to go to the store there. And so I did, on April 2, to be exact!
Bild
Bild
The store is located at 645 South La Brea Ave, Los Angeles, CA 90036. It is smaller than the one in NYC but just as well organized! And to be honest, there is still so much fabric to choose from, it gets a little overwhelming. One half of the store has all the fashion fabrics and the other half all the home decor fabrics. I spent about two hours in the store and left with four fabrics.
Bild


There is also a huge collection of buttons, buckles, zippers and all other supplies you can possibly think of. I mean look at the picture with all the buttons! Isn't that amazing??

And these are the fabrics I bought:
I started off in the knit section since I love nice cotton knits with prints and they are just so hard to get. This one is definitely going to be made into another summer dress, like the one I already made a couple weeks ago, with the Rochester skyline on the back. I even found this fabric online on the Mood Fabrics website, if you want to check it out.
Bild
Bild
I also bought this knit fabric with a large scale print:
Bild
Bild
My favorite is this next one! I was looking for a fabric to make a maxidress using a Burda style pattern and I found this awesome silk fabric:
Bild
Bild
Bild


This is the pattern I want to use. I haven't tried this one before but I think it will look really gorgeous with that fabric. I just hope I won't screw up on this one because I could not forgive myself if I did :)
If you are interested in this pattern, it is in the Burda style May 2013 edition and you can also find it on their website.

Bild


This is the last fabric I bought. I am not really sure what I am going to make of this one but I kind of liked the color combo. I could make it into a skirt for instance and it will match a lot of my tops. It is a Marc Jacobs fabric for $ 18/yard, so I couldn't resist.

Bild

I hope you enjoyed looking at my new fabrics! I know I do. If you ever make it to LA or NYC you have to check out Mood Fabrics. It is seriously one of the most exciting fabric stores I have ever been to (and that includes stores in Europe). I have been to both of them within four months and couldn't be more excited about it. I hope to be able to go back some time...

Bild
5 Comments

Name my new (tablet-)bag design - and win the pattern!

3/30/2014

19 Comments

 
Hi everybody!
Today I would like to introduce my new bag design to you, which will be released shortly as a PDF sewing pattern. But first I need a little help from you: I am looking for a fun and fitting name for this new pattern.
charmed Liebling tablet handbag
It is a medium-sized bag with two handles and a flap. The bag has a zipper pocket and two slip pockets on the inside.
My favorite feature however is this: a removable tablet sleeve!
charmed Liebling removable tablet sleeve
This sleeve closes with a zipper and it is padded for more protection for your tablet. It can be attached to the inside of the handbag with two buttons (or snaps). The sleeve measures 8.25” x 11.25” (21 x 28.5 cm) so it should fit most common tablets. I usually carry my iPad mini with me wherever I go and although I keep it in a (handmade) case it bothers me that it is thrown loosely into the bag and there isn’t a designated compartment for it in my handbags. That was the idea behind my new design. And you can use the sleeve separately as well.
Bild
Bild
charmed Liebling tablet handbag zip pocket
charmed Liebling tablet handbag
charmed Liebling tablet handbag proportions
I hope you like this design. Please have a look at the bag and all its features and if you can come up with a nice name you are welcome to leave me a comment. I will pick one winner, choose the name they suggested for my new bag design AND as a thank you she (or he?) will get the new pattern for free! You can either leave me a comment, send me a message or email me to anna(at)charmed-liebling(dot)com.
Please leave your name suggestion for the bag pattern, your name and your email address, so that I can contact you in case you win! I am looking forward to your suggestions. I will leave this contest open until April 27 and then pick a winner :) The pattern will be available in my pattern store in late April.

Bild
19 Comments

A custom order all in blue

3/23/2014

2 Comments

 
charmed Liebling handbag
Today I would like to show you one of my custom orders that I just finished a few days ago. A friend of mine asked me for a handmade handbag for her sister-in-law. Her only two specifications were the color - the bag would have to be blue - and the size: big!

I love orders like these since I can let my creativity run free :) First thing I did was check online for lots of samples of nice (blue) fabrics to show my friend. We started out looking for floral patterns but I found this really gorgeous and a little abstract pattern and just thought I'd put it on the list as well. In the end she went with exactly this print and I was really thrilled about it! To me it looks like a fairytale forest. I see a print like that and my imagination takes over...
Bild
"Blue Trees" of the Nite Owls collection by Paintbrush Studios.
Bild


As for the design: She saw my Rhine-Valley-Bag a couple of times and really liked the size and the style of it. She decided to go with an adjustable strap instead of two handles so I slightly altered the shape of the original bag pattern, making it a little more rounded at the top edges.
With 19 " the bag is also slightly wider. When using a recessed top zipper as a closure I always want to make sure the bag has a certain width (at least 12 "), otherwise it will be less comfortable to reach inside or take things out.

charmed Liebing handbag with adjustable strap
The adjustable strap
charmed Liebling Rhine Valley Bag pattern altered
Altering my Rhine Valley Bag pattern and giving the bag a more rounded shape and a straight top edge
charmed Liebling handbag interiorSolid blue lining - with two slip pockets and one zipper pocket
Inside there is a 9" zipper pocket and two large 3D-shaped slip pockets. I use them in the original pattern and love them in my bag! They keep everything so organized and I don't have to waste time looking for my stuff any more. I have a free tutorial lined up to be posted the first week of April which will show you how to simply add these kind of slip pockets to any bag pattern, so stay tuned!

Bild
I added a piece of blue lace to the side panel and the slip pockets.
charmed Liebling handbag interior
Wallet, folders, a water bottle... this bag is going to hold a LOT of stuff!
I am really happy how the bag turned out and had a lot of fun making it. I like this altered version of the original pattern and might even make some more bags with it :)
Thanks for reading and I hope you all have a great week with lots of sewing ahead!
Bild
2 Comments

My ROC City dress and a free sewing tutorial

3/16/2014

3 Comments

 
Bild
I remember that a few years ago there was this cool tutorial in one of my Burda magazines which showed you how to paint a city skyline onto a scarf. There was a stencil included in the magazine which portrayed some random fake city skyline. I thought the idea was pretty cool but if I am going to have a skyline on my clothing I want it to be a real one! So why not put Rochester, NY onto a dress?? If you are interested in making something like this for your city, here's what I did:
You need:
- a picture of your city. Print it onto a letter size sheet of paper
- tracing paper
- cardboard
- scissors and ideally a carpet cutter
- doublesided tape
- black fabric spray paint (I used Tulip Fabric Spray Paint "Asphalt")
-
a fabric pen matching your fabric - I used a red one with glitter effect (make sure it is a "pen" and not "slick" fabric paint which is dimensional!)
Bild
1. Trace the outlines of the city onto tracing paper. Then cut out the interior parts and discard them. Place the cut out picture onto your cardboard
(You may also cut the original picture if you don't have tracing paper or don't want to do the extra step but I thought using tracing paper was a little easier)
Trace the outlines onto the cardboard and then cut out the interior parts of the cardboard. This is going to be your stencil.
Bild
Before proceeding: I highly recommend trying your stencil on an old piece of fabric or muslin. You want to make sure you like the silhouette before you spraypaint the fabric of your garment! I am glad I used some simple yellow lining fabric to try out my stencil and my pens. I accidently bought a slick fabric paint pen which is dimensional and the result didn't really look nice. And I had cut out the bridge in the foreground of the cardboard at first which I also did not like. I removed the bridge part from the stencil so that I would have exclusively the outlines of the skyline. Everything structuring the skyline would have to be painted in later with a fabric pen. 
Bild
2. Tape the stencil to the fabric with doublesided tape. Make sure to cover all edges of the stencil with tape. It is important that the stencil will be attached securely to the fabric to prevent the spray paint from running over the edges. You also want to make sure to cover up the rest of the fabric with newspaper or some old fabric from your stash. For my garment I found this cotton/rayon knit fabric and love the pinkish/purplish color. I only bought a yard and thus knew that I only had one try to make this happen. No pressure at all :-)
Bild
Spray paint your fabric. Make sure to evenly distribute the paint and to get every corner. Let your fabric dry for at least a few hours before proceeding.
3. Take off the stencil and admire your work! So far so good - I actually procrastinated for about two days before proceeding to the next step. I was too scared I would screw up my nice skyline silhouette.
Bild
4. Now it's time to turn the silhouette into an actual skyline. I used the picture of Rochester for help and looked for significant details on the skyscrapers. E. g. the one in the center has a roof with slanted edges that reflects the sun. This part would be painted red to stand out more. The building on the left-hand side again has a very structured look with all those vertical lines, so I tried to draw in as many red lines as possible. The building on the right-hand side however is very dark, so I just draw the outlines and nothing else. As you can see I used the original stencil part to draw the bridge. I didn't want to eyeball this one since I am pretty sure I would have messed up on the proportions.
Bild
All done! After letting the paint dry for another few hours it was time to sew up the dress.
Bild
Bild
Not too bad! "Freddie-Sue Bridge" with Chase Tower, Bausch & Lomb Place and Xerox Tower (from left to right)
As for the dress I made with the fabric: it is a very simple pattern taken from Burda style magazine (April 2013, but they have the same pattern in the Spring 2014 edition which is available in stores right now). The pattern just uses one panel (cut on the fold) for the front and back and two facing pieces for the neckline. There are four pleats folded into the upper front part but I went with six since the neckline was a little too wide. I neglected the pockets. I like this pattern a lot and think the dress looks really good with a belt. Otherwise I would have probably made a more fitted version. 
Bild
Bild
Bild
And I really do like the skyline on the dress! Not everybody carries their city on their back :) Thanks for reading and if you like this tutorial please leave me a comment below!
Have a great week everyone!
Bild
3 Comments

Review of my Working Girl Laptop Bag on Sew Can She

3/10/2014

0 Comments

 
Bild
I am so excited that Caroline at Sew Can She wrote a review of one of my sewing patterns this week! It is one of my favorites, the Working Girl Laptop Bag pattern.
If you are interested in what she thinks about my pattern please head over to her blog. She picked some really nice fabrics for her project and I very much enjoyed seeing her finished laptop bag.
Click here if you want to learn more about the pattern and to see
all the bags of my pattern testers. Maybe this will inspire you to make your own Working Girl Laptop Bag? In this case you may head over to my pattern shop on Craftsy!

Have a great week everyone (with hopefully lots of sewing)!

Bild
Bild
0 Comments

FREE sewing tutorial: bag making - pockets, part II: how to add a pouch with flap 

3/6/2014

6 Comments

 
Bild
This is the second part of my series of tutorials on different kinds of pockets to add to your handmade handbag. For the first part ("How to make an inner elasticized pocket") click here.

Customize your handmade handbag by adding a very practical and spacious pouch on either the front or the back! Not only is this pouch 3D-shaped so that you can fit more items into it – it also closes with a flap, to look more stylish and to make sure all your things stay in place.
I used this pocket in my All Day Out Bag sewing pattern. I like it because it gives you a little extra space for all the things you need to carry around.

---
If you would rather prefer to download this complete tutorial as a PDF file you may
purchase it here for only $2 ---

Finished measurements:
20 x 25 cm (8“ x 10“)
Please note: The bag you are making should measure at least 25 cm (10") in height and
28 cm (11") in width to make sure this pouch fits onto it.  

The pouch will be attached to one of your main body panels. Make it and stitch it to your bag lining BEFORE assembling the handbag!


Please read all instructions before you begin.

All cutting measurements given are height x width.

All seam allowances are 1 cm (3/8”) unless stated otherwise.

Download the pattern pieces from the PDF file below and cut them out.

You need:
- Exterior fabric: 1 fat quarter
- Lining fabric: 1 fat quarter
- Fusible fleece e. g. Pellon 987F:
a 20 x 55 cm (8” x 22”) piece is sufficient
- Fusible interfacing e. g. Pellon 931TD: 0.25 m (1/4 yd)
- 1 magnetic snap
- pattern pieces #1, #2 and #3 (download them from the PDF file below)
pattern_pieces_pouch.pdf
File Size: 501 kb
File Type: pdf
Download File

Cut:
From exterior fabric:
(1 x) pattern piece #1 on the fold – pouch
(1 x) pattern piece #2 on the fold – pouch flap (outer part, with pleats)

From lining fabric:
(1 x) pattern piece #1 on the fold – pouch 
(1 x) pattern piece #3 on the fold – pouch flap (inner part, without pleats)

From fusible fleece:
(1 x) pattern piece #1 on the fold – pouch
(1 x) pattern piece #3 on the fold – pouch flap 

From fusible interfacing:
(1 x) pattern piece #1 on the fold – pouch
(1 x) pattern piece #2 on the fold – pouch flap

Instructions

1) Make the pouch flap:
On the inner pouch flap piece (cut with pattern piece #3, the one you interfaced with fusible fleece) measure and mark 3 cm (1.25”) up from the bottom (rounded) center edge.

This spot marks the center of the magnetic snap, so make sure to position the snap with its center right on top of your marking.

Install the male part of the magnetic snap in that spot, following the manufacturer’s instructions. Set aside.

Bild
Bild
Bild
Fold the pleats at the bottom (rounded) edge of the outer pouch flap piece (cut with pattern piece #2):

On the left-hand side of the pouch flap, bring the marking for the pleat up and over to the center and pin the fold in place.


Repeat for the right-hand side pleat. Baste across the pleats at the bottom edge of the pouch flap (approx. 0.5 cm (3/16”) from the edges) to make sure they stay in place.


Bild
Put the two pouch flap pieces right sides together, all edges matching.


 Pin in place and stitch around all edges of the flap but leave an opening of approx. 12 cm (4.75”) at the top edge. Trim the seam allowance and notch the curves (i. e. cut small “v”s into the fabric). Be careful not to cut into the stitching. Turn the flap right side out.
Bild
Bild
Bild


Fold the seam allowance of the opening down to the inside, pin in place and press the flap. Topstitch along the rounded edge of the flap using a 0.5 cm (3/16”) seam allowance. Set the pouch flap aside.


2) Make the pouch:
On one of the pouch pieces (cut with pattern piece #1), fold the top corner down so that the two edges of the bottom darts match. Pin in place and stitch along the straight edge of the dart. Repeat with the other edge of the fabric piece and then with the two edges of the second pouch piece.

Bild
Bild
Bild
On the outer pouch piece (interfaced with fusible fleece) insert the female part of the magnetic snap by following the manufacturer’s instructions, at the spot you marked.


Bild
Put the two pouch pieces right sides together, all edges matching. Make sure the seams of the darts of both inner and outer piece match. Pin in place and stitch around the edges but leave an opening at the bottom edge of approx. 10 cm (4”). Clip the seam allowance on the curves.


Bild
Turn the pouch right side out through the opening. Fold the seam allowance of the opening down towards the inside and pin in place. Press and topstitch along the top edge of the pouch using a 0.5 cm (3/16”) seam allowance. Set aside.


3) Attach the pouch to the bag main body panel
Bild
Decide where you want your pouch to be positioned on your bag and put the pouch flap with the pleated side up onto one of the exterior main body panels of your bag (the pouch flap should be at least 3.5 cm  (1.25”) down from the top edge of the main body panel). Pin in place and attach the pouch flap to the main body panel by stitching along the straight top edge of the pouch flap, at the same time closing the opening of the pouch flap.

Put the pouch with the magnetic snap up onto the exterior main panel of your bag and match both parts of the magnetic snap (of pouch and pouch flap) as if closing the pouch. This is how you find the correct placement for the pouch. With the magnetic snap closed, make sure the pouch sits centered on the exterior main panel and that its top edge is straight. Pin the pouch in place.
Attach the pouch to the exterior main panel by stitching along the side edges, curves, and bottom edge, at the same time closing the opening at the bottom. Be careful when sewing over the corners to prevent pleats. Leave the top (straight) edge open.
Bild
Bild

Your pouch is all set! Proceed with assembling your handbag.

If you would rather prefer to download this complete tutorial as a pdf file you may purchase it here for only $2.
--- I have received many emails with questions, tips and tricks on my tutorials. Thank you all! If you would like to weigh in with a short comment please feel free to let me know what you think of my tutorial below. I am interested to hear your feedback! ---
Bild
6 Comments

My Project Runway jacket

3/1/2014

2 Comments

 
charmed Liebling Annas new jacket
As some of you might know I have a little addiction to Project Runway. I love this show and think it's a nice way to get inspired by all the different styles and aesthetics the designers bring to the runway (and well, don't we all love the little drama of castinghows??).
Anyway, anybody remember Sonjia from season 10? She was eliminated in episode 12, right before the finale. She created a lot of interesting looks during the show but the one that I loved most was a jacket she made in episode 8 ("Starving Artists"):
Bild
When I saw that jacket I knew that I would try and make one for myself that was similar to hers. Fast forward 1.5 years and here we are :) I am really into sewing clothes lately and this jacket is my newest project. I used a thin, soft wool fabric that I had gotten from my mom several years ago. To make a nice contrast I picked an orange/white/gray colored lining.
charmed Liebling fabrics for jacket
For the top part of the jacket I used a pattern from Burda style magazine (December 2009).
I simply cut the pattern right at the waistline since this is were the peplum starts. I sewed up the top part and while I like the asymmetric look of the original jacket I decided to keep the front panels straight - mostly because I couldn't wrap my head around how to design this part of the jacket to be quite honest.
Burda style pattern December 2009
For the first time ever I used muslin to construct the jacket. This was due to the fact that I had to come up with the pattern pieces for the peplum by myself and did not want to risk wasting my precious wool fabric.
For the peplum I pretty much just looked at the picture of the Project Runway jacket, drafted the pieces and cut them out from the muslin and attached them to the top part. And then I keep altering the pieces until they had the look I intended and that matched with the look on the picture. Let's say it took me a while :)
peplum pattern pieces
My first try cutting the pieces for the peplum. As you can tell I am pretty lazy with the iron when I sew :)
jacket muslin
The jacket muslin on the dressform. Yeah, I still got a lot of work to do at this point :)
cut out peplum pieces
The final pieces for the peplum all cut out from the wool fabric (and carefully labeled so that I wouldn't mess up later...)
charmed Liebling jacket buttons


I put three gray buttons onto the front panel and went for a decorative orange botton to go on the collar, just to pick up the colors from the lining. I found the same buttons in a smaller size and decided to put them onto the back of the sleeves as an additional accessory (you can see them in the picture below).

charmed Liebling Annas project runway jacket
I have only sewn maybe a handful of jackets/coats so far and I find it quite a challenge. Especially fitting in the lining properly is still a mystery to me. That being said I think my jacket could have turned out a lot worse LOL! Of course it doesn't look as polished as the original (also because I think Sonjia used cashmere... I wish!!) but overall I am pretty happy with the outcome. It is just too bad that it's still only 10°F in the Rochester area, so this is another item that will still have to sit in my closet for a while...
Bild
2 Comments

FREE sewing tutorial: bag making - pockets, part I: how to make an interior elasticized pocket

2/20/2014

13 Comments

 
Bild
This tutorial is for all of you bag making lovers who like pockets in all varieties like me :)
It is the first part of my series of tutorials on different kinds of pockets to add to your handmade handbag. For the first part ("How to add a pouch with flap to the outside of your bag") click here.

Customize your handmade handbag by adding a very practical and spacious elasticized pocket! Not only is this pocket 3D-shaped so that you can fit more items into it – it is also divided in the center for more convenience, to keep your things organized.
I used this pocket in my All Day Out Bag sewing pattern. What I like about this pocket is that it reaches across the whole width of the bag interior - plenty of room to arrange your stuff!

For this project you will need (measurements see below):
-    2 pieces of fabric
-    1 piece of elastic

Make the pocket and stitch it to your bag lining BEFORE assembling the bag!

1) In preparation you will have to cut two rectangular fabric pieces for your elasticized pocket:

For the measurements for the pocket fabric pieces use the main body panel of your bag for help:
-    For the height of the elasticized pocket decide on where you would like the top edge of the elasticized pocket to be. Measure this height from the bottom edge of the main body panel and add 1.5 cm (1/2").
(For a medium-sized bag I recommend using approx. half the height of your main body panel).

-    For the width of the elasticized pocket use the width of your bag main body panel and add about 14 – 18 cm (5 ½ – 7”).

→ Cut 2 rectangles of that size so that you have two pieces for the elasticized pocket.
→ Cut 1 piece of elastic (length: about 3/4 of the width of the main body panel).

Bild
2) Assemble the elasticized pocket (all seam allowances are 1 cm (3/8”) unless stated otherwise):
Put the two fabric pieces for the elasticized pocket right sides together, all edges matching. Pin in place and stitch along the top edge. Fold the pocket right side out and press.
Measure and mark a horizontal line 1.5 cm (0.5“) down from the top edge. Topstitch along this line to create a channel for the elastic.
Bild
Bild
3) Attach a safety pin to each end of your piece of elastic. Pull the elastic through the channel you created on the top edge of your fabric piece.
Remove the safety pin from one end and carefully let the elastic slide into the channel so that it ends approx. 2 cm (3/4”) in from the side edge of the fabric. At 2.5 cm (1“) in from the side edge, topstitch down until you reach the bottom stitching of the channel, at the same time fastening the elastic.
Bild
Bild
4) The other end of the elastic will be in the channel. Pull it out at the safety pin. Tighten the elastic until the width of the top part of the pocket has the same width as the main body panel (see also last picture of this tutorial for reference).
Again, keep the elastic in place with your finger and topstitch down 2.5 cm (1”) in from the side edge, until you reach the bottom stitching of the channel to fasten the elastic.
Bild
Bild
Bild


5)
Remove the second safety pin. Pull the fabric of the channel back to the stitching and trim the excess elastic.

Bild
6) To get the bottom edge of the elasticized pocket to be the same width as your main body panel, fold pleats at the bottom edge:
Place the pocket onto your main body panel and align the bottom edge and the side edges of both pieces. This way you will have excess fabric at the bottom, which you will use to create the pleat: On the right-hand side of the pocket, bring this excess fabric up and over to the center of the pocket and pin the fold in place.
In the picture to the right you can see the right-hand side pleat already folded and the left-hand side pleat still unfolded.

Bild
7) Repeat for the left-hand side pleat. Baste across the pleats at the bottom edge of the pocket (approx. 0.5 cm (3/16”) from the edges) to make sure they stay in place


8) Before proceeding make sure to distribute the elastic evenly over the whole width of the pocket.
Place the main body panel right side up. Place the elasticized pocket onto it, with the pleats facing up. The side edges, and bottom edge of both pieces should be aligned. Pin the pocket in place and attach it to the lining main body panel by stitching along the side edges and the bottom edge using a 0.5 cm (3/16”) seam allowance. 
If your main body panel does not have a rectangular shape but curved edges like mine, you can trim off the excess fabric of the pocket after pinning it down onto the main body panel like shown in the picture below.
To get two compartments, topstitch down from the center of the pocket.
Bild
Bild
Your elasticized pocket is all set! Proceed with assembling the lining part of your handbag.

If you would rather prefer to download this complete tutorial as a pdf file you may purchase it here for only $2.
I hope you enjoyed this tutorial. Thanks for reading and happy sewing!
Bild
13 Comments
<<Previous
Forward>>

    Enter your email address:

    Delivered by FeedBurner


    Follow on Bloglovin

    RSS Feed

    Anna

    anna's blog -

    Welcome to my blog! I am an accountant who once started out her "career" in the US by designing bag and wallet sewing  patterns! My patterns are available on Etsy and occasionally I will share some of my sewing projects that I work on in my spare free time on my website.  Happy sewing :)

    Categories

    All
    Bags
    Bargains
    Dresses
    Fabric
    Fashion
    Germany
    Giveaway
    Home Dec
    Interfacing
    Review
    Sale
    Seasonal
    Sewing Patterns
    Sewing Tips
    Smartphone Cases
    Special Occasions
    Treasury
    Trips
    Tutorial
    Vacation Projects
    Wallets

    Threading My Way_Featured
    Pattern Spot dot com
    This page contains affiliate links. See my disclosure policy.
    Online Sewing Class
    Craftsy

    Archives

    December 2021
    May 2020
    April 2020
    January 2020
    January 2015
    October 2014
    September 2014
    August 2014
    July 2014
    June 2014
    May 2014
    April 2014
    March 2014
    February 2014
    January 2014
    December 2013
    November 2013
    October 2013
    September 2013
    August 2013
    July 2013
    June 2013
    May 2013
    April 2013
    March 2013
    February 2013
    January 2013
    December 2012
    November 2012
    October 2012
    September 2012
    August 2012
    July 2012
    June 2012
    May 2012

Powered by Create your own unique website with customizable templates.